How to Configure WAF on OPNsense Using NGINX/NAXSI
A Web Application Firewall (WAF) is a security mechanism positioned before a web application to inspect, filter, and stop harmful traffic. It serves as a mediator between the internet and your website or web application, scrutinizing HTTP requests and answers for any risks.
OPNsense provides NAXSI web application firewall (WAF) to protect web servers against cyber attacks. NAXSI WAF can be easily enabled by installing the NGINX web server plugin os-nginx on your OPNsense firewall.
This tutorial explores the Naxsi WAF, its operational mechanisms, and its capabilities, and provides guidance on configuring the WAF on the OPNsense firewall with the NGINX Naxsi module. Furthermore, we illustrate the process of establishing a whitelist or blacklist using the IP-based ACL functionality of the Nginx server.

What is NAXSI?
NAXSI, which stands for Nginx Anti XSS and SQL Injection, is a third-party NGINX module, offered as a package for many UNIX-like systems. NAXSI is compatible with all versions of NGINX. It relies onlibpcre for its regular expression support and runs well on NetBSD, FreeBSD, OpenBSD, Debian, and Ubuntu. NAXSI is considered as is one of the best open-source web application firewalls.
By default, NAXSI only considers a few simple criteria, such as 99% of known patterns associated with website vulnerabilities. For instance, <, | or drop should not be included in a URI.
Due to their simplicity, these patterns may correspond to lawful queries; it is the responsibility of the Naxsi administrator to implement particular rules that will whitelist acceptable behaviors. The administrator may manually add whitelists by examining nginx's error log, or preferably, begin the project with a rigorous auto-learning phase that will autonomously create whitelisting rules based on the website's behavior.
Naxsi functions as a default DROP firewall, necessitating the addition of specific ACCEPT rules for the target website to operate correctly.
The original NAXSI project has been officially abandoned and archived as of November 8, 2023. Giovanni, an enthusiast of cryptography, reverse engineering, and PowerPC CellBE, remains dedicated to sustaining the project as the only active developer. Assistance may be sought at https://github.com/wargio/naxsi.
OPNsense Business users may try OPNWAF plugin, which is offered by Deciso, to effectively safeguard web services against various injection threats and to provide encryption for inbound and outbound traffic.
How Does NAXSI Work?
The operational mechanism of Naxsi is given below.
- Rule-based detection: The WAF utilizes a compilation of recognized patterns, specifically malicious requests, to block incoming requests.
- Requests Analysis: Upon receipt of an incoming HTTP request, the WAF evaluates its contents against a predefined set of patterns.
- Threat Identification: Upon detecting a request that aligns with a recognized pattern, the WAF first verifies the existence of a whitelist rule. If the whitelist rule is absent, the WAF assigns a score to the request; if this score exceeds the established thresholds, it stops the request.
What are the Features of NAXSI?
A key characteristic of WAFs is virtual patching, enabling protection against known vulnerabilities without necessitating the application of real updates to the underlying code. Occasionally, a web application protected by a WAF may possess a security vulnerability that the system owner cannot promptly rectify. Naxsi may provide "virtual patches" to mitigate the vulnerability without necessitating changes to the foundational web application code. You may use virtual patching for the following purposes.
- Prevent the exploitation of unpatched or obsolete software versions.
- Safeguard against zero-day exploits and unidentified vulnerabilities
- Minimize the attack surface by intercepting suspicious requests prior to their arrival at your website.
These virtual patches are articulated as Naxsi rules and may be implemented on RAW requests or designated fields within the request.
Another important capability of Naxsi is whitelisting. Naxsi may use a whitelisting technique, whereby all inbound traffic is first banned by default. In this scenario, only requests that conform to designated criteria are permitted to proceed and access the web application protected by the WAF. This method enhances security by supposing that any unfamiliar traffic is a possible danger unless shown differently.
What are the NAXSI rules?
NAXSI WAF rules are used to initiate an action based on whether a condition is evaluated as true or false (negated). The typical use involves augmenting a score that can be subsequently verified; however, a rule may alternatively instantaneously impose a block (the plugin only accommodates a score). WAF rules are organized into a WAF policy, which then evaluates the cumulative score.
NAXSI has 2 types of rules: main rules and basic rules. The main rules apply to all situations and are used to stop parts of code that could let someone else into the server without permission, like SQL injection attacks, or take control of a client from the outside, like XSS attacks. Basic rules are often used inside locations to whitelist main rules by id within a location or to implement supplementary rules.
NAXSI incorporates libinjection, which is immediately accessible inside the location configuration, alongside the predefined rules. A suitable ruleset for initiation is available on GitHub at the project website, https://github.com/nbs-system/naxsi/blob/master/naxsi_config/naxsi_core.rules. The plugin on OPNsense cannot provide these rules due to licensing conflicts (GPL is incompatible with BSD 2 Clause code); nevertheless, you may input them manually.
OPNsense automatically disables User Agents used by bots, and this setting is non-configurable.
Error pages are located in /usr/local/etc/nginx/views folder.
Configuring WAF on OPNsense
OPNsense offers the NAXSI web application firewall (WAF) to safeguard web servers against cyber threats, such as SQL injection or XSS (cross-site scripting). NAXSI WAF may be easily activated on your OPNsense firewall by following 10 main steps.
- Installing NGINX Plugin
- Updating OPNsense WEB UI Port
- Adding Upstream Server
- Adding Upstream
- Downloading the NAXSI WAF Rules
- Creating Location
- Creating HTTP Server
- Testing NGINX Configuration
- Enabling NGINX
- Testing NAXSI WAF
Installing NGINX Plugin
NGINX is a high-performance edge web server characterized by minimal memory use and essential functionality for constructing current and efficient web infrastructure.
NGINX capabilities include HTTP server, HTTP and mail reverse proxy, caching, load balancing, compression, request throttling, connection multiplexing and reuse, SSL offloading, and HTTP media streaming.
You can easily install NGINX plugin by following the next steps.
-
Navigate to System > Firmware > Plugins.
-
Type
nginxin the search field to find the NGINX plugin.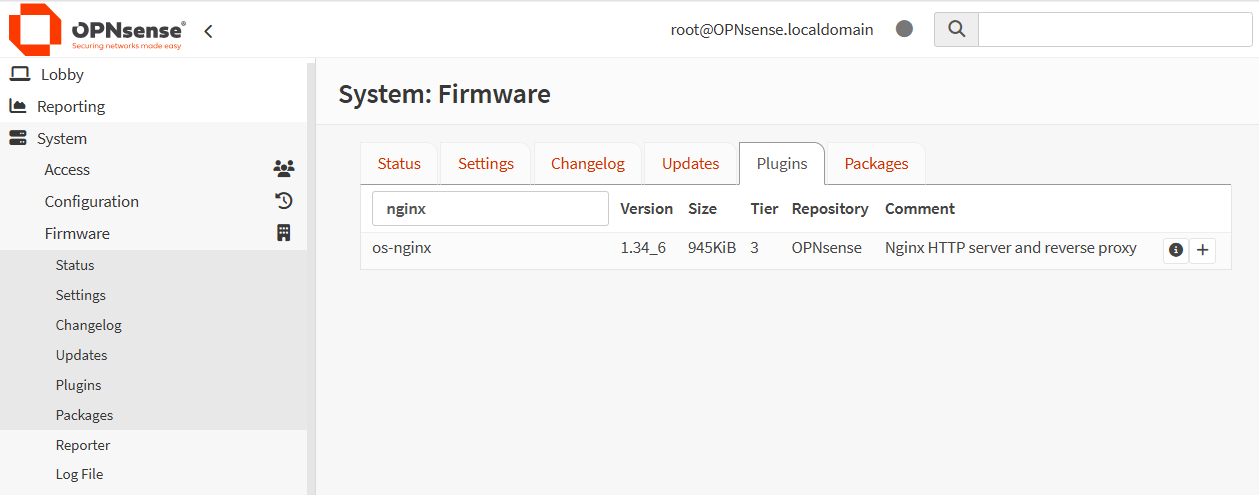
Figure 1. Searching os-nginx Plugin
-
Click on the
+icon next toos-nginxto install the plugin. Then you will be redirected to the Update menu tab.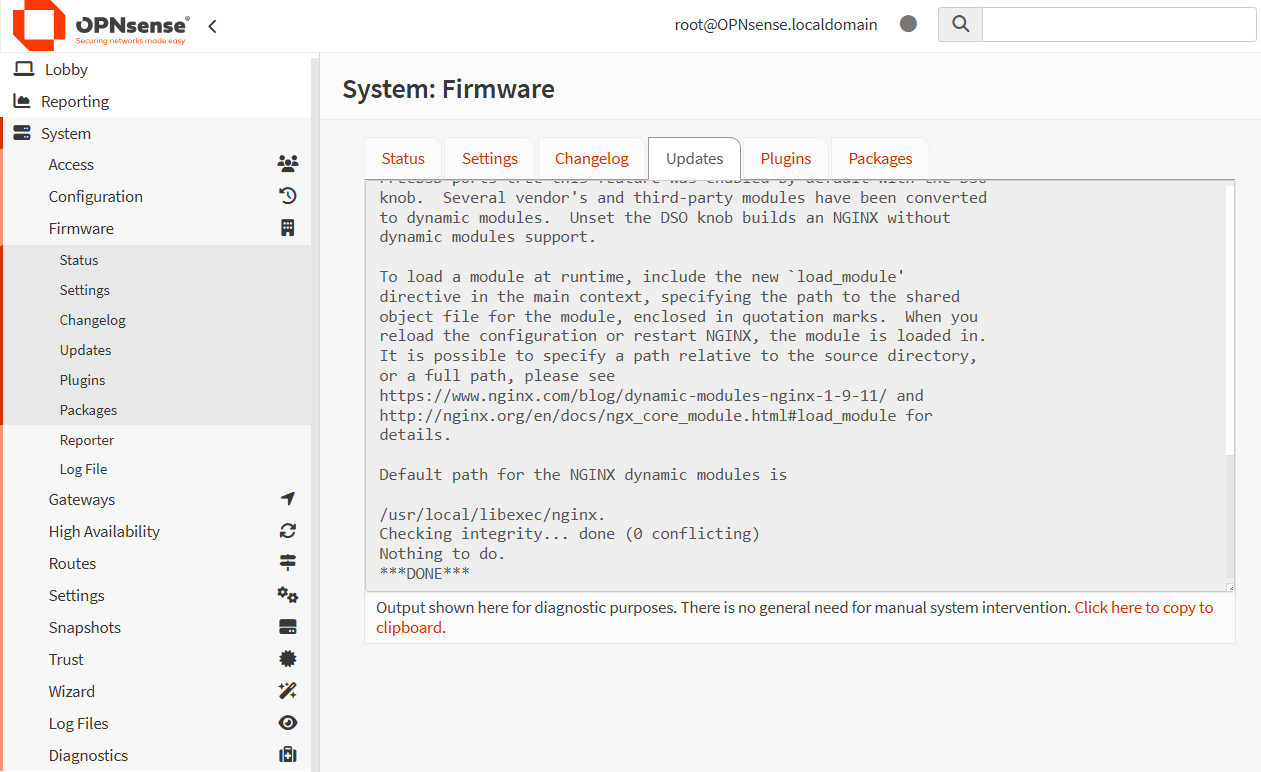
Figure 2. Installing os-nginx-proxy Plugin
-
Click on the Plugins tab. You should see that
os-nginxplugin is installed.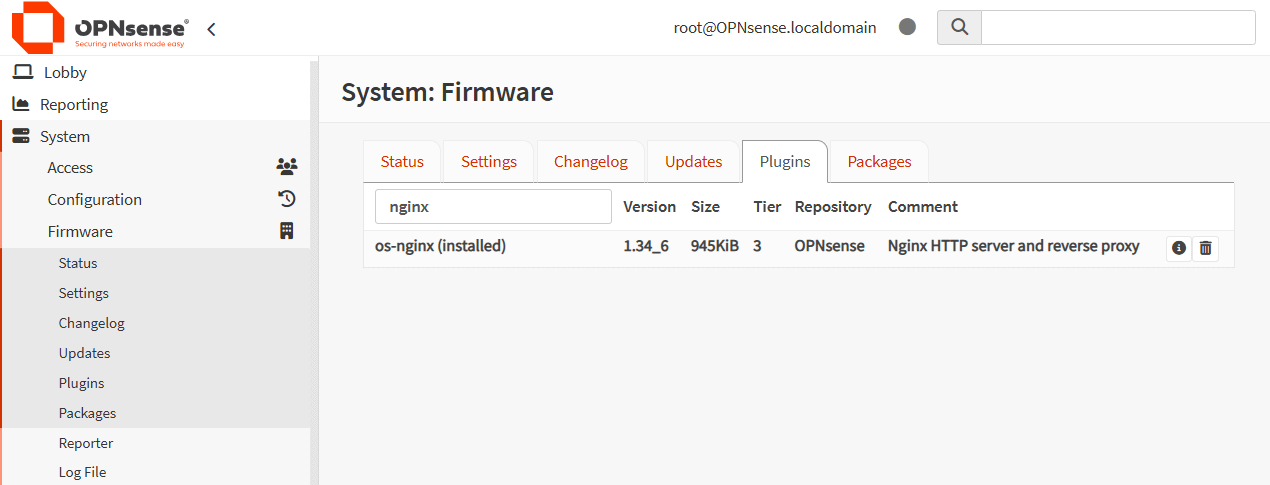
Figure 3. Verifying os-nginx Plugin Install
After reloading the page by clicking on the OPNsense logo at the top left, you should see Nginx menu under Services.
Updating OPNsense WEB UI Port
Before activating the NGINX service, it is necessary to modify the OPNsense GUI settings to prevent any port conflicts between NGINX and Lighttpd, the process responsible for serving the Web UI.
The following procedures will modify the ports of the web UI. Verify that the firewall rules permit access from the web UI to the newly configured TCP port prior to implementing the settings.
You may follow the next steps to modify the web UI connection port on your OPNsense firewall.
-
Define an alias for the new OPNsense web service port, like
webUIfor8443.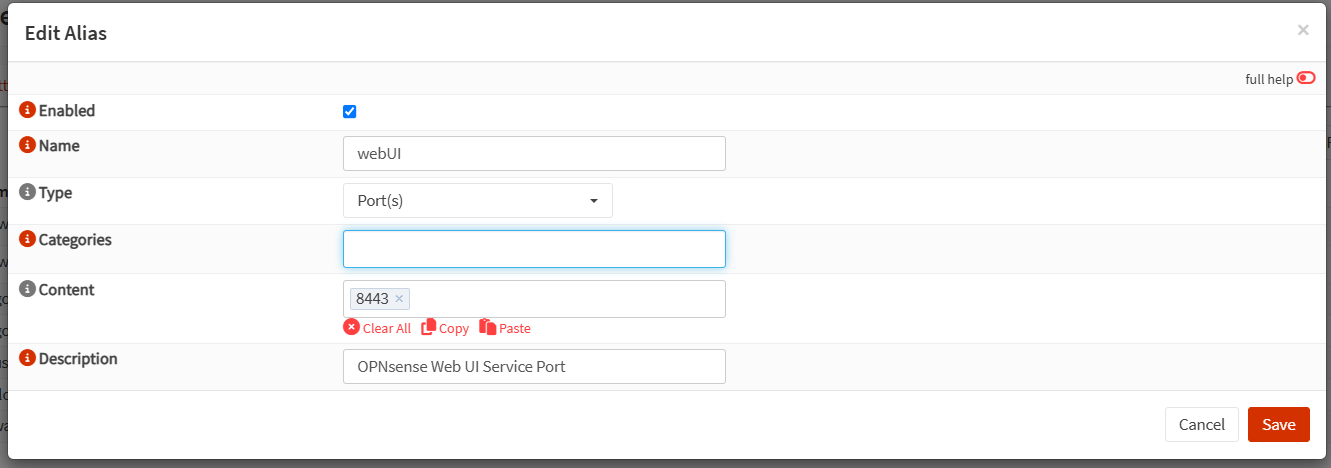
Figure 4. Defining an Alias
-
Define a firewall rule to allow access to the OPNsense web UI from the LAN.
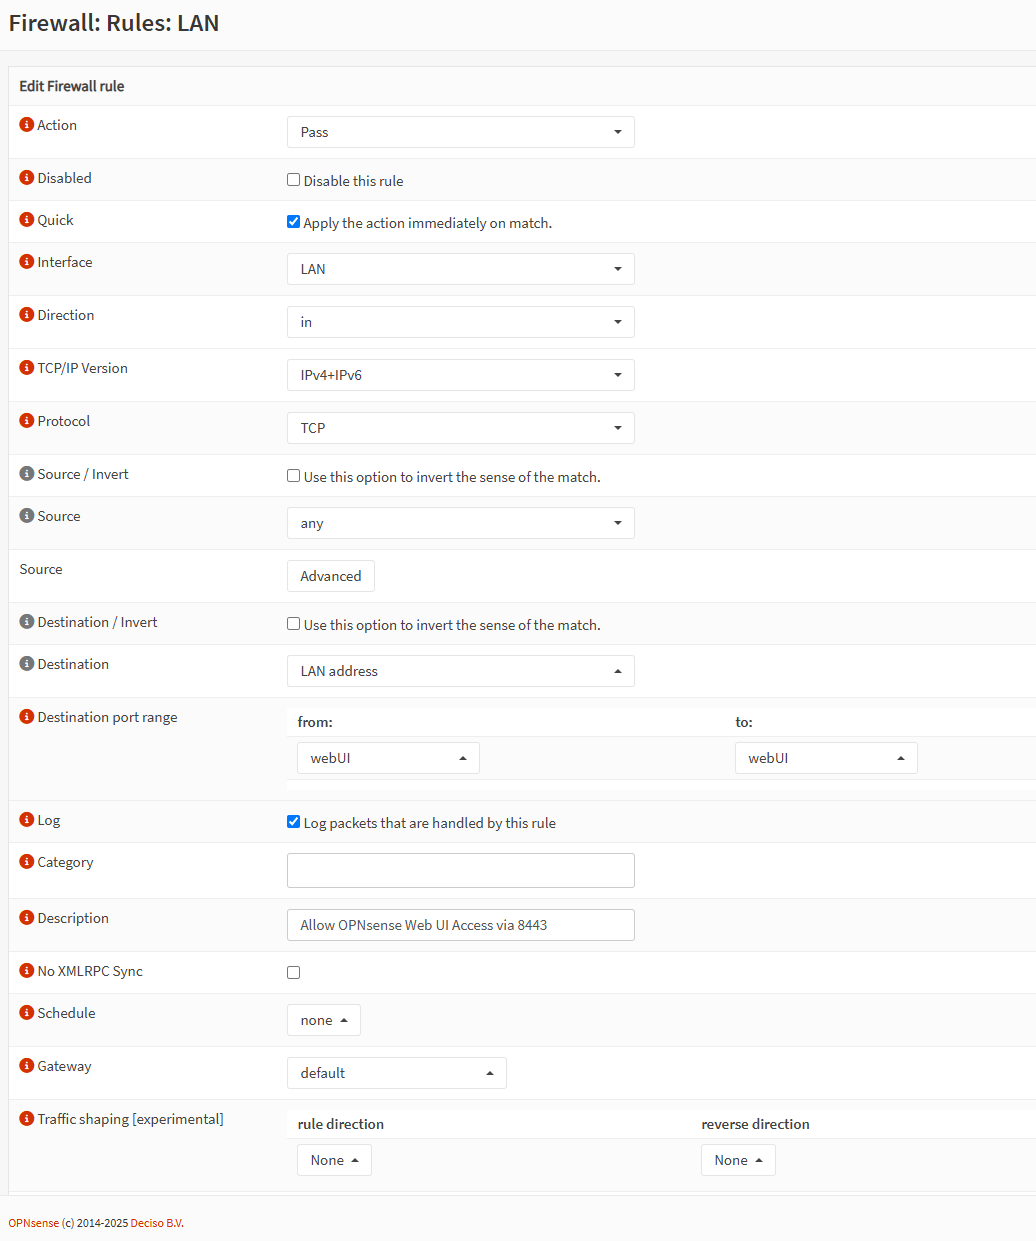
Figure 5. Firewall rule for web UI access
-
Add a firewall rule to allow the HTTP/HTTPS traffic on the desired network interface, such as WAN, so that your web server will be accessible from an external network like the Internet.
-
Navigate to System > Settings > Administration.
-
Alter the TCP port setting from
443to another port, such as8443. -
Verify the HTTP redirect option to disable web GUI redirect rule. This action will liberate TCP port 80 (HTTP) and allow the NGINX service to use this port.
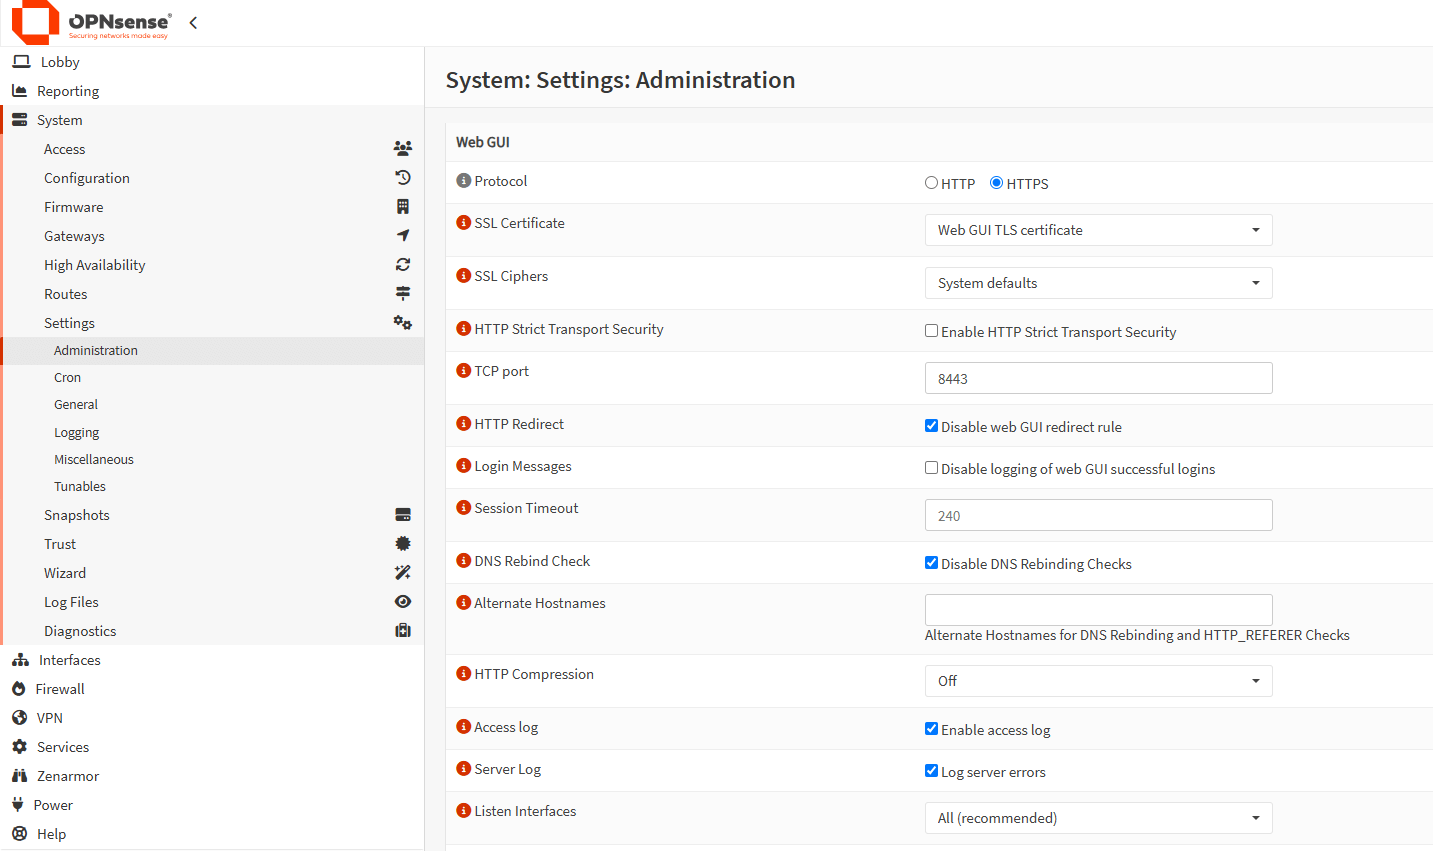
Figure 6. Updating OPNsense WEB UI Port
-
Click Save at the bottom of the page to activate settings.
Adding Upstream Server
Upstream server defines your web server(s). To add an upstream server, you may follow the next steps.
-
Navigate to the Services > Nginx > Configuration page.
-
Click on the Upstream drop-down menu at the top of the page.
-
Select Upstream Server menu.

Figure 7. Upstream Server Page
-
Click on the Add button with the
+icon at the bottom right of the page. -
Type a Description.
-
Type the IP address of the web server into the Server field.
-
Specify the web service port, such as
80, or443. -
You must specify a Priority, such as
1. This option establishes the precedence for this server entry. In a backend upstream configuration with many web servers, this priority will dictate which servers get requests preferentially. Servers with more weight will get increased traffic. The priority is irrelevant while operating a single server. -
Specify the Maximum Connections. This specifies the maximum number of concurrent requests that this server will handle.
-
Specify the Maximum Failures. This denotes the maximum allowable connection failures before considering the server down for the backend.
-
Specify the Fail Timeout. This determines the maximum duration, in seconds, that the backend will await a server response before considering it offline.

Figure 8. Adding Upstream Server
-
Click Save.
-
You may repeat steps 4-12 to add more upstream servers if you have additional servers.
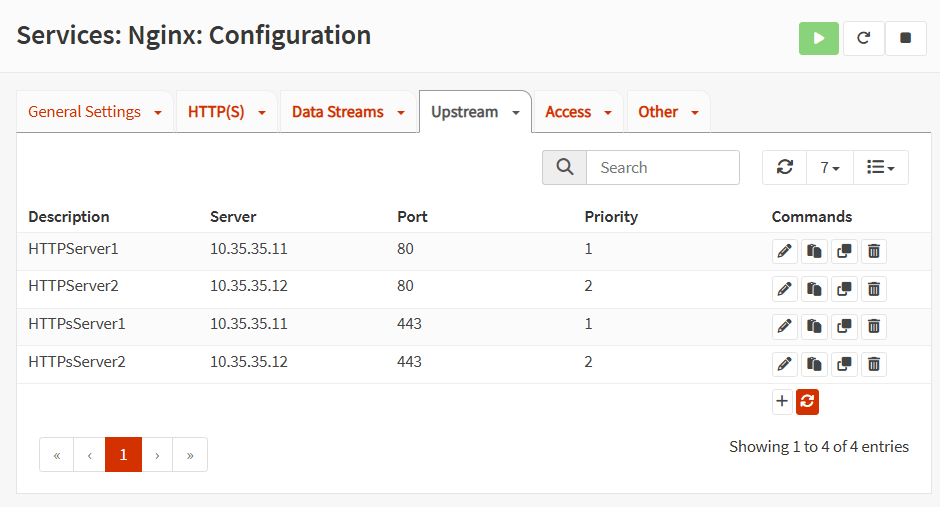
Figure 9. Viewing Upstream Servers
Adding Upstream
Upstream defines a grouping of upstream servers to load balance between. Upon establishing the upstream server, it is necessary to associate it with an upstream. To add an upstream, you may follow the next steps.
-
Navigate to the Services > Nginx > Configuration page.
-
Click on the Upstream drop-down menu at the top of the page.
-
Select Upstream menu.

Figure 10. Upstream Page
-
Click on the Add button with the
+icon at the bottom right of the page. -
Type a Description, such as
HTTP_Backend. -
Select the upstream servers from the Server Entries dropdown menu, such as
HTTPServer1,HTTPServer2. -
You may leave the Load Balancing Algorithm option as default,
Weighted Round Robin. -
You may leave other options as default for HTTP service.
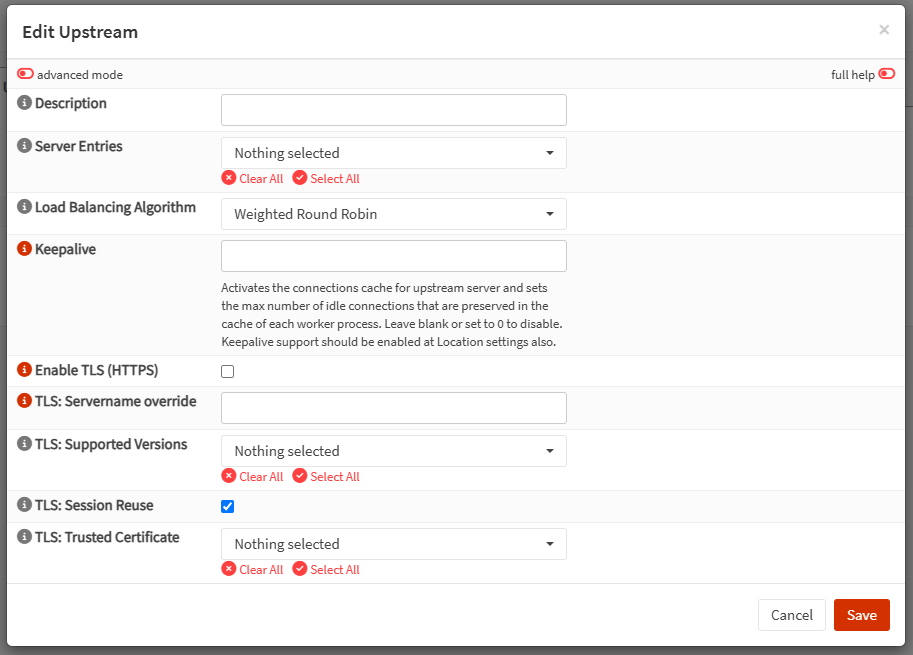
Figure 11. Adding Upstream
-
You may Select Enable TLS (HTTPS) option to establish an HTTPS connection to the upstream server.
-
When using a web server with a self-signed certificate, it is essential to choose the advanced mode option to deactivate certificate validation. Ensure that the TLS: Verify Certificate option is deselected.
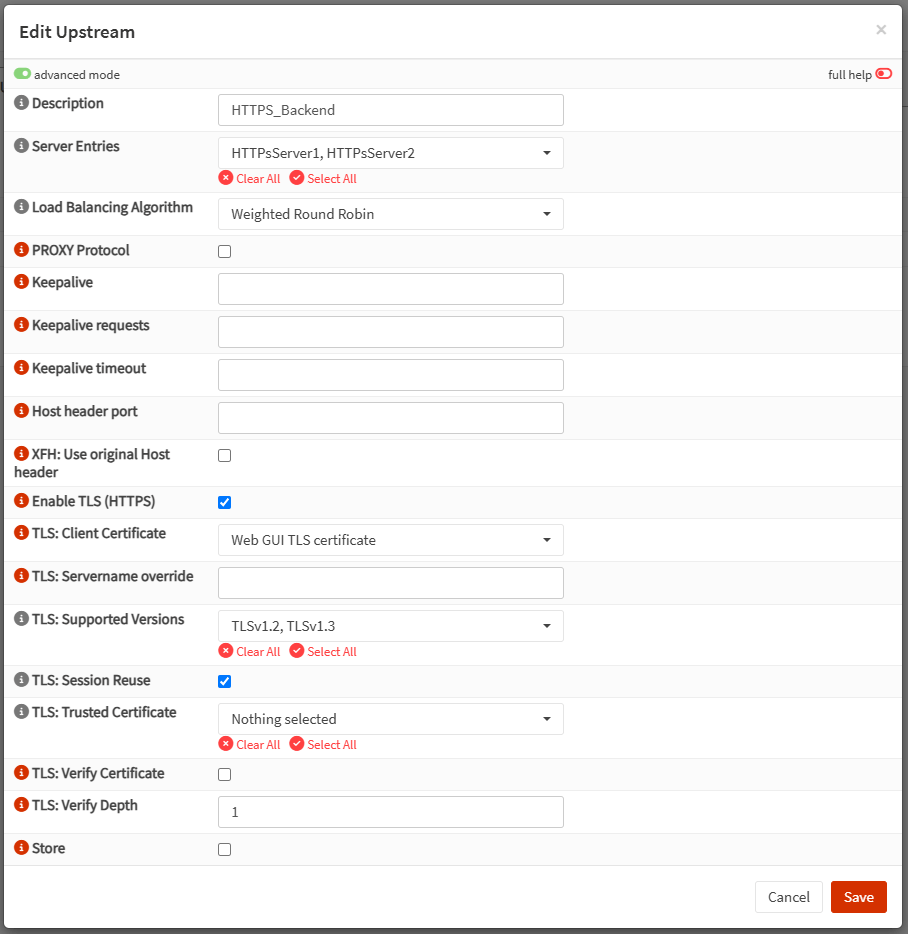
Figure 12. Adding Upstream for HTTPS
-
Click Save.
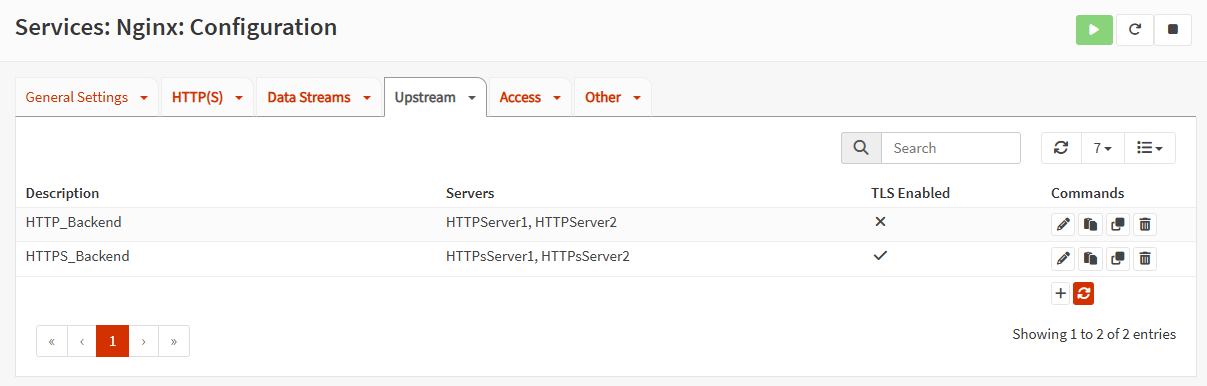
Figure 13. Viewing Upstream
What are Upstream Options?
OPNsense allows you to configure the following Upstream options.
- Description: You may specify a description for the upstream backend service.
- Server Entries: You may select available upstream servers.
- Load Balancing Algorithm: You may select an algorithm for load balancing. Available options are
Weighted Round RobinandIP Hash. - Keepalive: Sets the maximum number of inactive connections that are retained in the cache of each worker process and activates the connections cache for the upstream server. To disable it, either leave the field empty or set it to 0. Keepalive support should also be enabled in the location settings.
- Enable TLS (HTTPS): Check this option to use TLS to connect to the server.
- TLS: Servername override: This field enforces a specific hostname for the backend connection instead of transmitting the hostname from the downstream connection to the upstream connection.
- TLS: Supported Versions: You may select supported TLS versions. Available options are,
TLSv1, TLSv1.1, TLSv1.2, and TLSv1.3`. - TLS: Session Reuse:
- TLS: Verify Certificate: Upstream verification is enabled by default. The server names in the upstream certificate are checked with the name in the TLS: Servername override field. Successful verification requires OPNsense to trust the certificate of the certifying authority that issued the upstream certificate. The list of trusted CAs in the TLS: Trusted Certificate field may be further limited.
- TLS: Trusted Certificate: You may select installed Trust certificates on OPNsense.
Downloading the NAXSI WAF Rules
You may download NAXSI WAF rules by following the next steps.
-
Navigate to the Services > Nginx > Configuration page.
-
Click on the HTTP(S) drop-down menu at the top of the page.
-
Select NAXSI WAF Policy menu. A notification will appear for downloading NAXSI core rules.

Figure 14. NAXSI WAF Policy
-
Click Download button.
-
Click Accept And Download button to accept the Naxsi license terms and start downloading. This will automatically download the core rules from the repository of NAXSI.
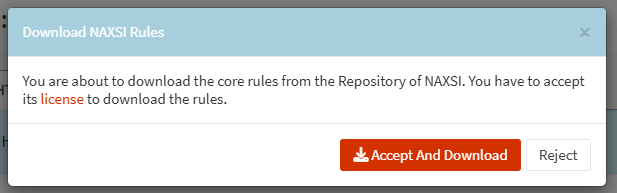
Figure 15. Accept NAXSI license terms
-
Naxsi policies will be displayed on the NAXSI WAF Policy page.

Figure 16. NAXSI WAF Policy
-
You may view Naxsi rules by navigating to Services > Nginx > Configuration > HTTP(S) > Naxsi WAF Rule.
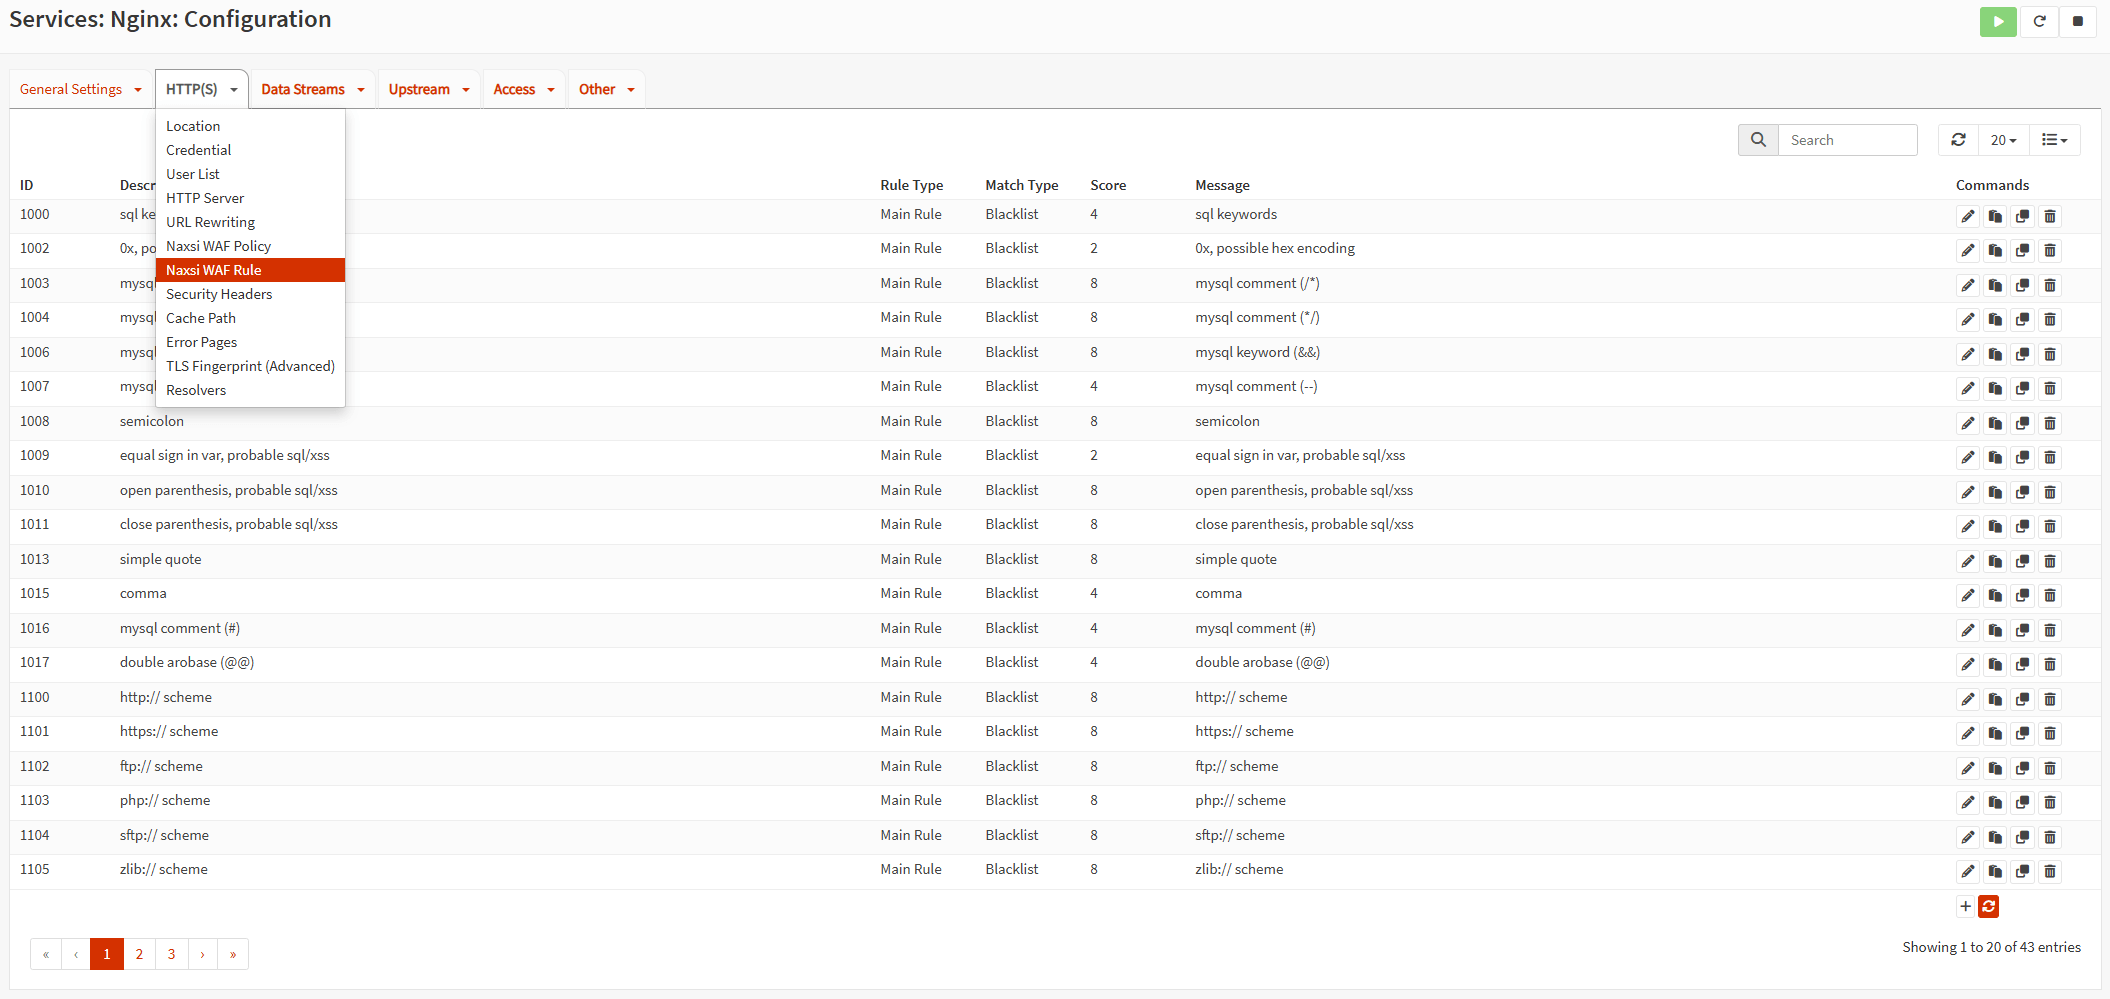
Figure 17. Naxsi WAF Rule
Creating Location
Location defines what will get redirected to the Upstream. WAF rules must be applied to a location. You may add a location by following the next steps.
-
Navigate to the Services > Nginx > Configuration page.
-
Click on the HTTP(S) drop-down menu at the top of the page.
-
Select Location menu.

Figure 18. Location page
-
Click on the Add button with the
+icon at the bottom right of the page. -
Type a Description, such as
HTTP_Root. -
Type the URL pattern to match. You may fill in the
/symbol to correspond with the root of your web server. To correspond with another path, modify it to a format such as/anotherpath/. -
Click on the Enable Security Rules checkbox to enable WAF.
-
You may click on the Learning Mode checkbox to enable learning mode, which means nothing is blocked but logged. When employing WAF for the first time, this option is advantageous. You may include whitelists until false positives stop to occur during the learning phase.
-
Select core WAF rules from the Custom Security Policies drop-down menu.
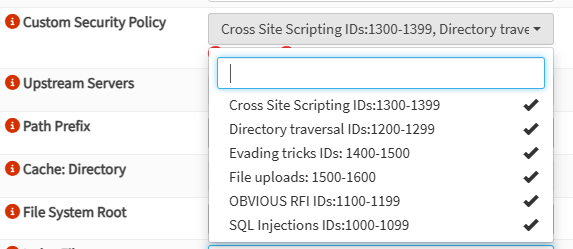
Figure 19. Selecting Custom Security Policies
-
Select Upstream Servers that you added before, such as
HTTP_BackendorHTTPs_Backend.
Figure 20. Adding Location
-
You may enable the Force HTTPS option to redirect HTTP queries to an HTTPS port.
-
You may leave other options as default.
-
Click Save button at the bottom of the page. The location configurations that you added appear on the Location page.
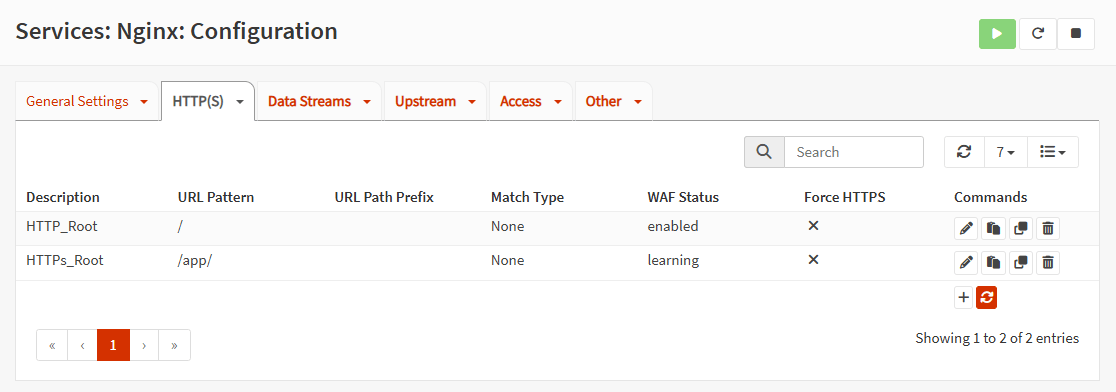
Figure 21. Viewing Location
Creating HTTP Server
You may add a front-end web server by following the next steps.
-
Navigate to the Services > Nginx > Configuration page.
-
Click on the HTTP(S) drop-down menu at the top of the page.
-
Select HTTP Server menu.
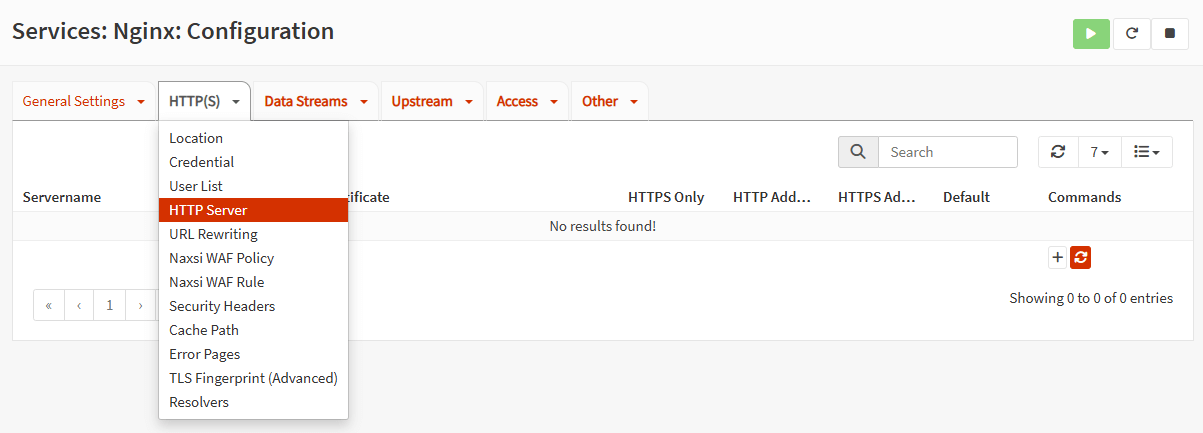
Figure 22. HTTP Server page
-
Click on the Add button with the
+icon at the bottom right of the page. -
Type the FQDN name of your website into the Server Name, such as
www.mywebsite.com. -
Select the Locations that you created previously.
-
To be able to use the HTTPS/TLS service, you must select TLS Certificate, Client CA Certificate, and Enable Let’s Encrypt Plugin options. A valid certificate must be installed in OPNsense for this option to be accessible. For testing reasons, you may use the Web GUI TLS certificate option. To get valid certificates at no expense, you may install the
os-acme-client, which offers the Let's Encrypt backend, an open certificate authority established by the Internet Security Research Group. The installation of the specified plugin enables the generation of valid certificates at no cost. You can easily install a CA-signed certificate on OPNsense with this plugin. -
You may leave other options as default.

Figure 23. Adding HTTP Server
-
Click Save.

Figure 24. HTTP Server List
Testing NGINX Configuration
You may verify your Nginx server configuration by following the next steps.
-
Navigate to the Services > Nginx > Configuration page.
-
Click on the Other drop-down menu at the top of the page.
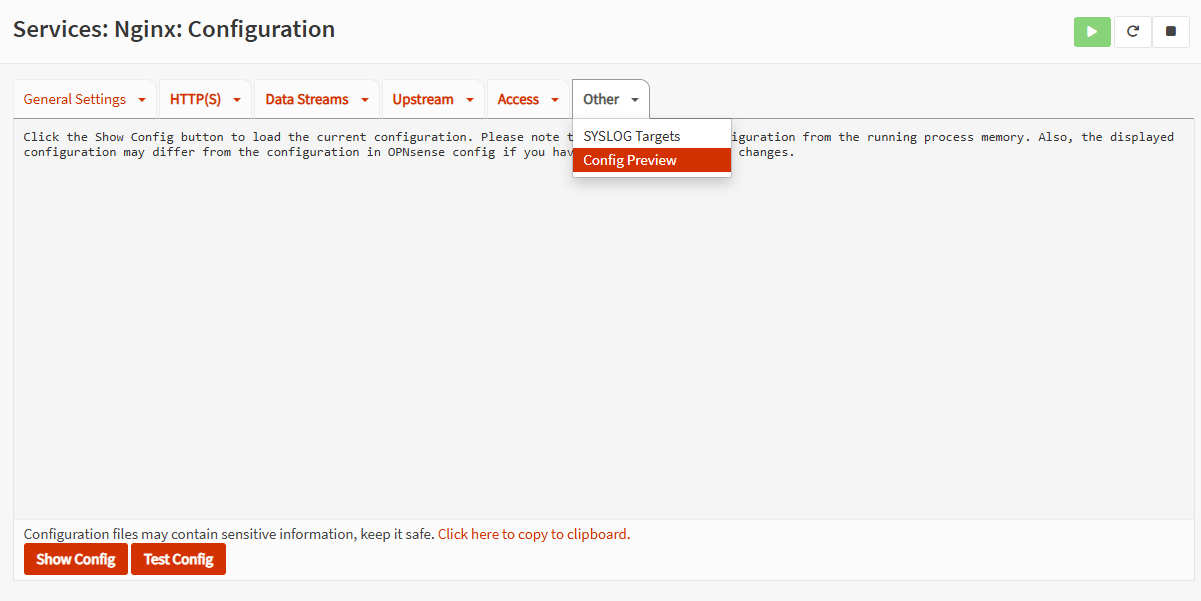
Figure 25. NGINX Configuration Preview
-
Select Config Preview menu.
-
Click on the Test Config button at the bottom of the page. If your Nginx server is properly configured, a successful message will appear. Otherwise, misconfiguration details will be displayed.
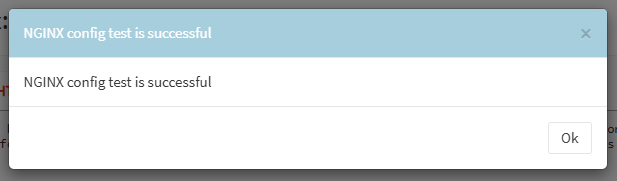
Figure 26. NGINX Configuration Test Passed
-
Click OK to close the dialog box.
Enabling NGINX
To enable the Nginx server, you may follow the next steps.
-
Navigate to the Services > Nginx > Configuration page.
-
Click on the General Settings drop-down menu at the top of the page.
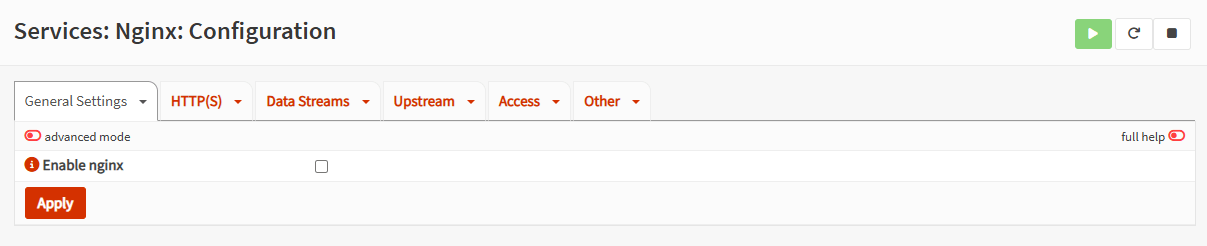
Figure 27. NGINX General Settings
-
Select Enable nginx check box.
-
Click Apply to activate the settings.
Testing NAXSI WAF
Triggering the WAF by generating a request considered malicious would result in an entry in the server error log and the display of an OPNsense-branded error page (Request Denied For Security Reasons). For this purpose, you may attempt to access the following URLs either using a web browser or by running the curl commands on your CLI.
-
http://www.mywebsite.com/index.php?a=select&b=union&c=from -
http://www.mywebsite.com/accountView?id=' or '1'='1 -
http://www.mywebsite.com/search?term=<script>/*You+have+been+hacked+by.....*/</script>
Figure 28. Request Denied Page
You may examine the NGINX logs by following the next steps.
-
Navigate to the Services > Nginx > Logs/HTTP Error page.
-
Click on the dropdown menu that belongs to the HTTP server, such as
[www.mywebsite.com](http://www.mywebsite.com). -
Click current menu. This will automatically display all error logs.
-
You may type "NAXSI" into the Message field to apply a filter. You should see web attack logs similar to the one given below.
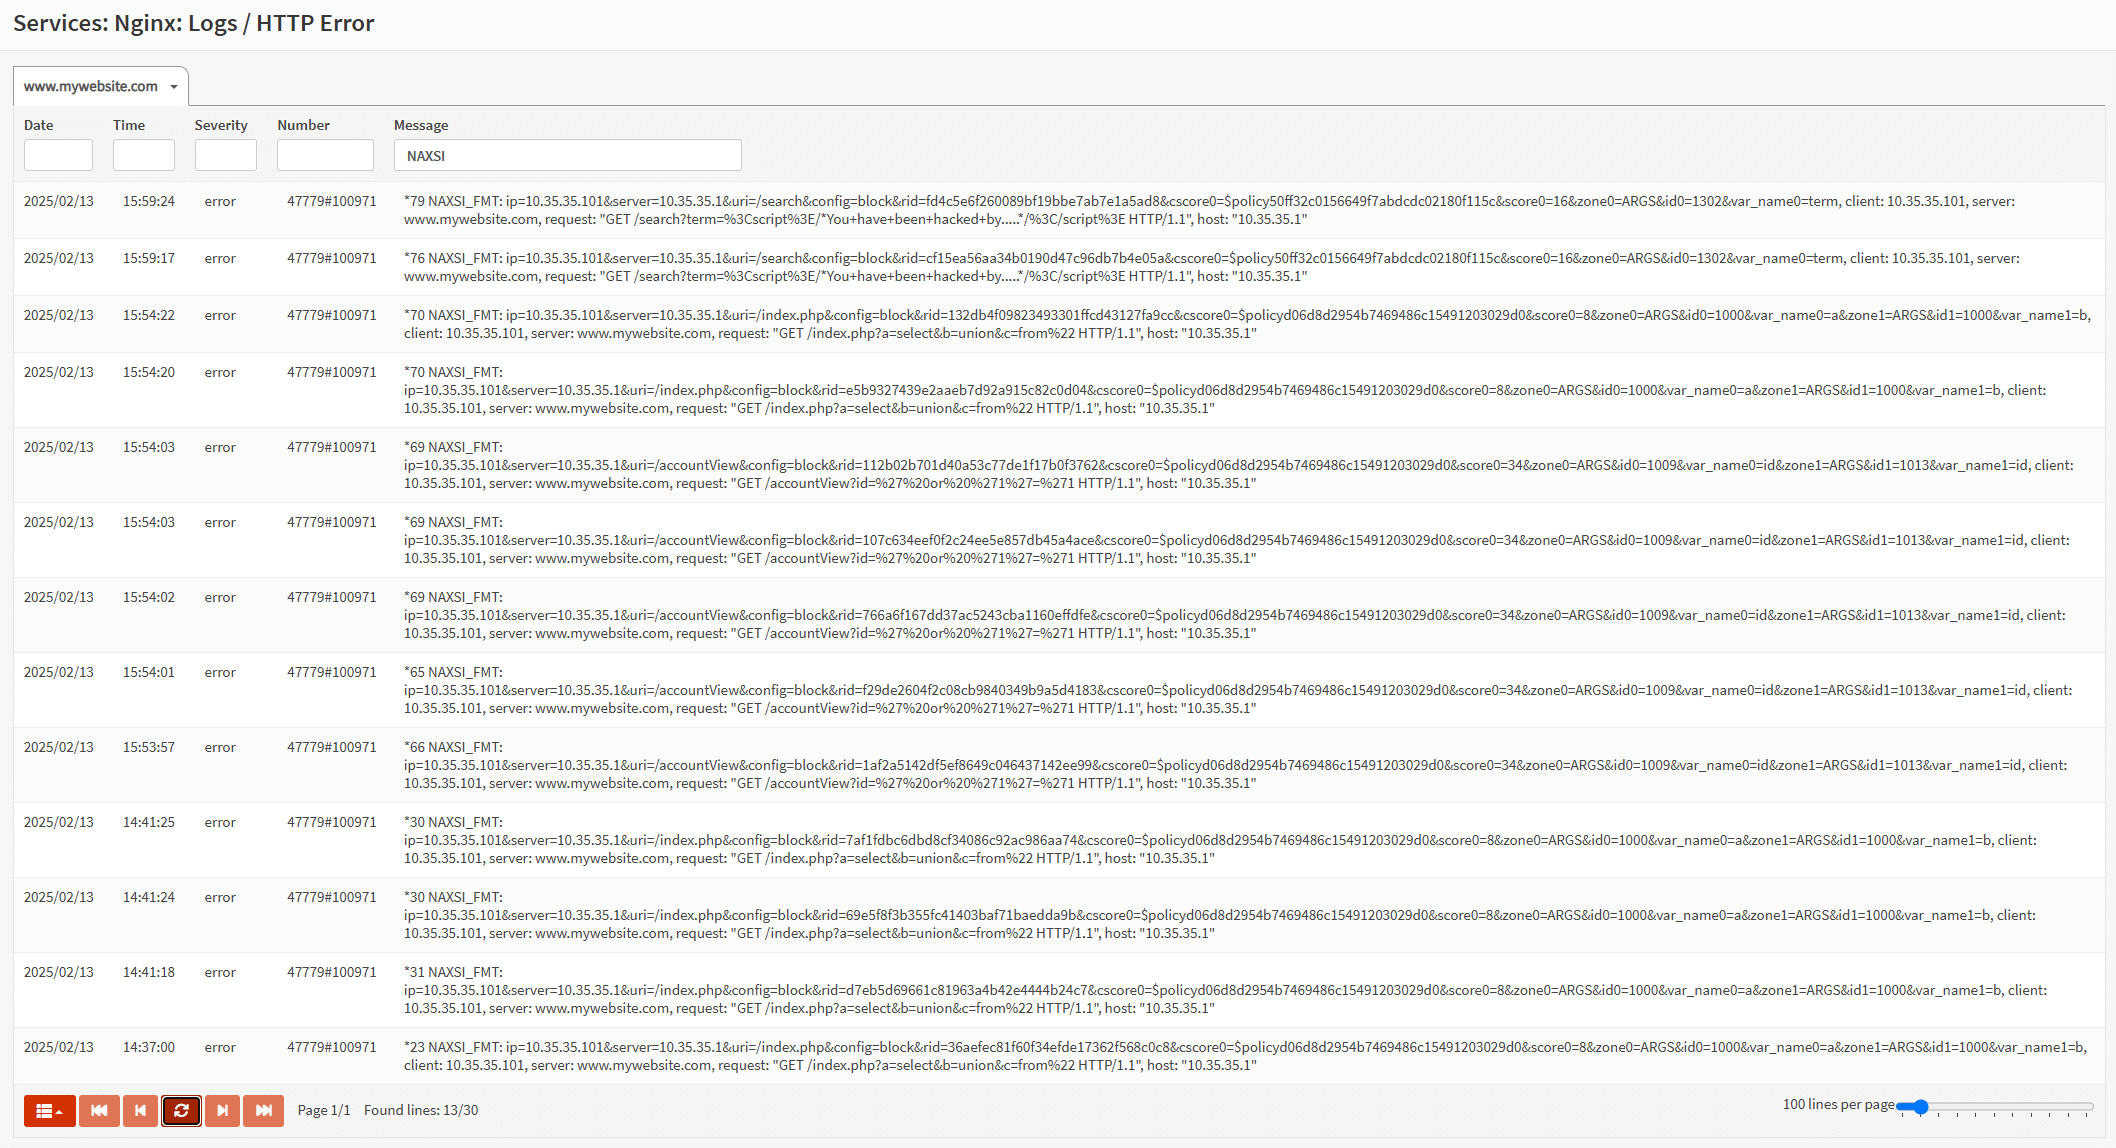
Figure 29. NGINX logs
How to Create Whitelists using IP-Based ACL
NGINX server has IP-based access control list feature that may be used externally to provide access (whitelisting approach) to a certain web service only for trusted clients, so effectively eliminating the majority of malicious traffic directed at the application server. However, this IP-based restriction has some disadvantages, such as making your website invisible to search engines and preventing indexing. Conversely, you may use a blacklist method to exclude certain bot IP addresses and certain bulletproof hosting ranges.
To define an Nginx IP ACL on your OPNsense firewall for whitelisting or blacklisting purposes, you may follow the next steps.
-
Navigate to the Services > Nginx > Configuration page.
-
Click on the Access drop-down menu at the top of the page.
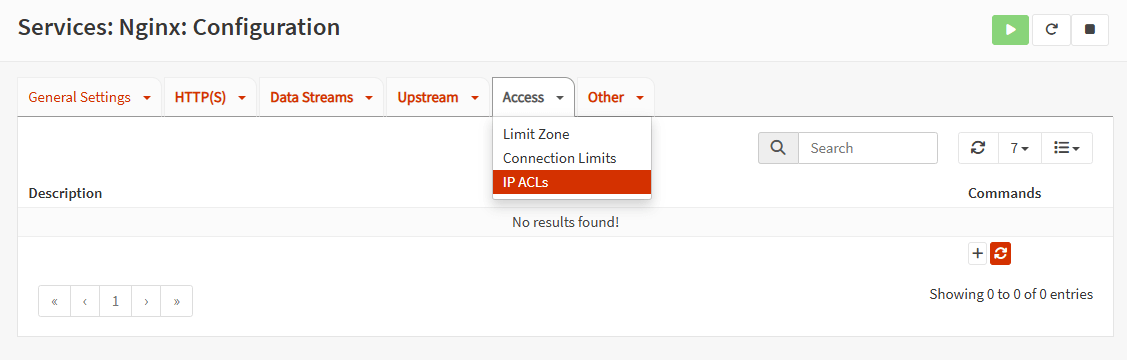
Figure 30. IP ACL Page
-
Select IP ACLs menu.
-
Click on the Add button with the
+icon at the bottom right of the page. -
Type a Description for the ACL, such as
Permit Private LAN. -
Click on the Add button with the
+icon to add ACL Entries. -
Type the IP address that you want to whitelist, like
10.0.0.0/8. -
Select Allow from the drop-down list.
-
You may add a new entry by selecting the
+icon, whereas the trash can symbol can be used to remove an entry. This indicates that this service should be only accessible internally. -
Select Deny Access from the Default Action drop-down menu. For our example, this means that some standard private IP ranges were permitted, but the default rule was configured to block them.
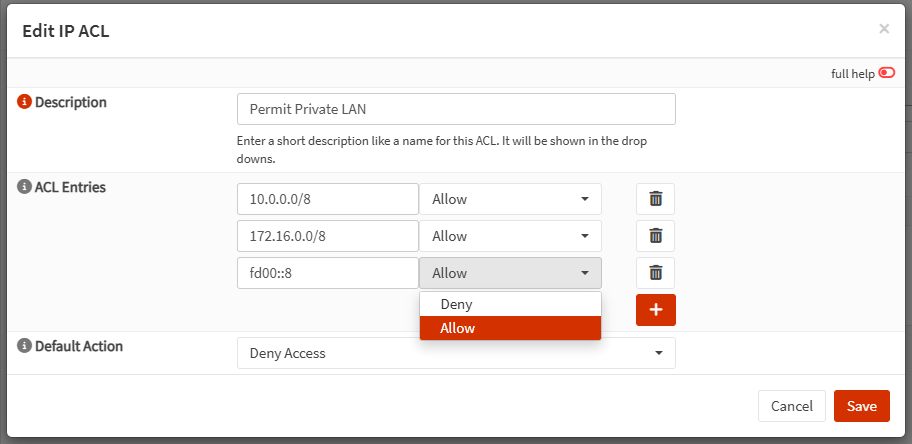
Figure 31. Adding Whitelist IP ACL
-
Click Save button.
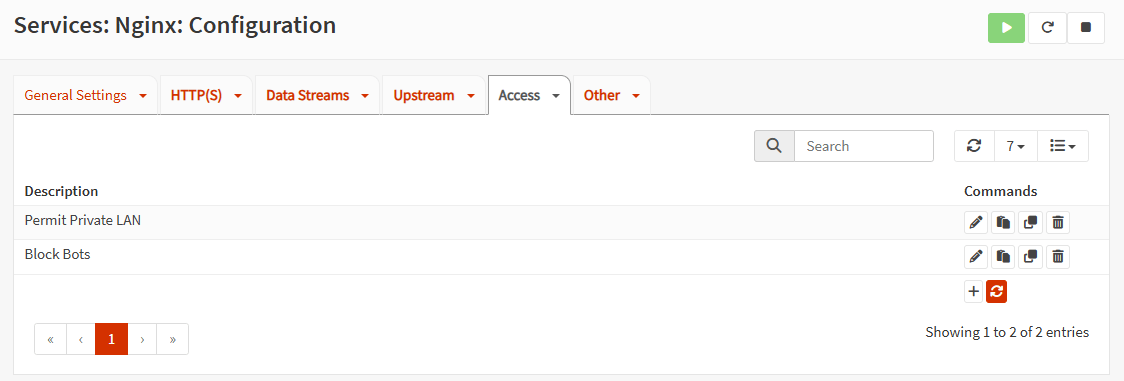
Figure 32. Viewing IP ACL
-
You may assign the IP ACL to a Location or an HTTP server. To assign it to your web server, navigate to the HTTP(S) > HTTP Server menu at the top of the page.
-
Edit your HTTP server, such as
www.mywebsite.com, by clicking on the pen icon under the Commands column. -
Select the access control list that you already created from the IP ACL drop-down menu.
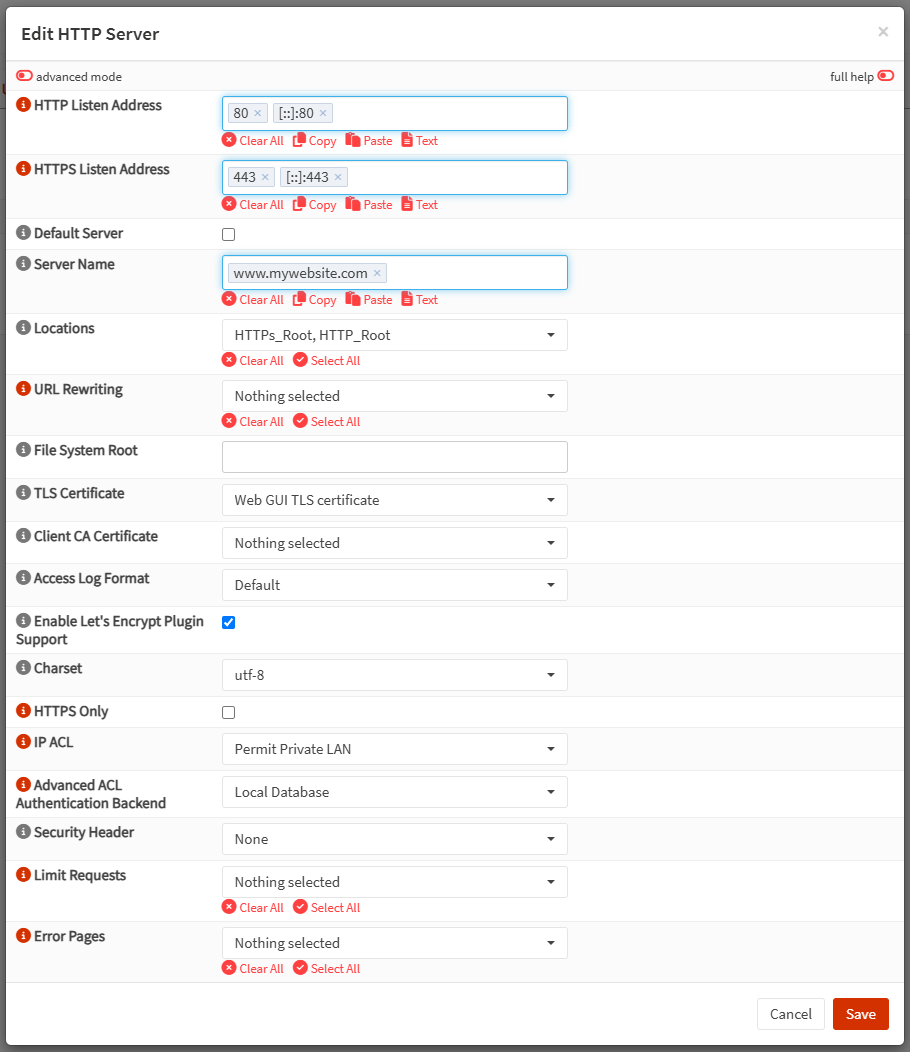
Figure 33. Adding IP ACL to HTTP Server
-
Click Save.
-
Restart the Nginx service.
-
You may check your logs by navigating to Services > Nginx > Logs/HTTP Access >
www.mywebsite.com> current page. You should see that some clients located on your LAN are accessing the web server successfully.
Figure 34. Logs/HTTP Access
If you add a blacklist for blocking some IP addresses, you should see records on the Logs/HTTP Error page. similar to the ones given below for blacklisted IP traffic.

Figure 35. Logs/HTTP Error
How to Restart NGINX Server
You may easily restart the NGINX service for your networks on the OPNsense firewall by following the next steps.
-
Navigate to the Services > NGINX > Configuration on your OPNsense web UI.
-
Click on the Restart button at the top right of the page.

Figure 36. Restart NGINX
tipYou may view or start/stop/restart NGINX services by navigating to the System > Diagnostics > Services page on OPNsense web UI.
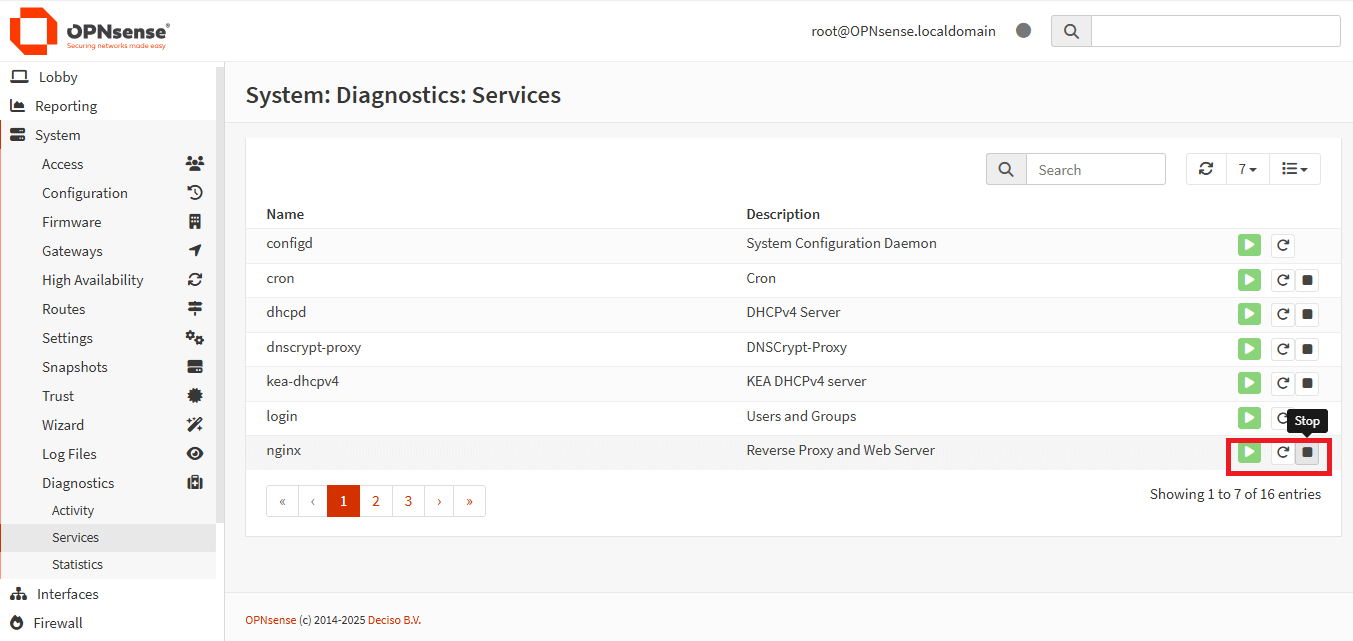
Figure 37. Diagnostic Services
Why Do You Need WAF?
A Web Application Firewall (WAF) is crucial for safeguarding web applications from diverse online threats and vulnerabilities. A WAF safeguards your web applications by filtering, monitoring, and preventing any malicious HTTP/S traffic sent towards the application, while also preventing unauthorized data exfiltration from the app. It does this by following a series of rules that distinguish between malicious and safe communications. The primary reasons for requiring a WAF are as follows.
- Defense Against Prevalent Attacks: WAFs safeguard against prevalent web-based threats like SQL injection, cross-site scripting (XSS), and cross-site request forgery (CSRF), among others. These assaults use weaknesses in online applications to expropriate data, alter systems, or disrupt services.
- Traffic Monitoring and Filtering: They oversee incoming traffic, obstructing harmful requests while allowing access to authorized users, so assuring the seamless functioning of your program.
- Zero-Day Threat Mitigation: Web Application Firewalls (WAFs) may combat zero-day attacks by scrutinizing and obstructing anomalous traffic patterns, regardless of the precise vulnerability being exploited.
- Customizable Rules: Web Application Firewalls (WAFs) enable the formulation of bespoke rules designed to meet the distinct requirements of your application, hence enhancing security measures.
- DDoS Protection: Certain Web Application Firewalls (WAFs) have functionalities to alleviate Distributed Denial of Service (DDoS) assaults, which may inundate your application with excessive traffic.
- Compliance: Regulatory frameworks such as PCI DSS, GDPR, and HIPAA mandate that enterprises adopt security measures, including Web Application Firewalls (WAFs), to safeguard sensitive information.
A WAF is an essential instrument for protecting online applications, assuring operational continuity, and preserving user confidence.