How to Configure DNS over HTTPS (DoH) with DNSCrypt-Proxy on OPNsense
DNS is an essential protocol for Internet communication. However, the security of this critical protocol might be significantly enhanced. Encryption is absent, and although authentication systems are available, they face criticism and have not gained significant use. The DNSCrypt protocol was explicitly developed to enhance DNS security. DNSCrypt is a protocol that encrypts, authenticates, and optionally anonymizes communications between a DNS client and a DNS resolver. It is an open standard with free and open-source reference implementations, and it is not affiliated with any firm or organization. DNSCrypt version 2 was defined and executed in 2013 and is perhaps the most widely used encrypted DNS protocol to date.
DNSCrypt is helpful in mitigating DNS spoofing attacks. It employs cryptographic signatures to authenticate that replies are sourced from the designated DNS resolver and remain unaltered.
In this tutorial, we examine the installation and configuration of the DNSCrypt-proxy plugin on OPNsense firewall. Furthermore, we give the list of public DNScrypt servers and explain the features of DNScrypt service.

Installing DNSCrypt-proxy Plugin
You can easily install DNSCrypt-proxy plugin by following the next steps.
-
Navigate to System > Firmware > Plugins.
-
Type
dnsryptin the search field to find the DNSCrypt-proxy plugin.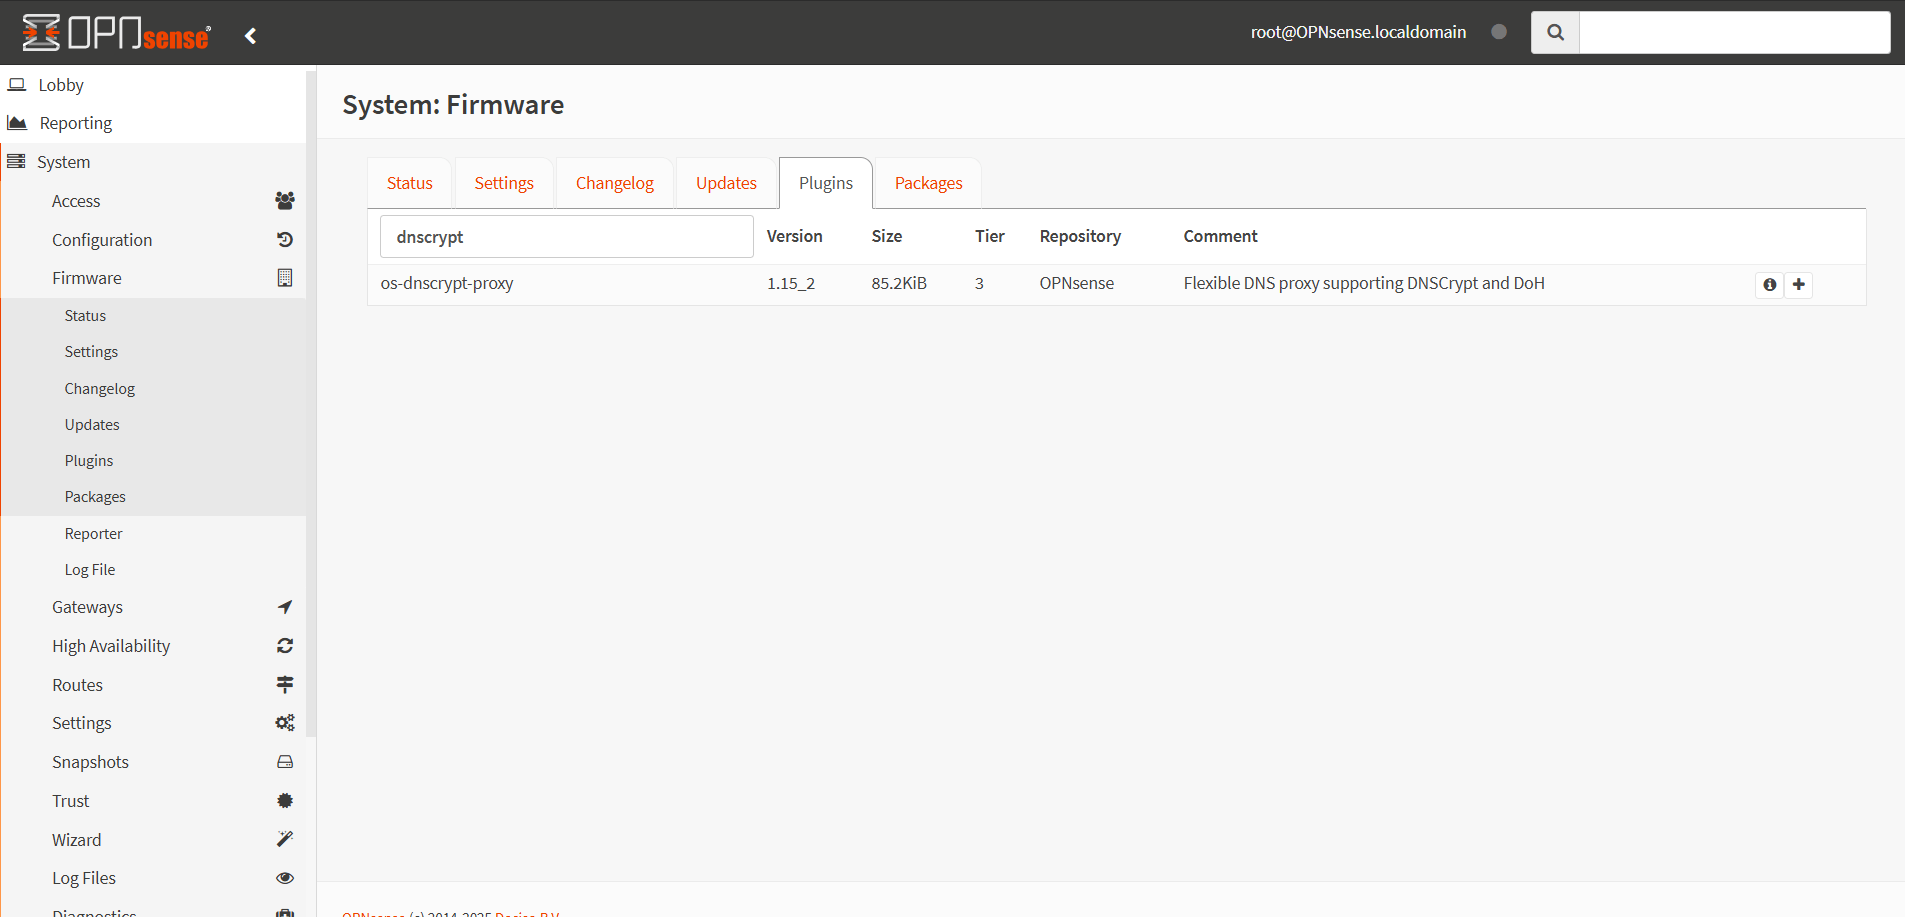
Figure 1. Searching os-dnscrypt-proxy Plugin
-
Click on the
+icon next toos-dnscrypt-proxyto install the plugin. Then you will be redirected to the Update menu tab.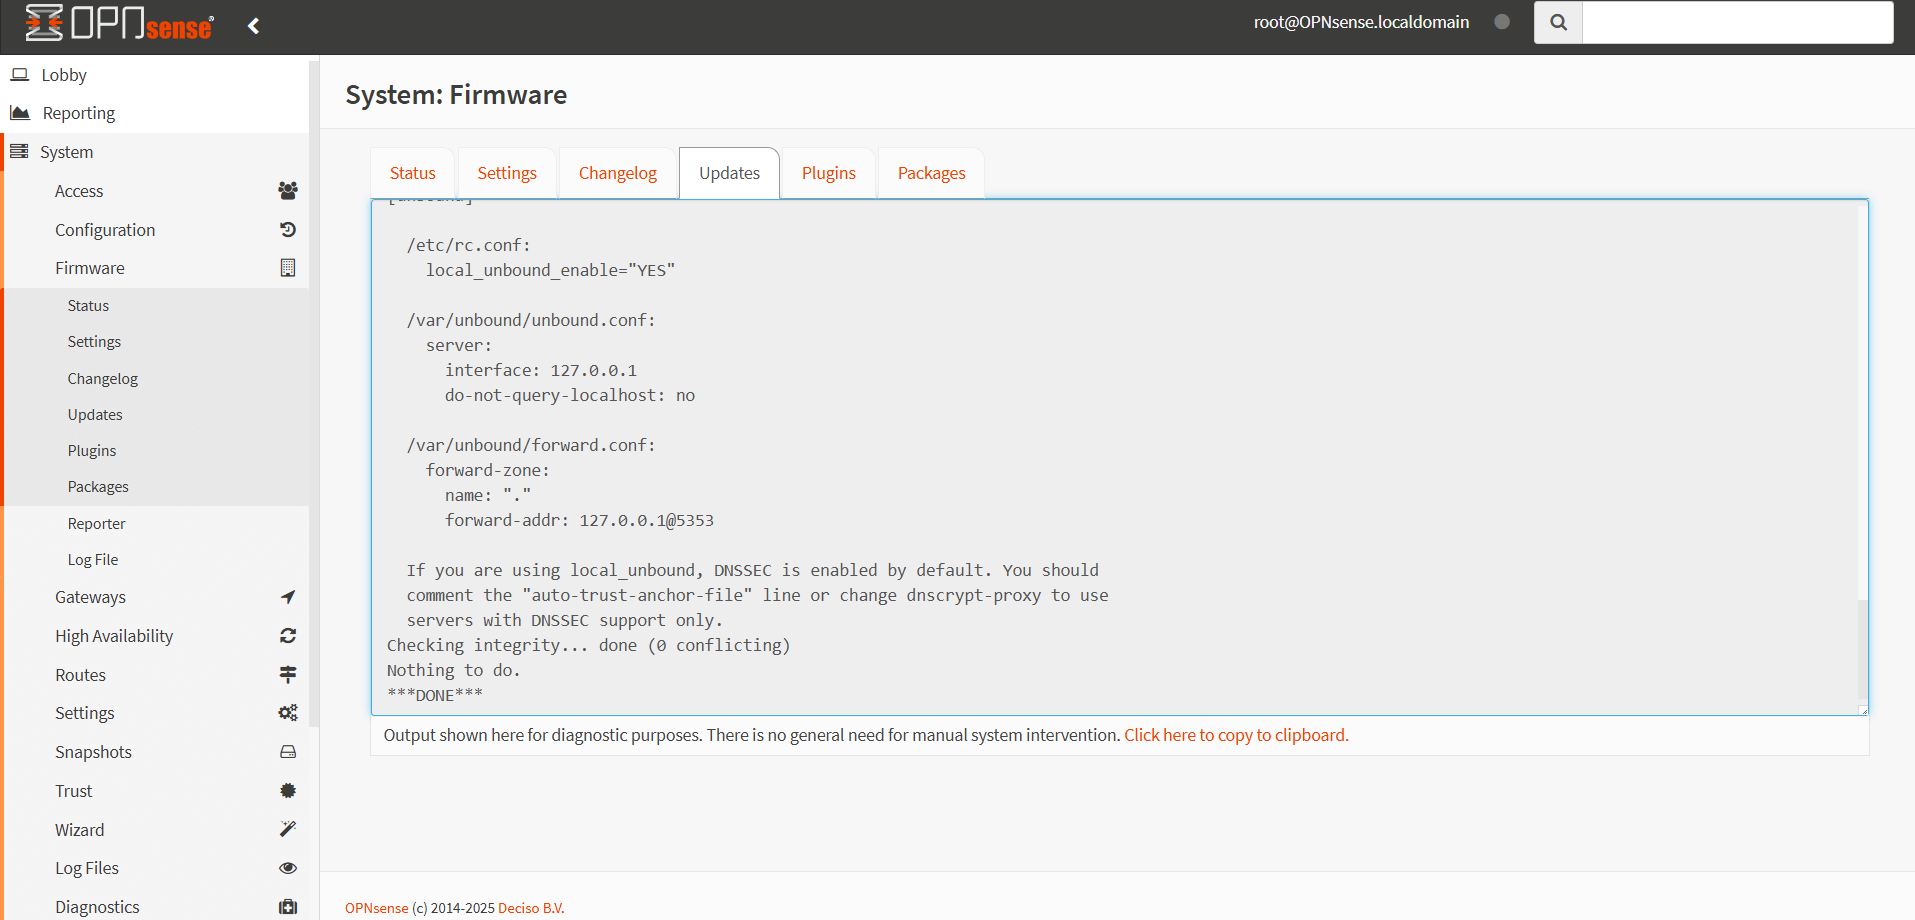
Figure 2. Installing os-dnscrypt-proxy Plugin
-
Click on the Plugins tab. You should see that
os-dnscrypt-proxyplugin is installed.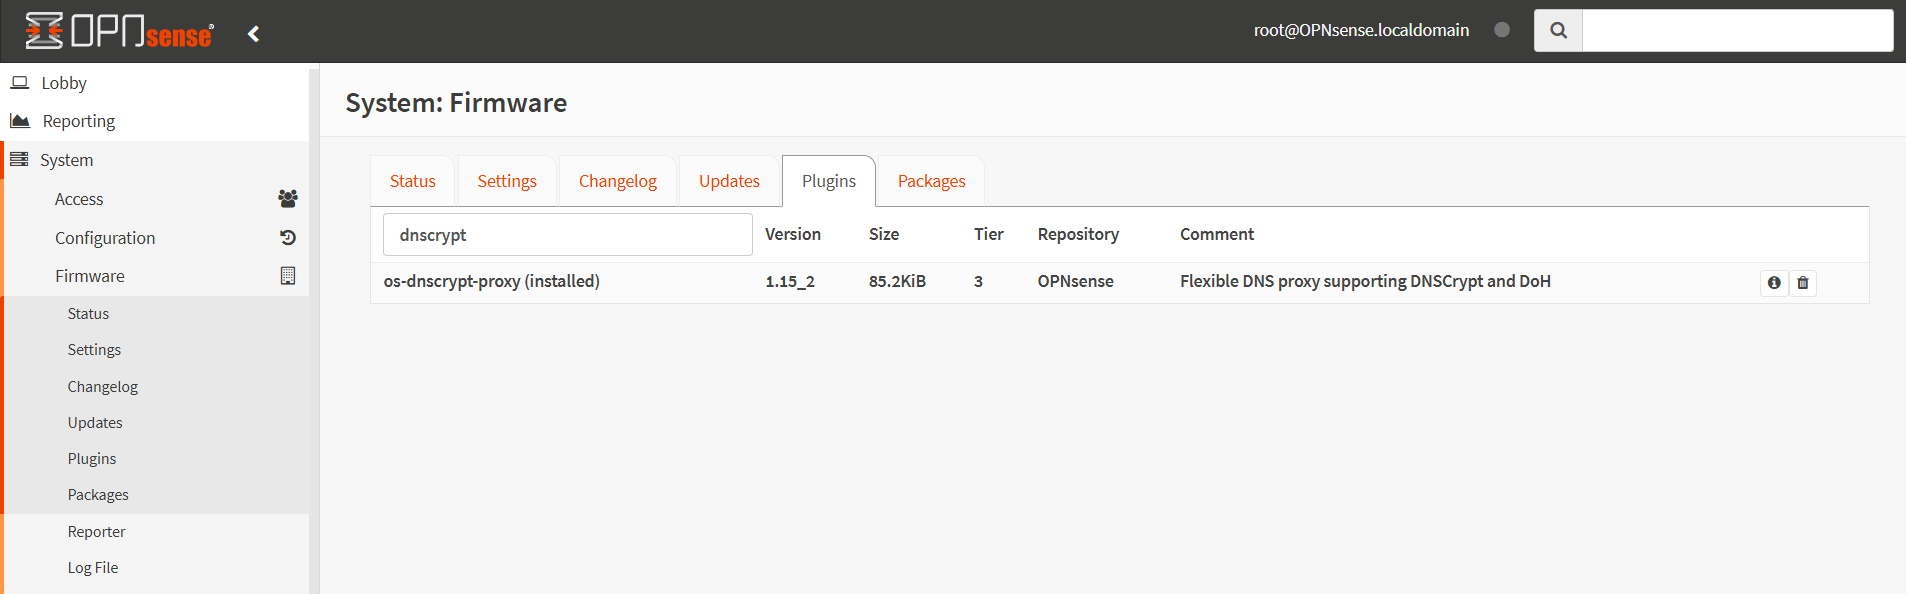
Figure 3. Verifying os-dnscrypt-proxy Plugin Install
After reloading the page by clicking on the OPNsense logo at the top left, you should see DNSCrypt-Proxy menu under Services.
Configuring DNSCrypt-proxy Plugin
You may enable and configure DNSCrypt-proxy on OPNsense by navigating to the Services > DNSCrypt-proxy > Configuration. The daemon searches for a list of public DNS servers from this location, https://dnscrypt.info/public-servers, when it is initiated:
Depending on the parameters below, the list can be shortened to your preference, such as disabling logging or limiting it to IPv4. DNS queries will be executed by the two servers that complete them most quickly. The following options are available on DNSCrypt-proxy configuration page.
-
Enable DNSCrypt-Proxy: You may click on the checkbox to activate DNSCrypt-Proxy service.
-
Listen Address: You may configure the addresses and ports for listening. The default settings are localhost and port
5353. To allow listening on port 53, you must enable Allow Privileged Ports, particularly when the system is intended to function as a resolver. -
Allow Privileged Ports: This option allows the service to listen on ports below
1024, like53. -
Max Client Connections: You may set the maximum number of simultaneous client connections to accept.
-
Use IPv4 Servers: You may let DNSCrypt-Proxy use IPv4 enabled servers.
-
Use IPv6 Servers: You may let DNSCrypt-Proxy use IPv6 enabled servers.
-
Use DNSCrypt Servers: You may let DNSCrypt-Proxy use servers with DNSCrypt protocol enabled servers.
-
Use DNS-over-HTTPS Servers: You may let DNSCrypt-Proxy use servers with DNSCrypt-over-HTTPS protocol enabled servers.
-
Require DNSSEC: You may allow only DNS resolvers with DNSSEC enabled.
-
Require NoLog: You may allow only DNS resolvers with disabled-logging.
-
Require NoFilter: You may allow only DNS resolvers without filtering.
-
Force TCP: You may consistently use TCP for connections to upstream servers. This is beneficial if you need to route all traffic over Tor; otherwise, it should remain disabled.
-
Proxy: You may use this option to route all TCP connections to a local Tor node. The format has to be like `127.0.0.1:9050.
-
Timeout: You may specify how long a DNS query will wait for a response in milliseconds; the default is
2500. -
Keepalive: You may specify keepalive for HTTP (HTTPS, HTTP/2) queries in seconds; the default is
30.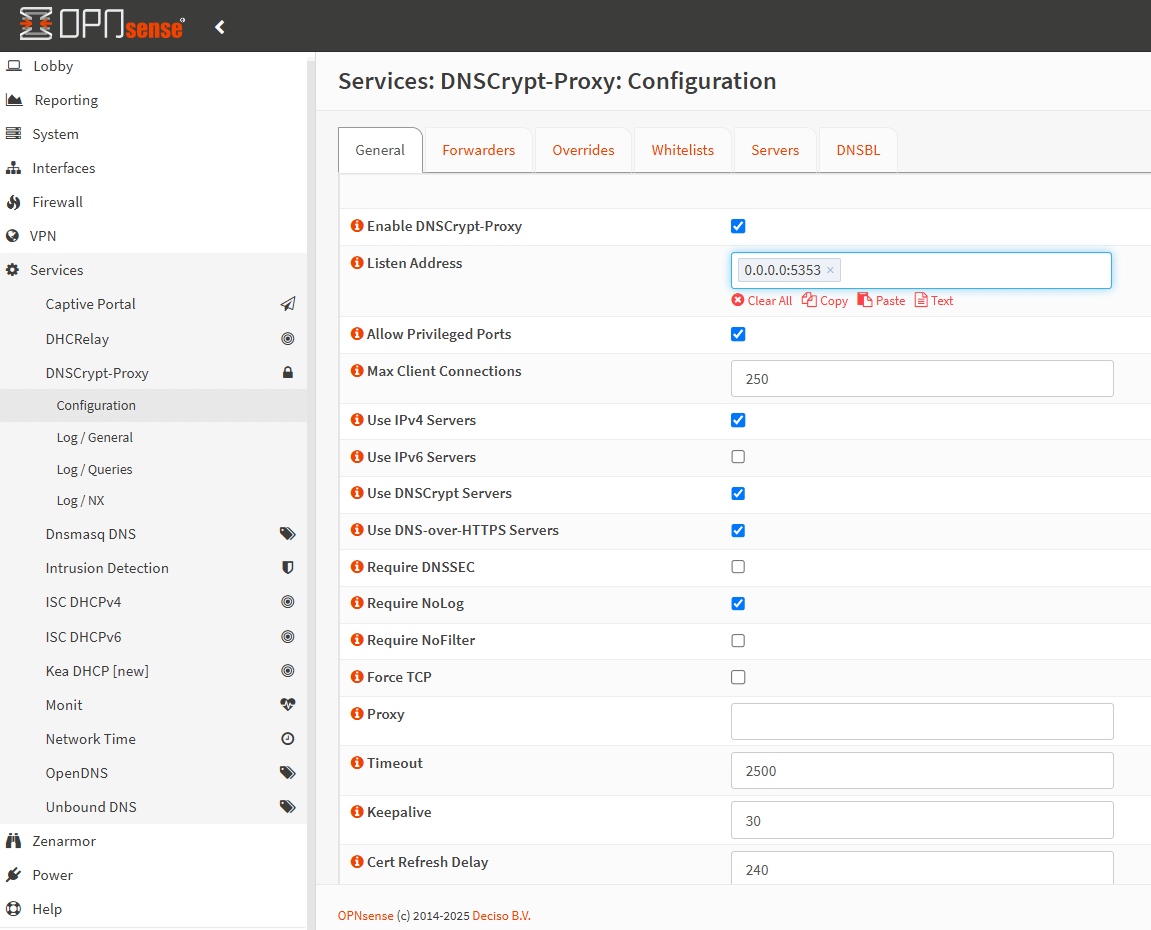
Figure 4. Enabling DNScrypt-proxy
-
Cert Refresh Delay: You may specify the delay in minutes after which certificates are reloaded; the default is
240. -
Ephemeral Keys: You may generate a distinct key for each DNS query. This may enhance privacy but may considerably affect CPU use.
-
TLS Disable Session Tickets: You may disable TLS session tickets. This enhances privacy but also increases latency.
-
Fallback Resolver: This is a standard, non-encrypted DNS resolver intended just for one-time requests to get the initial list of resolvers, and only if the system's DNS configuration fails. The default value is
9.9.9.9:53which corresponds to the Quad9 DNS service. You may change it to1.1.1.1:53to use Cloudflare. -
Block IPv6: You may check this option if you don’t use IPv6.
-
**Cache: You may enable a DNS cache to reduce latency and outgoing traffic.
-
Cache Size: You may specify the cache size.
-
Cache Min TTL: You may specify the minimum TTL for cached entries.
-
Cache Max TTL: You may specify the maximum TTL for cached entries.
-
Cache Negative Min TTL: You may specify the minimum TTL for negatively cached entries.
-
Cache Negative Max TTL: You may specify the maximum TTL for negatively cached entries.
-
Server List: You may set a list of known servers. You can also put your manually added servers here. You may find a list of available servers in the following section. If this options is left blank, DNS servers are selected randomly.
-
Enable query logs: This option will enable/disable local logs.
-
Disabled Servers List: You may exclude servers from automatic selection by adding any specific server names here if you do not want to use them for any reason.
-
Relay List: You may set a list of relays that will be used for relaying to all configured servers.
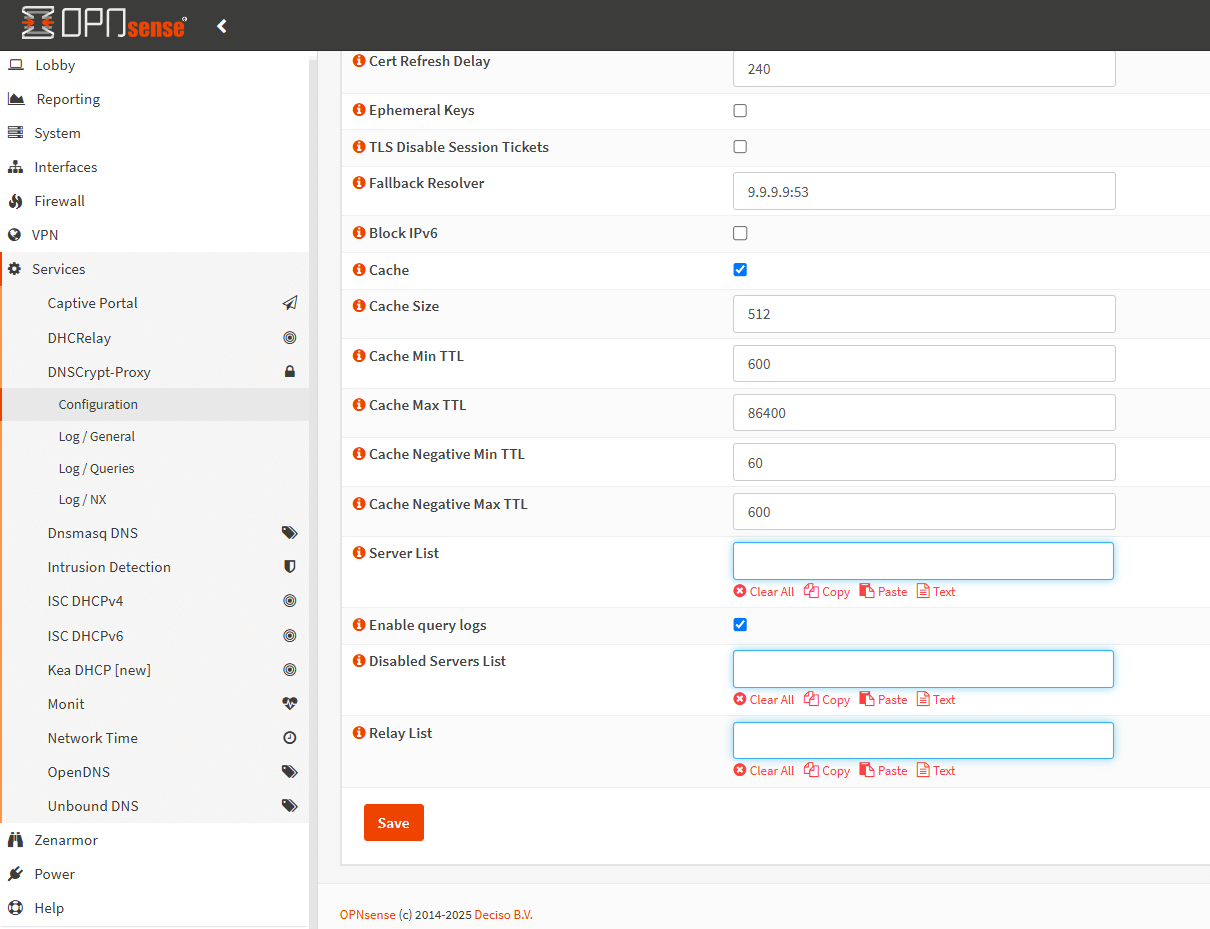
Figure 5. DNScrypt Options
Adding Public DNSCrypt Servers Manually
DNSCrypt-proxy plugin allows you to add specific public DNSCrypt servers as you want. To define public DNSCrypt servers that you want to use on your OPNsense, you may follow the next steps.
-
First, you need to find the SDNS stamp information for the DNS server that you will add. For this purpose, you may visit
https://dnscrypt.info/public-servers/. -
Click on the DNS server, such as
adguard-dnswhich may be used for removing ads and protecting your computer from malware. -
Copy the SDNS stamp field.
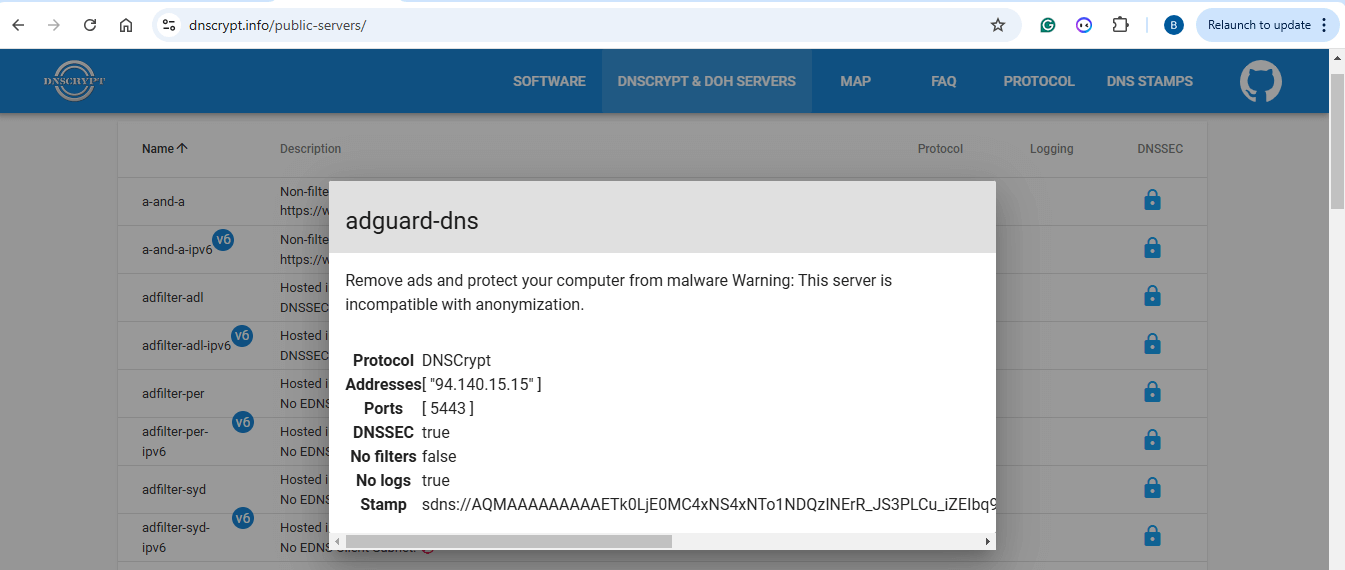
Figure 6. Viewing Adguard-dns Stamp
-
Navigate to the Services > DNSCrypt-proxy > Configuration on OPNsense web UI.
-
Click on the Servers tab.
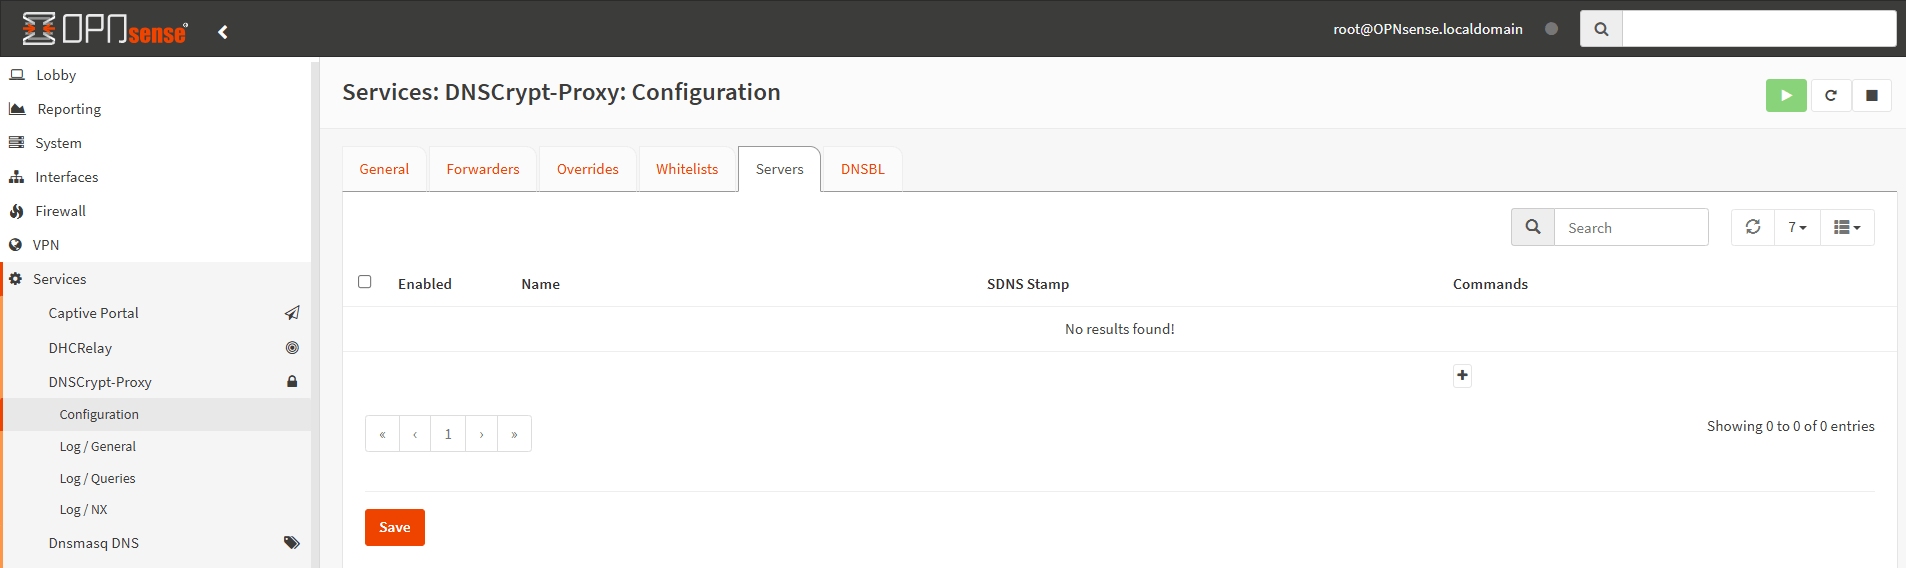
Figure 7. DNScrypt Servers
-
Click on the Add button with the
+icon at the bottom right of the page. -
Ensure that Enabled option is checked.
-
Type the Name for the DNS resolver, such as
adguard-dns. -
Paste the SDNS Stamp that you copied in step 3 without
sdns://prefix.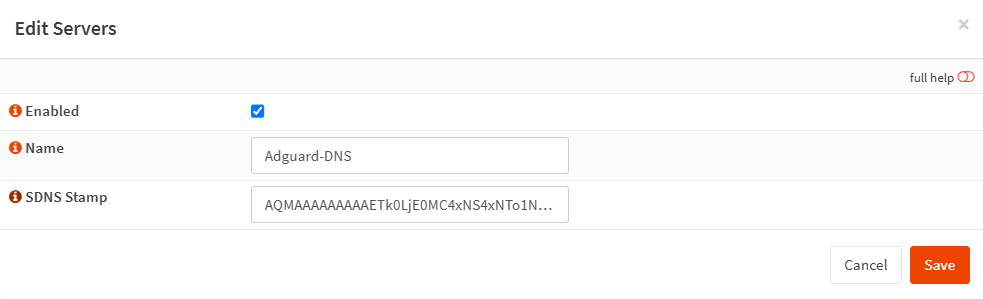
Figure 8. Adding Adguard-dns
-
You may add as many DNS servers as you want.
-
Click Save. This will automatically add the new server settings, and it will be listed on the Servers page.
-
Click Save.
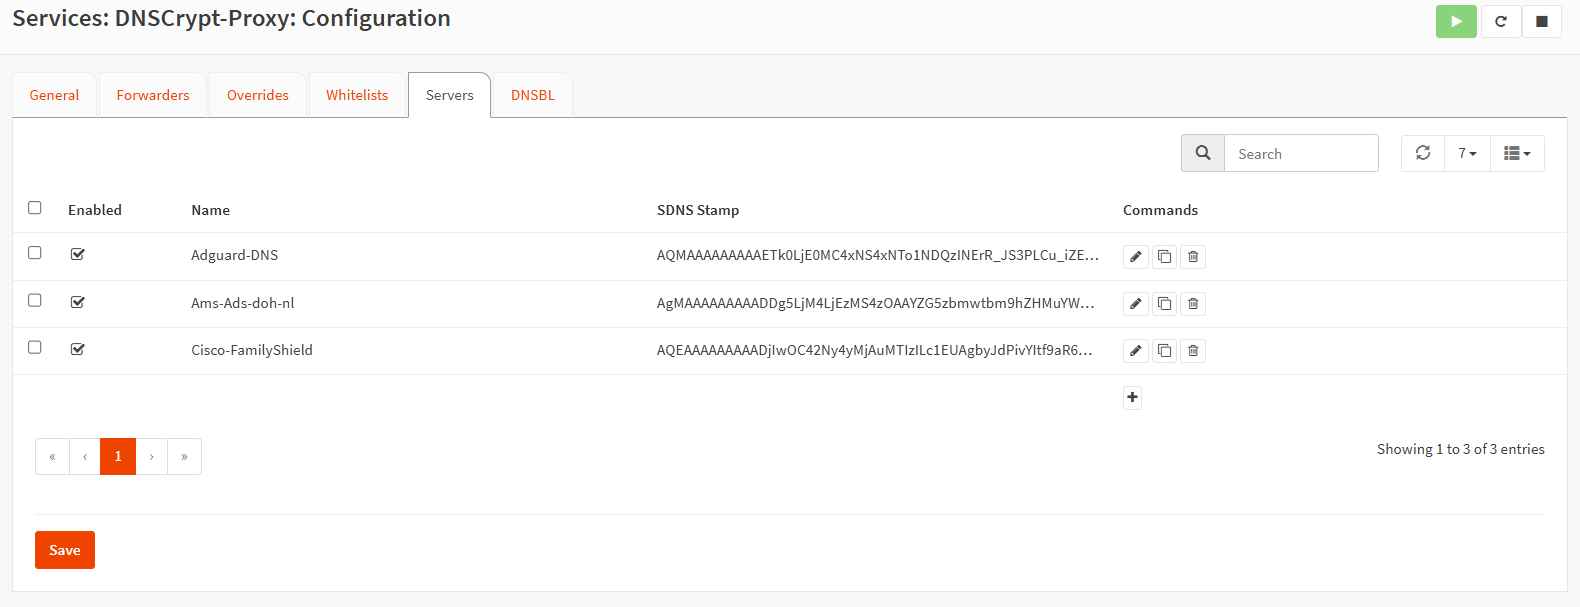
Figure 9. Viewing DNScrypt Servers
-
You can easily edit the DNS server setting by clicking on Edit button with a pen icon at the end of the row.
-
You may remove the DNS server setting by clicking on Delete button with a trash icon at the end of the row.
Enabling DNSBL
Blocklists are names or patterns that will cause a query to immediately receive a REFUSED response. Rather than creating blocklists from scratch, you may use existing ones. You may easily add blocklists by following the next steps.
-
Navigate to the Services > DNSCrypt-proxy > Configuration on OPNsense web UI.
-
Click on the DNSBL tab.
-
Click Enable DNSBL and RPZ checkbox to activate the use of DNS Blocklists for ADs, Malware, or both.
-
Select the predefined external DNSBL blocklist from the Type of DNSBL drop-down list. You may select as many DNSBL types as you want. When any DNSBL type is used, the material will be retrieved straight from its original source.
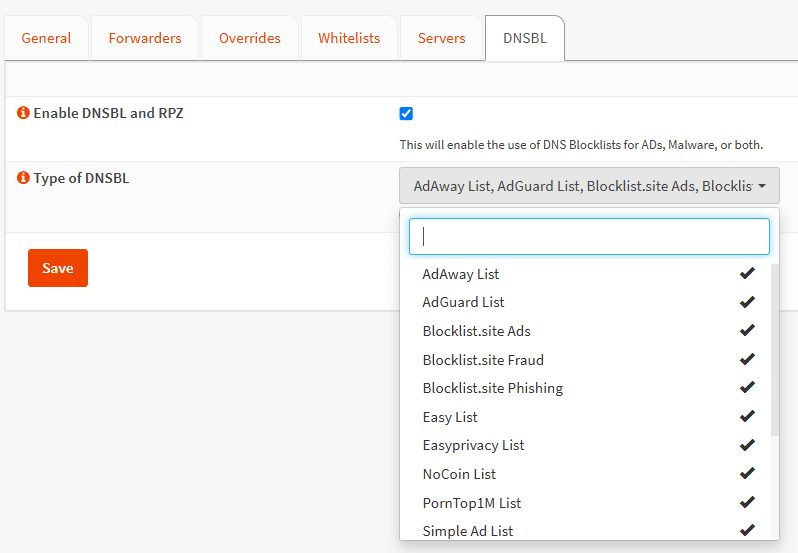
Figure 10. DNSBL Types
-
Click Save to activate the settings.
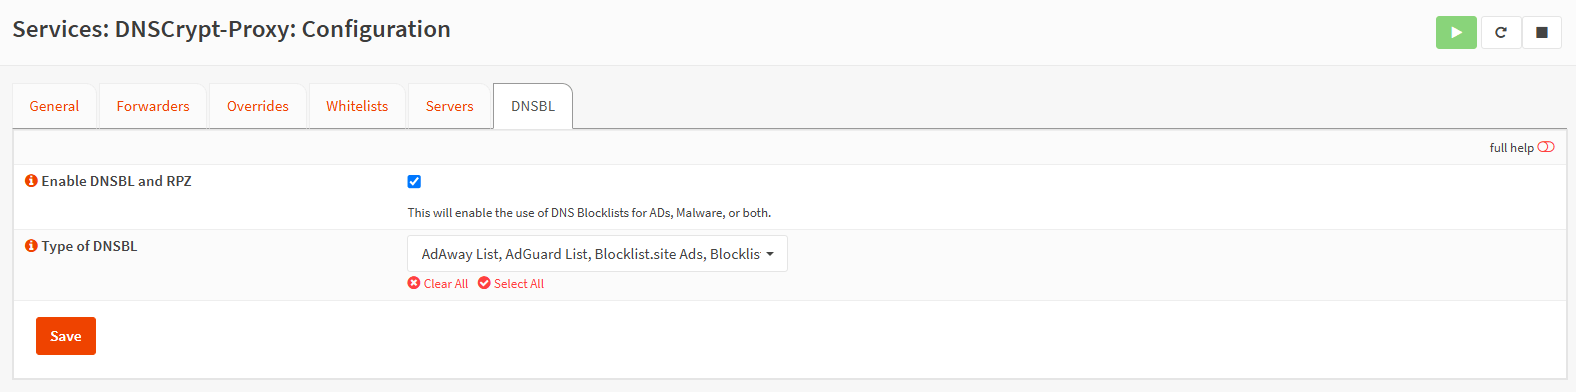
Figure 11. Enabling DNSBL
For an alternate solution to DNS filtering systems or an extra security measure complementing your DNS filtering method, we highly propose the Zenarmor next-generation firewall. It is a rapid, robust, economical solution that is simple to deploy. It offers both the security level of DNS filtering systems and extensive reporting and analytical capabilities, a vast real-time cyber threat information database, enhanced manageability, and flexibility. It utilizes its technologies to perpetually enhance its threat detection capabilities and to promptly react to emerging cyber threats. You may use the Zenarmor Free Edition indefinitely at no cost inside a non-commercial setting.
What are the available DNSBL Types?
The following DNSBL types are available for DNSCrypt-proxy on OPNsense platform.
-
AdAway List
-
AdGuard List
-
Blocklist.site Ads
-
Blocklist.site Fraud
-
Blocklist.site Phishing
-
Easy List
-
Easyprivacy List
-
NoCoin List
-
PornTop1M List
-
Simple Ad List
-
Simple Tracker List
-
Steven Black List
-
WindowsSpyBlocker
-
YoYo List
Adding Whitelist
Whitelist is a name or pattern that will cause a query to bypass blocklists. It will never be blocked. Whitelists might be advantageous when using a third-party blocklist to ensure certain domains remain consistently accessible. They may be beneficial if you want to blocklist a domain, like *.example.com, but permit its subdomain, like api.example.com.
You may easily add whitelists by following the next steps.
-
Navigate to the Services > DNSCrypt-proxy > Configuration on OPNsense web UI.
-
Click on the Whitelists tab.
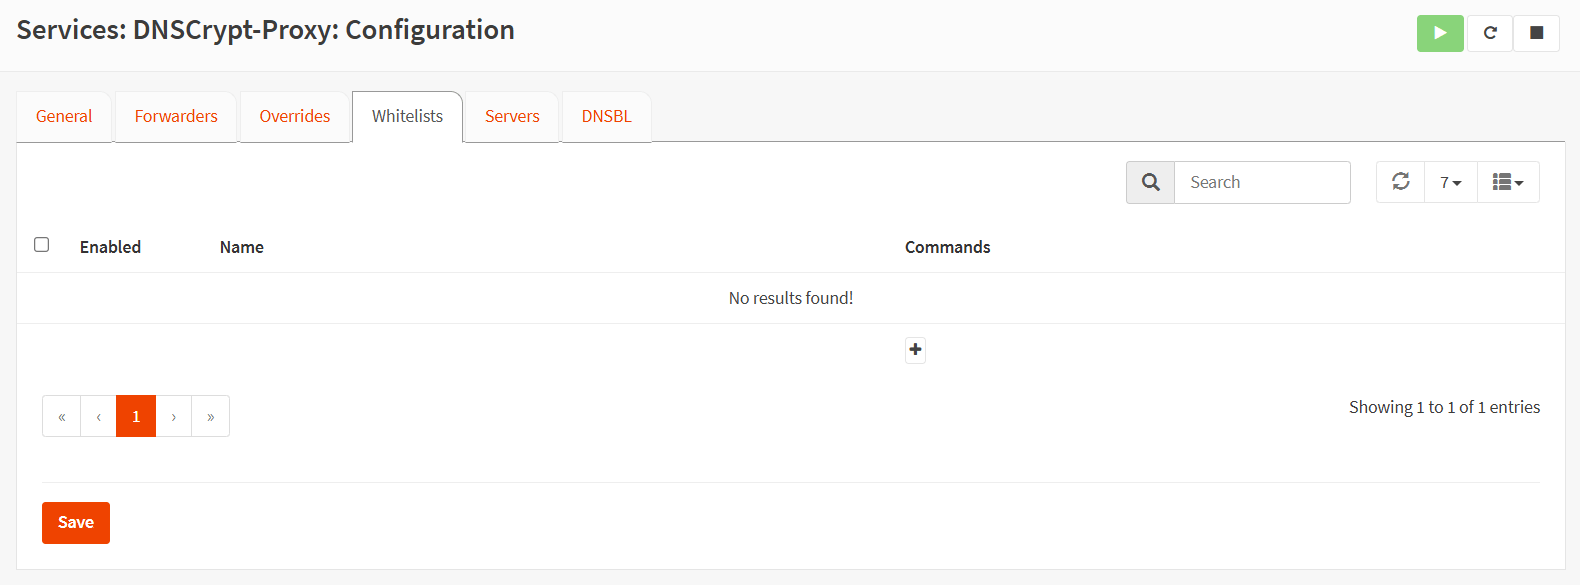
Figure 12. Whitelists
-
Click on the Add button with the
+icon at the bottom right of the page. -
Ensure that Enabled option is checked.
-
Set the domain, IP or expression to whitelist, e.g.
ads.*or*.example.comin Name field. -
You may type a Description.
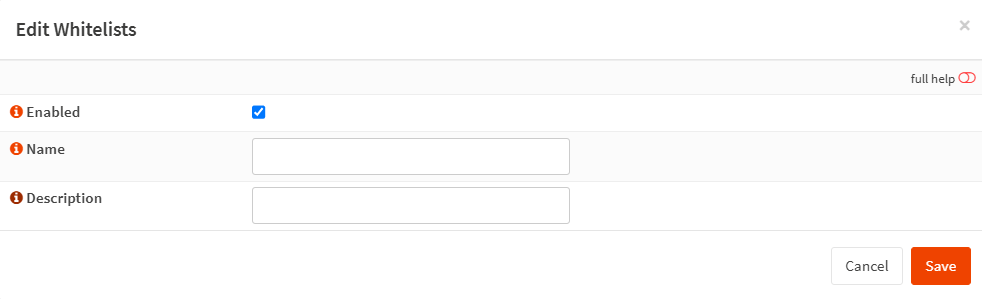
Figure 13. Adding Whitelists
-
Click Save to save the whitelist. This will automatically add the whitelist settings, and it will be listed on the Whitelists page.
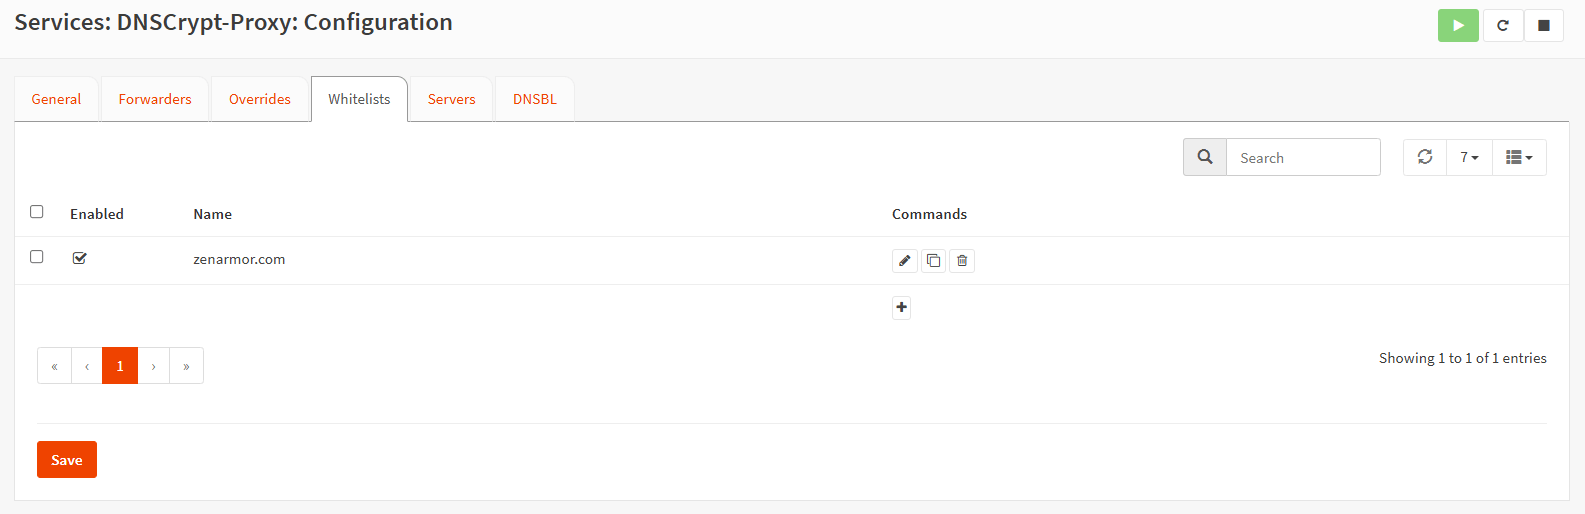
Figure 14. Viewing Whitelists
-
Click Save.
-
You can easily edit the whitelist setting by clicking on Edit button with a pen icon at the end of the row.
-
You may remove the whitelist setting by clicking on Delete button with a trash icon at the end of the row.
Redirecting Unbound DNS Queries to DNSCrypt-proxy
You may easily integrate Unbound DNS server with DNSCrypt-proxy on an OPNsense firewall. To enable Unbound DNS to send all DNS queries to the DNSCrypt-proxy, you may follow the next steps.
-
Navigate to Services > Unbound DNS > Query Forwarding.
-
Click on the Add button with the
+icon at the bottom right of the Custom Forwarding pane. -
Ensure that Enabled option is checked.
-
Leave the Domain field empty to redirect all inquiries to the DNScrypt-proxy service.
-
Type
127.0.0.1in Server IP field. -
Specify the DNSCrypt-proxy service listen port in the Server Port option, such as
5353. -
You may enter a Description for your reference, like
DNSCrypt-proxy.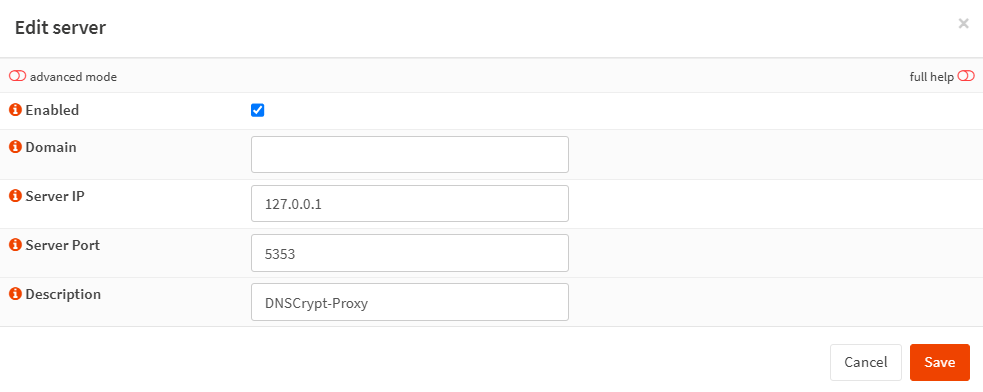
Figure 15. "Unbound DNS Query Forwarding
-
Click Save button.
-
Click Apply to activate the query forwarding.

Figure 16. Unbound DNS Query Forwarding to DNSCrypt-proxy
Running DNSCrypt-proxy as a Standalone DNS server
The DNSCrypt-Proxy may function as a comprehensive independent DNS alternative to Unbound or Dnsmasq. This configuration eliminates the need for a forwarder solution to encrypt DNS queries or use DNSBL. To run DNSCrypt-Proxy as a standalone DNS server you may need to complete the following steps.
-
Disable Unbound DNS by navigating to Services > Unbound DNS > General and then deselecting Enable Unbound option.
-
Disable Dnsmasq by navigating to Services > Dnsmasq DNS > Settings and then deselecting Enable Dnsmasq option.
-
Services > DNSCrypt-proxy > Configuration.
-
Set the Listen Address to
0.0.0.0:53to enable the service to be recognized as standalone by the main system.
You may now proceed with your setup tasks, such as selecting servers, establishing a privacy policy, or configuring caching. Cloaking (overrides) or DNSBL may be used without any circumventions.
How to Restart DNSCrypt-proxy Server
You may easily restart the DNSCrypt-Proxy service for your networks on the OPNsense firewall by following the next steps.
-
Navigate to the Services > DNSCrypt-Proxy > General on your OPNsense web UI.
-
Click on the Restart button at the top right of the page.
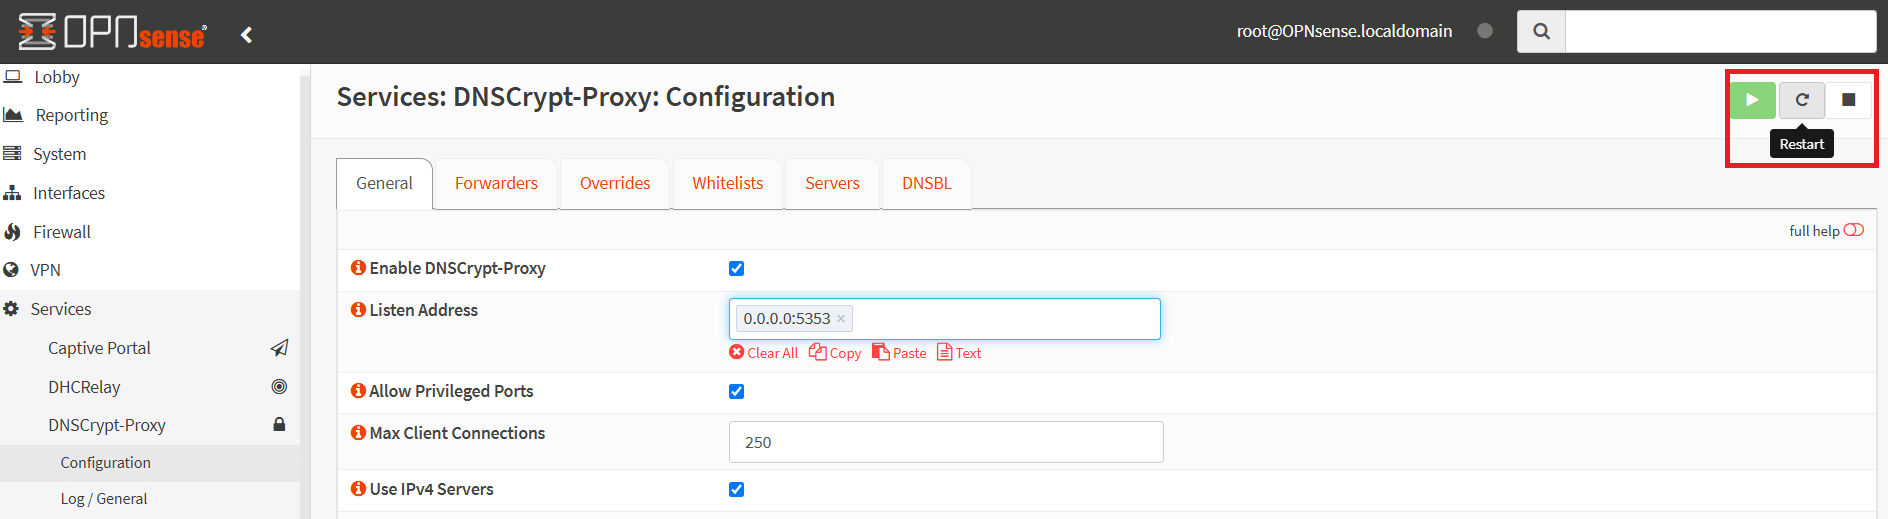
Figure 17. Restart DNSCrypt-Proxy
How to Start/Stop DNSCrypt-Proxy
You may easily start or stop DNSCrypt-Proxy service for your networks on the OPNsense firewall by following the next steps.
-
Navigate to the Services > DNSCrypt-Proxy > Configuration on your OPNsense web UI.
-
Click on the Stop button at the top right of the page. This will immediately stop the service.

Figure 18. Stop DNSCrypt-Proxy
-
Click on the Start button at the top right of the page to start the DNSCrypt-Proxy service. This will immediately start the server.

Figure 19. Start DNSCrypt-Proxy
tipYou may view or start/stop/restart DNSCrypt-Proxy services by navigating to the System > Diagnostics > Services page on OPNsense web UI.
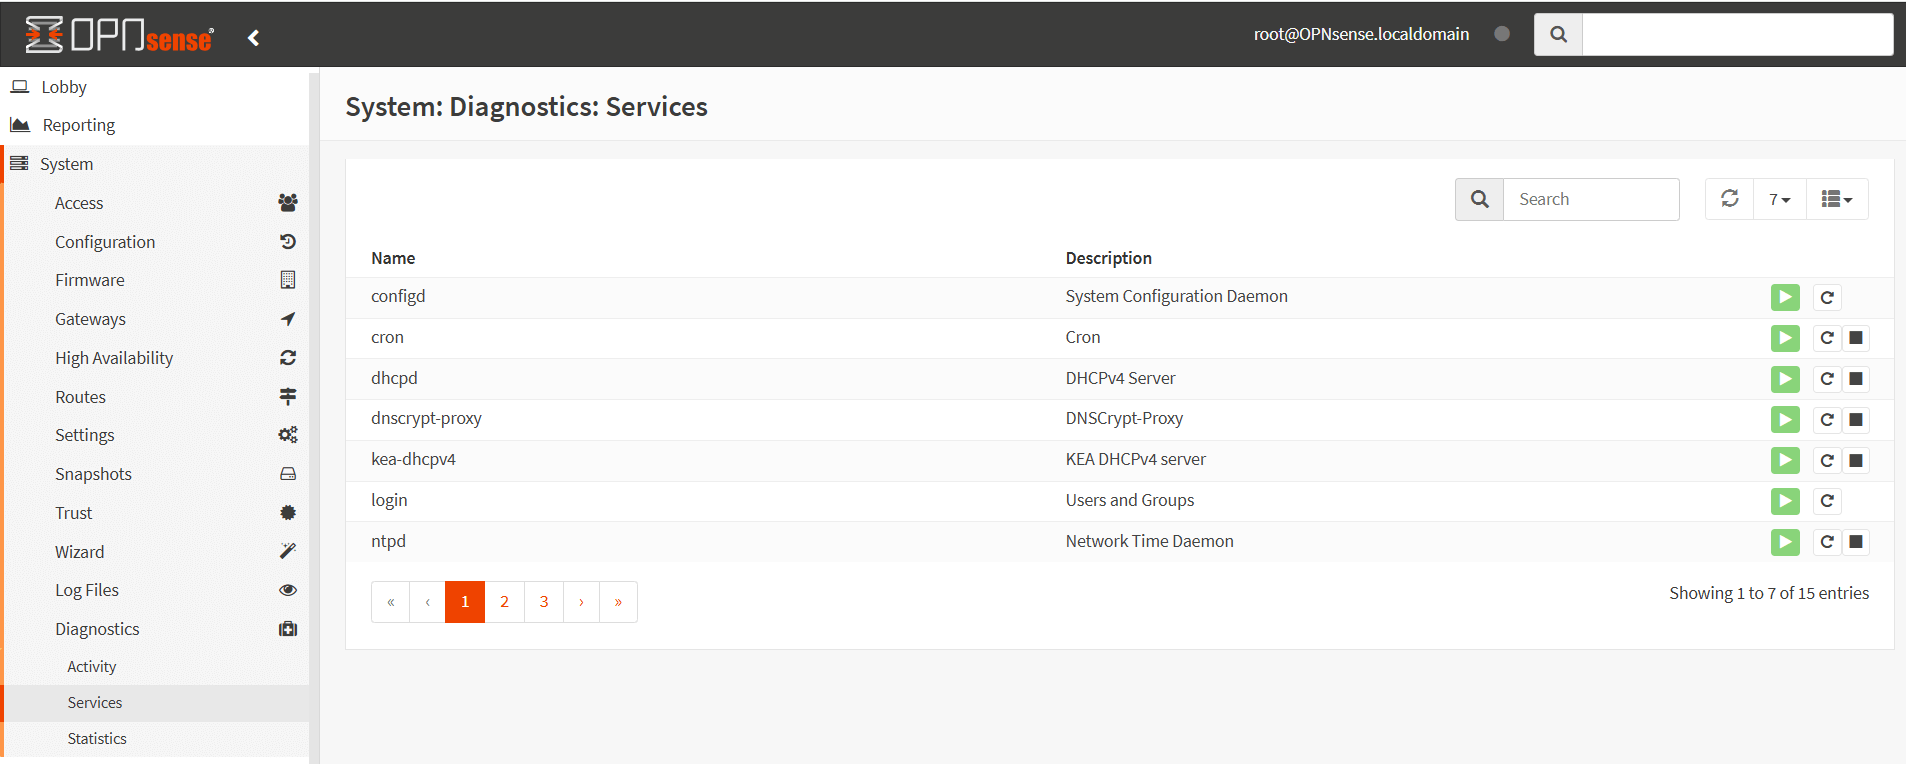
Figure 20. Diagnostic Services
Verifying DNSCrypt-proxy Configuration
After installing DNScrypt-proxy plugin on OPNsense firewall, you may verify your configuration in several ways explained below.
Viewing DNSCrypt-proxy Logs
After enabling DNSCrypt-proxy server and enable query logging option on your OPNsense, you should see both rejected and passed DNS queries on your network on the Log/Queries page by navigating to the Services > DNSCrypt-proxy > Log/Queries. A sample log file is given below.
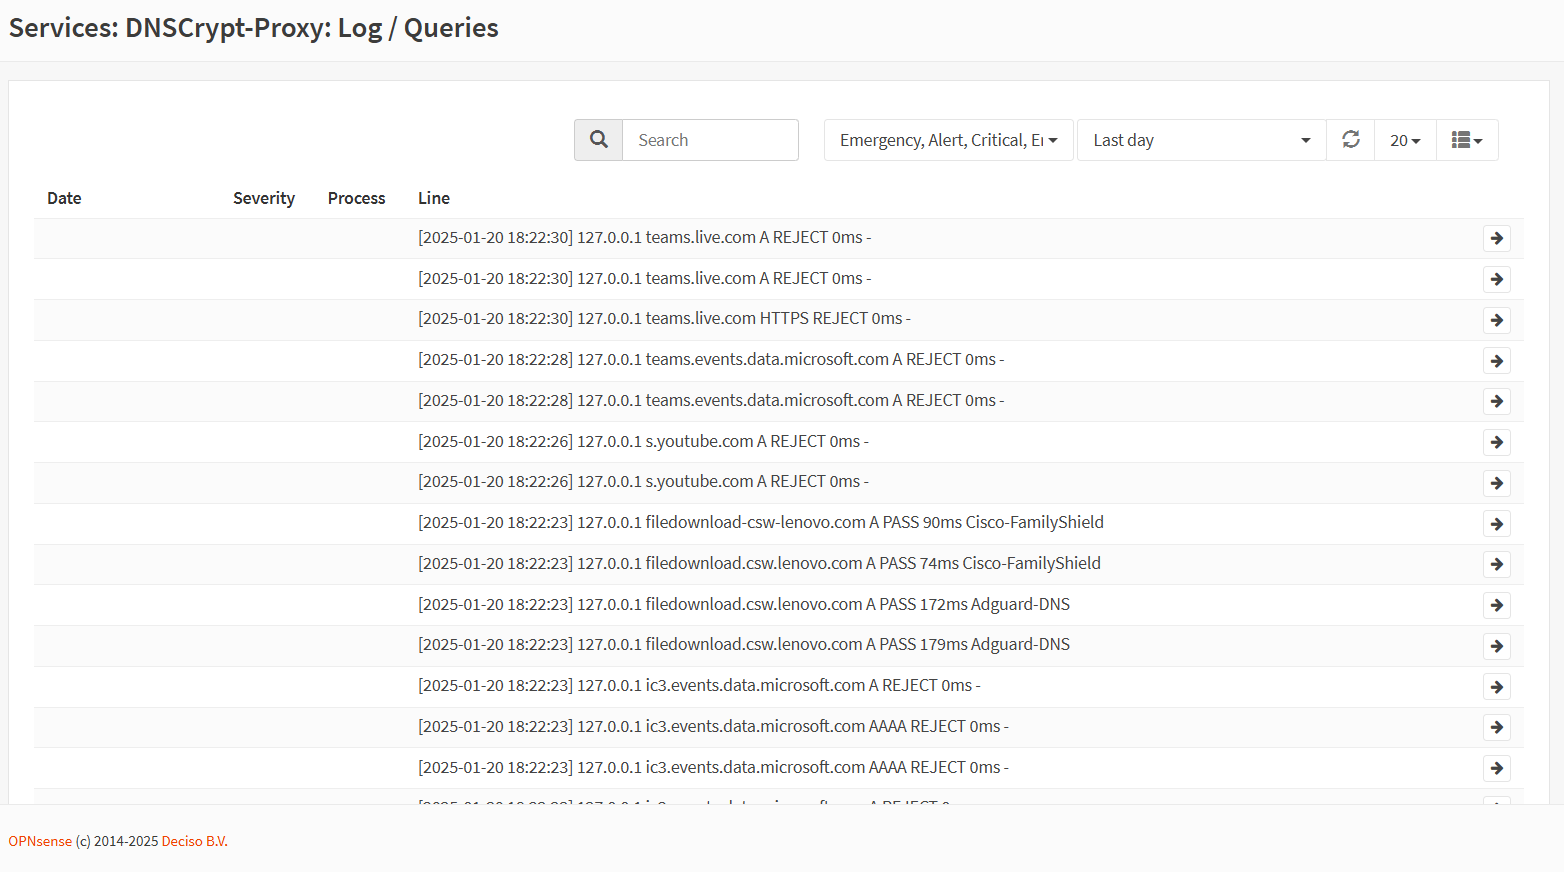
Figure 21. Viewing DNSCrypt-proxy Logs
You may view the available DNS servers that your OPNsense firewall has already accessed and their response times on the Log/General page by navigating to the Services > DNSCrypt-proxy > Log/General.

Figure 22. Viewing DNSCrypt-proxy General Logs
Using DNS Leak Test Website
DNSleaktest.com is a widely used website that can be used to determine the DNS resolvers that are potentially in use.
You may verify your DNSCrypt-proxy by following the next steps.
-
Visit
dnsleaktest.comwebsite. -
Click Extended test button and wait for the test to complete.
-
You should see the list of your DNSCrypt servers similar to the one below.

Figure 23. DNS Leak Test Results
Please be advised that it will solely verify the configuration of your web browser. It is possible that other software is employing a distinct DNS configuration. Incorrect results may also be generated by an HTTP proxy.
Stopping DNSCrypt-Proxy
A quick method to ascertain if your DNS queries are being “leaked” from your network is to disable DNSCrypt-proxy. Upon shutdown, all DNS queries should be unsuccessful when attempting to access a website, for example. Upon re-enabling it, you should regain the ability to resolve domain names. Even if DNS lookups are leaking from your network, you will still be able to access websites and other resources inside your network. If that is the case, your devices are using another DNS server for lookups.
Capturing Traffic
tcpdump tool may be used to ascertain the presence of outbound unencrypted traffic. To capture the outgoing DNS packets, you may run the following command on OPNsense CLI.
tcpdump -n dst port 53 and 'not dst net (::1 or 10 or 127 or 172.16/12 or 192.168/16)'
There should be no packets in the output, as given below.
tcpdump: verbose output suppressed, use -v[v]... for full protocol decode
listening on vtnet0, link-type EN10MB (Ethernet), snapshot length 262144 bytes
Additionally, you may capture the traffic sent to a DNSCrypt server that you are using by running the following command on OPNsense CLI. Then, you should see the packets belonging to DNS queries and responses.
tcpdump host $IP_Address_of_DNS_Server
For our example, we may capture the traffic for AdGuard DNS server using the IP address shown in the figure 6 by running the next command.
root@OPNsense:~ # tcpdump host 94.140.15.15
tcpdump: verbose output suppressed, use -v[v]... for full protocol decode
listening on vtnet0, link-type EN10MB (Ethernet), snapshot length 262144 bytes
19:56:33.839151 IP 192.168.0.21.35466 > dns.adguard-dns.com.5443: UDP, length 1252
19:56:33.863767 IP dns.adguard-dns.com.5443 > 192.168.0.21.35466: UDP, length 304
19:56:45.606895 IP 192.168.0.21.30973 > dns.adguard-dns.com.5443: UDP, length 1252
19:56:45.663692 IP 192.168.0.21.34819 > dns.adguard-dns.com.5443: UDP, length 1252
19:56:45.673662 IP dns.adguard-dns.com.5443 > 192.168.0.21.30973: UDP, length 1136
19:56:45.688827 IP dns.adguard-dns.com.5443 > 192.168.0.21.34819: UDP, length 1136
19:56:46.703917 IP 192.168.0.21.41500 > dns.adguard-dns.com.5443: UDP, length 1252
19:56:46.893364 IP dns.adguard-dns.com.5443 > 192.168.0.21.41500: UDP, length 304
19:56:47.110723 IP 192.168.0.21.30969 > dns.adguard-dns.com.5443: UDP, length 1252
19:56:47.164891 IP dns.adguard-dns.com.5443 > 192.168.0.21.30969: UDP, length 304
19:56:47.364300 IP 192.168.0.21.7977 > dns.adguard-dns.com.5443: UDP, length 1252
19:56:47.389396 IP dns.adguard-dns.com.5443 > 192.168.0.21.7977: UDP, length 304
19:56:53.925273 IP 192.168.0.21.3010 > dns.adguard-dns.com.5443: UDP, length 1252
19:56:53.951237 IP dns.adguard-dns.com.5443 > 192.168.0.21.3010: UDP, length 304
Blocking Ads Traffic
You may add DNSBL types, such as AdAway List, AdGuard List and Simple Ad List, to block advertisements and then visit the https://canyoublockit.com/testing/ site. You should see the Adblocker Test page, which is similar to the one below.
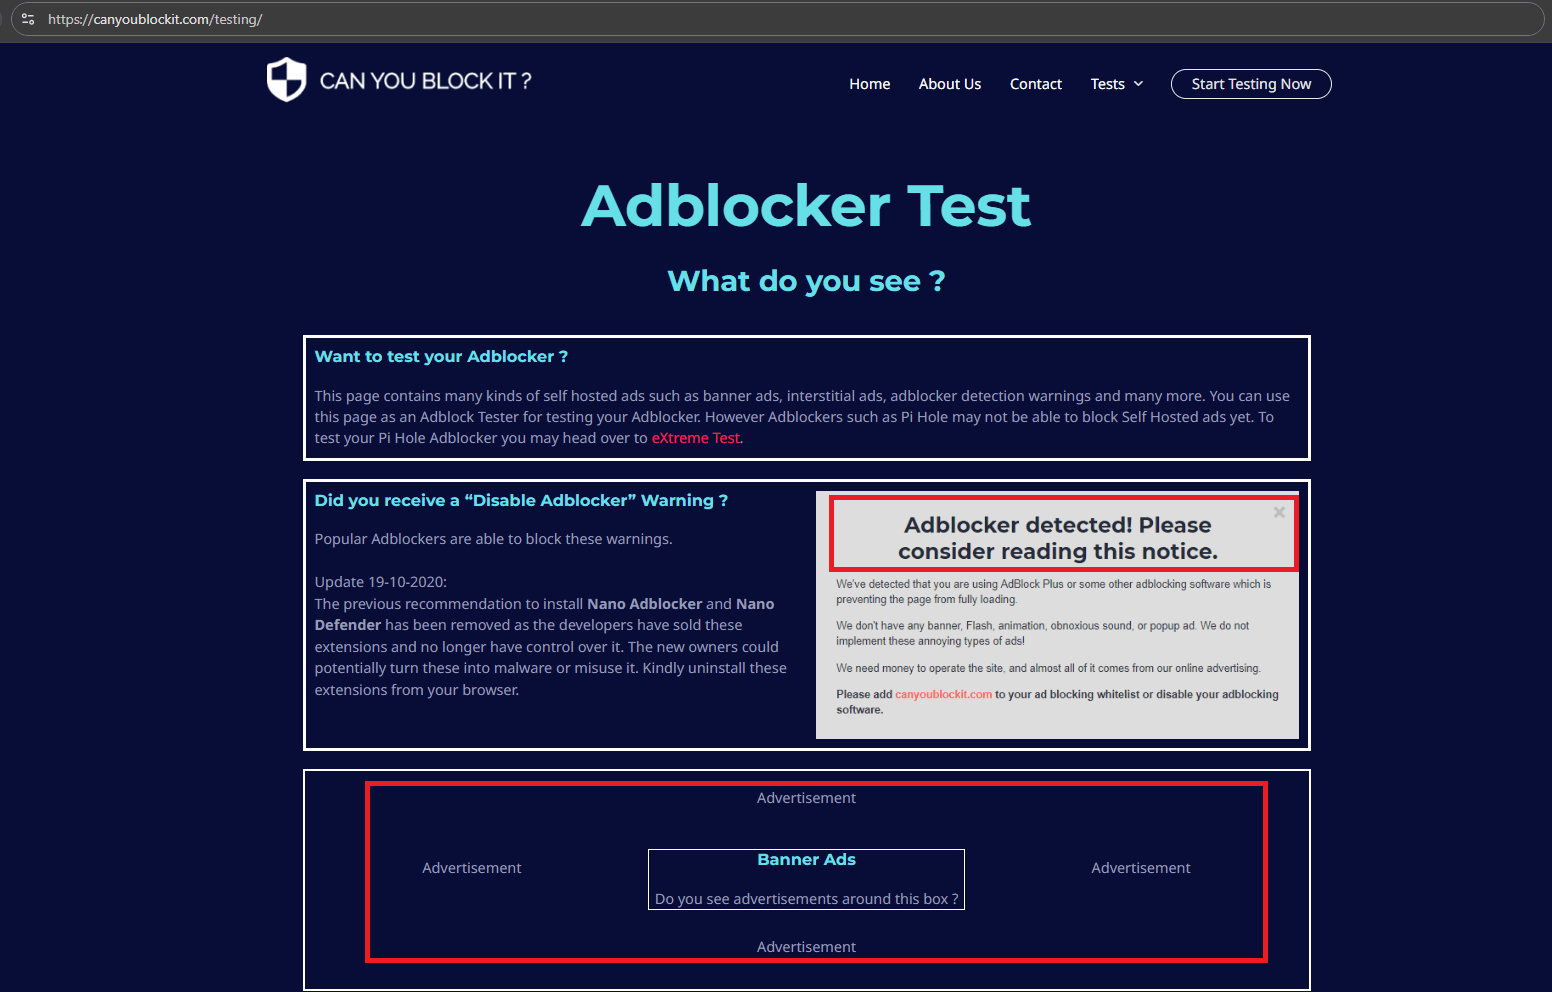
Figure 24. Adblocker Test page
Testing MSN before the Ads are blocked

Figure 25. MSN homepage with ads
MSN Homepage after DNSCrypt-proxy DNSBL blocked Ads

Figure 26. Ads blocked by DNSCrypt-proxy DNSBL on MSN homepage
What are the Public DNSCrypt Servers?
Free DNSCrypt-enabled resolvers are accessible globally. You may find an interactive list of public DNS servers at https://dnscrypt.info/public-servers.
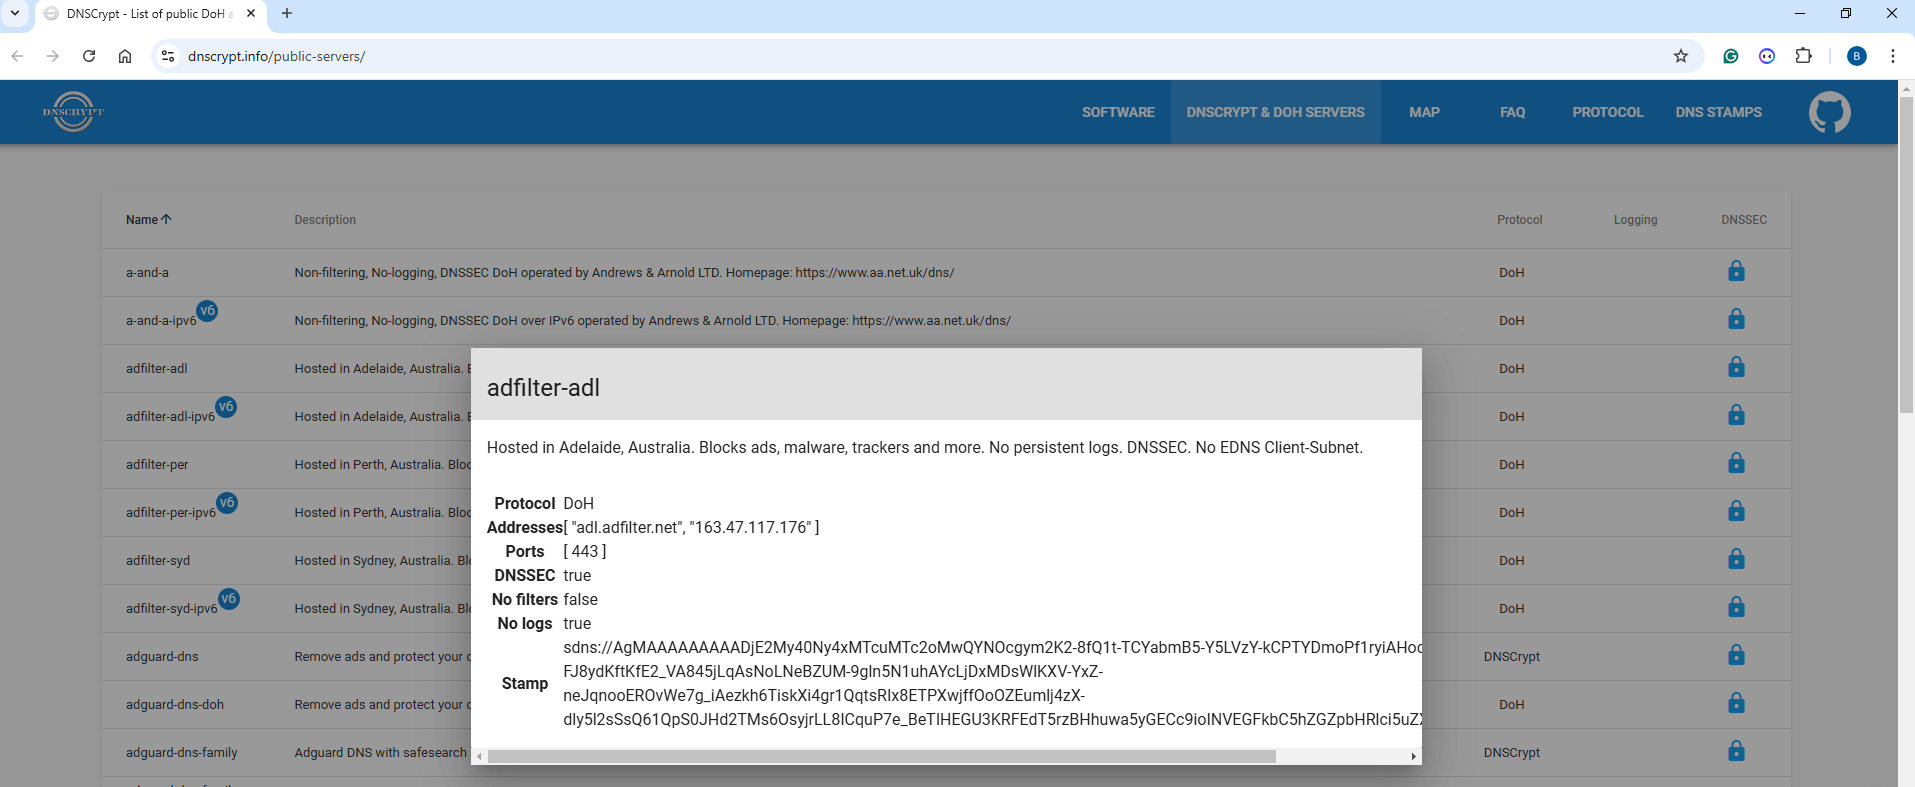
Figure 27. Public DNSCrypt Servers interactive list
An interactive map of public DNS servers is available at:https://dnscrypt.info/map.

Figure 28. DNSCrypt Servers Map
DNSCrypt-enabled OpenNIC servers are listed at https://download.dnscrypt.info/dnscrypt-resolvers/v3/opennic.md.
DNSCrypt servers used for parental control are available at: https://download.dnscrypt.info/dnscrypt-resolvers/v3/parental-control.md.
An extensive list of public DNS resolvers supporting the
DNSCrypt and DNS-over-HTTP2 protocols is accessible at: https://download.dnscrypt.info/dnscrypt-resolvers/v3/public-resolvers.md
What are the Features of DNSCrypt-proxy?
DNSCrypt-proxy is a powerful DNS proxy. It operates on your computer or router, enabling local blockage of undesirable information, disclosing the destinations of data transmissions from your devices, enhancing application performance via DNS response caching, and bolstering security and secrecy by using secure routes for communication with upstream DNS servers. DNSCrypt-proxy has the following capabilities.
-
Filtering: Blocks advertisements, viruses, and further undesirable content. Compatible with all DNS providers.
-
Encryption and authentication of DNS communication. Facilitates DNS-over-HTTPS (DoH) using TLS 1.3 and QUIC, DNSCrypt, Anonymized DNS, and ODoH. Client IP addresses may be concealed via Tor, SOCKS proxies, or Anonymized DNS relays.
-
Cloaking that may be used for local growth and to provide secure search outcomes on Google, Yahoo, DuckDuckGo, and Bing.
-
Time-based filtering with a versatile weekly timetable.
-
Load balancing by allowing administrators to choose a group of resolvers. In such cases, DNScrypt-proxy will automatically assess and monitor their performance, distributing traffic among the quickest available options.
-
Monitoring DNS requests, using distinct log files for standard and anomalous inquiries
-
DNS caching for latency reduction and privacy improvement.
-
Clear routing of designated domains to certain resolvers
-
Local IPv6 suppression to mitigate latency on IPv4-exclusive networks
-
Automated background updating of resolver lists
-
Compatible with DNS Security Extensions
-
Incorporates a local DoH server to facilitate ECH (ESNI).
-
Can force outbound connections to use TCP
Why Do You Deploy DNSCrypt?
The main reasons and advantages of deploying DNSCrypt on a network are as follows.
-
Encrypts and authenticates DNS communication, specifically designed for DNS.
-
Incorporates safeguards against DNS amplification attacks
-
A significant number of servers endorse the protocol.
-
Has undergone rigorous testing since 2011
-
Both UDP and TCP may be used for transport.
-
Extremely straightforward to do; necessitates just two conventional cryptography frameworks.
-
Innately facilitates reordering, parallelism, and prioritization.
-
Maintains a limited quantity of states server-side
-
Eliminates the need for a TLS stack, thus reducing the attack surface.
-
Cannot be subjected to man-in-the-middle attacks via traditional techniques
-
Does not depend on X509 certificates and Certificate Authorities.
-
Does not possess any insecure parameters
-
Possesses a comprehensive specification since 2013
-
DNSCrypt and DoH may be concurrently served on the same port.
-
Standard DNS and DNSCrypt may use the same port, however port 443 is recommended owing to routers sometimes intercepting port 53.
-
Imposes certificate signatures
-
Can obscure client IP addresses from servers (Anonymized DNSCrypt)
-
A prototype using post-quantum cryptography is accessible.