Adding a Linux Endpoint
Zenarmor provides device-level protection for Linux endpoints by installing the Zenarmor endpoint application directly on supported Linux distributions.
Once installed, Linux endpoints are connected to your organization and centrally managed through the Zenconsole. This allows you to monitor and control web and application traffic regardless of the user’s location.
Zenarmor provides multiple installation options for Linux endpoints. Choose the method that best fits your environment and deployment preferences, and follow the steps to install the agent.
The available methods are listed below.
To be able to protect Linux endpoints using Zenarmor, you need to register your endpoints to Zenconsole
Before starting endpoint registration, you should have an organization set up with identity and access management configuration already completed on Zenconsole.
Organization features and endpoint support are only available on SSE and higher subscriptions.
Method 1: Shell Script
You can install the Zenarmor endpoint application on your Linux device by following the steps below.
-
Open your browser and navigate to Zenconsole.
-
Enter your username and password.
-
In the left-hand navigation menu, click Global Deployments.
-
Navigate to Gateways & Endpoints in Zenconsole.

Figure 1. Add Endpoint
-
Click + Add Endpoint and switch to the Linux tab.
-
Locate Method 1: Shell Script, as shown below, and copy the command provided there.
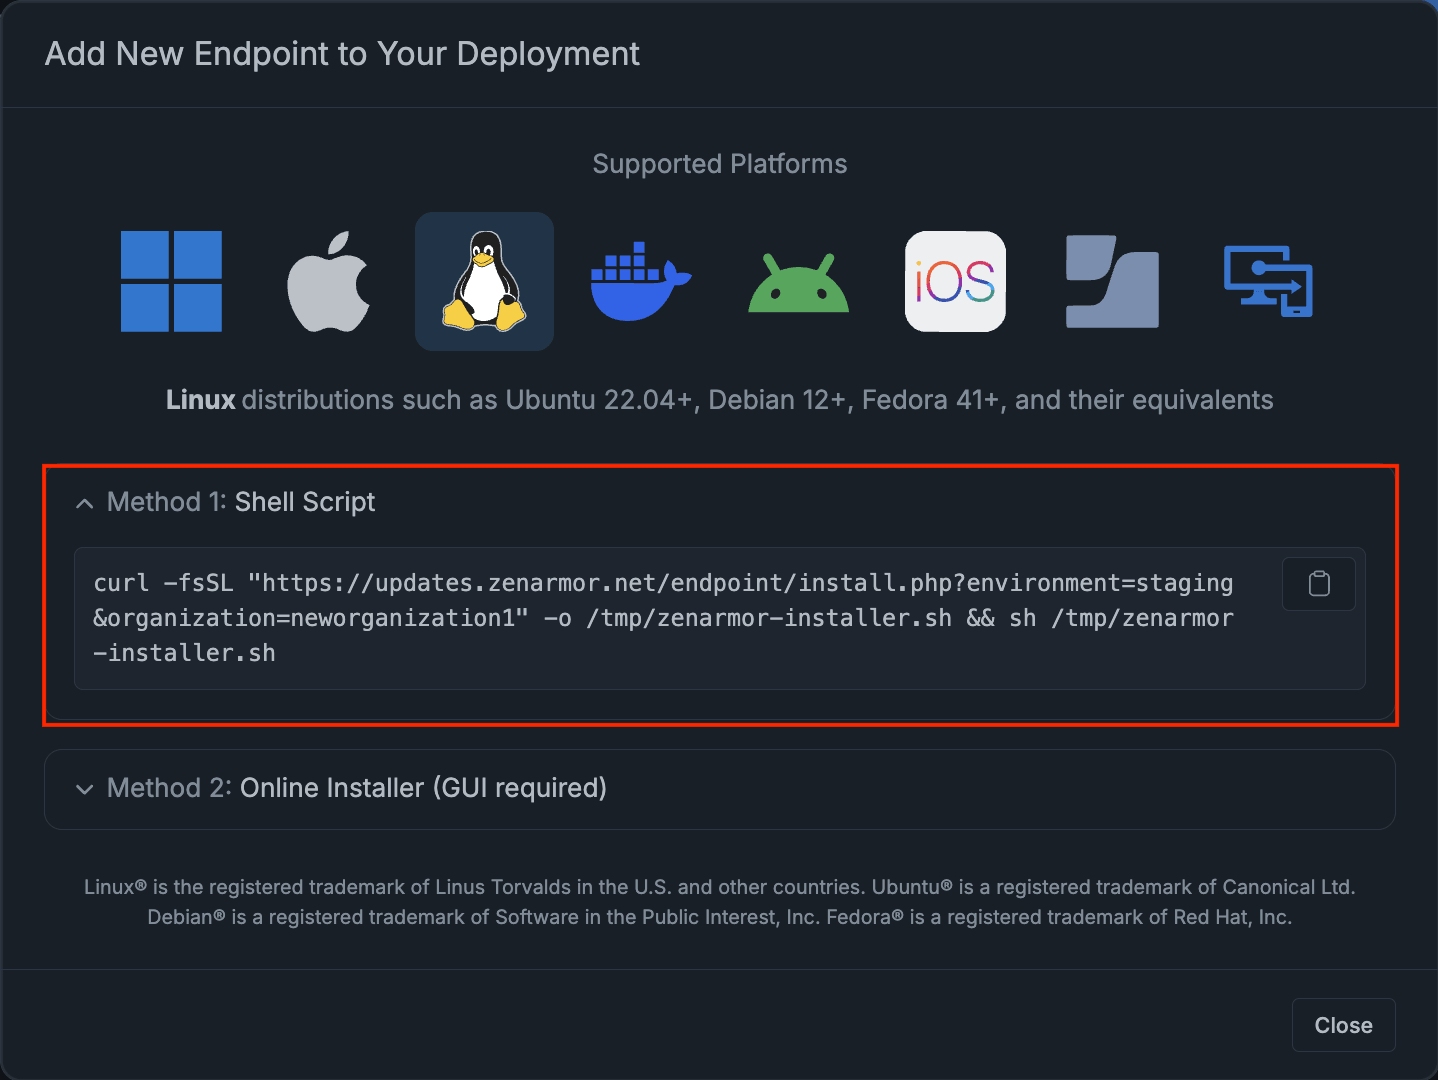
Figure 2. Add an Endpoint to Your Deployment - Shell Script
-
Open a terminal on your Linux device as a user with
sudoprivileges. -
Paste and run the copied script in the terminal.
-
Wait until the installation finishes. Zenarmor will be installed automatically.
Now, you must authenticate & register your Linux endpoint to your organization on the Zenconsole.
Method 2: Online Installer(GUI required)
The Online Installer method allows you to install the Zenarmor endpoint application through a graphical installer interface.
Follow the steps below to install Zenarmor on Linux using the online installer:
-
Log in to your Zenconsole account.
-
In the left-hand navigation menu, click Global Deployments.
-
Navigate to Gateways & Endpoints in Zenconsole.
-
Click + Add Endpoint and switch to the Linux tab.
-
Under Method 2: Online Installer, download the installer package that matches your processor architecture:
- Zenarmor x86_64 installer
- Zenarmor aarch64 installer

Figure 3. Add an Endpoint to Your Deployment - Online Installer
-
Go to the Properties menu by right-clicking on the file.
-
Enable the Executable as Program option.

Figure 4. Executable as Program Option
-
Right-click on the file. Run the installation file by clicking on the Run. This will launch the Zenarmor setup wizard.
-
Click Next to proceed with the setup wizard.
-
Click Next to start the installation. You may need to type the password to allow the new software installation.
-
Enter username and password to allow making changes to the System Certificate Trust Settings, which is required for full TLS inspection.
-
Wait while the setup wizard installs Zenarmor.
-
Click Close to exit the setup wizard and launch Zenarmor.

Figure 5. Zenarmor Installer - Success Message
Now, you must authenticate & register your Linux endpoint to your organization on the Zenconsole.