Managing Zero-Trust Network Policies on Zenconsole
Zenarmor implements a robust Zero Trust Network Access (ZTNA) model in which no user or device is inherently trusted. Every connection request is evaluated through identity verification, access controls, and continuous policy enforcement. This approach minimizes the risk of lateral movement by granting users and devices access only to the applications and resources explicitly permitted by configured access rules.
Zenarmor’s private access control feature guarantees consistent policy enforcement and visibility across all users, devices, and locations. Whether your employees are working from home, in a coworking space, or at a branch office, they will experience the same high level of security and protection. This uniformity makes Zenarmor an ideal, scalable solution for organizations striving to support a flexible, location-independent workforce effectively and securely.
By combining Zero Trust Network Access with real-time threat inspection, Zenarmor continuously evaluates trust and manages access according to centrally defined policies. Zenarmor SSE and higher editions therefore provide a scalable, policy-centric solution for organizations adopting Zero Trust as a core security framework.
To access and manage Zero-Trust Network Access Policies in Zenconsole follow these steps below.
-
Login Zenconsole.
-
Select the organization that you want to manage.
-
Navigate to Policies from the left navigation panel.
-
Click on the Zero-Trust Network Policies tab.
- If your organization already has one or more Zero-Trust Networks, their names appear under Zero-Trust Network Policies in the left navigation panel.

Figure 1. Zero-Trust Network Page
- If your organization does not have a Zero-Trust Network, the No Zero-Trust Network Created Yet message appears. Click Go to Zero-Trust Networks to create a network before configuring access rules. For detailed instructions, see Creating Zero-Trust Networks

Figure 2. No Zero-Trust Network Created Yet
-
Select the Zero-Trust Network for which you want to create or manage access rules.
The Zero-Trust Network Access Policies workspace opens for the selected network. The workspace displays the configured rules and their source peer, destination peer, and application matching criteria.
If no custom rules have been created, only the predefined Default Deny rule appears.
Each Zero-Trust Network includes a predefined Default Deny rule. Connections that do not match an enabled custom access rule are evaluated against this rule and blocked.
The Default Deny rule serves as the final fallback rule and cannot be edited, cloned, deleted, or reordered.
From the Zero-Trust Network Access Policies workspace, you can perform the following management tasks:
- Create a new access rule
- View configured access rules
- Review source peer, destination peer, and application matching criteria
- View the status of access rules
- Enable or disable a custom access rule
- Edit an access rule
- Clone an access rule
- Delete an access rule
- Reorder custom access rules
- Synchronize rule changes immediately by clicking Sync Now
Creating a Zero-Trust Network Access Rule
You can create a Zero-Trust Network Access rule to define which source peers can access specific destination peers, protocols, and applications within a Zero-Trust Network.
To create a Zero-Trust Network Access rule, follow the steps below:
-
Navigate to Policies > Zero-Trust Network Policies.
-
Select the Zero-Trust Network for which you want to create an access rule.
-
Click + Create New Rule button at the top right of the page. A dialog box will open to rename the new rule.
-
Configure the Status toggle. A newly created rule is enabled by default. Disable the toggle if you want to create the rule without immediately activating it.
-
Enter a descriptive rule name in the Name field, such as
Administrative Access. -
Configure the Source Peers Matching Criteria to determine where the connection originates. You can define matching criteria based on users, groups, peers, IP addresses, ports, and locations.
-
Configure the Destination Peers Matching Criteria to determine which users, groups, peers, IP addresses, ports, or locations the source peers can access.
-
Under Transport Protocol, specify the transport protocol to which the rule applies. The default value is any.
-
Under Allowed Applications, select the applications that the rule permits. The default value is Any.
-
Under Device Posture Checks, optionally configure:
- Internet Security Policy Assignments
- CrowdStrike ZTA Score
-
Under Time Schedule, configure when the rule is active:
- Leave Always active enabled to apply the rule at all times.
- Disable Always active to select specific days and define start and end times.
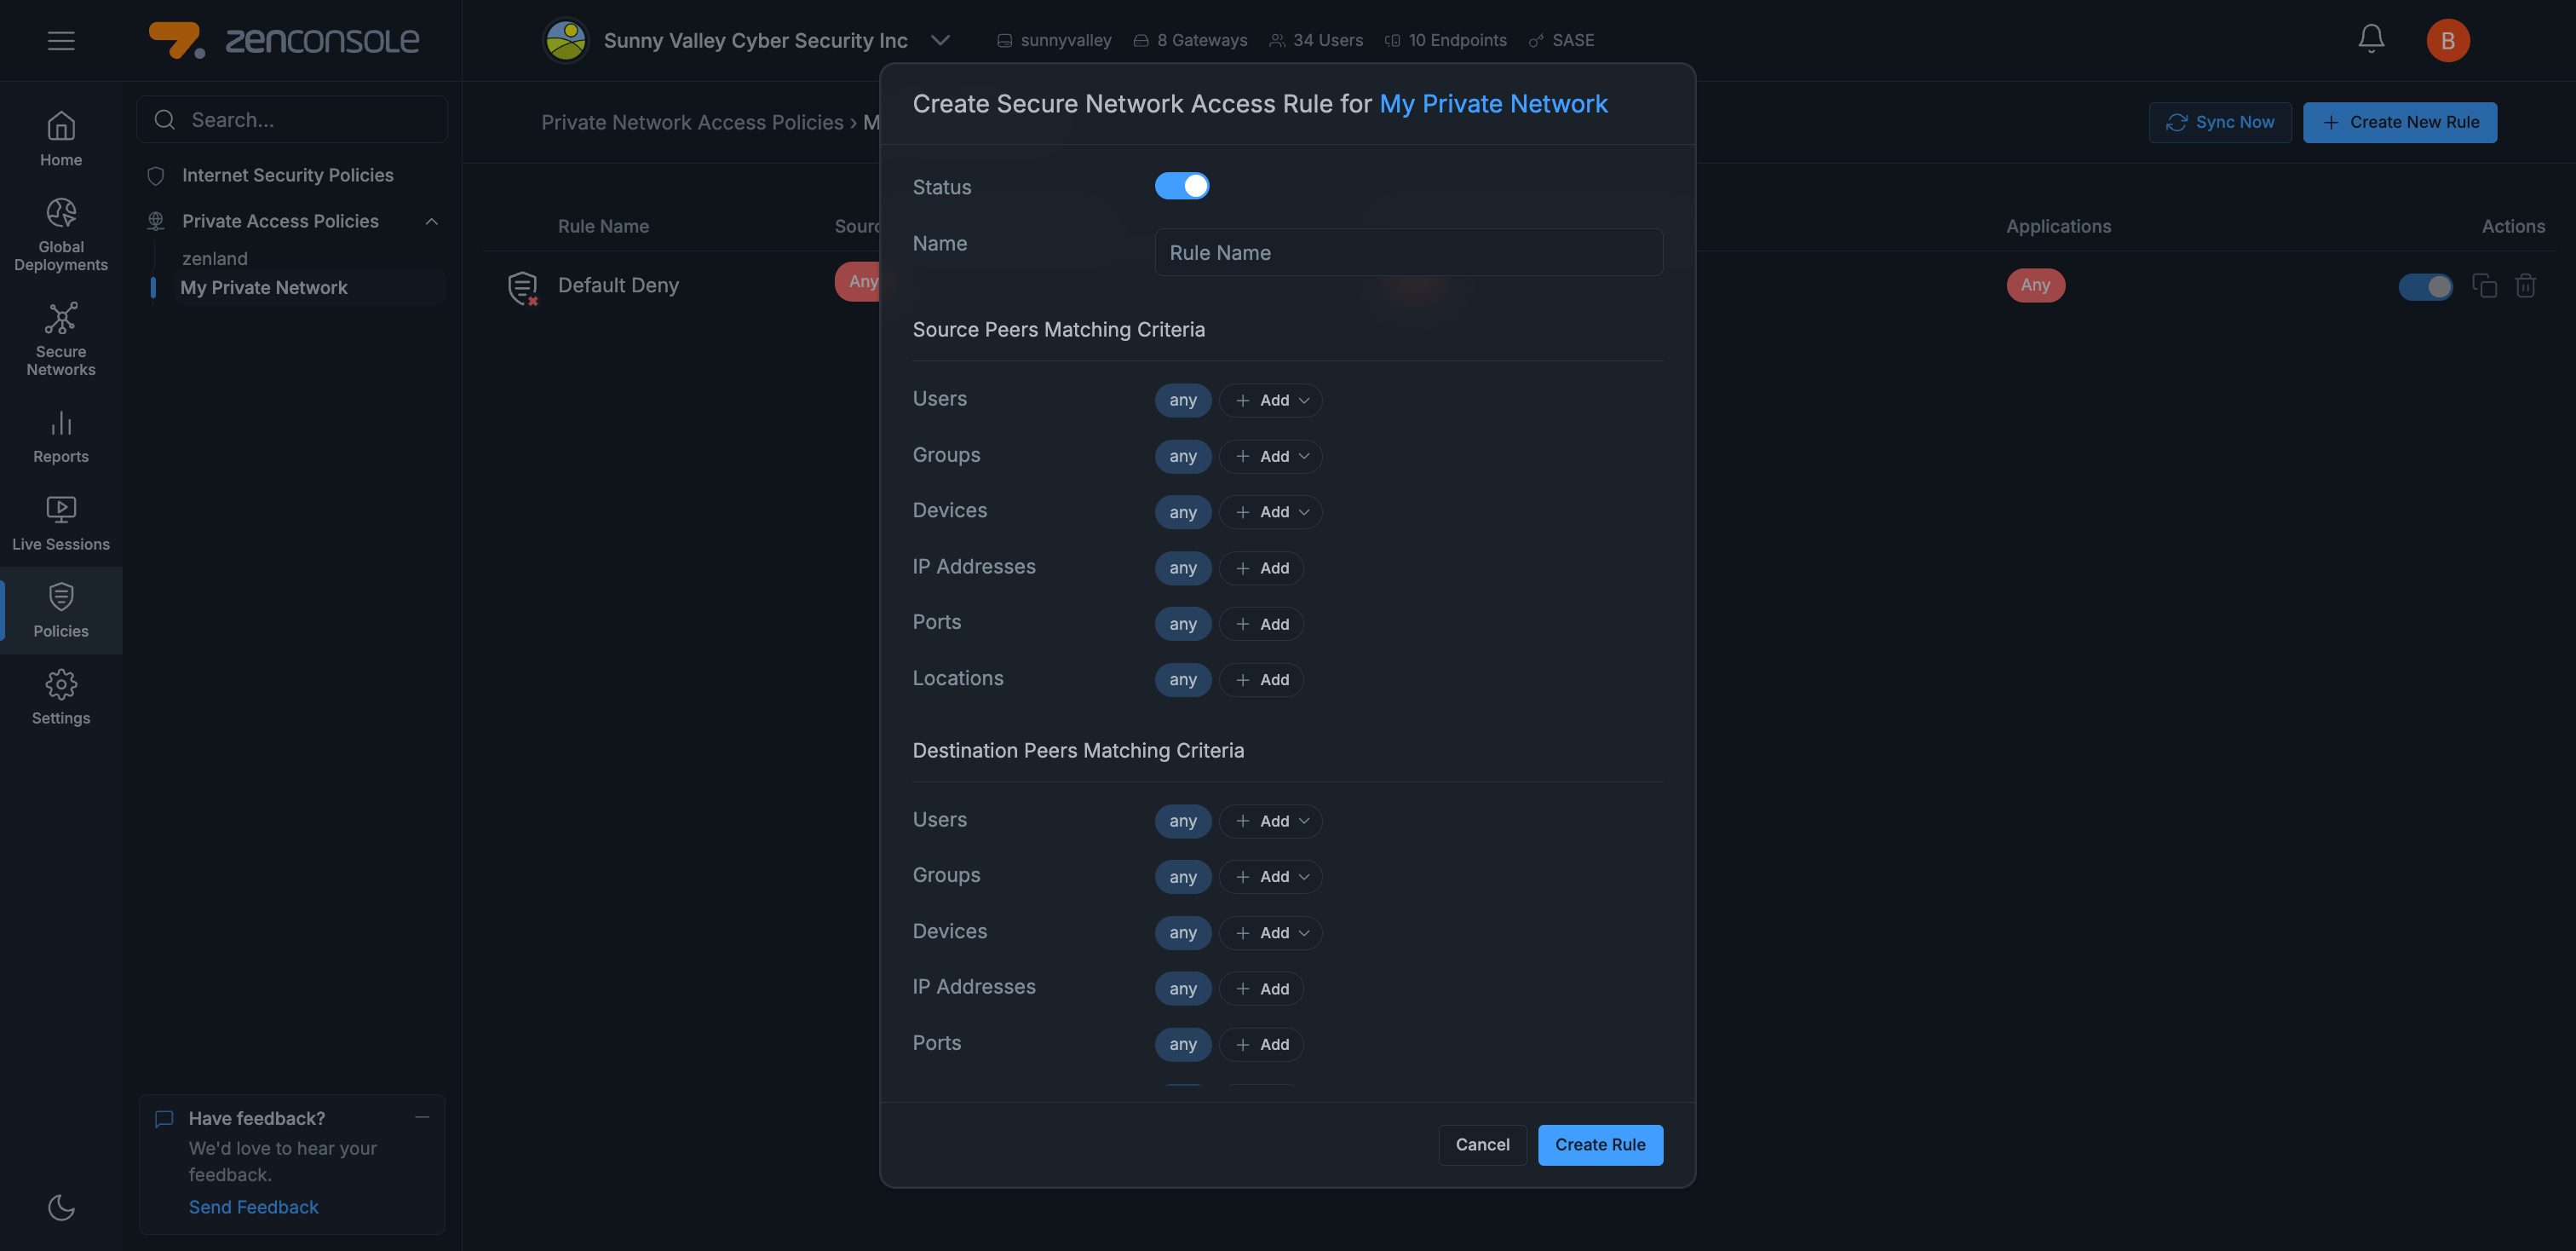
Figure 3. Creating Secure Network Access Rule
-
Click Create Rule. The new rule is automatically added to the rule list for the selected Zero-Trust Network.
-
After the rule is created, Zenconsole displays a Configuration Updated notification in the lower-right corner. Click Sync Now in the notification to apply the rule immediately.
If you do not click Sync Now, the changes will still be applied automatically during the next scheduled synchronization interval. However, clicking the Sync Now button, either from the notification or from the Sync Now button located next to the Create New Rule button at the top of the page, immediately applies the new rule across all instances without waiting.
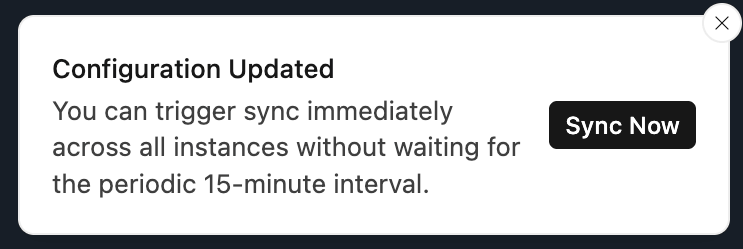
Figure 4. Configutation Updated - Sync Now
Please note that all of the criteria for the zero-trust network access rules are matched with the AND logical operator. In order for a flow to match your configured policy, all of these criteria need to match the flow information.
Defining Source Peers Matching Criteria
Source peer matching criteria determine where a connection matching the Zero-Trust Network Access rule can originate.
By default, each source peer criterion in a newly created rule is set to any. Therefore, the rule does not restrict the source by user, group, peer, IP address, port, or location unless you configure one or more of these criteria.
You can restrict the source of a connection using the following criteria:
-
Users: Select one or more users in your organization from the searchable Users drop-down list.
-
Groups: Select one or more groups in your organization from the searchable Groups drop-down list.
-
Peers: Select one or more endpoint or gateway peers participating in the Zero-Trust Network from the searchable Peers drop-down list.
-
IP Addresses: Click Add next to IP Addresses to define one or more source IP addresses.
-
Ports: Click Add next to Ports to define a source port or port range.
-
Locations: Click Add next to Locations to define a geographical source location. This will display a dialog box. You may set the location by selecting a country from the drop-down menu and optionally typing a City name.

Figure 5. Source Peers Matching Criteria
Defining Destination Peers Matching Criteria
Destination peer matching criteria determine which destinations a Zero-Trust Network Access rule applies to.
By default, all destination peer criteria in a newly created rule are set to any. This means that the rule does not restrict the destination by user, group, peer, IP address, port, or location unless you configure specific criteria.
You can restrict the destination using the following criteria:
-
Users: Click Add next to Users, and then select one or more users in your organization.
-
Groups: Click Add next to Groups, and then select one or more groups in your organization.
-
Peers: Click Add next to Peers, and then select one or more endpoint or gateway peers participating in the Zero-Trust Network.
-
IP Addresses: Click Add next to IP Addresses to specify one or more destination IP addresses.
-
Ports: Click Add next to Ports to specify a destination port or port range.
-
Locations: Click Add next to Locations to specify a geographical destination. This will display a dialog box. You may set the location by selecting a country from the drop-down menu and optionally typing a City name.

Figure 6. Destination Peers Matching Criteria
Criteria that remain set to Any do not restrict destination matching. If you configure multiple criterion types, the destination must satisfy all configured criteria for the rule to match.
Defining Transport Protocol
By default, the Protocol criterion of a newly created Zero-Trust Network Access rule is set to any. Therefore, the rule applies regardless of whether the connection uses TCP or UDP.
If you want to restrict the rule to a specific protocol, you can define it manually. To specify a protocol, click the + Add drop-down list next to the Protocol field.
You can choose one or both of the available options:
-
TCP
-
UDP

Figure 7. Selecting Transport Protocol
Defining Allowed Applications
By default, the Applications criterion of a newly created Zero-Trust Network Access rule is set to Any. This means that the rule allows access to any application that satisfies the other configured criteria.
You can specify allowed applications individually by clicking on the + Add drop-down list next to the Applications option. You may add as many applications as you need.

Figure 8. Specifying Allowed Applications
The available applications that you can select are as follows.
- AFP
- CassandraDB
- CIFS
- DNS over HTTPS
- DNS over TLS
- Domain Name Resolution
- Elastic Search
- Email Access via IMAP
- Email Access via POP3
- FTP over TLS/SSL
- FTP-DATA
- Kerberos
- LDAP
- LDAPS
- LLMNR
- MDNS
- Microsoft-DS SMB
- MongoDB
- MS RDP
- MS SQL Connection
- MySQL
- MySQL Connection
- NETBIOS Datagram Service
- NETBIOS Name Service
- NETBIOS Session Service
- Oracle
- Oracle DB
- PostgreSQL
- Radius
- RealVNC
- Redis DB
- Secure Email Access via IMAP
- Secure Email Access via POP3
- Secure Email Transport
- Secure Shell
- Secure Web Browsing
- SIP Telephony
- SMTP Email Relay Services
- SMTP Submission Port
- SNMP
- SNMP Trap
- Syslog
- Telnet
- Telnet over TLS/SSL
- TFTP
- Web Browsing
Defining Device Posture Checks
Device posture checks allow a Zero-Trust Network Access rule to evaluate the security state of a device before permitting access.
By default, Internet Security Policy Assignments is set to Any, and no CrowdStrike ZTA Score requirement is applied. Therefore, device posture does not restrict rule matching unless you configure one or more posture criteria.
If needed, you can refine posture conditions using the available options in this section:
-
Internet Security Policy Assignments: Click + Add to select one or more specific Internet Security Policies. After selection, each policy appears as a tag, and the rule applies only to devices assigned to those policies.
-
CrowdStrike ZTA Score: By default, the value is set to any, meaning no ZTA-based restriction is applied. Click Set to define a minimum ZTA score threshold. Only devices with scores meeting this requirement will be allowed to match the rule. See CrowdStrike ZTA Integration for detailed configuration steps.
To learn more about the Device Posture Checks, we recommend reviewing the detailed explanation of Device Posture Checks.
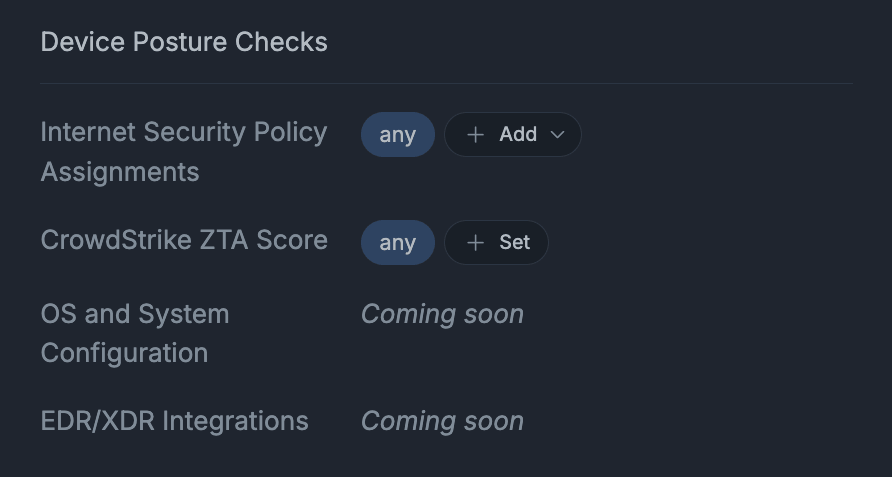
Figure 9. Device Posture Checks Panel
Other posture check types, such as OS and System Configuration and EDR/XDR Integrations, are shown as Coming Soon and will become available in future updates.
Defining Time Schedule
By default, the Always active option is enabled for a newly created Zero-Trust Network Access rule. Consequently, the rule can match connections at any time, provided that all other configured criteria are satisfied.
To restrict access rules for a specific time, you may define a time schedule by following the next steps.
-
Scroll to the Time Schedule section in the rule configuration panel.
-
Disable Always active.
-
Enable the toggle next to each day on which the rule should be active.
-
Specify the Start time and End time for each enabled day.
-
Repeat these steps for any additional days that require a schedule.

Figure 10. Specifying Time Schedule of Zero-Trust Network Access Rule
The schedule determines when the rule is eligible to match a connection. Outside the configured time periods, the rule does not apply, and Zenconsole evaluates the connection against the remaining enabled rules. If no rule matches, the predefined Default Deny rule blocks the connection.
Viewing Rule List & Status of the Rules
All Zero-Trust Network Access rules configured for the selected Zero-Trust Network are displayed in the Zero-Trust Network Access Policies workspace.

Figure 11. Policies List View
Viewing Rule Status
 If the rule is enabled, a solid green circle is displayed in the bottom right corner of the policy's icon to the left of the rule name.
 If it is not enabled, you will see a solid white circle instead of green.
Enabling/Disabling a Rule
You can easily change the status of the Rule to Enabled or Disabled by clicking on the Status toggle button on the Rule Configuration page or by clicking on the toggle button next to the rule name on Rule list view.

Figure 12. Enabling/Disabling Rule
Editing a Rule
You may edit a custom Zero-Trust Network Access rule by simply clicking on the name of the rule in the policy list view. You may follow the steps described in Creating a Zero-Trust Network Access Rule section above.

Figure 13. Editing a Zero-Trust Network Access Rule*
Cloning a Rule
Zenconsole allows you to clone a custom rule within the same Zero-Trust Network. Cloning creates a new rule with the same configuration as the original rule. To make a copy of a rule you may follow these steps.
-
Click on the clone icon
 next to the rule name that you wish to copy. This will open a dialog box for renaming the clone of the rule.
Figure 14. Cloning Zero-Trust Network Access Rule
-
Enter a descriptive name for the new rule.
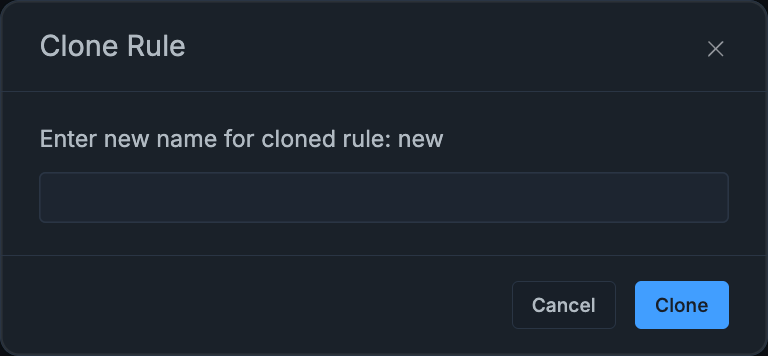
Figure 15. Clone Rule Pop-up
-
Click the Clone button. This automatically create a cloned rule in disabled state. You will see the clone of the rule at the bottom of the rule list.
-
Click Sync Now button at the top right of the page to activate the access rule in the selected Zero-Trust Network. This will display a dialog box for confirmation.
Deleting a Rule
You can permanently delete a custom Zero-Trust Network Access rule that is no longer required.
To delete a rule, you may follow the next steps below:
-
Click on the trash icon
 in the Actions column next to the rule name that you want to remove. This will open a dialog box for confirming the deletion of the rule.
Figure 16. Deleting Zero-Trust Network Access Rule
-
Click the Delete button. The rule will be removed from the zero-trust network.
-
After deleting the rule, Zenconsole will display a Configuration Updated notification in the bottom-right corner. Click the Sync Now button in this notification to apply the rule immediately.
If you do not click Sync Now, the changes will still be applied automatically during the next scheduled synchronization interval. However, clicking the Sync Now button, either from the notification or from the Sync Now button located next to the Create New Rule button at the top of the page, immediately applies the new rule across all instances without waiting.
Ordering Rules
The order of Zero-Trust Network Access rules determines how Zenconsole evaluates connection requests.The rule at the top of the list is examined and implemented first if a match is found. The default rule is the rule that is implemented if none of the other policies match. The settings of the default rule cannot be modified or removed. It cannot be raised or lowered.
A Zero-Trust Network Access rule may be easily reordered by dragging and dropping it inside the rule list.

Figure 17. Reordering Zero-Trust Network Access Rule