Blacklist and Whitelist Exclusions
Zenconsole (Centralized Cloud Management Portal) allows you to define Exclusions for your Zenarmor policies easily.
What is an Exclusion?
The Zenarmor Exclusions list consists of entries that you may use to allow or restrict connections destined to specified host(s), IP address(es), and domain(s).
You can define an exclusion as Whitelist or Blacklist.
Whitelist is an allowed destinations list and your users that match the policy can reach the destinations placed in this list without any restrictions.
Blacklist is the blocked destinations list that can never be accessed by your users that match the policy.
Exclusions take precedence over all your Security/App/Web rules.
Why do you need an Exclusion?
You can employ exclusions to fine-tune Zenarmor's detecting behavior. By defining exclusions you can not only reduce false positives but also meet exceptional business requirements.
How to define an Exclusion?
You can exclude an IPv4/IPv6 address, domain, or hostname from scanning threats. These exclusions will apply to all devices in your network that match the related policy.
To manage your exclusions in a policy you may access Exclusions page by following next steps:
-
Select the policy name in the
Policieslist view of a node. -
Navigate to the
Exclusionstab.
Add an Exclusion
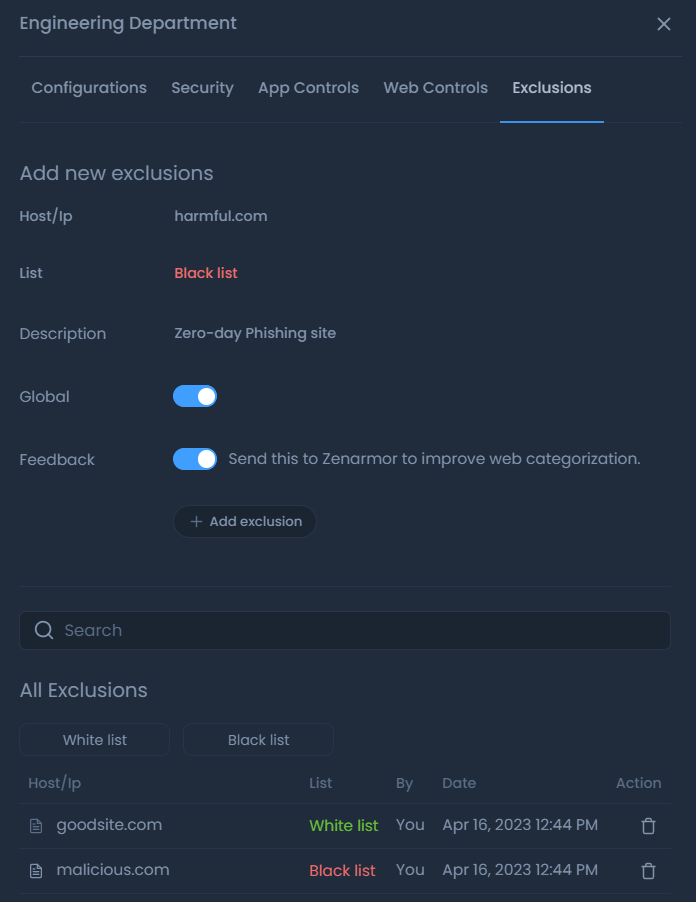
To add an exclusion, you may follow next steps:
-
Enter an IP address, hostname, or domain.
tipYou can enter hostnames, domains, and IP addresses. Domains match all subdomains if they are under the same application category with root domain. Beware that if the application category of a subdomain is different from the base/root domain category you must explicitly add them to the exclusions list. CIDR notation is acceptable for IP addresses. For example:
host.sub.domain.com,domain.com,172.16.1.1,10.10.0.0/16. -
Select the
typeof Exclusion,whitelistorblacklist. By default, it iswhitelist. -
You may fill in the Description field optionally.
-
You may enable the
Globaloption if you want to define the exclusion to be applied for all policies on the node. -
You may disable
Feedbackoption. Feedback option is used for sharing your exclusion definition with Zenarmor team. It is very useful for maintaining the accuracy of the Zenarmor cloud threat intelligence database and resolving false-positive issues on web categorization. -
Click on the
+Add exclusionbutton
Figure 1. Managing Exclusions

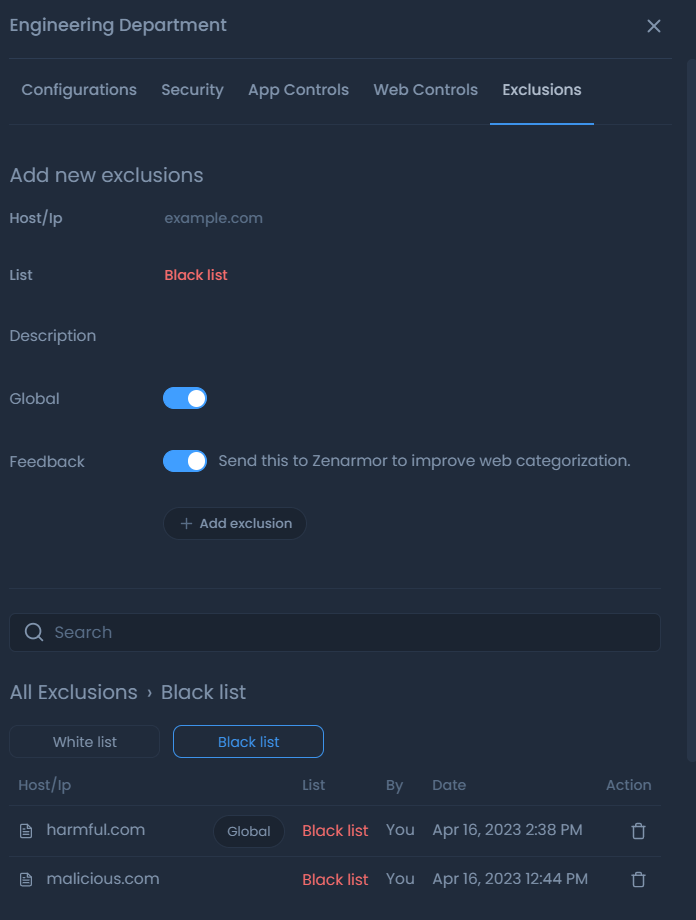
Figure 2. Exclusion - Black List
Search Exclusion
You can filter your blacklist/whitelist entries by using search criteria. When you start to type the IP/hostname it will filter out the results instantly.
Figure 3. Exclusion - Search
View Exclusions
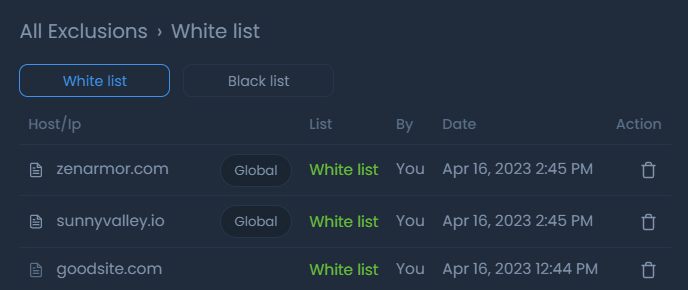
You can view your exclusions on the All Exclusion pane. By default both your Whitelist and Blacklistare displayed in this pane. The following information is provided in the Exclusions list view:
-
Description
-
Hostname/Domain/IP address
-
Tag (if
Globaloption is enabledGlobaltag displayed ) -
Exclusion Type (Whitelist/Blacklist)
-
Admin name(Who defines the exclusion)
-
Date (Exclusion creation date)
-
Action button (Remove)

Figure 4. Exclusion - White List
You can view your Whitelist exclusions under the White list tab or view your Blacklist exclusions under the Black list tab in the All Exclusions pane.
To view the description of an exclusion, hover your mouse on the paper icon at the beginning of the exclusion line. This will display the Description you entered when creating the exclusion.
Figure 5. Exclusion - Viewing Description
Delete an Exclusion
To delete an exclusion in a policy, you may follow the next steps.
-
Search the domain/hostname/IP of the exclusion that you want to delete.
-
Click the trash icon in the search result. You will be prompted to as Figure 5.
-
Click
Removeif you want to delete the exclusion.
Figure 6. Exclusion Delete Warning