Configuring a Policy
Zenarmor comes pre-installed with a Default policy for the Free and Premium Editions. Default policy configuration is managed by the Zenarmor engine. A Premium subscription includes the following features not available in the Free Edition:
-
Create new policies
-
Enable/disable policies
-
Specify the packet direction for protection
-
Include/exclude VLANs, IP/Network addresses, users, groups to be protected
-
Time schedule for each policy
-
Advanced Securityfunctionality -
Custom Web Controlprofiles -
Create Cloud Centralized policies
For more information on the features available for each type of subscription, please refer to plans & pricing.
Although you cannot change the Default policy, you can still change the Security rules, Application Control rules, Web Control rules, and Exclusions on the default policy to suit your needs.
Create New Policy
When you have the Premium Edition, you can create additional policies to defend your network infrastructure in a more customizable manner. After creating a new policy, the configuration and identification of the policy rules must be completed by editing the policy.
To add a new policy, you may follow the next steps:
-
Select the firewall that you want to add a policy on your Zenconsole UI
-
Navigate to Policies page via the left-hand sidebar.
-
Click on the Create New Policy button at the top right corner of the Policies page. A dialog box will open to rename the new policy.
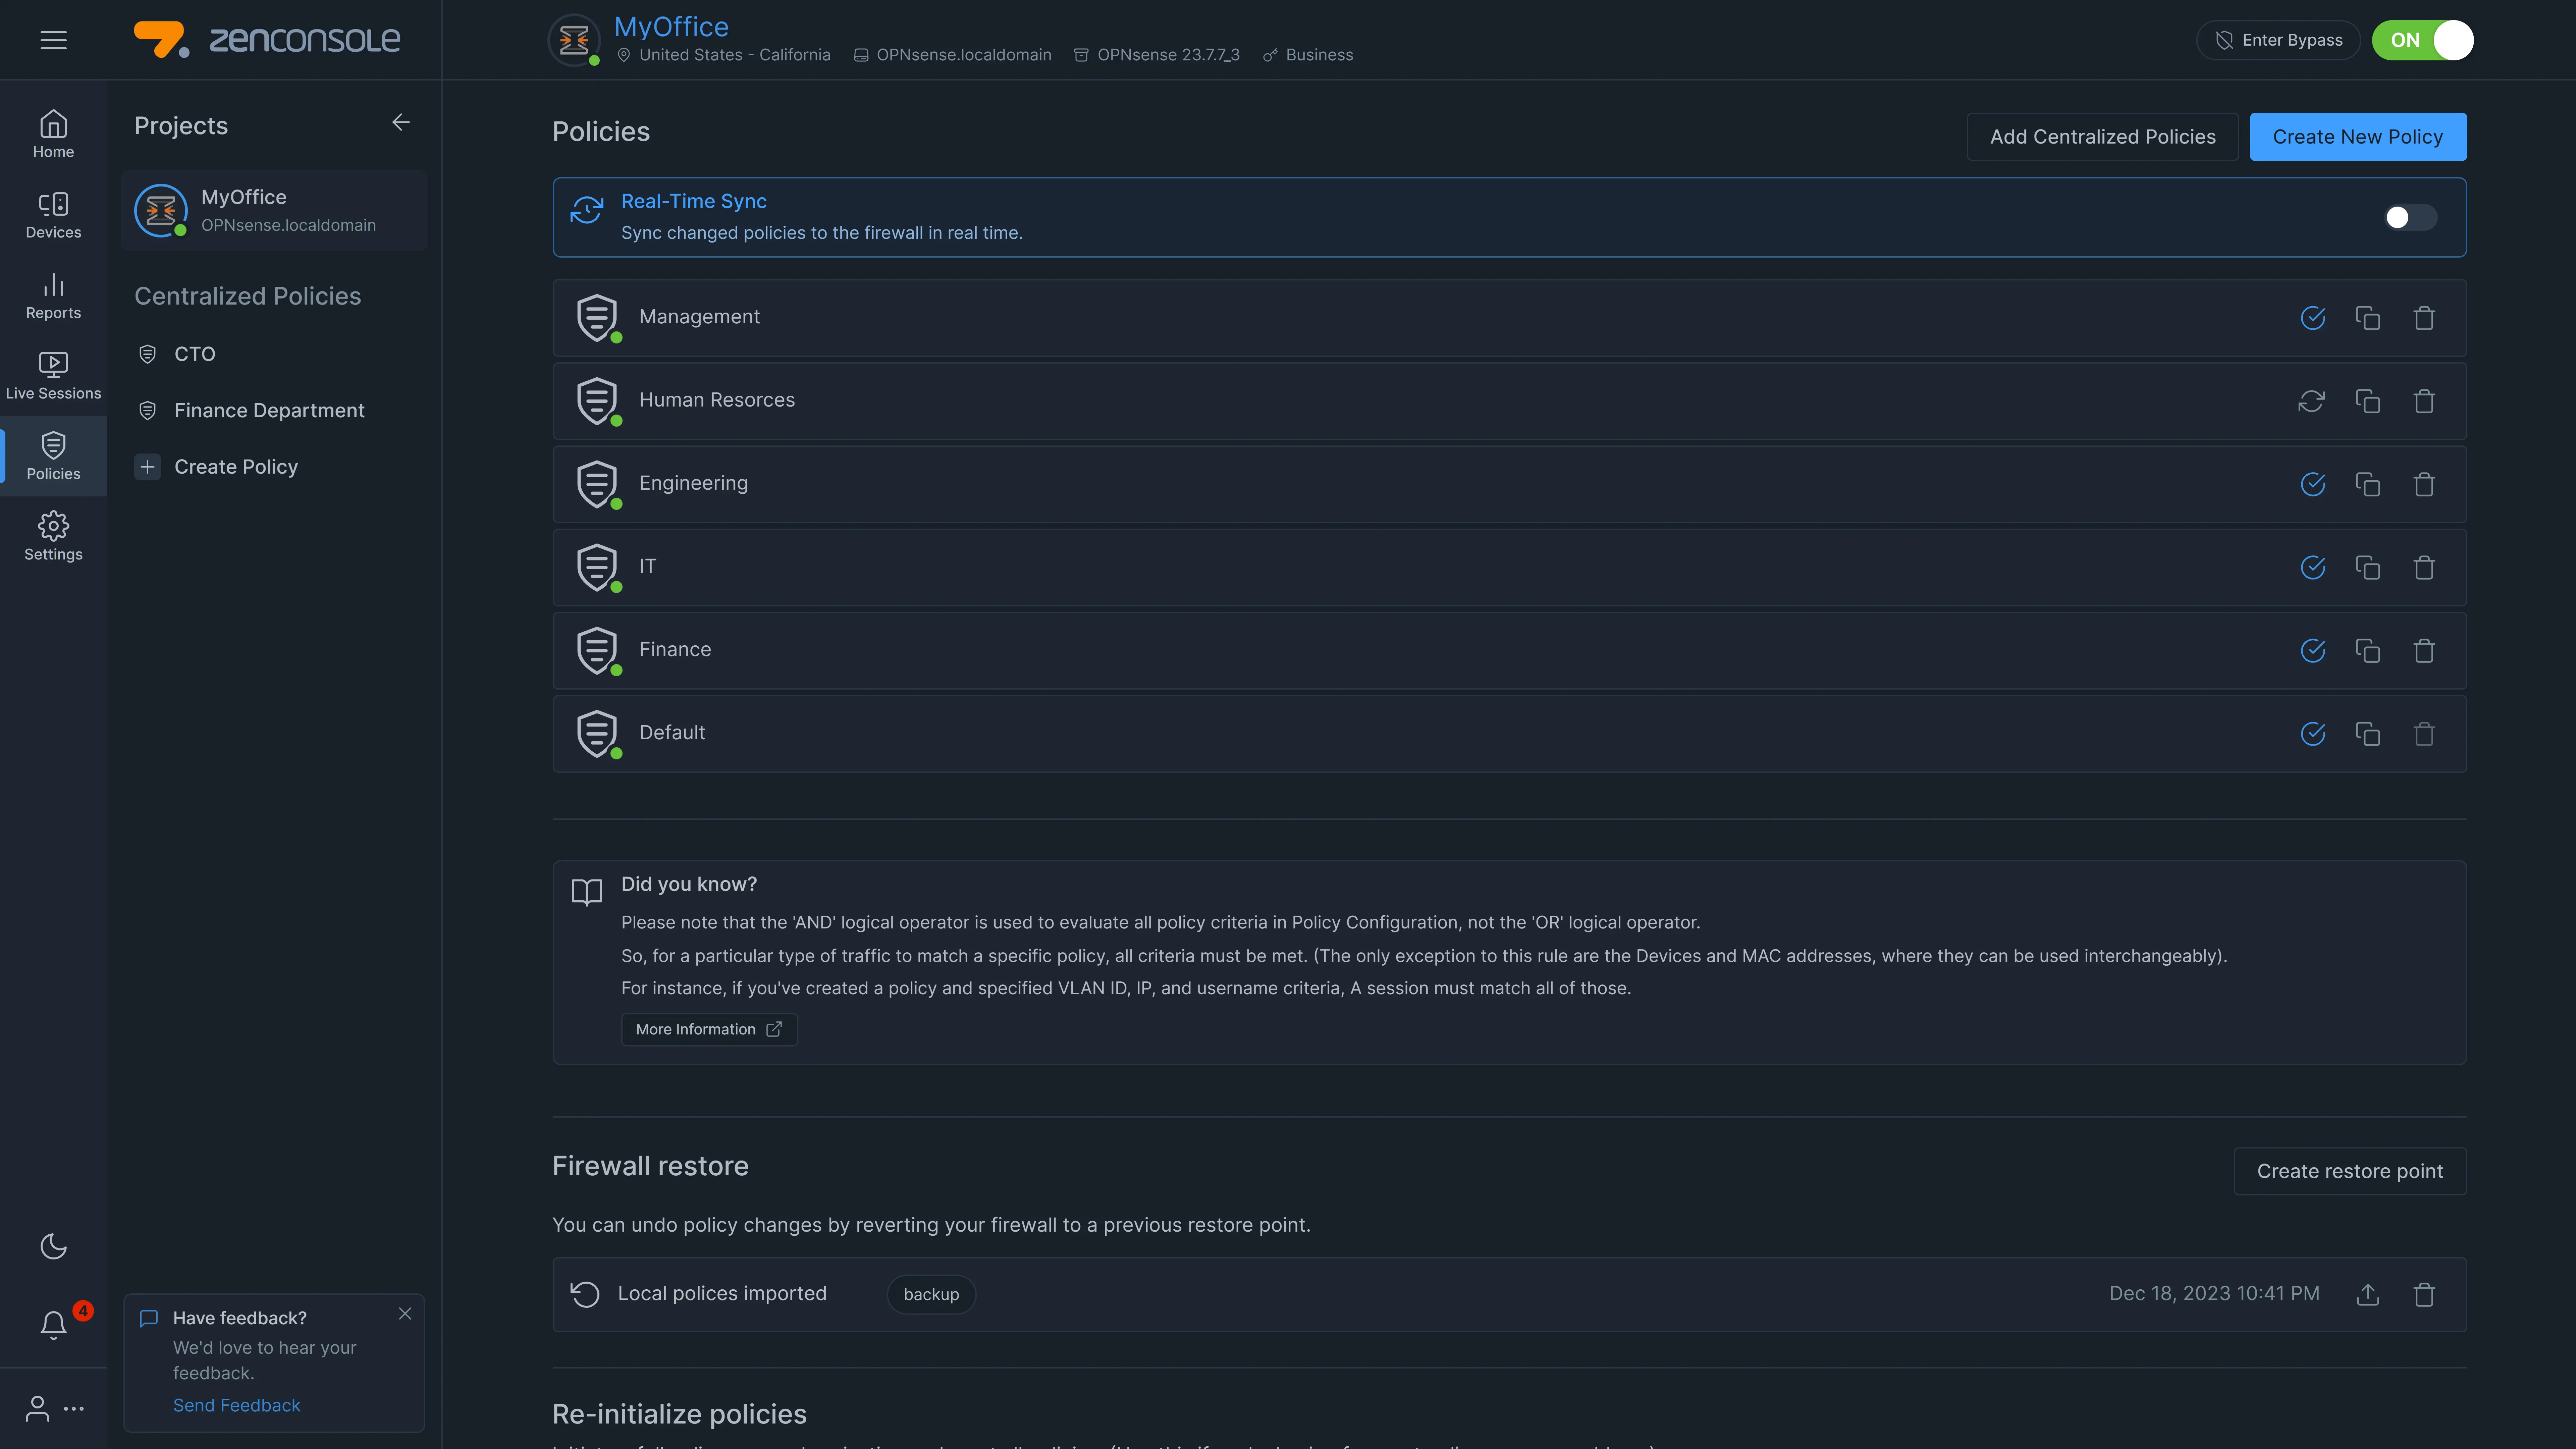
Figure 1. Policy List View
-
Enter a name and click the Create button. The new policy will be created automatically. You will see the new policy in the policy list view. It will be disabled by default. You need to configure it in order to enable it.

Figure 2. Creating a new policy
Policy Configuration
After the creation of a new policy, you must complete the configuration of the policy rules. You can edit the configuration of a policy by clicking on the name of the policy in the policy list view. This will display the policy configuration view as shown in figure 1.

Figure 3. Editing a policy
Once the policy configuration has been completed, you will be able to apply the policy to your firewall.
Please note that all of the criteria listed below are matched with the AND logical operator. In order for a flow to match your configured policy, all of these criteria need to match the flow information. The only exception to this rule are the Devices and MAC addresses, if they are used together they can be used interchangeably. For instance, if you have a policy configuration specifying the 10.0.0.0/24 network, the em0 interface, and the 'Admins' group, all of these conditions should be met for a policy to be applied. If a packet is identified as belonging to the 'Admins' group but is on the ixl0 interface, the packet will not match this particular policy.
You may configure the following options for a policy:
- Status
- Name
- Time Schedules
You may apply Zenarmor Security, Web and Application control rules on a policy according to the folowing criteria:
- No Internet
- Interfaces
- Packet Direction
- VLAN IDs
- Devices
- IP / Networks
- MAC Addresses
- Users
- Groups
Enable/Disable Policy
By default, a newly created policy is set to disabled, and none of the interfaces is selected for protection. You should complete policy configuration and set policy rules depending on your needs.
You can enable/disable a policy depending on your needs by clicking on the Status toggle bar on the policy configuration page.
Change Policy Name
You can easily change the name of a policy, except Default policy, via Name field on the policy configuration page.
Restrict Internet Access
Zenarmor enables the complete restriction of Internet access for Untrusted devices concealed behind protected interfaces or for all endpoints specified in a policy.
You can accomplish this restriction via No Internet setting on the policy configuration page. There are two options under this setting. By default, these options are disabled.
- Block all internet access: If you wish to restrict all Internet access at specific time intervals, you can enable this option. When it is enabled, it overrides all rules and blocks all connections. In other words, this option blocks all connections in your network regardless of the policy's app/web/security rules.
- Block Untrusted Devices: You can enable this option to activate the Device Access Control feature on your network. It prevents unauthorized devices from connecting to the Internet when enabled. Since all newly detected devices are categorized as Untrusted by default, you must acknowledge and mark them as trusted to allow them to reach the Internet if this option is enabled.

Figure 4. Blocking All or Untrusted Devices
Select Interfaces
You may select one of the available interfaces to be protected by Zenarmor. By default, none of the interfaces are selected.
You may easily select interfaces by clicking on the checkbox next to the interface name in Interfaces pane of the policy configuration page. The selected interfaces get filtered when the Policy is enabled.
If yo do not select any of the interfaces, policy will be checked for network packets on all interfaces.
Select Packet Direction
The network packet direction in which to apply the rules may be specified for a policy. Packets may be filtered Inbound, Outbound, or both directions.
By default, packets in both Inbound and Outbound directions are filtered. You can easily change packet direction settings by clicking on the toggle bars next to the Inbound and Outbound options on the Packet Direction pane.
VLAN-Based Filtering
You may apply policies to specific VLANs on your network.
For efficient VLAN-based policy configuration, it is advised to select the physical parent interface of VLAN interfaces to be protected.
After adding VLAN-IDs to your policy configuration, all network packets tagged with these VLAN-IDs will be filtered by Zenarmor.
To define a Vlan-based filtering, you may follow the next steps:
-
Click on the + Add VLAN Id button in the VLAN IDs pane.
-
Type the VLAN ID that you want to filter. (Warning: The VLAN ID must be a number between 1 and 4096.)
-
Click on the Add button.

Figure 5. Adding a VLAN to the policy
All added VLANs are listed on VLAN-IDs pane.

Figure 6. Added VLANs List on policy
To remove a VLAN ID from the policy, you may follow the next steps:
- Click on the Remove with
Xicon next to the VLAN ID that you want to delete. This will pop up a dialog box for VLAN removal confirmation. - Click Remove button to delete the VLAN ID from the policy configuration.
Device-Based Filtering
Zenarmor allows you to define device-based filtering by adding discovered devices or device categories to the policy configuration.

Figure 7. Devices option
To define a device-based filtering by adding a device into the policy configuration, you may follow the next steps:
-
Click on the + Device button in Devices pane. This will pop up a dialog box listing discovered devices on your network

Figure 8. Adding Devices
-
Select all the devices that you want to add by clicking on them. Or you may click on the Add Custom Device button at the top right of the dialog box to add a custom device manually. Type Device ID and Description for the custom device.

Figure 9. Adding Custom Device
-
Click Add button at the bottom of the dialog box.
Device Category-Based Filtering
To add a device category into the policy configuration, you may follow the next steps:
-
Click on the + Device Category button in Devices pane. This will pop up a dialog box listing device categories.

Figure 10. Adding Device Category
-
Select all the device categories that you want to add by clicking on them.

Figure 11. Selecting Device Categories to Add
-
Click Add button at the bottom of the dialog box.
Update Device-Based Filtering
All added devices in a Device-Based policy are listed in the Devices pane.

Figure 10. Added Devices List on policy
You can perform the following tasks on the added devices by clicking on the Actions column on the Devices pane:
- Edit: You may change the Description field of a device.
- Disable/Enable: You may temporarily remove a device from the policy by disabling it. After disabling a device, you may add it to the policy by clicking on the Enable action button on the device list.
- Remove: To permanently remove a device from the policy, you may click on the Remove action button on the device list.
- View Device Details: You may view device details by clicking on the Device Details action button on the device list.
Update Device Description in a Policy
To change the description of a device on the policy, you may follow the next steps:
-
Click on the
...- 3-dot menu icon next to the device that you want to edit under the Actions column. This will pop up a drop-down menu.
Figure 11. Editing Device
-
Click on the Edit menu item.
-
Change the description of the device.
-
Click Save.
Remove Devices from a Policy
To remove an Device from the policy, you may follow the next steps:
- Click on the
...- 3-dot menu icon next to the device that you want to remove under the Actions column. This will pop up a drop-down menu. - Click on the Remove menu item. This will automatically remove the Device from the policy configuration.
Enable/Disable Devices in a Policy
To enable/disable a Device, you may follow the next steps:
- Click on the
...- 3-dot menu icon next to the device that you want to enable/disable under the Actions column. This will pop up a drop-down menu. - Click on the Enable or Disable menu item. This will automatically change the status of the device on the policy. Disabled device is represented with a solid grey circle icon while a green circle icon is used for enabled device.
Remove Device Categories from a Policy
To remove a device category from the policy, you may click on the Remove with X icon next to the device category that you want to delete.
IP/Network Address-Based Filtering
A policy may be applied to the IPv4/IPv6 addresses that you enter into IP / Networks option. You can enter a single IPv4/IPv6 address or many IP addresses by specifying their subnet masks. CIDR format is also accepted (i.e. 172.10.10.0/24). You can also specify a description for the entries so that you can remember why you’ve added them later on.
To add an IP/Network address, you may follow the next steps:
-
Click on the + Add IP / Network button on the Policy Configuration page.
-
Fill in the IP/Network address and Description fields
-
Click Submit button.

Figure 12. Adding an IP address to the policy
All added IP/Network addresses are listed in IP/Networks pane.

Figure 13. Added IP/Network Address List on Policy
Update IP/Network Address Description in a Policy
To change the description of the IP/Network address field on the policy, you may follow the next steps:
-
Click on the
...- 3-dot menu icon next to the IP/Network address that you want to edit under the Actions column. This will pop up a drop-down menu.
Figure 14. Actions menu for IP/Network Address List on Policy
-
Click on the Edit menu item.
-
Change the description of the IP/Network address field.
-
Click Save.
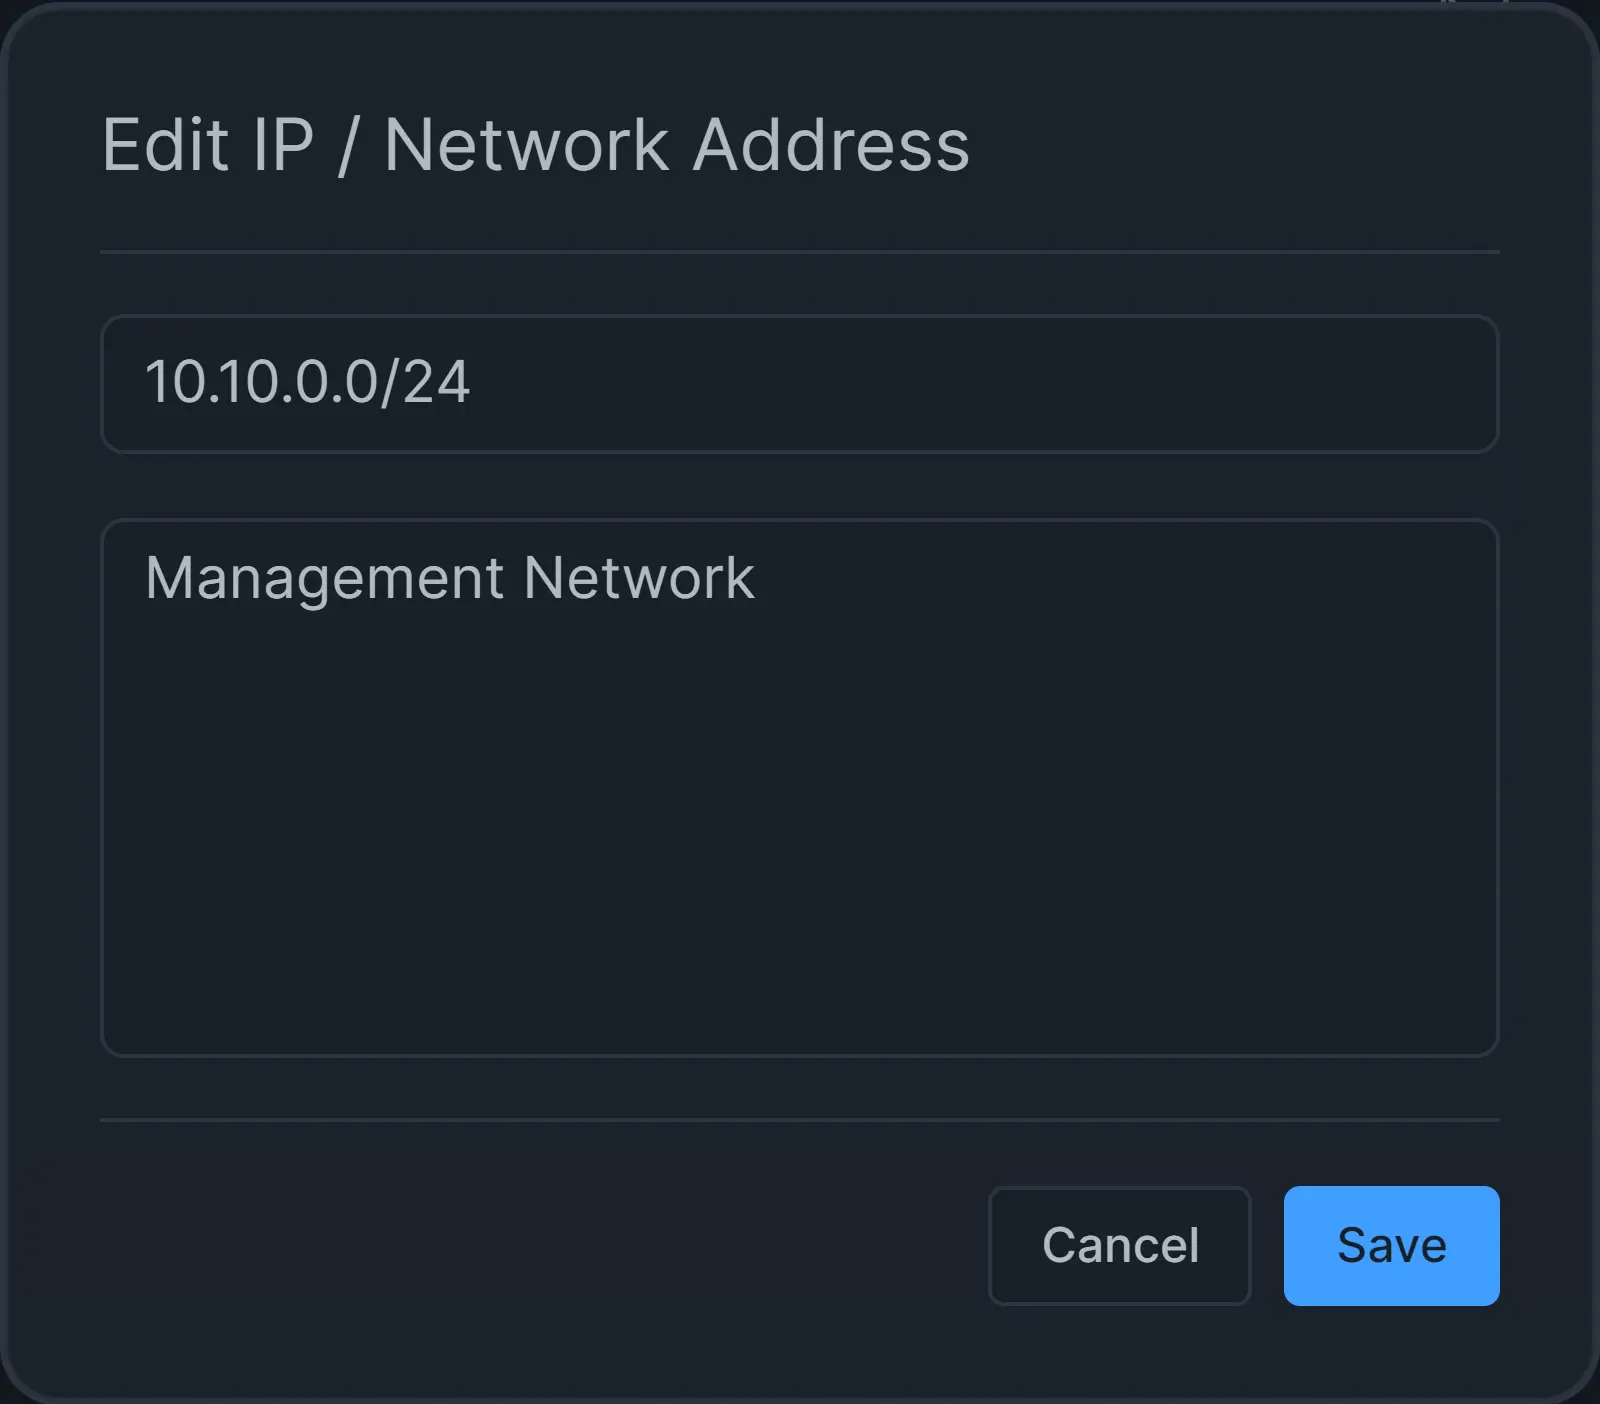
Figure 15. Editing IP/Network Address on Policy Configuration
Remove IP/Network Address from a Policy
To remove an IP/Network address from the policy, you may follow the next steps:
- Click on the
...- 3-dot menu icon next to the IP/Network address that you want to remove under the Actions column. This will pop up a drop-down menu. - Click on the Remove menu item. This will automatically remove the IP/Network Address from the policy configuration.
Enable/Disable IP/Network Address in a Policy
You may enable and disable the IP/Network address. To enable/disable the IP/Network address, you may follow the next steps:
- Click on the
...- 3-dot menu icon next to the IP/Network address that you want to enable/disable under the Actions column. This will pop up a drop-down menu. - Click on the Enable or Disable menu item. This will automatically change the status of the IP/Network Address on the policy. Disabled IP/Network Address is represented with a solid grey circle icon while a green circle icon is used for enabled IP/Network Address.
MAC Address-Based Filtering
A policy may be applied to the MAC addresses that you enter into MAC Addresses option. You may also give each entry a description so you know what device the MAC address belongs to. All proper MAC address formats are supported, such as:
aa:aa:aa:aa:aa:aaaa-aa-aa-aa-aa-aaaaa.aaa.aaa.aaa
To define a MAC address-based policy by adding a MAC address, you may follow the next steps:
-
Click on the + Add MAC Address button in the MAC Address pane on the policy configuration page.
-
Fill in the MAC address and Description fields.
-
Click Submit button.

Figure 17. Adding a MAC address to the policy
All added MAC addresses are listed in MAC Addresses pane

Figure 18. Added MAC Address List on Policy
To change the description of the MAC address field on the policy, you may follow the next steps:
-
Click on the
...- 3-dot menu icon next to the MAC address that you want to edit under the Actions column. This will pop up a drop-down menu.
Figure 19. Actions menu for MAC Address List on Policy
-
Click on the Edit menu item.
-
Change the description of the MAC address field.
-
Click Save.

Figure 20. Editing MAC Address on Policy Configuration
To remove a MAC address from the policy, you may follow the next steps:
- Click on the
...- 3-dot menu icon next to the MAC address that you want to remove under the Actions column. This will pop up a drop-down menu. - Click on the Remove menu item. This will automatically remove the MAC address from the policy configuration.
You may enable and disable the MAC address. To enable/disable the MAC address, you may follow the next steps:
- Click on the
...- 3-dot menu icon next to the MAC address that you want to enable/disable under the Actions column. This will pop up a drop-down menu. - Click on the Enable or Disable menu item. This will automatically change the status of the MAC Address on the policy. Disabled MAC Address is represented with a solid grey circle icon while a green circle icon is used for enabled MAC Address.
Defining User- or Group-Based Policy
The Zenarmor Active Directory and OPNsense Captive Portal integration features provide user-based policy filtering. Zenarmor can integrate with your Microsoft Active Directory (AD) and/or OPNsense Captive Portal for username/group resolution.
You can define a user/group-based policy by just adding a user or group to the policy on the policy configuration page.
To define a user- or group-based policy, you may follow the next steps:
-
Navigate to the Configuration page of the policy.
-
Click on the + Add User button in Users pane or + Add Group button in Groups pane.

Figure 20. *Adding Users/Groups on Policy Configuration *
-
Enter a username, or groupname. You may add the desired
Active DirectoryorOPNsense Captive Portalusers and groups. -
Click on the Add button.

Figure 21. Adding a User to the policy
After enabling and synchronizing the policy with your firewall, your user/group-based filtering will be activated on your node.
Defining Time Schedule
A time schedule may be added to your policy if you want your policy to be active only certain times of the day or days of the week. You may also update or remove schedules which were previously created on the Policy Configuration page.

Figure 22. Time Schedules on Policy Configuration
To create a new schedule for a policy you may follow the next steps:
-
Click the
Add new schedulebutton. This will open a dialog box for naming the schedule.
Figure 25. Adding a new time schedule for a policy
-
Enter a name and click on the
Addbutton. This will add the new schedule to theTime scheduleslist. -
Select each day you wish to be applied to the schedule. Selected days will be displayed with a solid blue checkmark icon.
-
Specify the starting and stopping hours for which the policy will be effective.

Figure 26. Time schedule configuration for a policy
You can change the existing time schedule by updating the start/stop hours and selecting/deselecting the days any time after you create the initial schedule.
To remove an existing time schedule, click on the Remove button with a trash icon. This will open a dialog box for confirming the removal of the schedule. Clicking on Remove button on the confirmation box will erase the time schedule for the policy.

Figure 27. Removing a time schedule for a policy
After completing Policy Configuration, you can proceed to specify the Security rules of the policy by clicking on the Security tab.
Security Rules
The Security page allows you to select options for blocking potentially dangerous websites and various types of malware activity.
The Free Edition users can only enable the Essential Security options. The Advanced Security options are exclusive to Premium subscriptions.
Zenarmor Premium provides Advanced Threat Protection against the latest viruses, malware, and phishing attacks by preventing users access to websites that are known to host viruses and malware and to launch phishing attacks. With Zenarmor's Advanced Threat Protection capabilities, you are provided with commercial-grade threat protection and tracking in near real-time.

Figure 28. Configuring security rules of a policy
For more information about the Essential Security and Advanced Security options, please refer to Security Rules.
After setting the security options, proceed to the application rules section by clicking on the App Controls tab.
Application Control Rules
Application filtering for your policy may be managed on the App Controls page. You can accomplish the following management tasks:
-
Allow/Block Application Category
-
Allow/Block Application(s)
-
Search an application/category

Figure 29. Configuring Application Control rules of a policy
For more information about application control configuration, please refer to Application Control Rules.
After completing the configuration of the Application Control, proceed to define the Web Control rules by clicking on the Web Controls tab.
Web Control Rules
Web content filtering rules may be defined on the Web Controls page.
You can select one of the predefined Web Profiles or define a custom profile by blocking or allowing the web categories from the list provided.
There are four types of predefined Web Profile:
-
Permissive: This profile has no restrictions for web browsing.
-
Moderate Control: Only harmful/high risk web categories such as Illegal Drugs, Violence, Adult, Pornography and Advertisements are blocked in this profile.
-
High Control: In addition to the categories blocked in the moderate profile, the following categories are blocked in this profile: Forums, Alcohol, Blogs, Gambling, Chats, Dating, Games, Job Search, Online Storage, Social Networks, Software Downloads, Weapons, Military, Swimsuits, Tobacco and Warez Sites.
-
Custom: You may fully customize the web filtering by using this profile and selecting the categories to block.

Figure 30. Configuring Web Control rules of a policy
The Custom Web filtering profile is only available for Premium subscriptions. If you have the Free edition, you cannot fully customized web filtering. You can only choose between the Permissive/Moderate/High predefined profiles.
For more information about the web filtering configuration, please refer to Web Control Rules.
After selecting one of the predefined web profiles or customizing a profile, you can proceed to the Exclusions section to define whitelist and blacklist entries by clicking the Exclusions tab.
Exclusion Rules
Sometimes you may need to define exceptions for your policy rules. Zenarmor allows you to define exclusions that take precedence over all Security, Web, App rules.
For example, let us assume that video streaming is not allowed in your company's network but some of your staff may need to attend an online training program that includes training videos. In such a case, you may allow the staff to access the online training site by adding the domain/IP address to the whitelist temporarily.
You can manage exclusions(whitelist and blacklist) for your policy on the Exclusions page. You can accomplish the following management tasks:
-
Add a domain/hostname/IP address to the whitelist for a node
-
Add a domain/hostname/IP address to the whitelist for all nodes(global)
-
Add a domain/hostname/IP address to the blacklist for a node
-
Add a domain/hostname/IP address to the blacklist for all nodes(global)
-
Search for a domain/hostname/IP address in exclusions
-
View exclusions
-
Remove an exclusion

Figure 31. Configuring exclusion rules of a policy
For more information about managing exclusions, please refer to Blacklists and Whitelists: Exclusions.
Don't forget to synchronize your policy with your firewall after configuring policy rules to activate the updated policy.