Web Control Rules on Zenconsole
Web Controls provide policy-based controls for HTTP and HTTPS traffic. You can use these controls to enforce safer browsing, manage access to website categories, and block specific websites or pages.
The distinction between Application Controls and Web Controls is that Web Controls give more specific and focused policy management for HTTP and HTTPS (Web) connections.
Application Controls, on the other hand, are a more generalized control mechanism that works for all protocols and connection types.
For example, if you want to block a specific website or category that you know uses the HTTP protocol, you should use Web Controls to do so.
If you want to create an access policy for Tor Browser that can run on any TCP port, you should use Application Controls.
The Zenarmor® processes the request, performs real-time queries to SVN Cloud, and determines whether it should be blocked or allowed. In milliseconds, we check against 300+ million websites in 120+ categories.
HTTPS filtering is based on SNI and FQDN information if TLS Inspection is not enabled. URL and HTTP protocol headers are also examined if TLS Inspection is enabled.
General Web Protection Controls
General Web Protection Controls provide foundational protections for safer and more controlled web usage across your network. You can use these settings to enforce Safe Search and prevent Encrypted Client Hello (ECH) from reducing visibility into HTTPS connections.
Enabling/Disabling Safe Search
Popular search engines like Google, Bing, Duckduckgo, Yandex, and YouTube provide a Safe Search feature optionally for a safer browsing experience. Safe Search removes offensive or inappropriate content from search results. YouTube's Restricted Mode is analogous but only applies to their videos. When Safe Search is enabled, sexually explicit videos and images, as well as results that may link to explicit content, are filtered from Search result pages. Restricted Mode was created to give YouTube users more control over the content they see and the option to choose a purposefully limited YouTube experience.
Typically, Safe Search feature is activated per user or endpoint. Nevertheless, Zenarmor allows you to activate Safe Search enforcement per-policy for all network users. This feature is ideal for school networks where Safe Search is enabled by default for students but not for instructors and other staff. This feature enables IT departments to control Safe Search globally and efficiently across the network.
You may easily enable/disable the Safe Search feature by following these steps:
-
Navigate to the Web Controls tab on the policy configuration page.
-
Switch on/off the Enforce Safe Search option on the General Web Protection Controls pane.
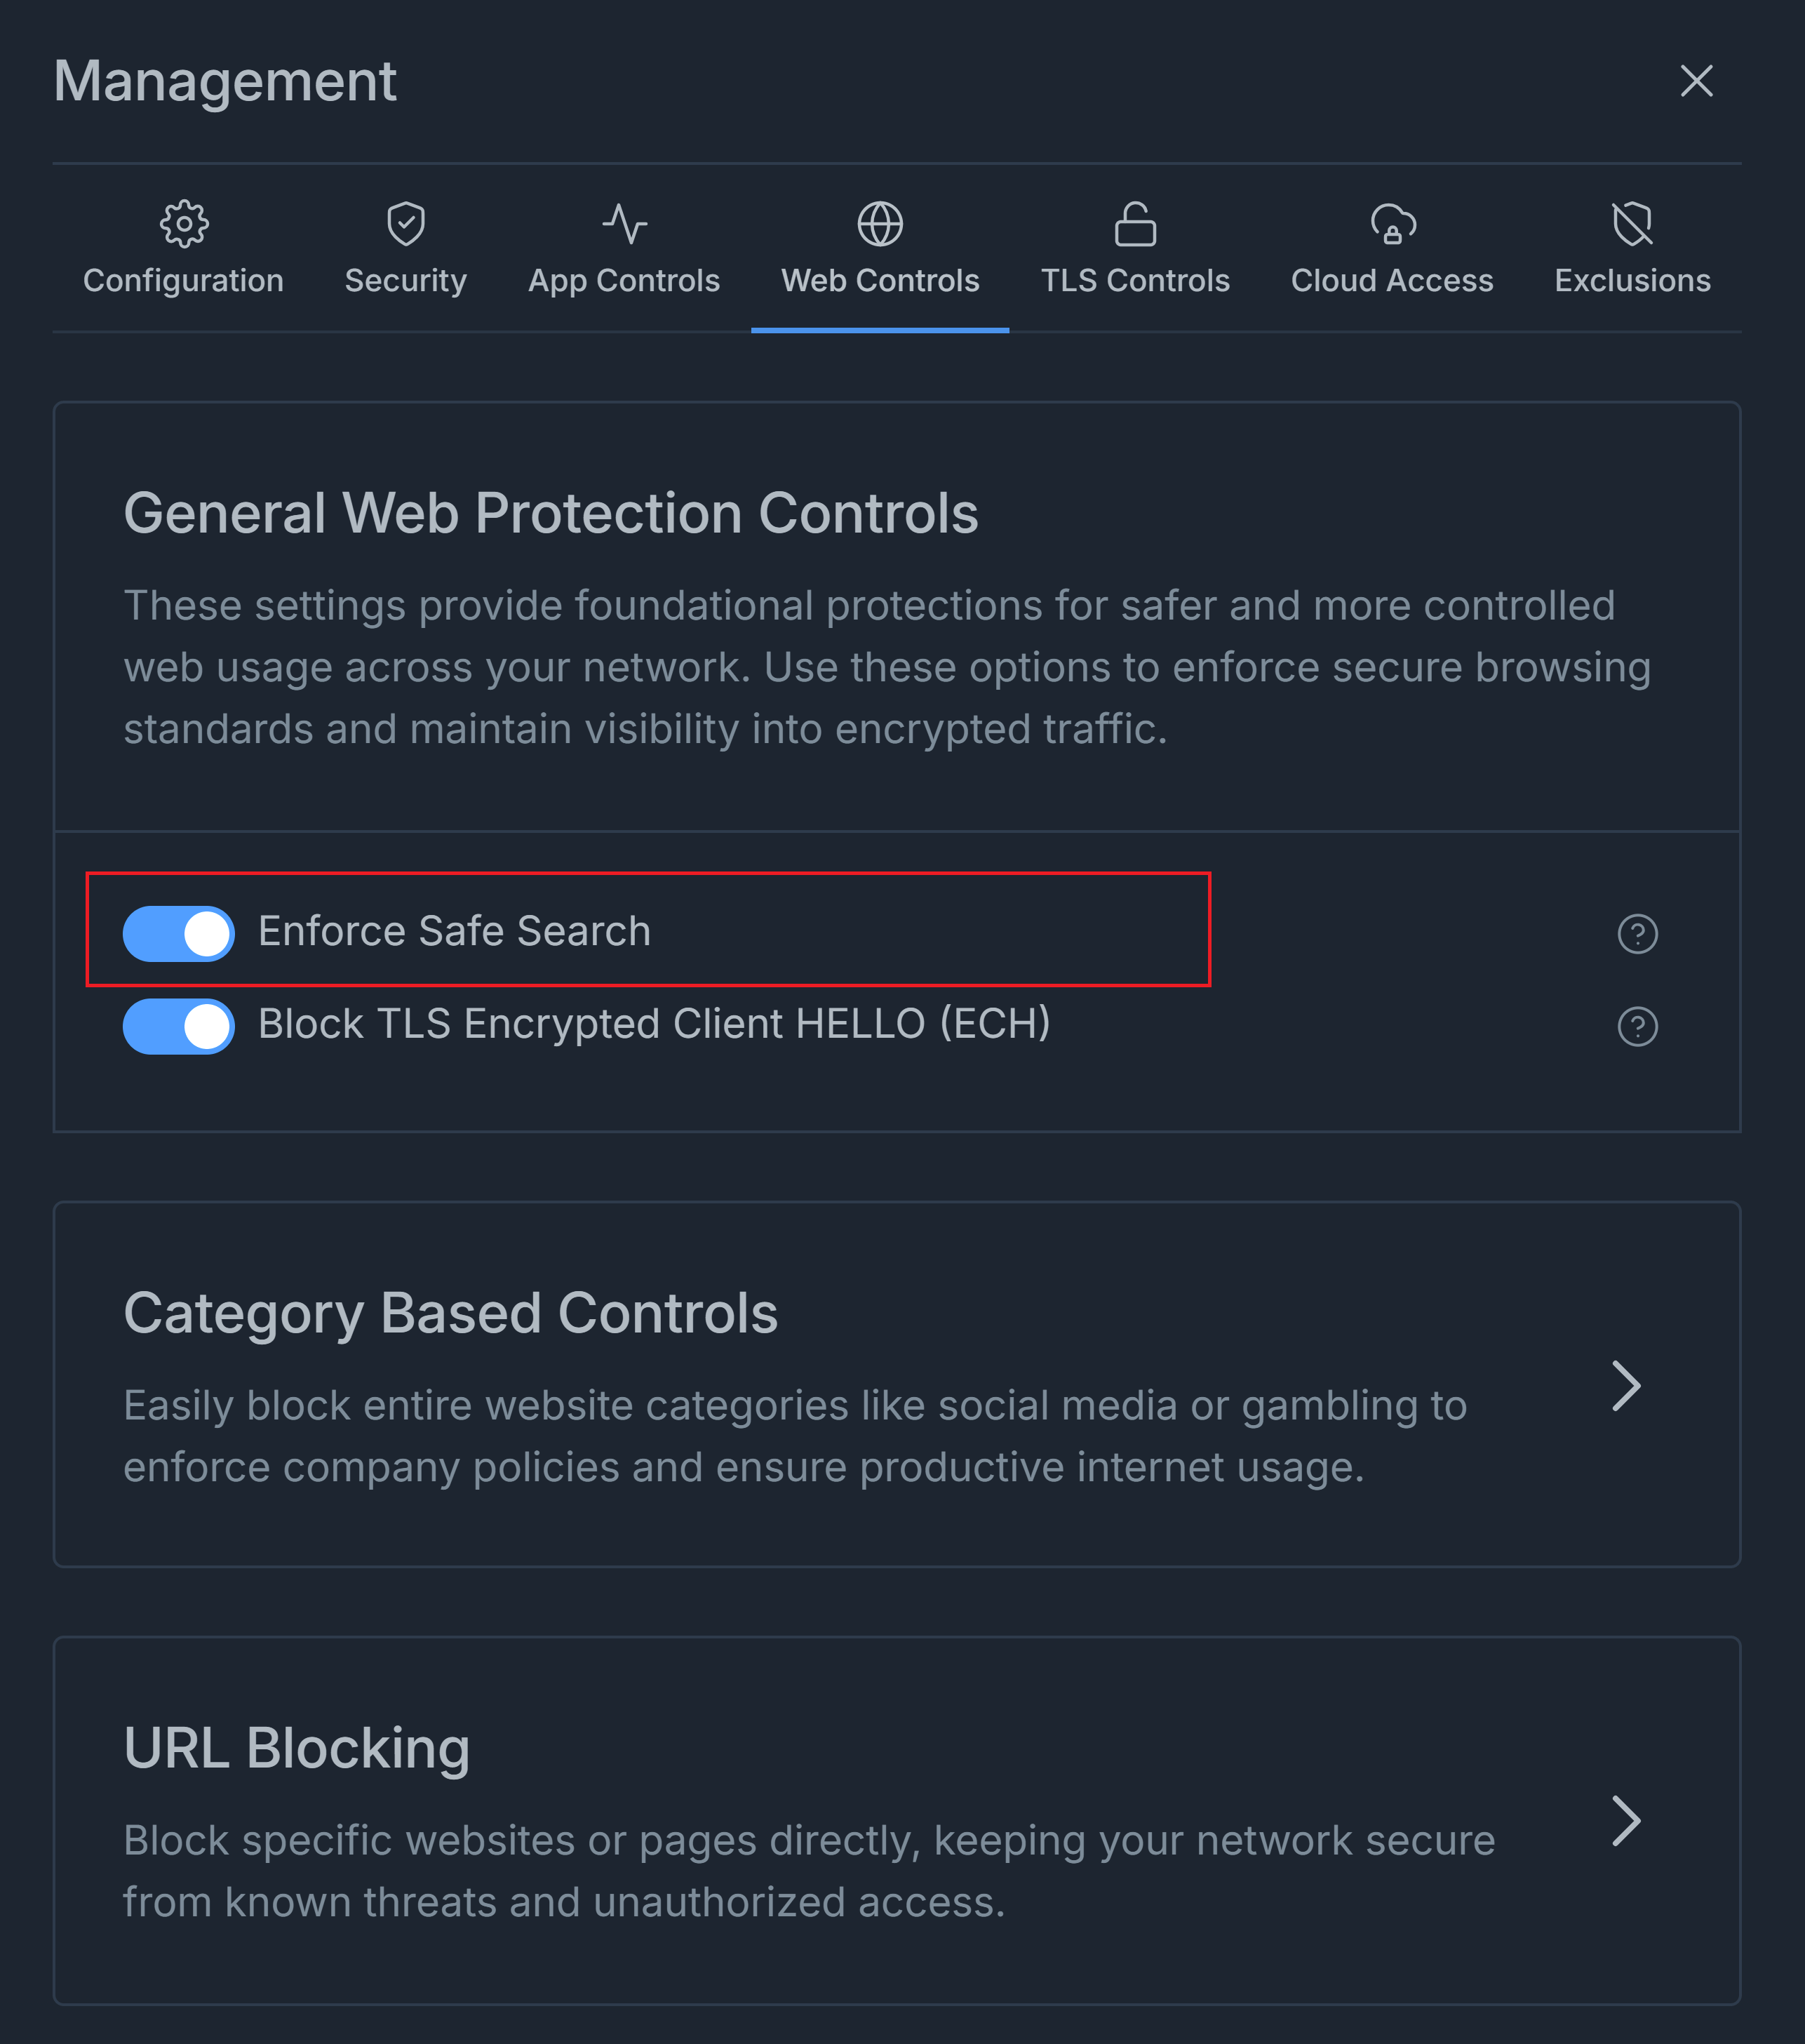
Figure 1. Enforcing Safe Search
Enabling/Disabling TLS Encrypted Client HELLO (ECH)
Zenconsole enables you to prevent the use of TLS 1.3 Encrypted Client HELLO (ECH), a privacy feature that conceals domain names in HTTPS connections. Zenarmor can inspect traffic metadata for improved policy enforcement and visibility by blocking ECH. ECH is prohibited by default. To enable TLS 1.3 Encrypted Client HELLO (ECH), disable the Block TLS Encrypted Client HELLO (ECH) toggle bar in the General Web Protection Controls pane.
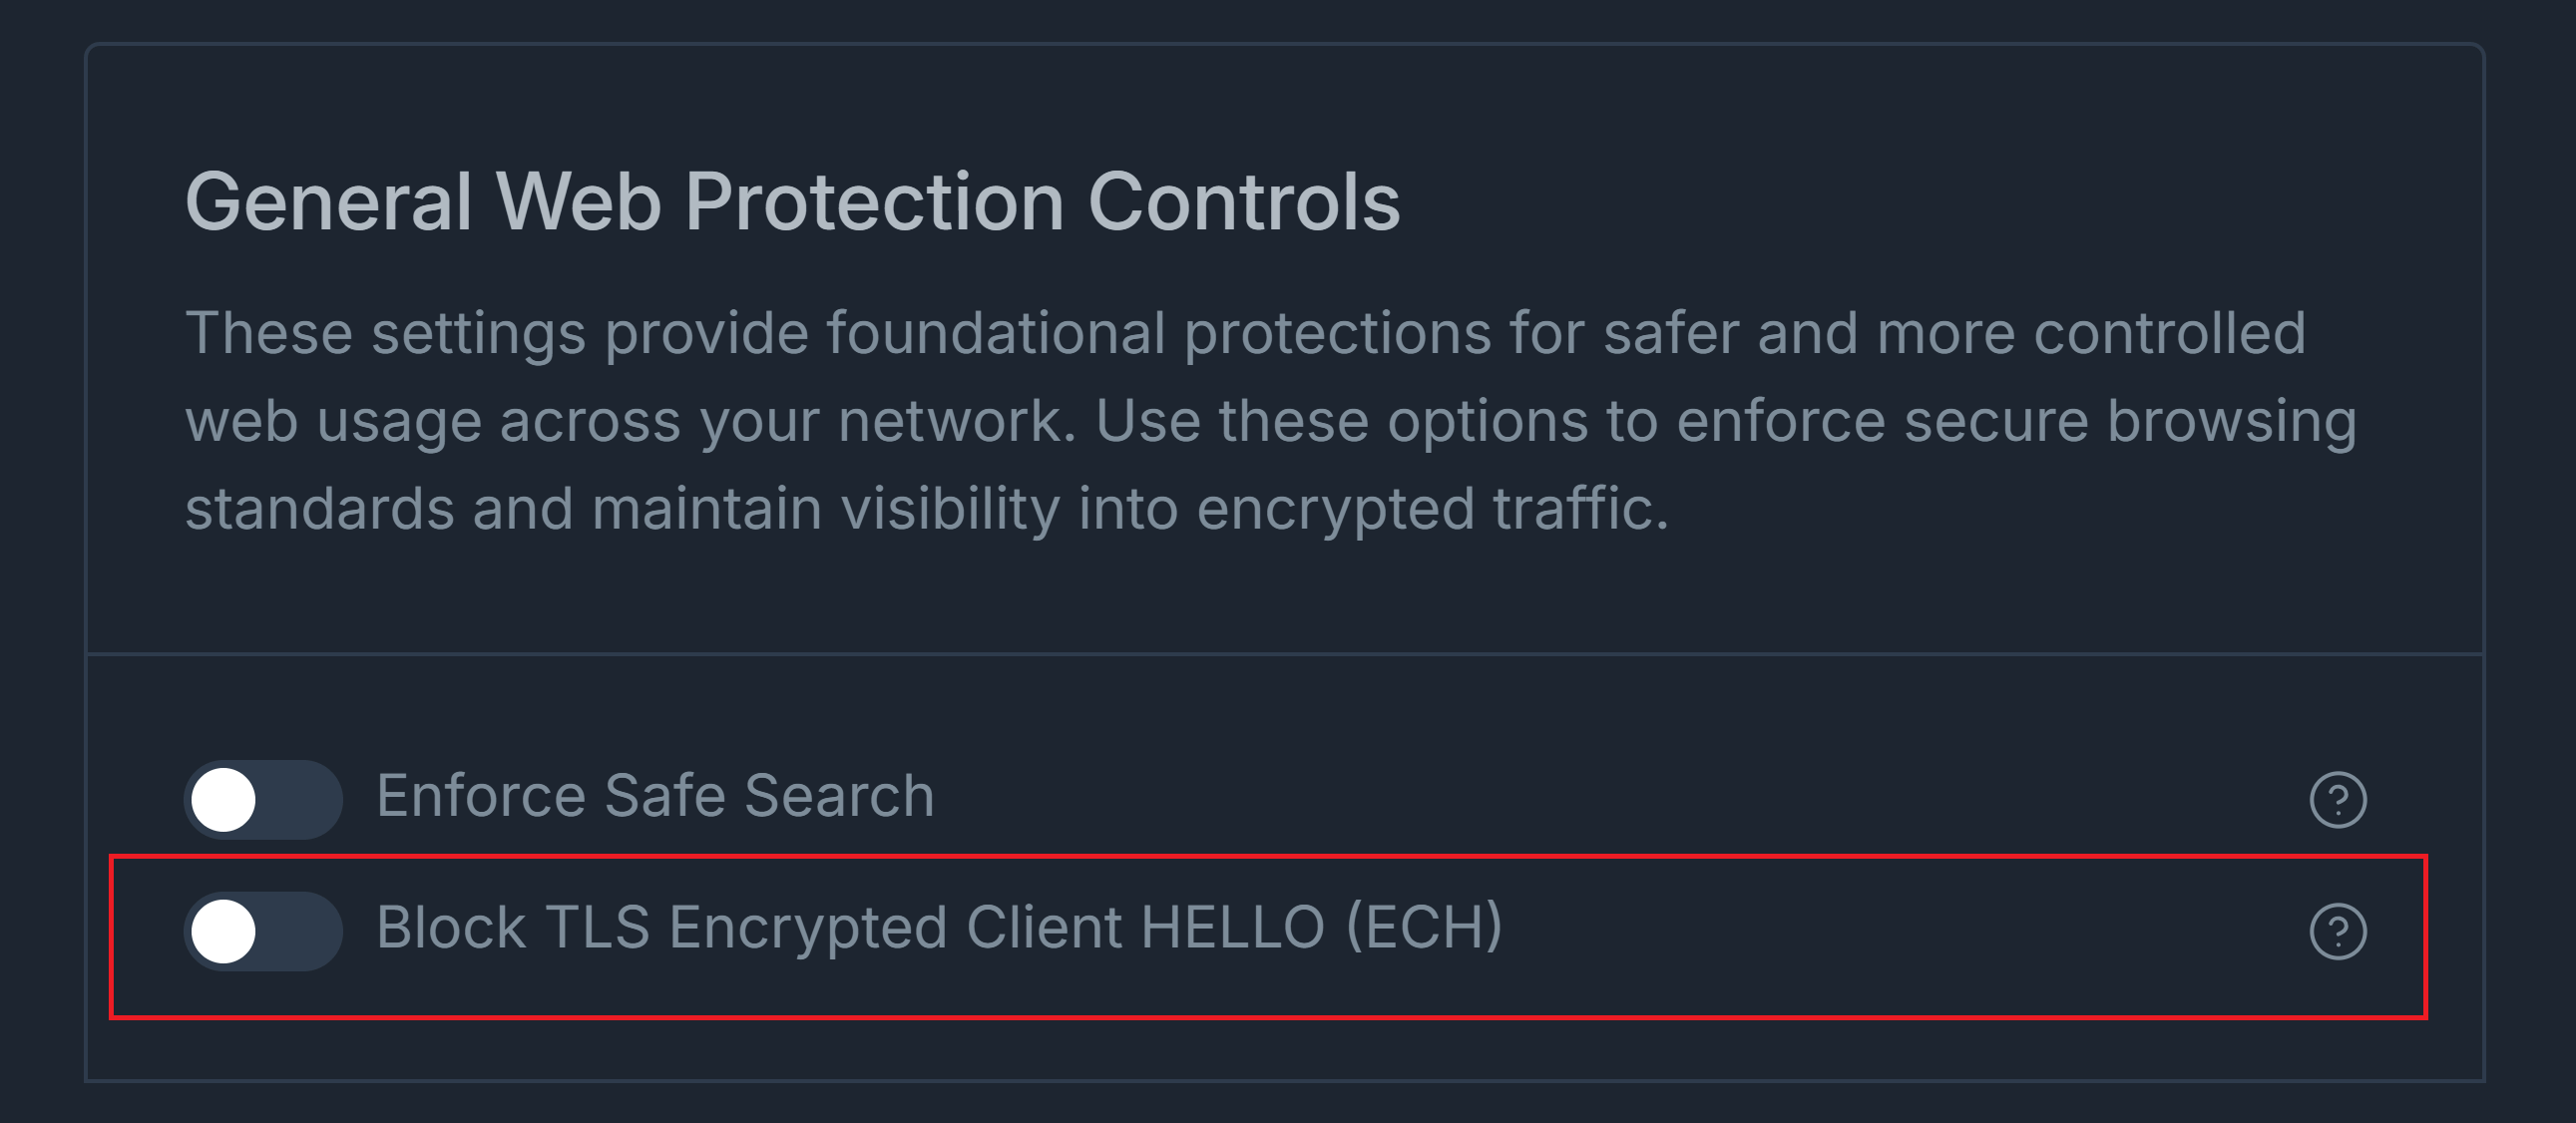
Figure 2. Block TLS Encrypted Client HELLO (ECH) Option
Category Based Controls
Zenarmor Web Controls allow you to block entire website categories, such as gambling and social media, to enforce organizational policies and provide a safer and more productive browsing environment.
Website categories and their current statuses are displayed under the Category Based Controls pane. Zenconsole provides the following Web Control profiles:
- Permissive: Allows all website categories by default and provides unrestricted web browsing.
- Moderate Control: Blocks dangerous, inappropriate, or high-risk website categories, such as Adult, Advertisements, Illegal Drugs, Pornography, and Violence.
- High Control: Provides stricter filtering by including the categories blocked by Moderate Control and additional categories such as Blogs, Chats, Dating, Gambling, Games, Social Networks, Software Downloads, and other potentially distracting or restricted content.
- Custom: Represents a customized category configuration. Zenconsole automatically switches the profile to Custom when you manually change the status of a website category.
To select a Web Control profile, follow the steps below:
- Select the policy you want to configure.
- Navigate to the Web Controls tab.
- Expand the Category Based Controls pane.
- Select one of the following predefined profiles:
- Permissive
- Moderate Control
- High Control
- Review the status of the website categories included in the selected profile.
The selected profile is highlighted at the top of the pane. The category list displays the name and current status of each website category.

Figure 3. Web Control Profiles and Website Categories
The categories included in predefined profiles are maintained by Zenarmor and may change as website classifications and security requirements are updated.
Searching for a Web Category
You can use the Search field in the Category Based Controls pane to quickly locate a website category.
To search for a web category:
- Navigate to the policy's Web Controls tab.
- Expand the Category Based Controls pane.
- Enter all or part of the category name in the Search field.
- Review the matching categories and their current statuses.
The category list is filtered dynamically as you type.

Figure 4. Searching for a Web Category
Defining Custom Web Controls
You can customize a predefined Web Control profile by changing the status of individual website categories.
You do not need to select Custom before modifying a category. When you change the status of any category, Zenconsole automatically switches the selected profile to Custom.
To define custom category controls:
- Select Permissive, Moderate Control, or High Control as the starting profile.
- Locate the website category you want to configure.
- Enable the toggle next to the category to block it, or disable the toggle to allow it.
- Repeat this process for any additional categories you want to customize.
The Custom profile retains the settings inherited from the previously selected profile together with your individual category changes.
The Custom Web Profile is only available for Premium Zenarmor Editions.
Blocking or Allowing a Web Category
The Status column displays whether each website category is currently allowed or blocked:
- Allowed: Websites classified under the category are accessible.
- Blocked: Websites classified under the category are blocked.
To change the status of a category:
- Locate the category in the Category Based Controls pane.
- Enable the toggle in the Status column to block the category.
- Disable the toggle to allow the category.
After you manually change a category, the selected Web Control profile automatically changes to Custom.

Figure 5. Blocking Web Category Individually
URL Blocking
For ZTNA, SSE, and SASE subscriptions, Zenconsole provides URL and URL regex-based blocking capabilities, enabling users to implement more stringent security measures by preventing access to particular websites or patterns within URLs. This protects their clients against known threats and unauthorized entry.
The URL Blocking capability is closely integrated with the TLS inspection feature. URL Blocking enables you to restrict URLs at a more detailed level by using (*) wildcard options in your URL. This allows you to specifically target subdomains or pathways throughout the whole system.
In order for the URL Blocking feature to function, your policy must have Full TLS Inspection enabled (TLS decrypt/re-encrypt).
You may easily block a URL by following the next steps:
-
Navigate to the Web Controls tab on the policy configuration page.
-
Click on the URL Blocking pane.
-
Type the URL, including
httporhttps, into the URL field. -
Type a descriptive name into the Description field.
-
Click Block.

Figure 6. Blocking URL on Zenconsole
Editing Blocked URLs
You may quickly edit or update manually blocked URLs by following these steps:
-
Navigate to the Web Controls tab on the policy configuration page.
-
Click on the URL Blocking pane. All blocked URLs that you previously defined will be listed here.
-
Find the URL that you need to edit.
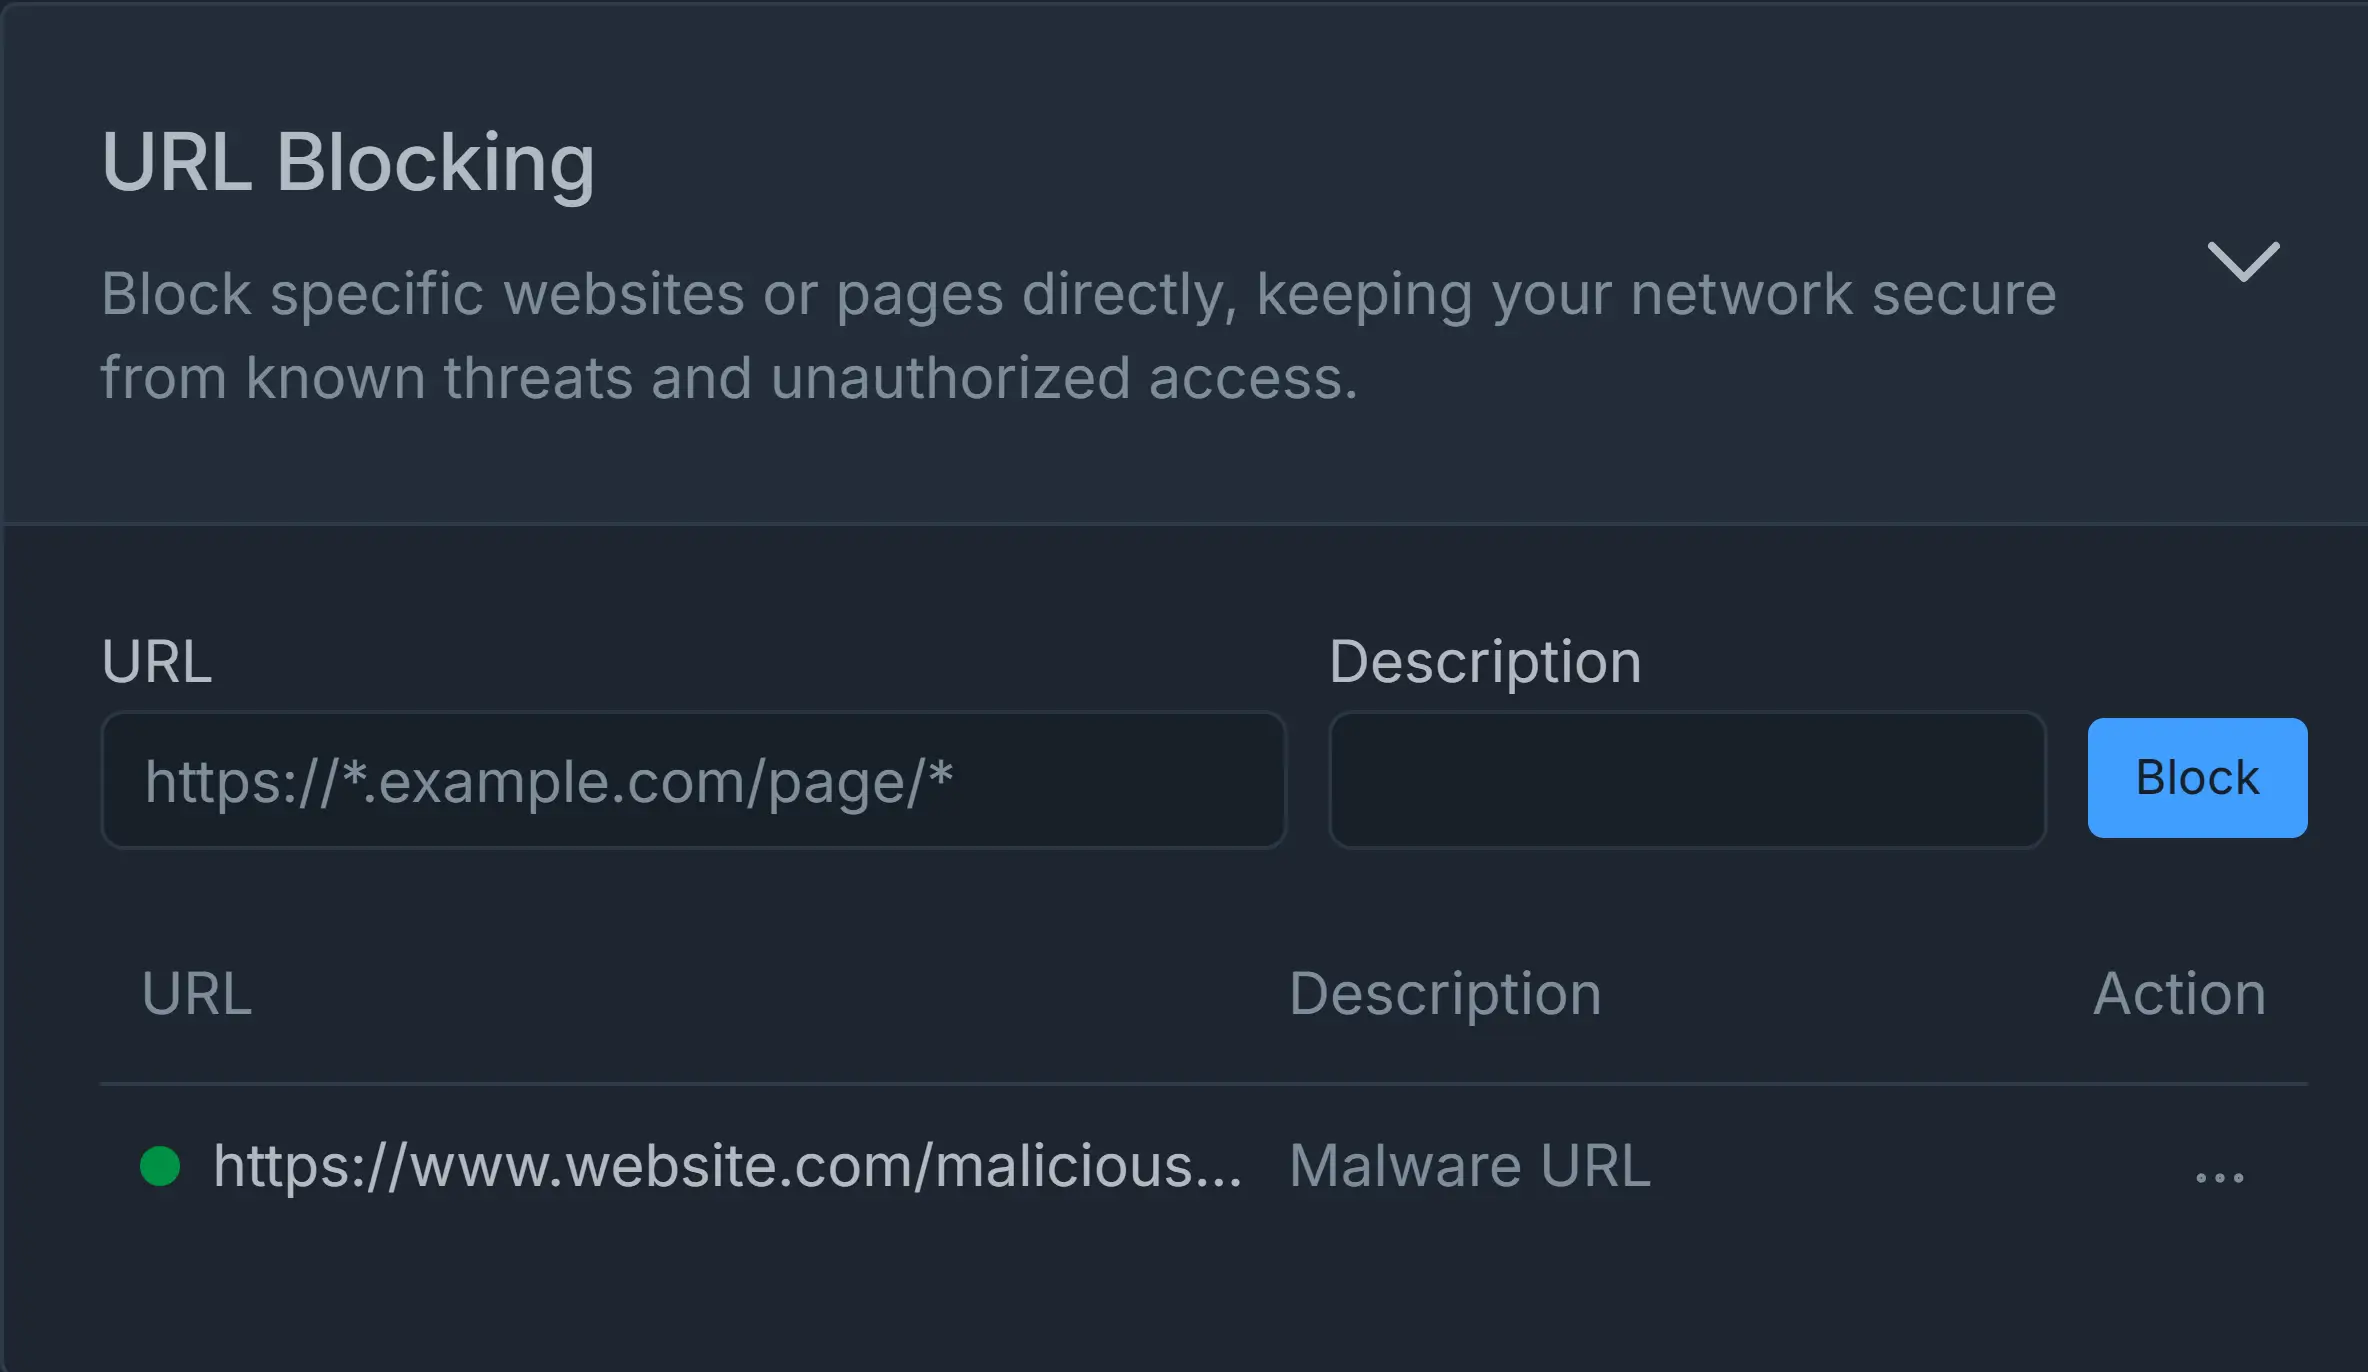
Figure 7. Blocked URL List
-
Click on the menu with the 3-dot
...icon under the Action column. This will open a task menu.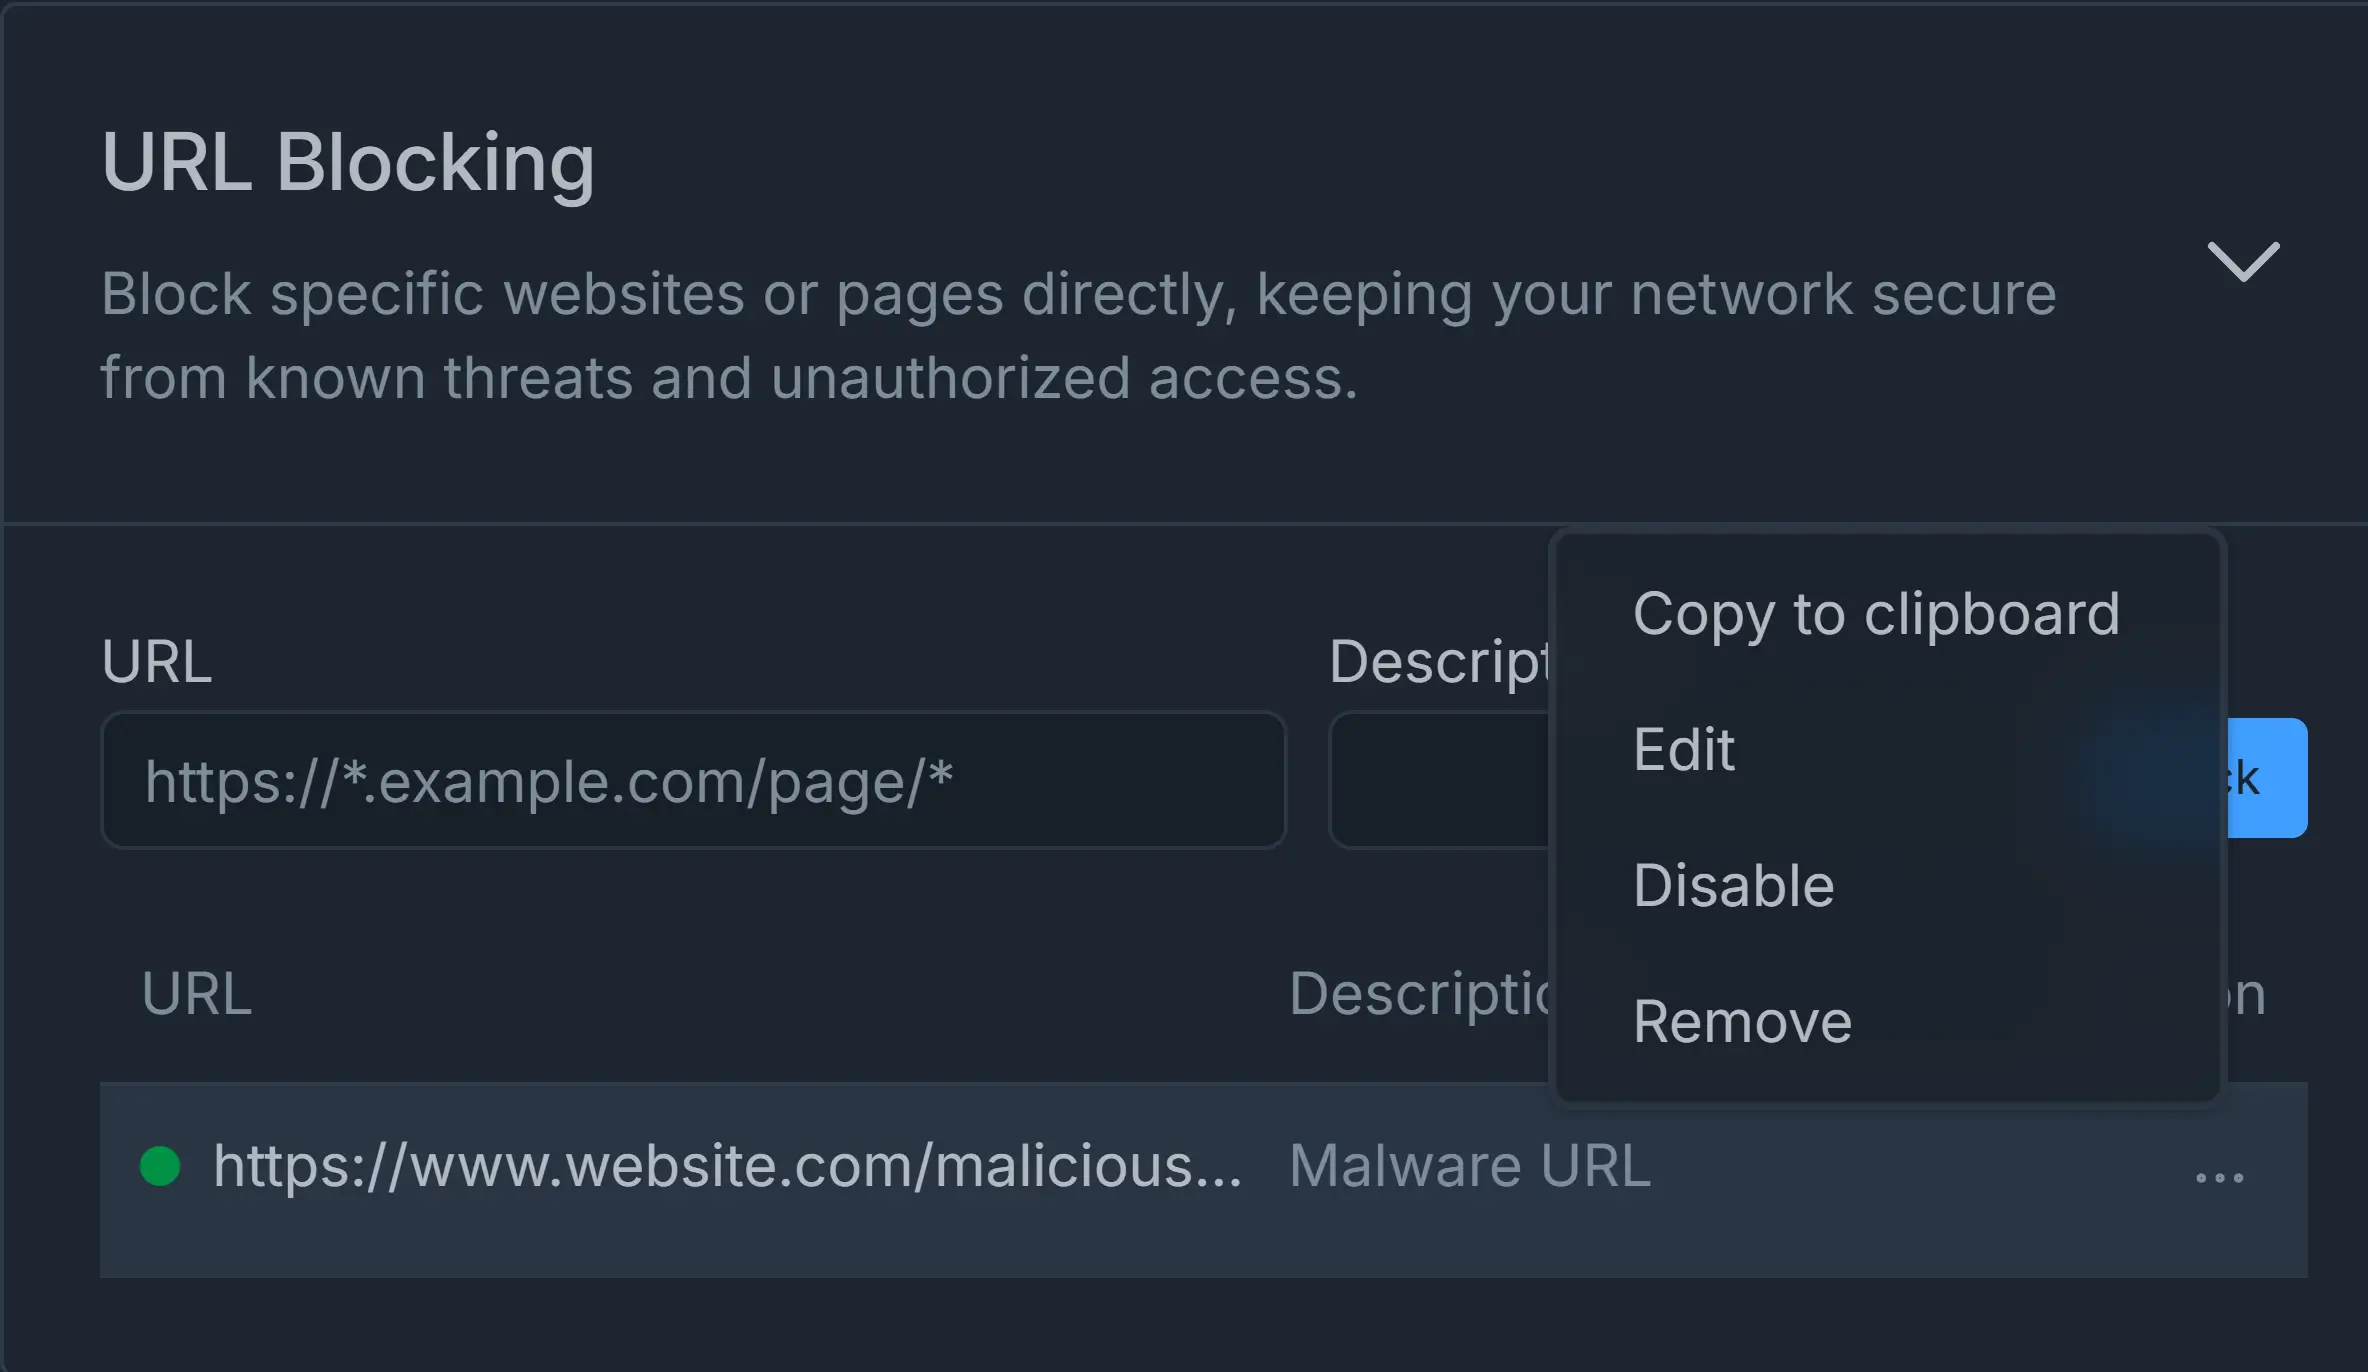
Figure 8. Edit Blocked URL
-
Click Edit menu. This will pop up a window for updating URL fields.
-
Update the URL information depending on your need.
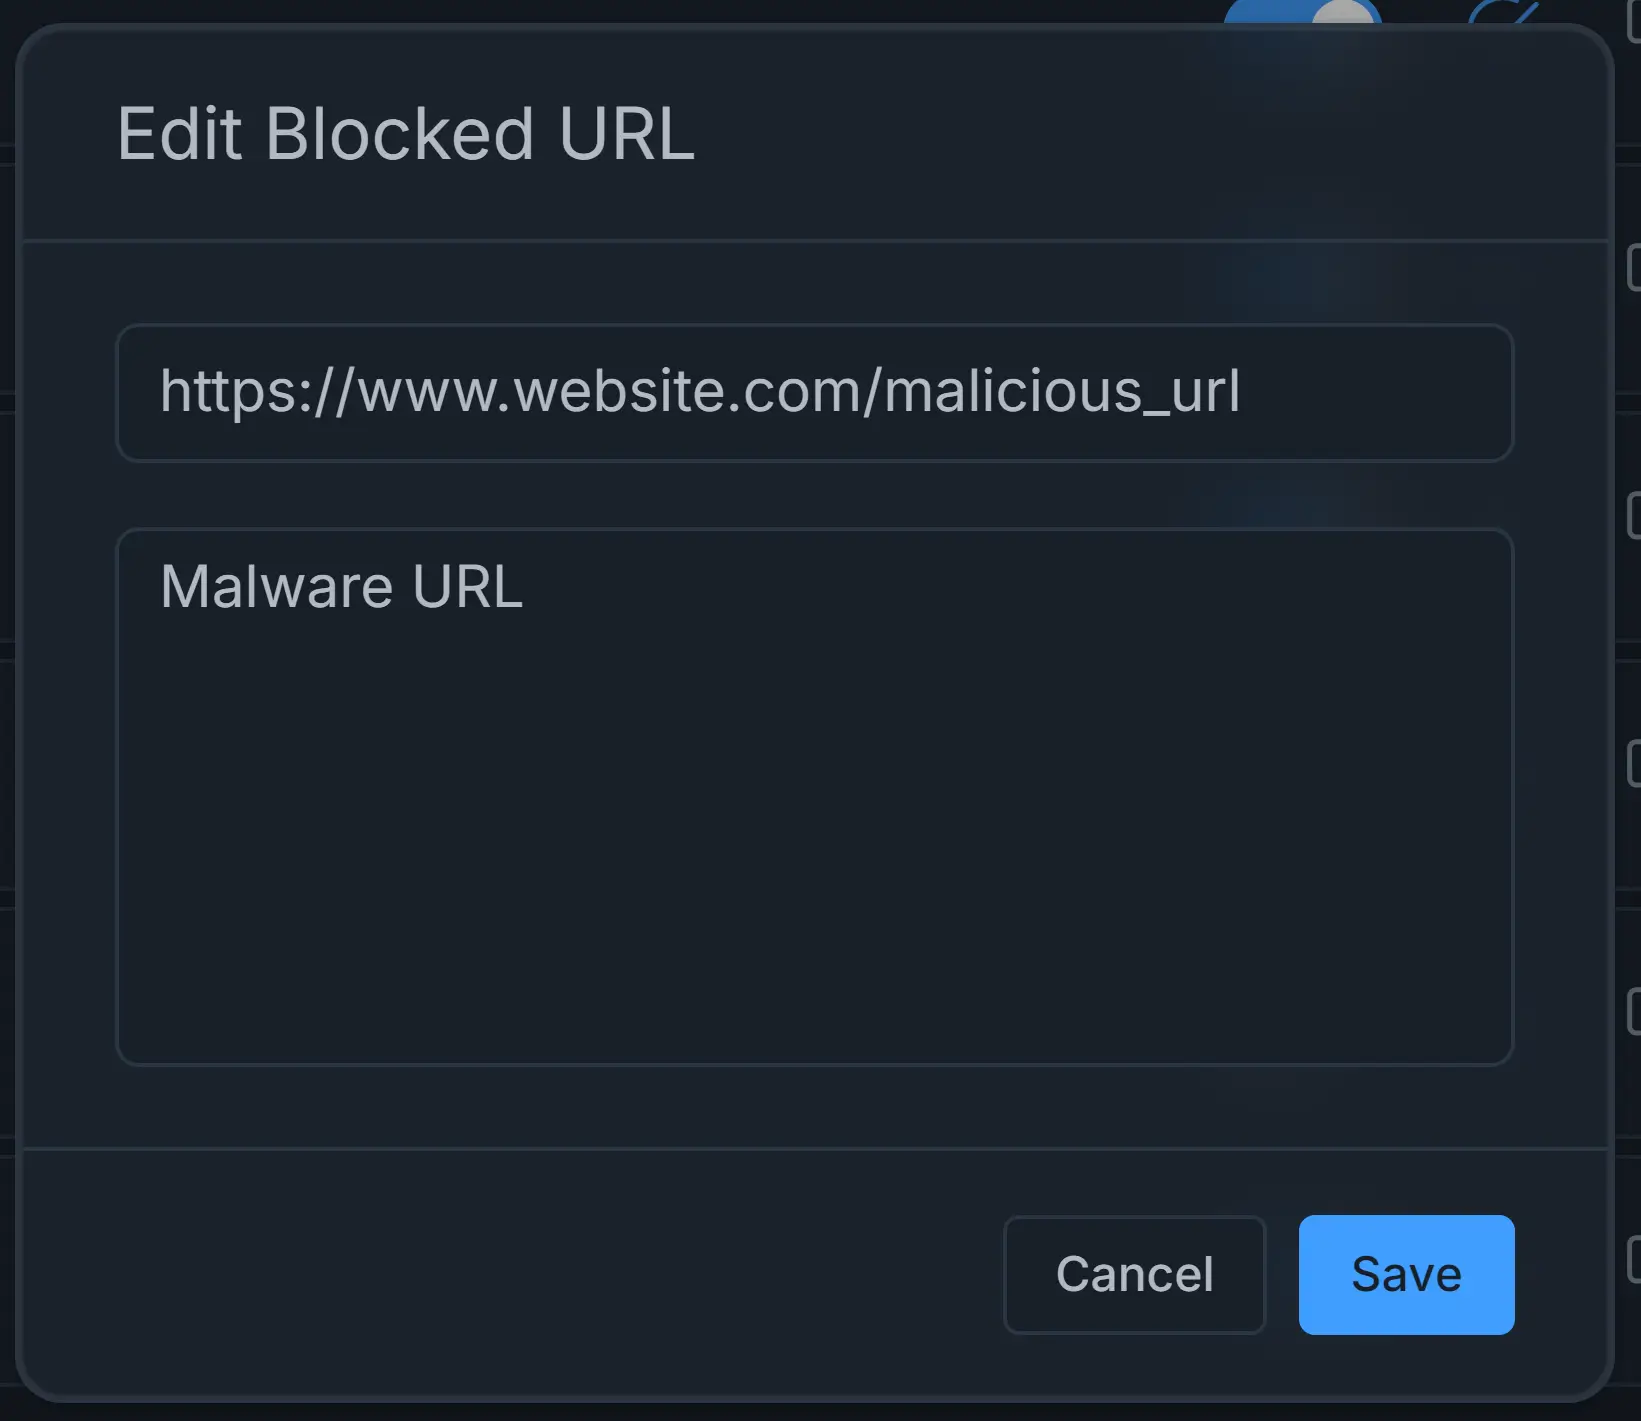
Figure 9. Updating Blocked URL information
-
Click Save.
Enabling / Disabling Blocked URLs
You may quickly enable or disable the manually blocked URLs by following these steps:
-
Navigate to the Web Controls tab on the policy configuration page.
-
Click on the URL Blocking pane. All blocked URLs that you previously defined will be listed here.
-
Find the URL that you need to enable or disable. Enabled URLs have a green circle icon at the beginning of the URL line in the list while disabled URLs have a gray circle icon.
-
Click on the menu with the 3-dot
...icon under the Action column. This will open a task menu. -
Click Enable or Disable menu. After disabling the blocked URL, it will be accessible to the clients.
-
Update the URL information depending on your need.
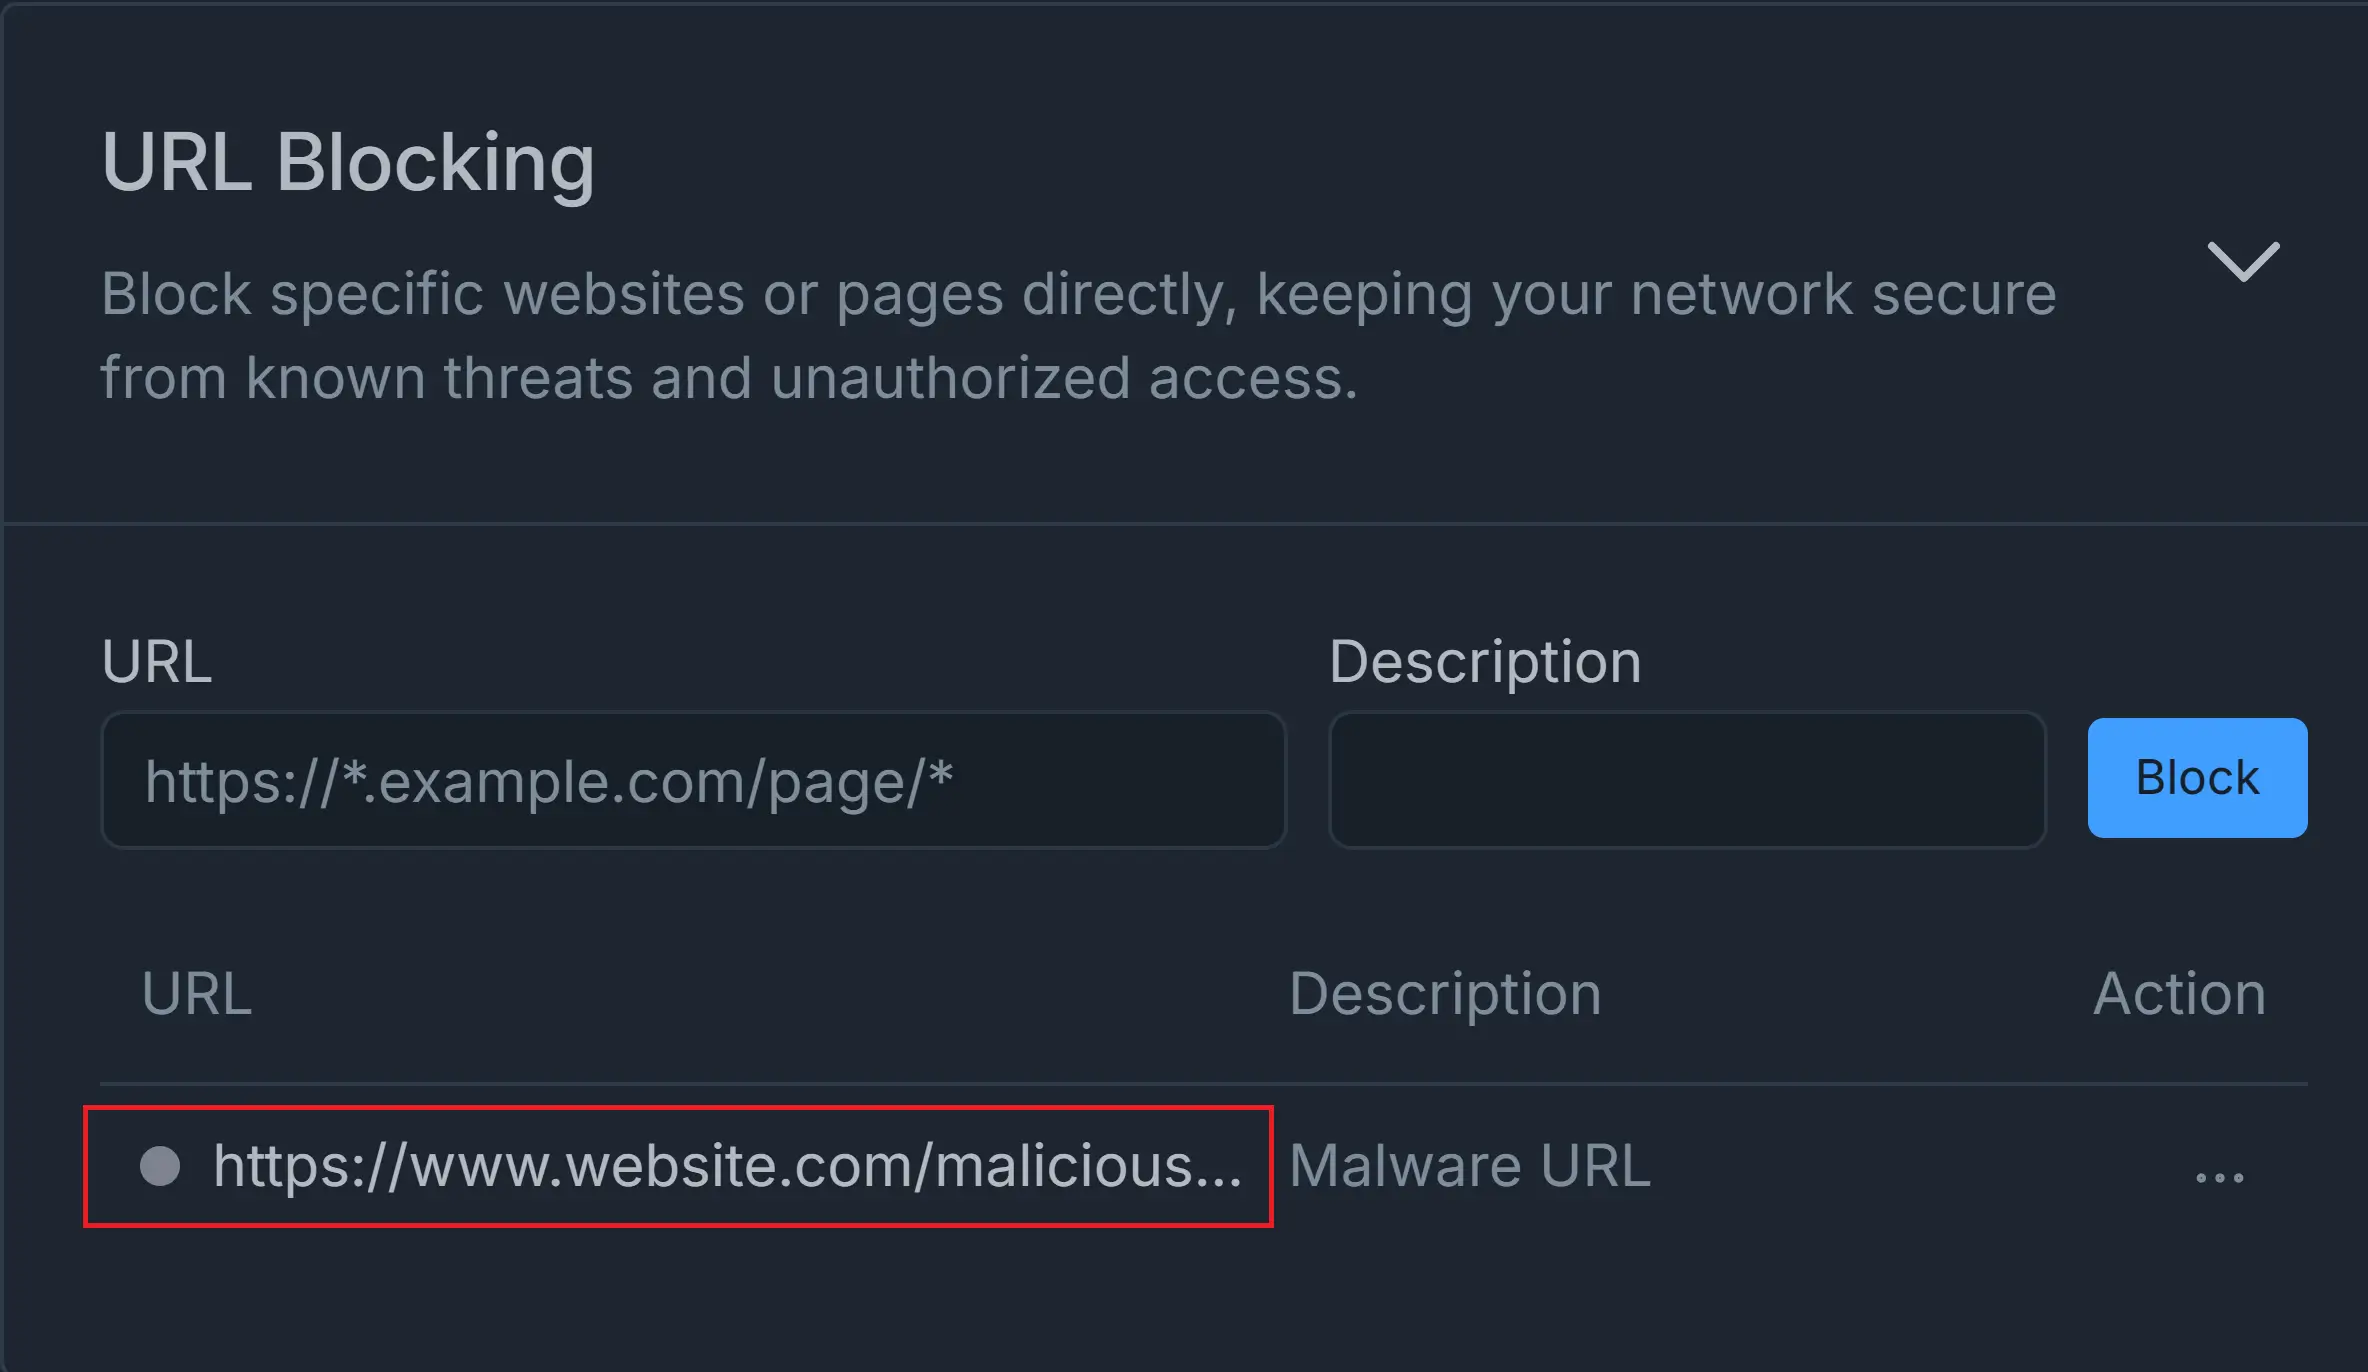
Figure 10. Disabled Blocked URL
Removing Blocked URLs
You may quickly remove the manually blocked URLs by following these steps:
- Navigate to the Web Controls tab on the policy configuration page.
- Click on the URL Blocking pane. All blocked URLs that you previously defined will be listed here.
- Find the URL that you need to remove permanently.
- Click on the menu with the 3-dot
...icon under the Action column. This will open a task menu. - Click Remove menu. This will display a notification window for confirmation.
- Click on the Remove button to confirm URL removal.
Activating the rules
When you're satisfied with your changes, click the synchronization button next to the policy to synchronize with the firewall and activate the rules on the policies list view.
Here is a video about the Zenarmor Web Security Controls.