How to Install pfSense® Software on Proxmox VE?
pfSense® Software is an open source firewall distribution based on FreeBSD. In addition to being a powerful, flexible firewalling and routing platform, it includes DHCP servers, DNS servers, VPNs, Proxy, IPS/IDS and etc. Moreover, pfSense is one of the supported platforms by Zenarmor NGFW, which offers application management and web filtering. pfSense Software is capable of being deployed on both physical and virtual servers.
Proxmox VE is an effective open-source corporate virtualization platform based on Debian Linux. With the integrated web-based user interface, you can simply manage VMs and containers, highly available clusters, and integrated disaster recovery solutions. In terms of simplicity, PVE offers a substantial edge over alternative virtualization systems. Even untrained users can install and set up the software in minutes. Importantly, Linux expertise is essential since it operates on Debian.
pfSense Software works efficiently on a Proxmox VE server hosting a KVM-based virtual machine. In this pfSense® Software installation on Proxmox VE guide, we will take you through a simple pfSense Software 2.6 installation to get you up and running.
You may easily install pfSense Software on your Proxmox VE by following the explained steps below:
- Determining Hardware Requirements of pfSense
- Downloading pfSense Software Image on Proxmox?
- Creating a Virtual Machine on Proxmox VE
- Setting Network Configuration of the OPNsense Virtual Machine on Proxmox VE
- Creating Linux Bridge
- Adding Network Devices to pfSense VM on Proxmox
- Installing pfSense Software
- Network Device Assignments for pfSense Firewall
- IP Address Settings for pfSense Firewall
- Updating pfSense Firewall on CLI
- Accessing the pfSense Web GUI
- Initial Configuration of the pfSense Firewall
pfSense Hardware Requirements
The pfSense® software distribution is compatible with the vast majority of FreeBSD-supported devices.
Recent versions of pfSense are compatible with 64-bit (amd64, x86-64) architectural hardware and ARM-based Netgate firewalls.
Not supported are other hardware architectures like Raspberry Pi, other Non-Netgate ARM devices, MIPS, PowerPC, SPARC, etc.
How to Determine Hardware Compatibility?
The FreeBSD Hardware Notes for the FreeBSD version used in a particular build of pfSense software are the best reference for establishing device compatibility for home-built systems. Version 2.6.0-RELEASE of the pfSense software is based on 12.3-STABLE@ef1e43f92c6. The Hardware section of the FreeBSD FAQ is an additional resource.
Network Adapters
FreeBSD supports a number of wired Ethernet Network Interface Cards (NICs), making them compatible with pfSense software. Yet, not all NICs are equal. The quality of hardware might vary significantly across manufacturers.
The recommended strategy is to use Intel network interface controllers since FreeBSD drivers support them well and they function well.
Some of the other PCIe/PCI cards supported by FreeBSD function well, while others may be unstable or perform poorly. In certain instances, FreeBSD supports a particular NIC, although some chipset implementations are of inferior quality or have inadequate driver support. When in doubt, consult the Netgate Forum for the experiences of other users of the same or comparable gear.
When a firewall demands the usage of VLANs, consider adapters with hardware capability for VLAN processing.
Due to their instability and poor performance, USB network adapters of any brand or model should not be utilized.
What is the Minimum Hardware Requirements?
The minimum hardware requirements for pfSense® software on hardware are as follows:
-
64-bit amd64 (x86-64) compatible CPU
-
8 GB or larger disk drive (SSD, HDD, etc)
-
1GB or more RAM
-
One or more compatible network interface cards
-
Bootable USB drive or high capacity optical drive (DVD or BD) for initial installation
How to Download pfSense Software Image on Proxmox?
You can download the pfSense Software image on your Proxmox VE by following the steps below:
-
Go to the official pfSense Software Download page (
https://www.pfsense.org/download/) via your browser. -
Select
AMD64(64-bit)in the Architecture dropdown menu. -
Select
DVD Image (ISO) Installerin the Installer dropdown menu. -
Select the mirror site closest to you, such as
Austin, TX USA. -
Right-click the Download button.
-
Click on the Copy link address.

Figure 1. Selecting pfSense image to download
-
Connect to your Proxmox VE via SSH as a
root. -
Change the working directory by running the following command:
cd /var/lib/vz/template/iso -
Run the next command to download the image using the ISO image address that you copied in step 6.
wget https://frafiles.netgate.com/mirror/downloads/pfSense-CE-2.6.0-RELEASE-amd64.iso.gz--2023-02-23 11:24:39-- https://frafiles.netgate.com/mirror/downloads/pfSense-CE-2.6.0-RELEASE-amd64.iso.gz
Resolving frafiles.netgate.com (frafiles.netgate.com)... 206.81.29.184, 2a03:b0c0:3:d0::842:c001
Connecting to frafiles.netgate.com (frafiles.netgate.com)|206.81.29.184|:443... connected.
HTTP request sent, awaiting response... 200 OK
Length: 437073513 (417M) [application/octet-stream]
Saving to: pfSense-CE-2.6.0-RELEASE-amd64.iso.gz
pfSense-CE-2.6.0-RELEASE-amd64.iso.gz 100%[========================================================================================================================================>] 416.83M 2.81MB/s in 2m 25s
2023-02-23 11:27:05 (2.88 MB/s) - pfSense-CE-2.6.0-RELEASE-amd64.iso.gz saved [437073513/437073513] -
After downloading the compressed image file successfully run the next command for uncompression:
gunzip pfSense-CE-2.6.0-RELEASE-amd64.iso.gz
Now, you can install pfSense virtual machine on your Proxmox via Web UI.
Creating a Virtual Machine on Proxmox VE
After downloading the pfSense ISO image to the Proxmox VE, we will create a Virtual Machine for our pfSense firewall. To create a virtual machine on Proxmox, you should follow the next steps given below.
-
Click on the blue
Create VMbutton in the upper right-hand corner of the Proxmox VE web UI. -
Enter a name for your virtual machine, such as
pfSenseFW. Then, clickNext.Figure 2. Naming the pfSense VM on Proxmox
-
Select the pfSense ISO image under the
OStab, and then clickNext.Figure 3. Selecting pfSense ISO to install on Proxmox VE as an OS
-
You may accept the default settings on the
Systemtab by clickingNext.Figure 4. System settings of the pfSense VM on Proxmox
-
Set the
Hard Disksize as you wish. We recommend enabling theIO threadwhich should improve IO performance by giving the disk its Datacenter worker thread.
Figure 5. Setting Hard disk size as 32 GB for pfSense on Proxmox VE
-
Set the
CPUconfiguration as you wish.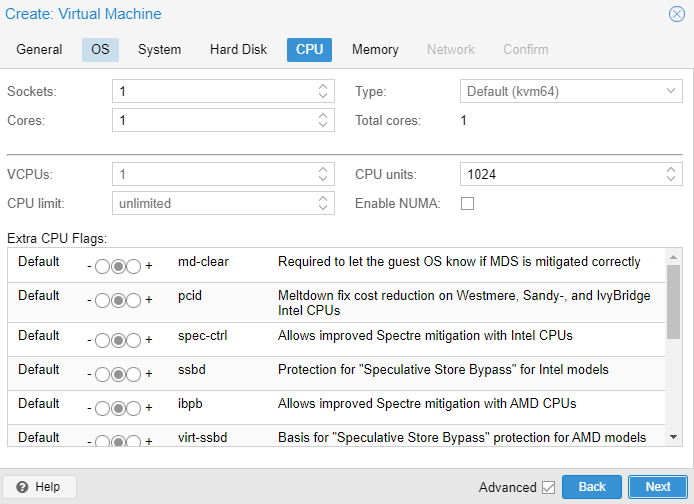
Figure 6. CPU settings for pfSense firewall on Proxmox VE
-
Set the
Memorysize as you wish.Figure 7. Setting Memory size 8 GB for pfSense firewall on Proxmox
-
Set
Multiqueue to 8which will allow the BSD kernel to negotiate the optimal value with Proxmox VE in the Network configuration. We will cover this configuration for our topology deeply later.Figure 8. Network configuration of pfSense VM on Proxmox VE
-
Confirm the pfSense virtual machine configuration by clicking on the
Finishbutton.Figure 9. Confirming the pfSense virtual machine configuration
Setting Network Configuration of the pfSense Virtual Machine on Proxmox VE
In this tutorial, we will configure two physical NICs for our pfSense firewall. These NICs will be used and configured for the following purposes
-
WAN Connection: Internet connection/Untrusted zone.
-
LAN Connection: Clients and servers are placed in this trusted zone.
Creating Linux Bridge
To be able to define 2 network interfaces for the pfSense virtual machine, firstly we must create Linux bridge devices on the Proxmox device.
To create a Network Bridge follow the next steps.
-
Navigate to
Data center->pve->Network.
Figure 10. Viewing the network devices of the Proxmox VE
-
Click on the
Createbutton. This will pop up theLinux Bridgeconfiguration window. -
You may leave the name as default such as
vmbr1. EnterIPv4/CIDRaddress andBridge ports(Network device name seen on the Network configuration window, such as ens3f0). Then, click on theCreatebutton.Figure 11. Creating a Linux bridge on the Proxmox VE
-
Click on the
Apply Configurationbutton orRebootthe Proxmox device to start using new Linux bridges.
Now, you have two Linux Bridges as seen in the Figure below.

Figure 12. Viewing the network devices of the Proxmox VE
Adding Network Devices to pfSense VM on Proxmox
It is time to add a network device that will be used for LAN connections.
To add a new network interface to the pfSense virtual machine on Proxmox you can follow these steps.
-
Navigate to the
Data center->pve->pfSenseFW->Hardware->Add. -
Click on
Network Device.
Figure 13. Adding NIC to pfSense VM on Proxmox VE
-
Select the
Linux Bridgesuch as vmbr1. -
Select
ModelasVirtlO(paravirtualized). -
Uncheck
Firewalloption. -
Set
Multiqueueto8.Figure 14. Setting Additional NIC for pfSense VM on Proxmox VE
-
Click the
Addbutton.
After finishing the network configuration of the pfSense virtual machine on Proxmox, you should see the Hardware configuration for the pfSense VM similar to the following figure.

Figure 15. Hardware configuration of the pfSense VM on Proxmox VE
Now, your pfSense firewall has 2 different physical interfaces ready to connect to different networks, Internet, and LAN respectively.
It is recommended that you should note the MAC address of the network devices used by pfSense VM. You will need them to complete the network settings of the firewall after installing the pfSense software.
A Youtube Video showing how to create a pfSense software on Proxmox VE is given below:
Installing pfSense Software
To start the installation of the pfSense on your Proxmox virtual environment, first, you should start the pfSense virtual machine. To start the virtual machine and install pfSense software, you may follow the steps listed below:
-
Click on the
pfSenseFWvirtual machine on the node list. -
Click on the
Startbutton. -
Click on the
Consoleto connect the virtual machine from the Proxmox console and continue the installation of the pfSense. While the system is booting do not press any key and wait for the login prompt.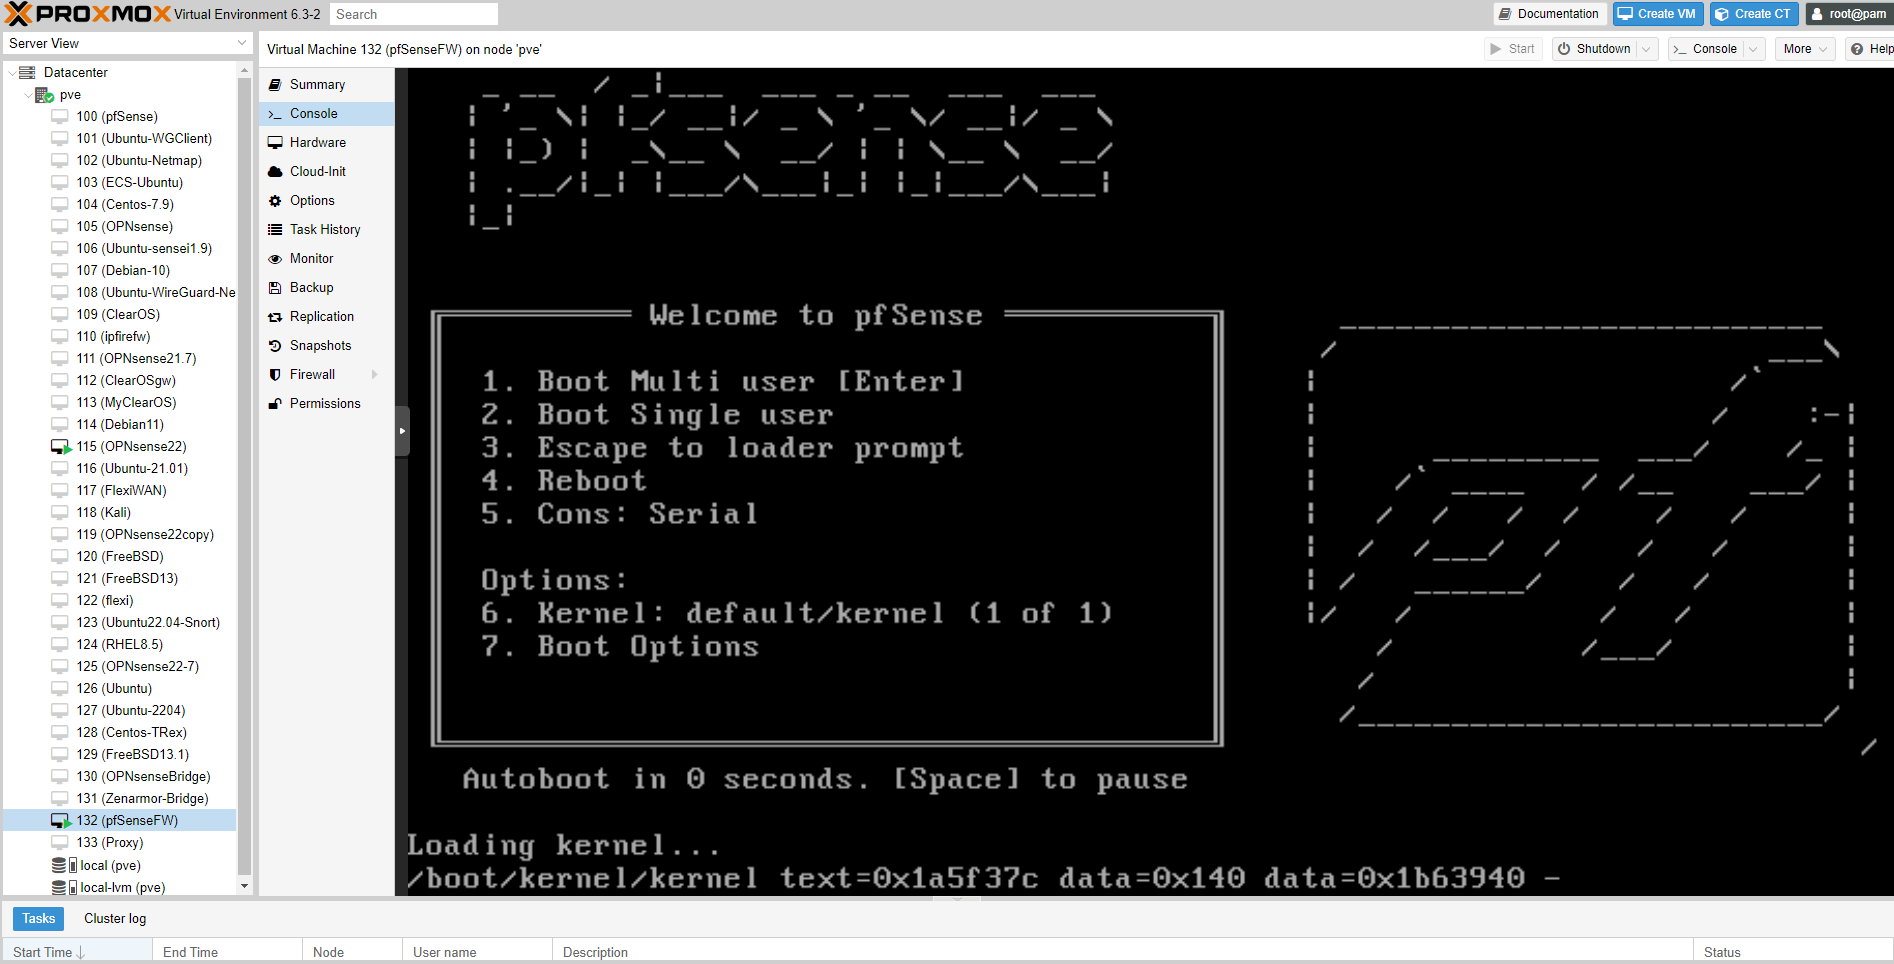
Figure 16. Connecting pfSense VM console on Proxmox VE
-
Press
Acceptto accept the copyright and distribution notice.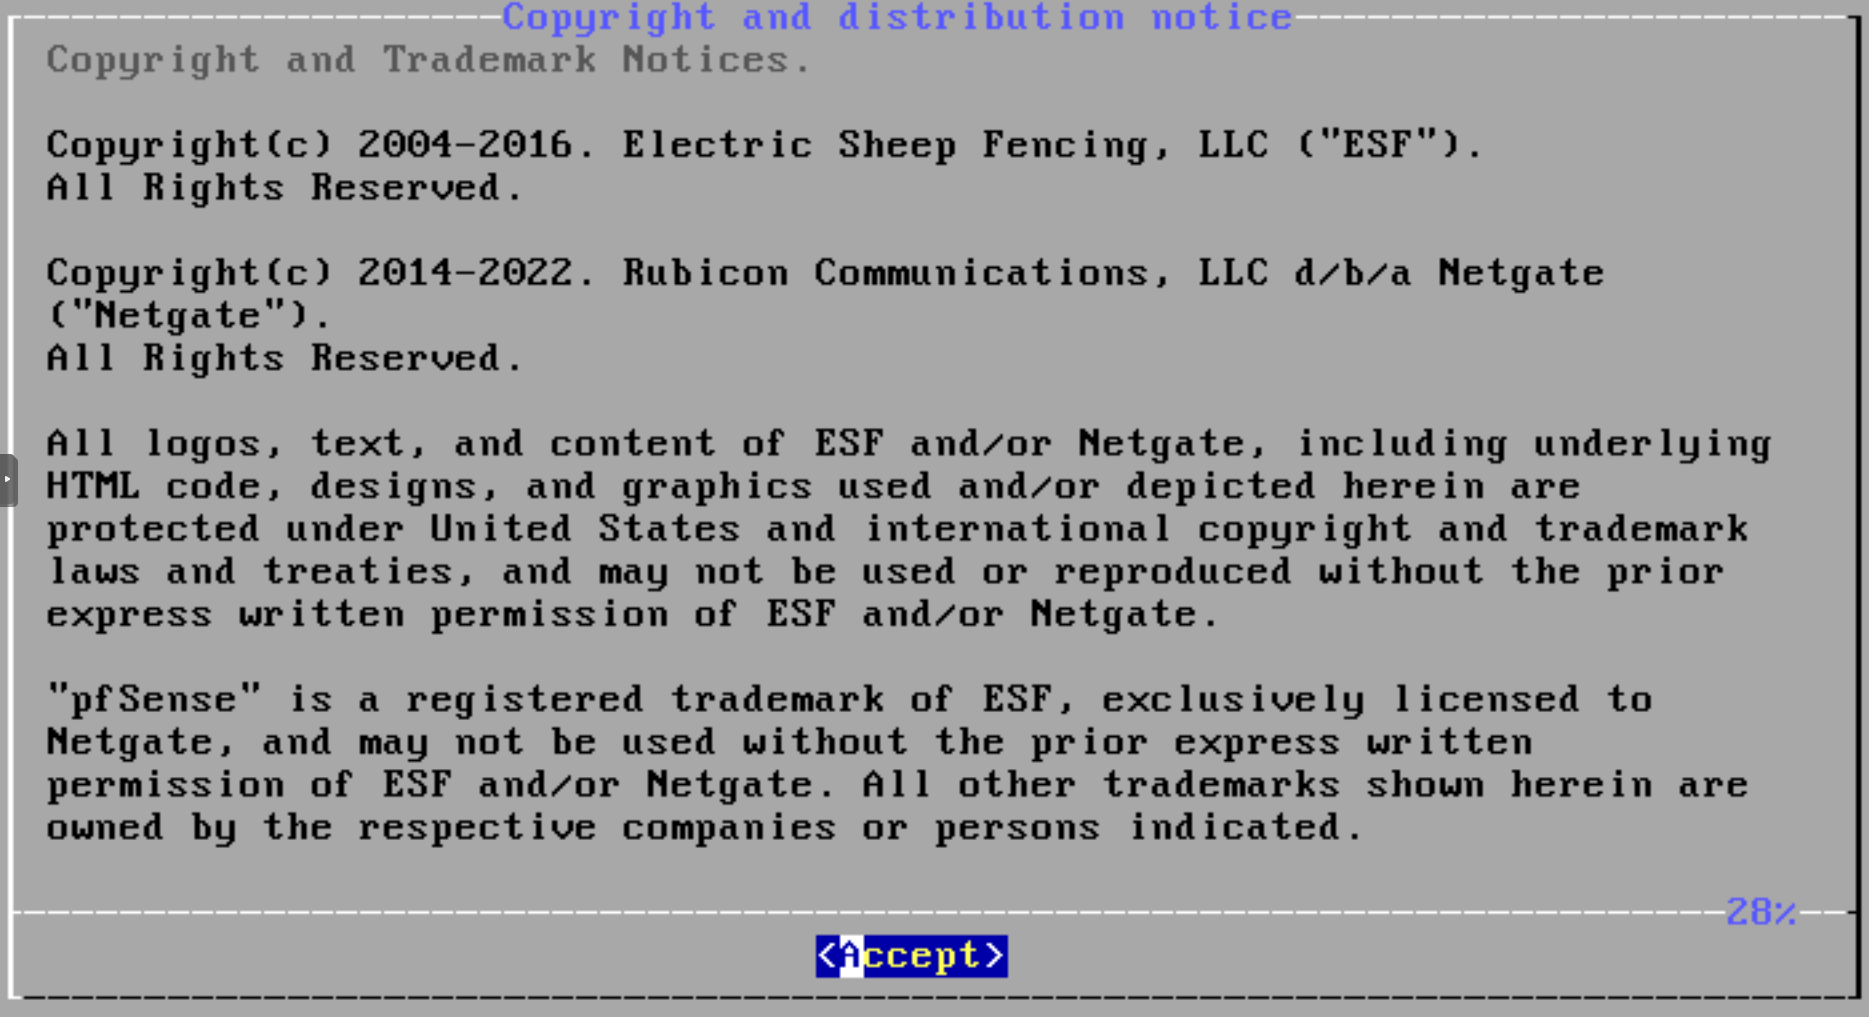
Figure 17. Accepting the copyright and distribution notice
-
Select
Installto start installation of pfSense software.
Figure 18. pfSense software installation Welcome menu
-
Select a keymap, or continue with the default keymap settings.
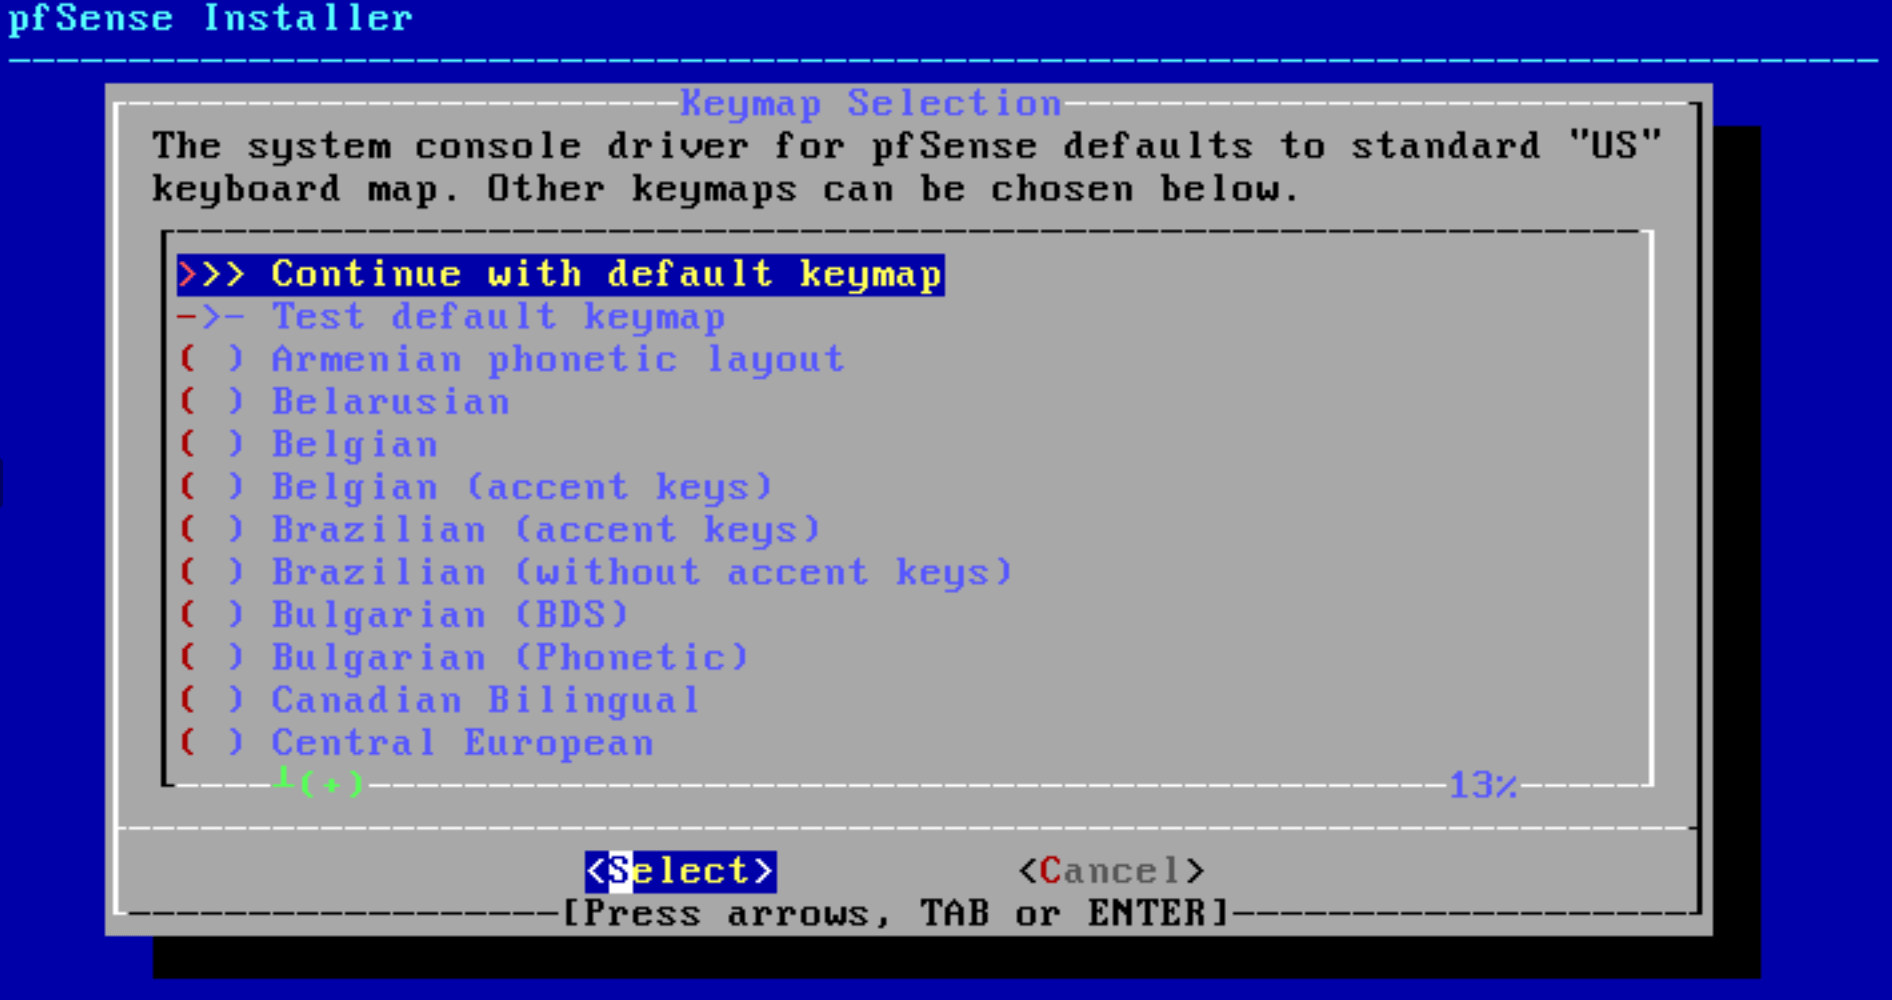
Figure 19. pfSense software installation Keymap Selection menu
-
Select
Auto (ZFS) Guided Root-on-ZFSon the partitioning menu and then pressOK.
Figure 20. pfSense software installation Partitioning menu
-
Select
Installby accepting the default ZFS settings to proceed with the installation.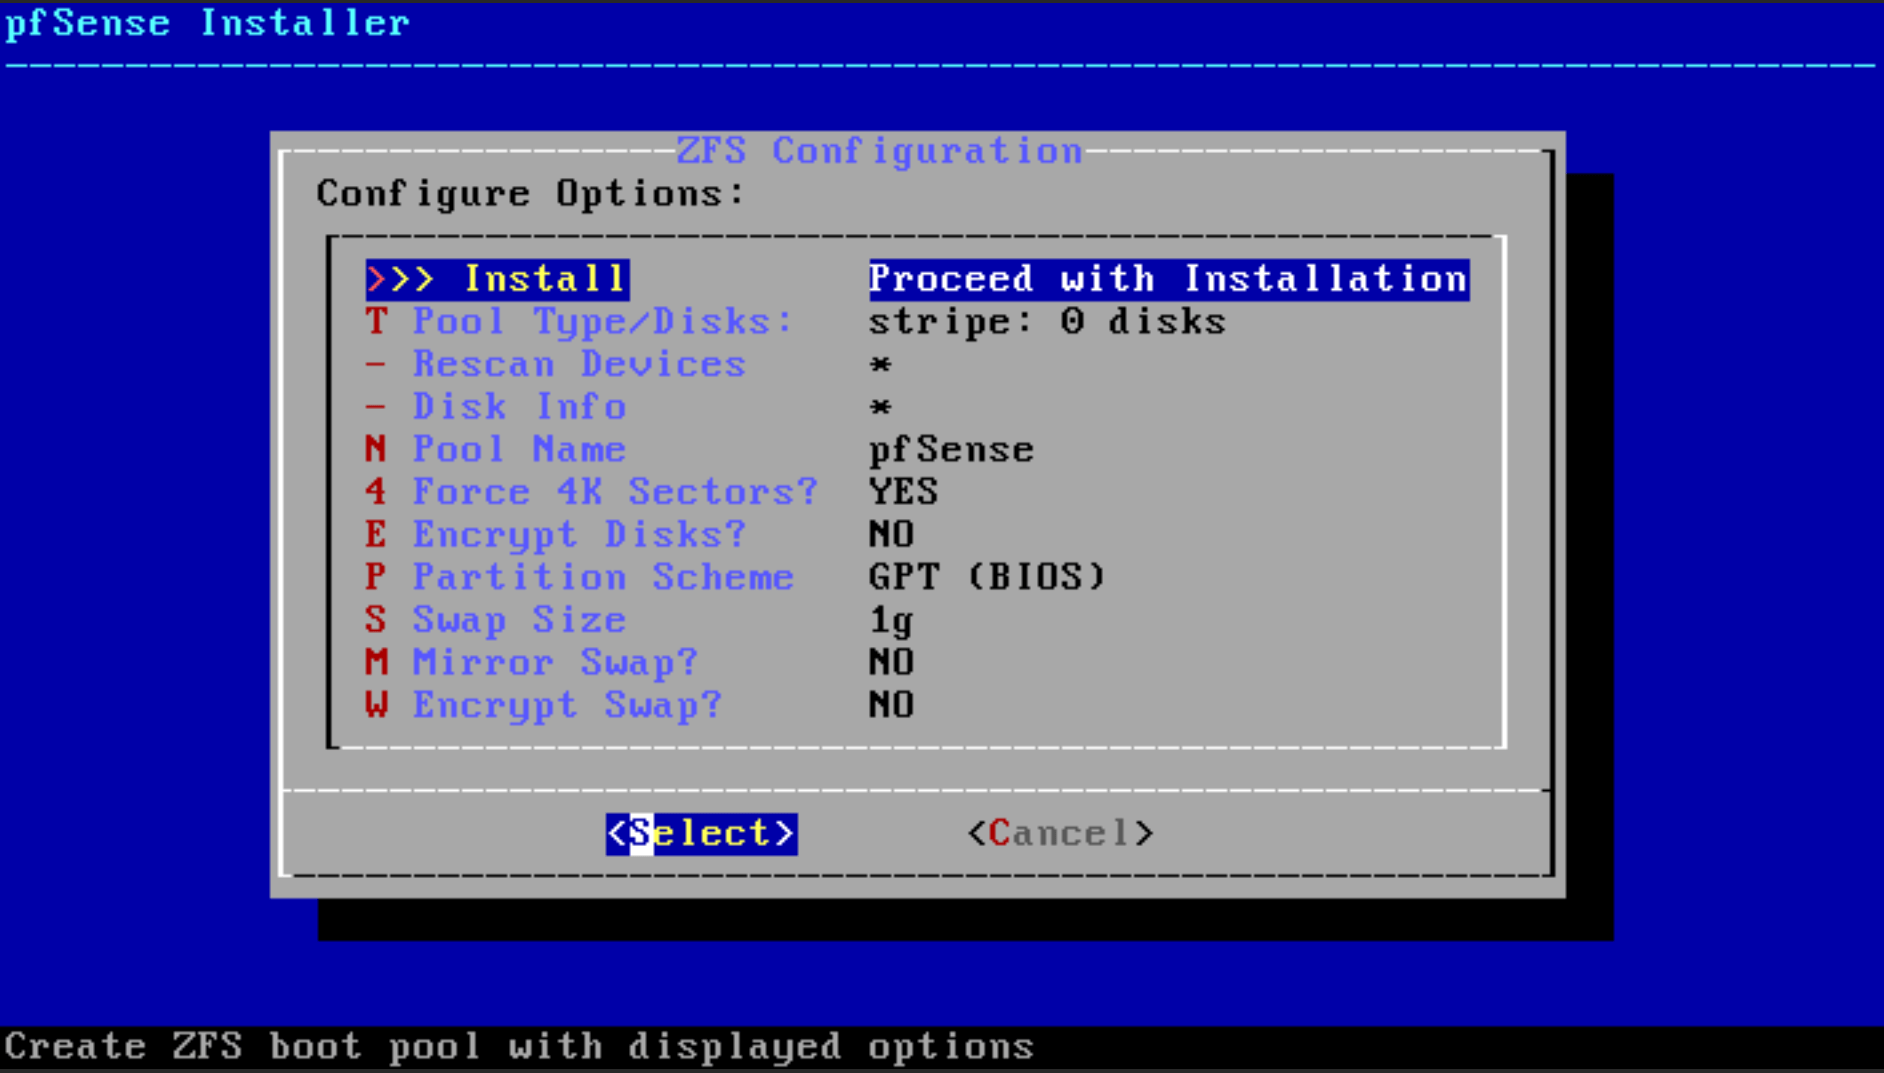
Figure 21. pfSense software installation ZFS Configuration menu
-
You may select
stripe - no redundancyoption as a Virtual Device Type in ZFS Configuration and then pressOK. If you need to use redundancy, you may select other options depending on your needs.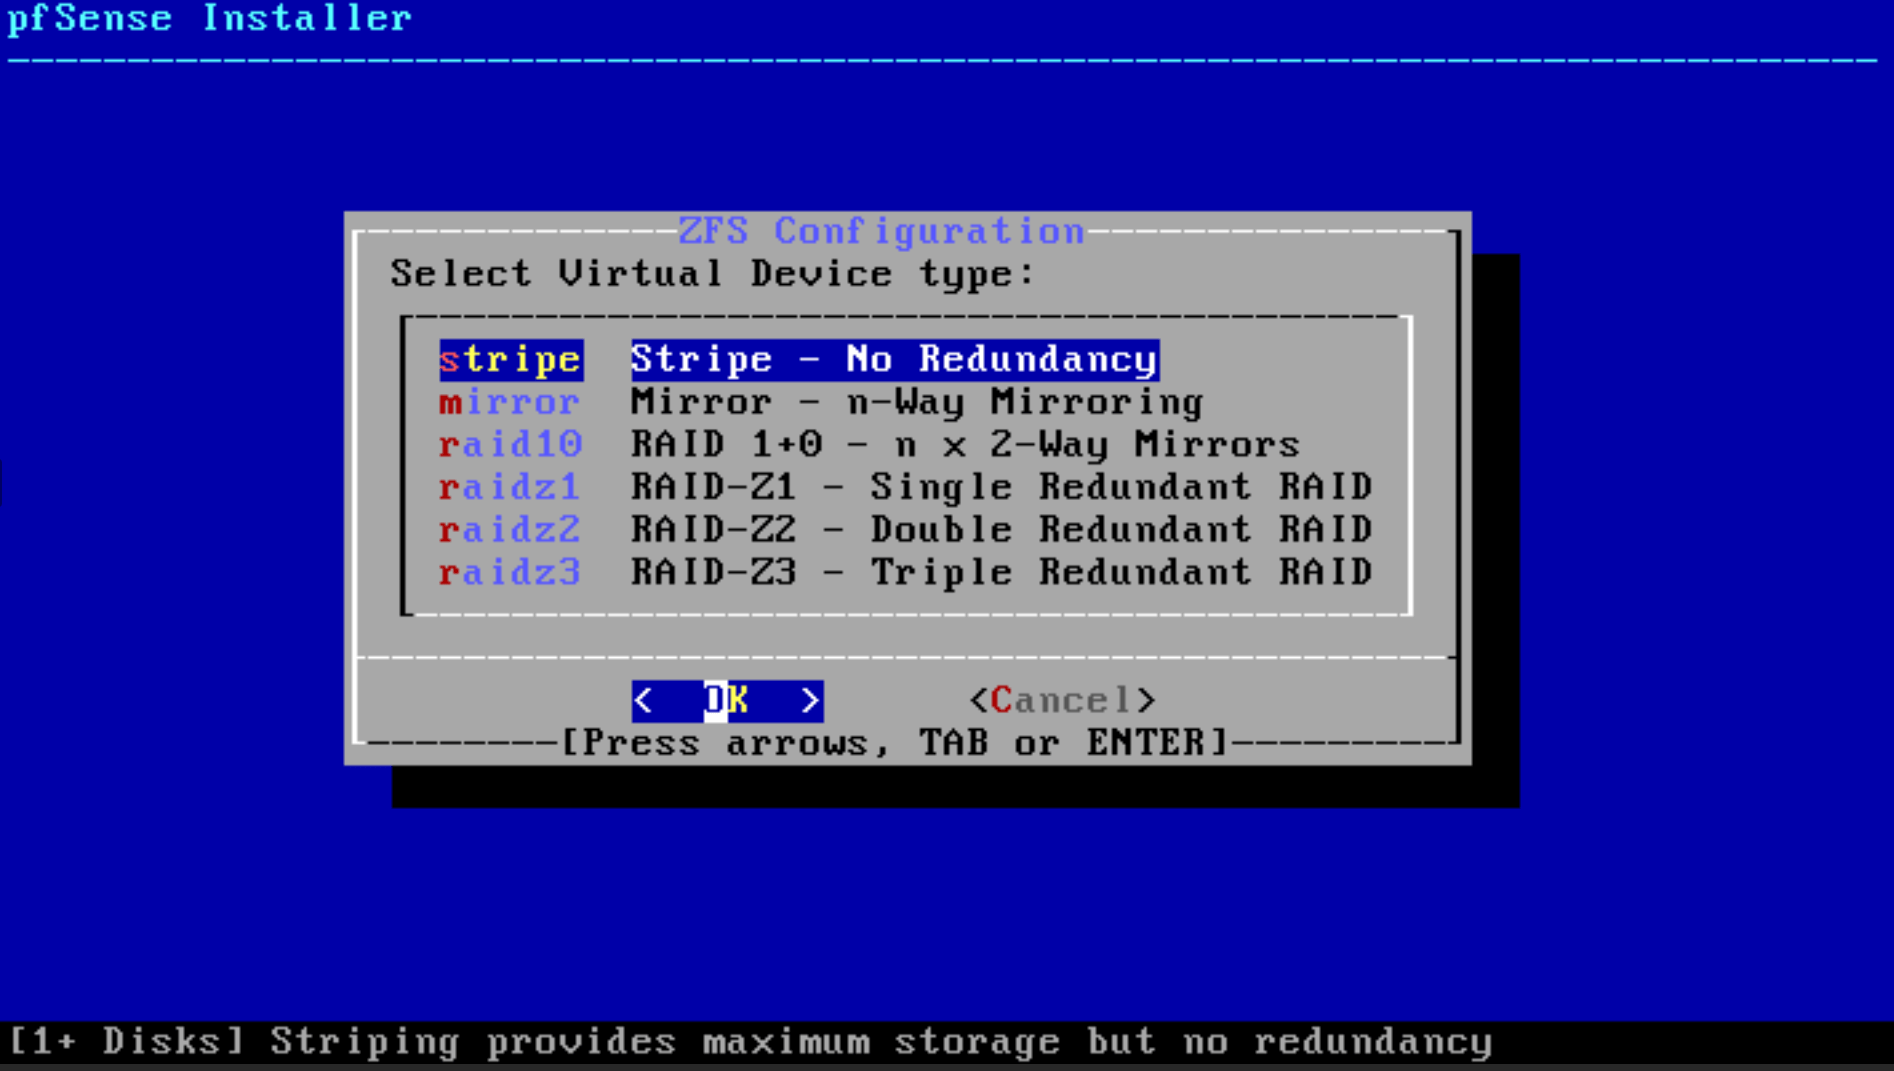
Figure 22. pfSense software installation Virtual Device Type menu
-
Press the space bar to select the hard disk and click
OK.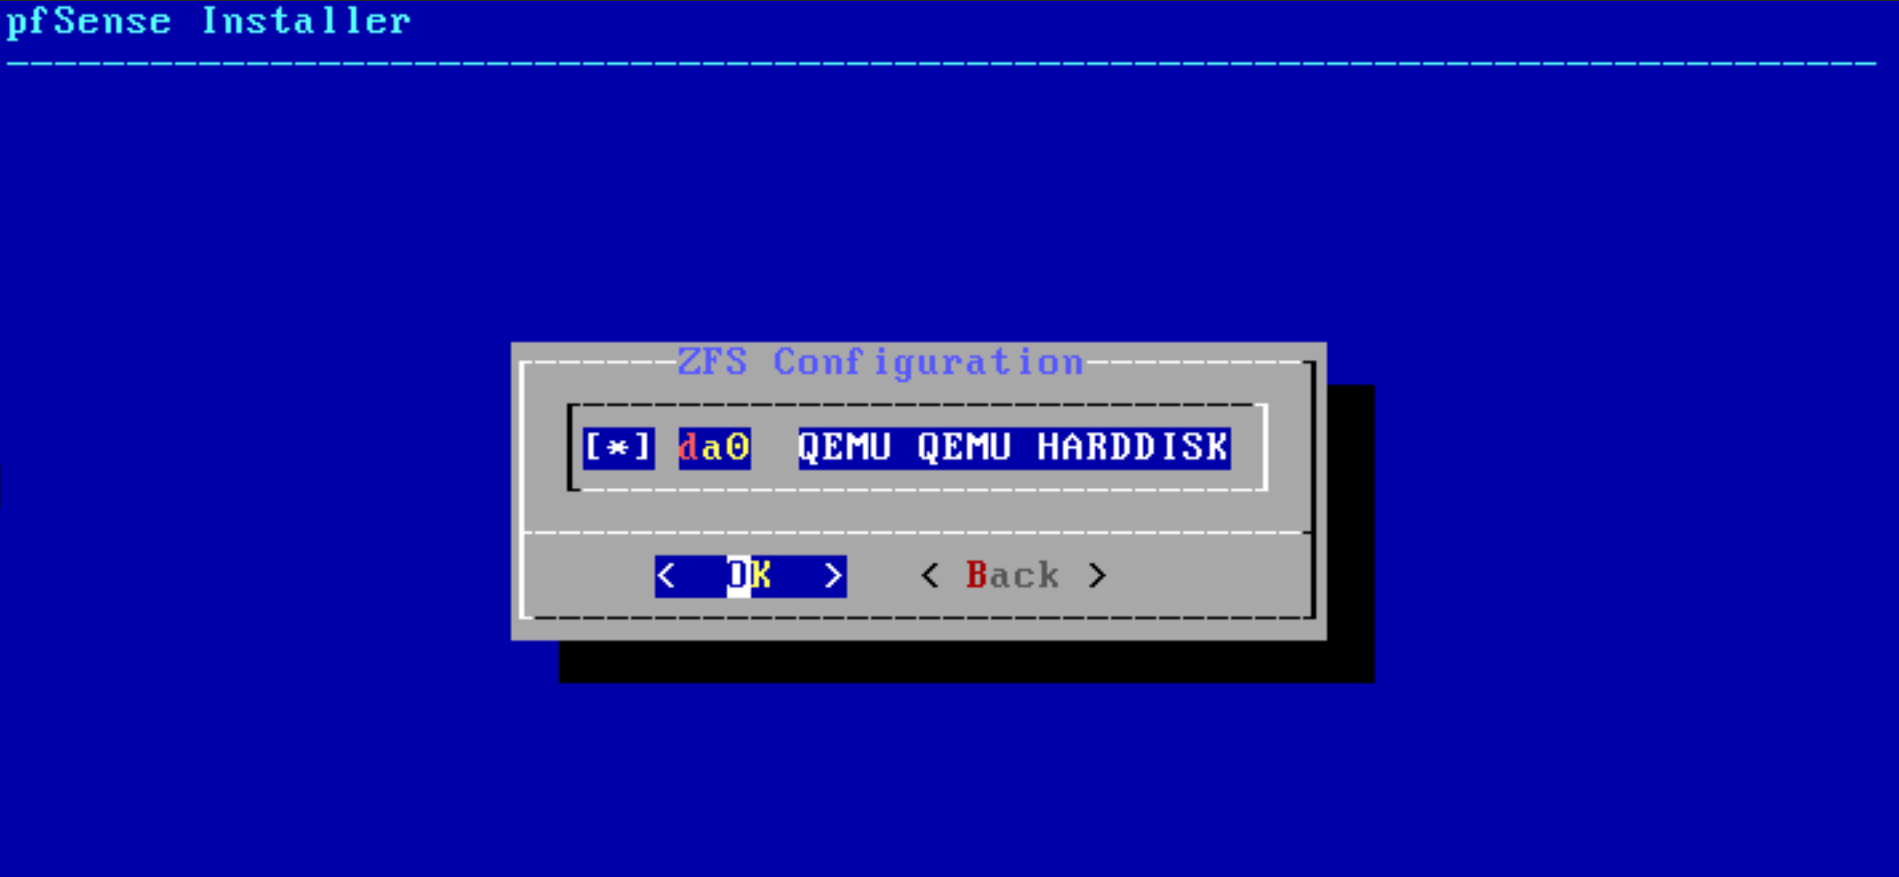
Figure 23. pfSense software installation Harddisk selection menu
-
Press
yto confirm the hard disk destroy for proceeding with the installation. Your pfSense operating system will be installed now.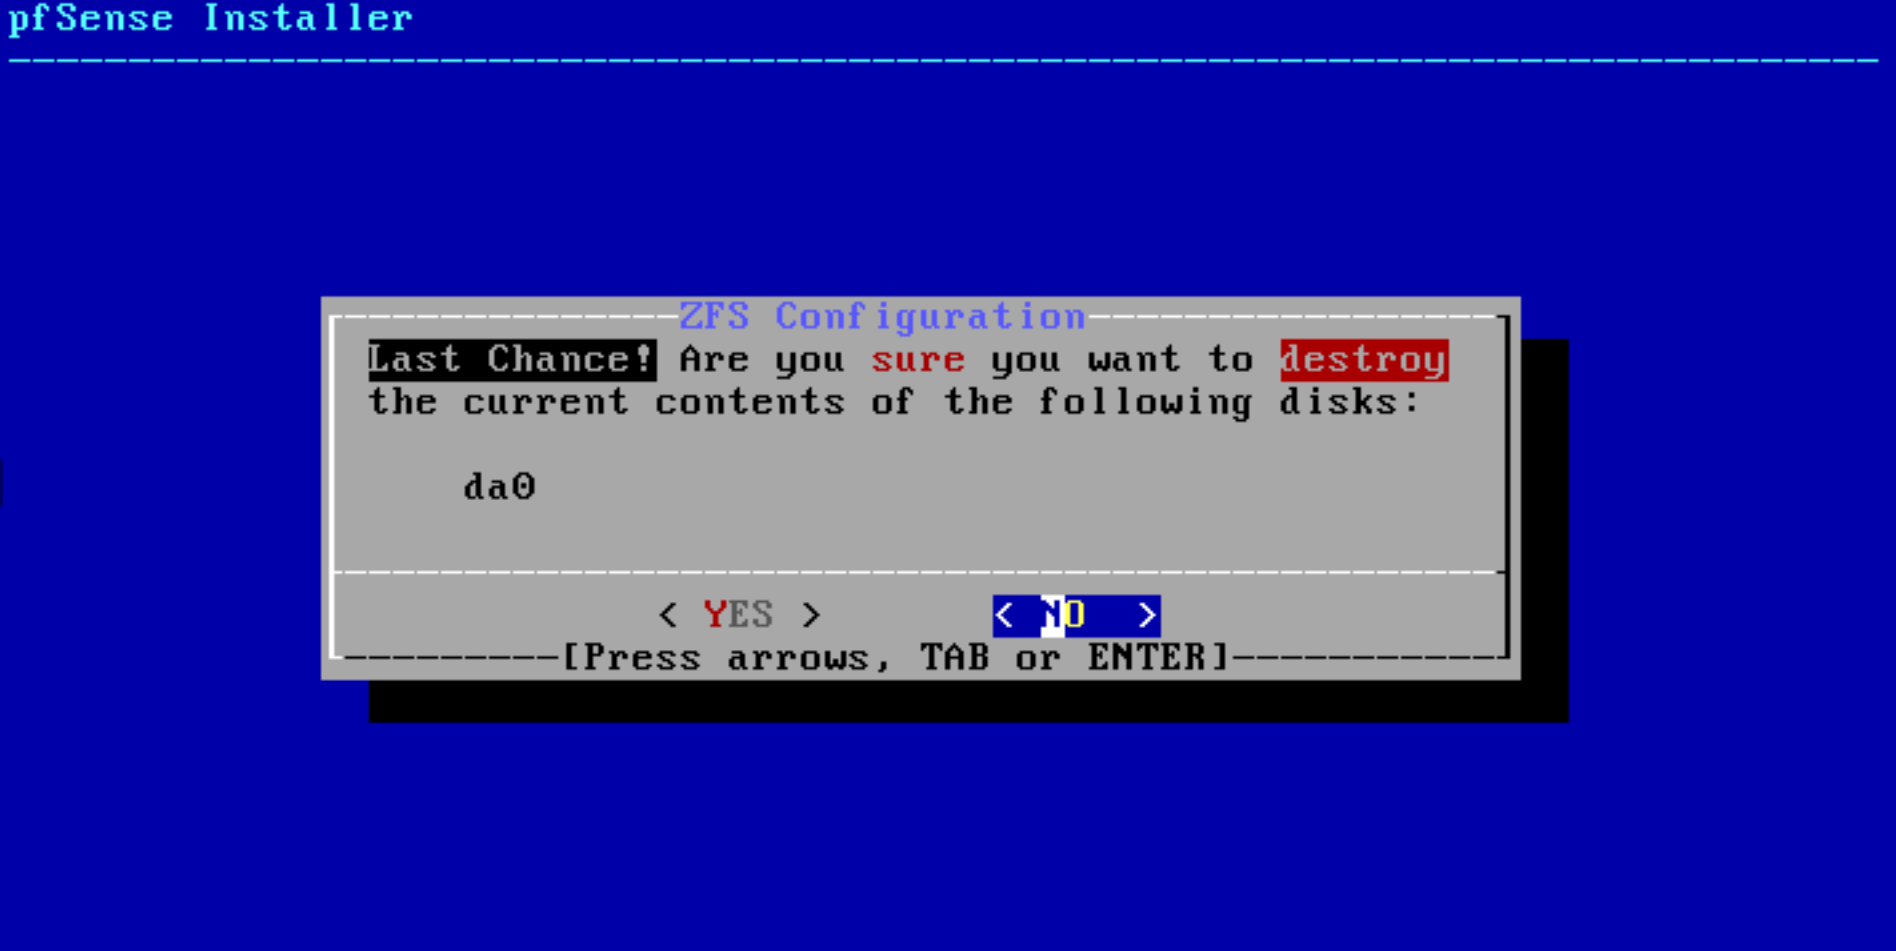
Figure 24. Confirming hard disk destroy for pfSense installation
-
Select
Noin the manual configuration menu.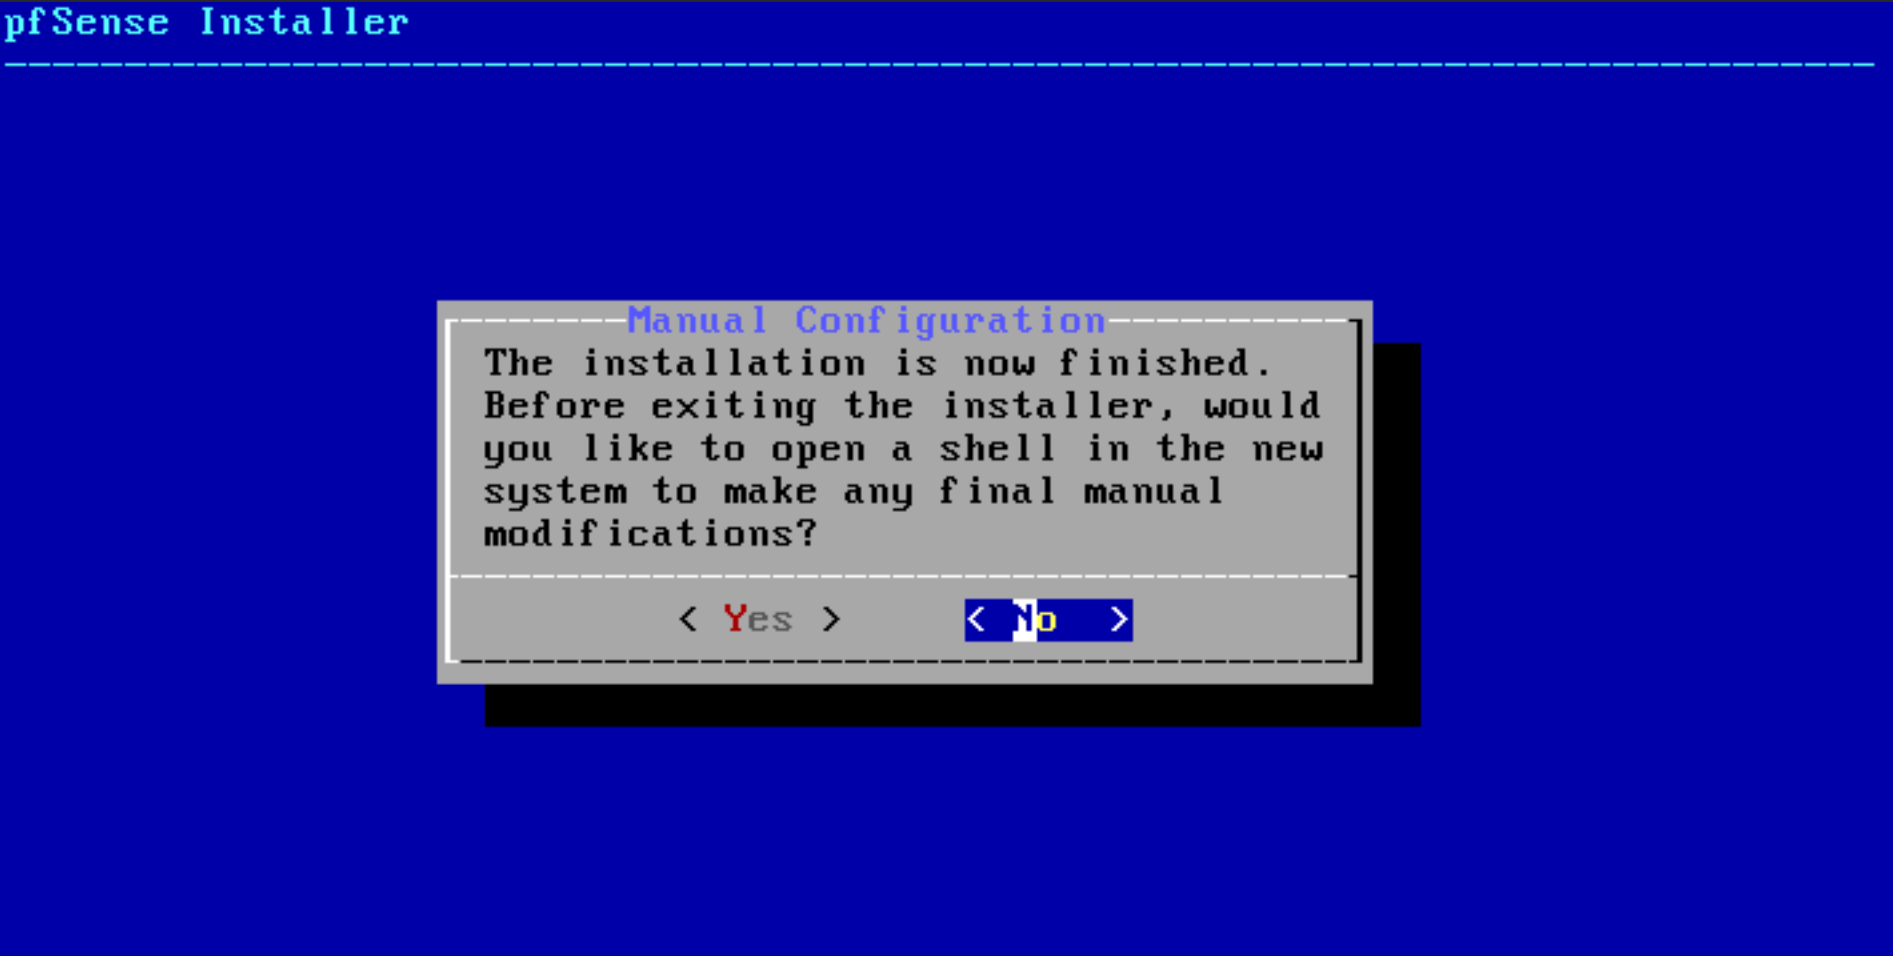
Figure 25. pfSense installation Manual Configuration menu
-
Your pfSense Software installation is completed. Press
Reboot.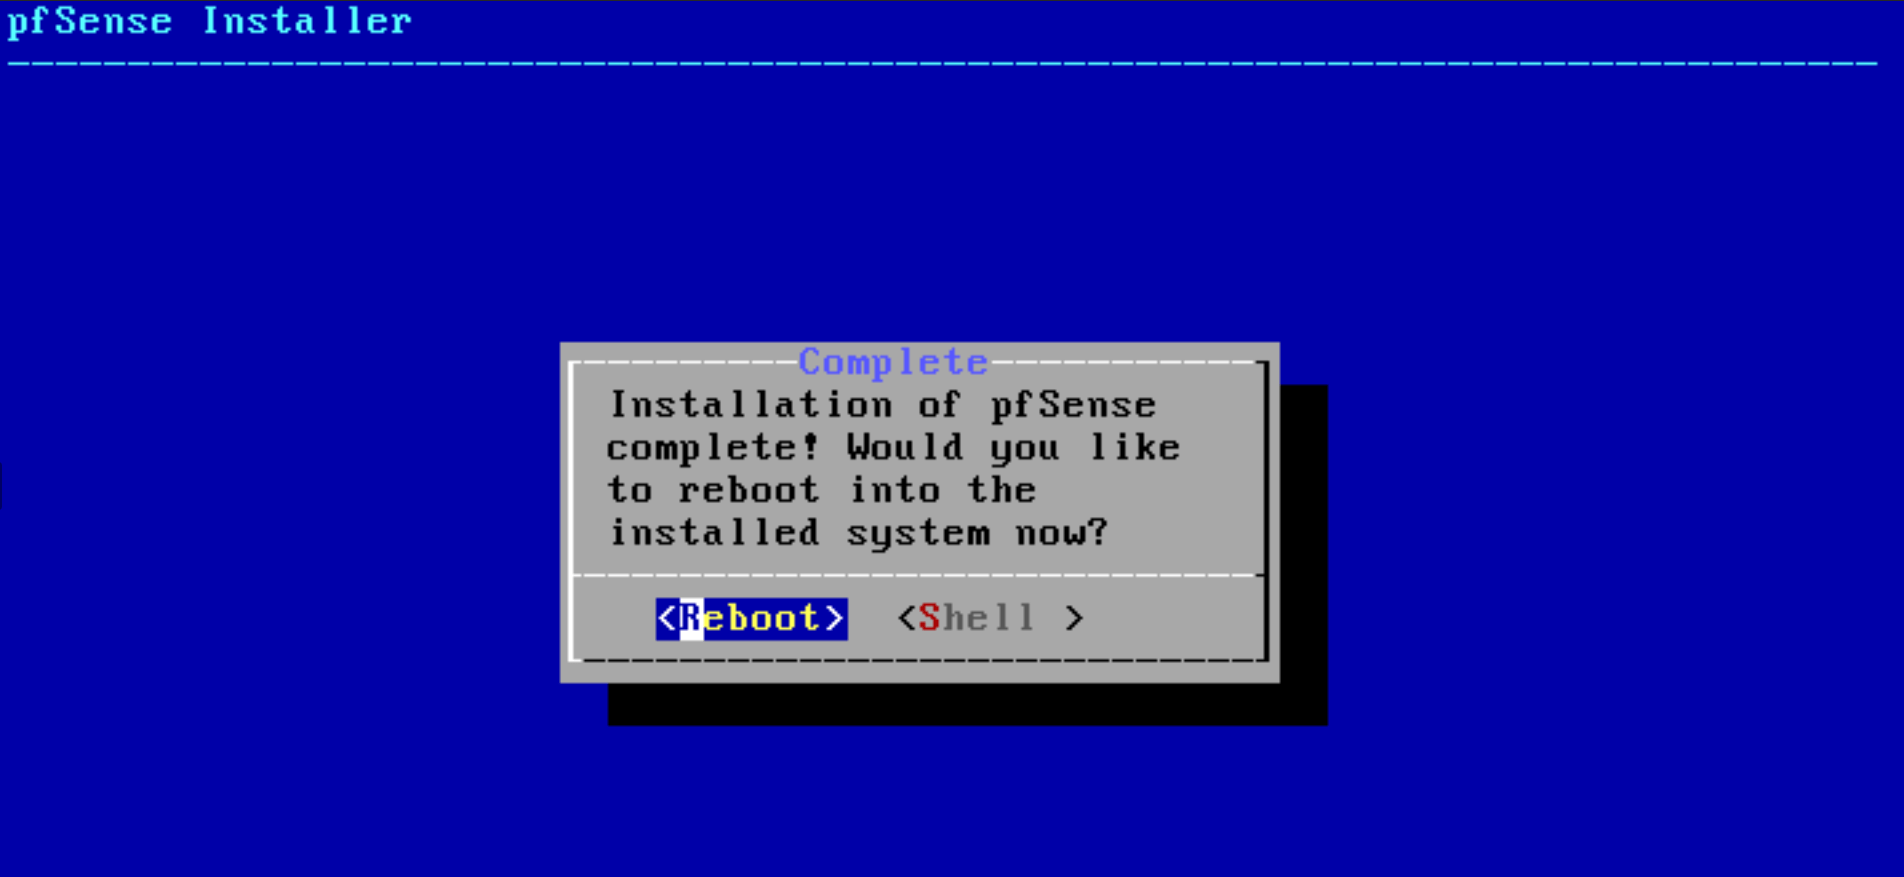
Figure 26. Rebooting pfSense node
Network Device Assignments for pfSense Firewall
By default, the system will be configured with 2 interfaces LAN & WAN. The first network port found will be configured as LAN and the second will be WAN. However, pfSense may not assign the network interface cards to the proper networks correctly. Then, you must assign the network devices to the proper networks manually.
For example, in our installation, pfSense assigned the vtnet0 device to the LAN, and vtnet1 device to the WAN. But, the correct configuration is vice versa. While the vtnet0 device should be assigned to the WAN, vtnet1 device should be assigned to the LAN. Let's correct the network device configuration for our pfSense.
-
VLAN configuration. Wizard will ask for the VLAN configuration. You may also configure VLAN settings on OPNsense GUI later. Since we will not configure any VLAN now, Press
nto continue.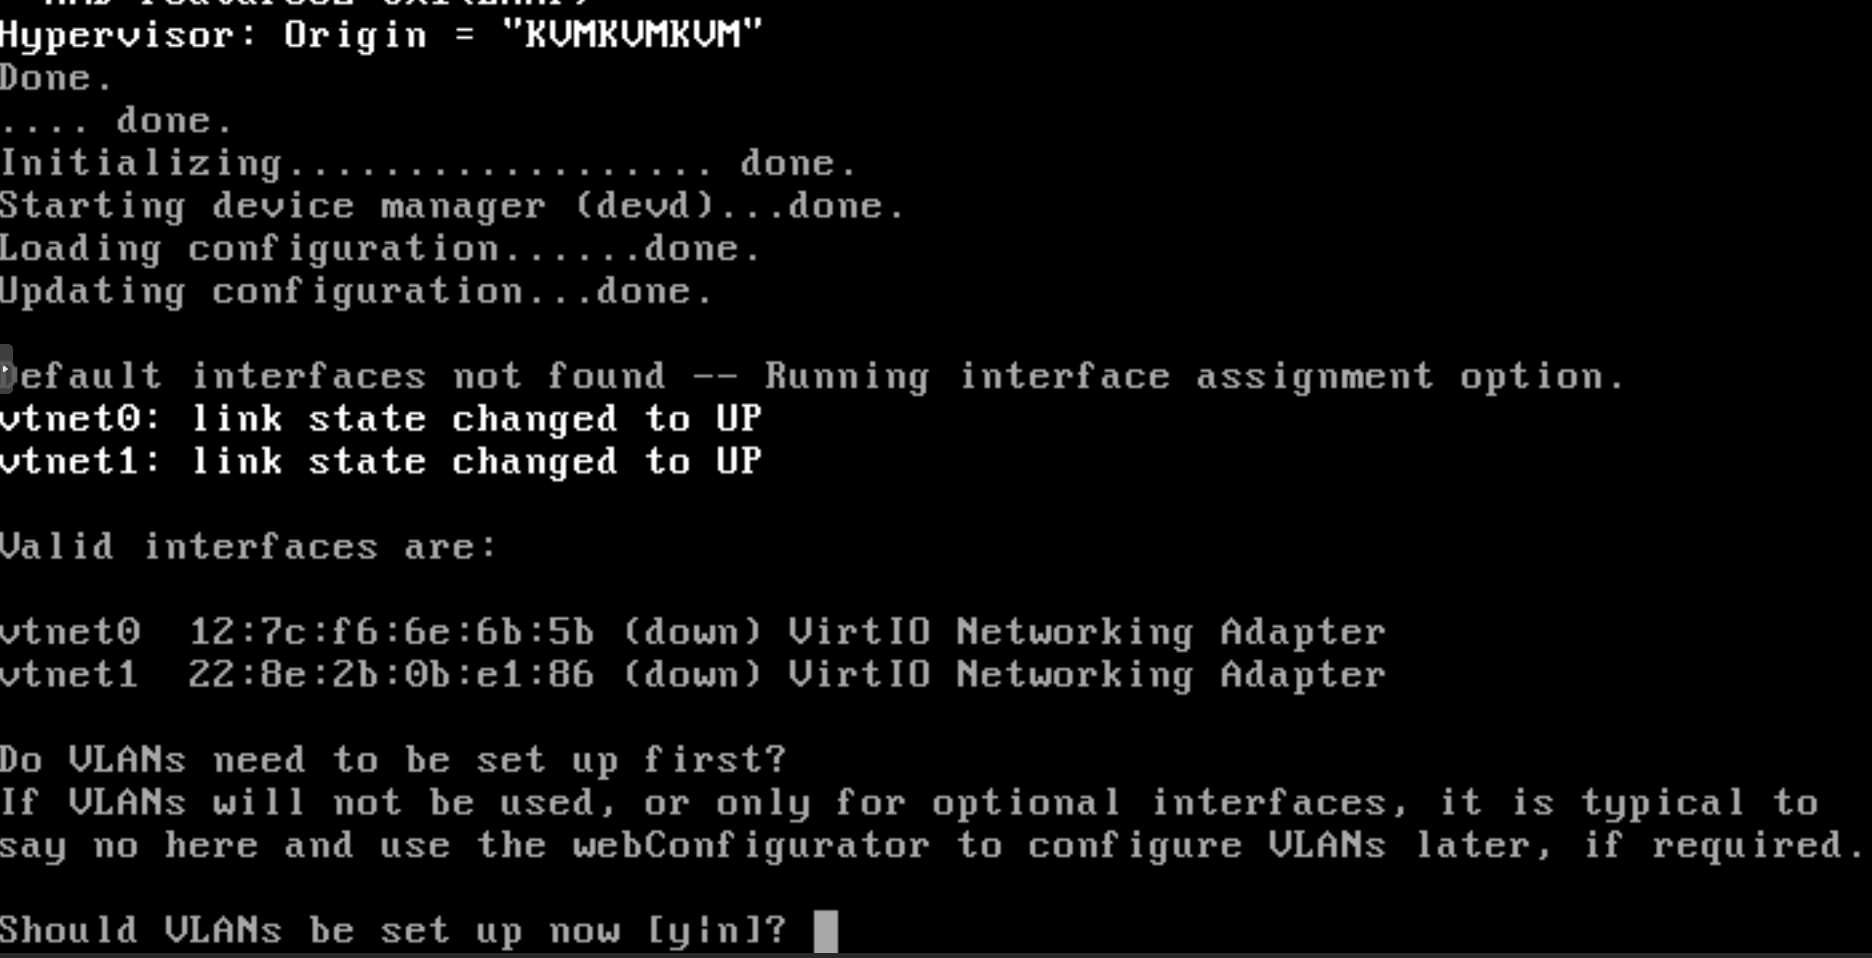
Figure 27. VLAN configuration for network interfaces of pfSense on CLI
-
Setting WAN interface: Wizard will ask for the WAN interface name. Enter the name of the WAN interface and then press enter. For example, in our OPNsense system, the WAN interface name is
vtnet0. -
Setting LAN interface: Wizard will ask for the LAN interface name. Enter the name of the LAN interface and then press enter. For example, in our pfSense system, the interface name is
vtnet1. -
Interface Confirmation: Interface assignments will be listed for verification. Type
yto confirm the interface assignment on pfSense firewall.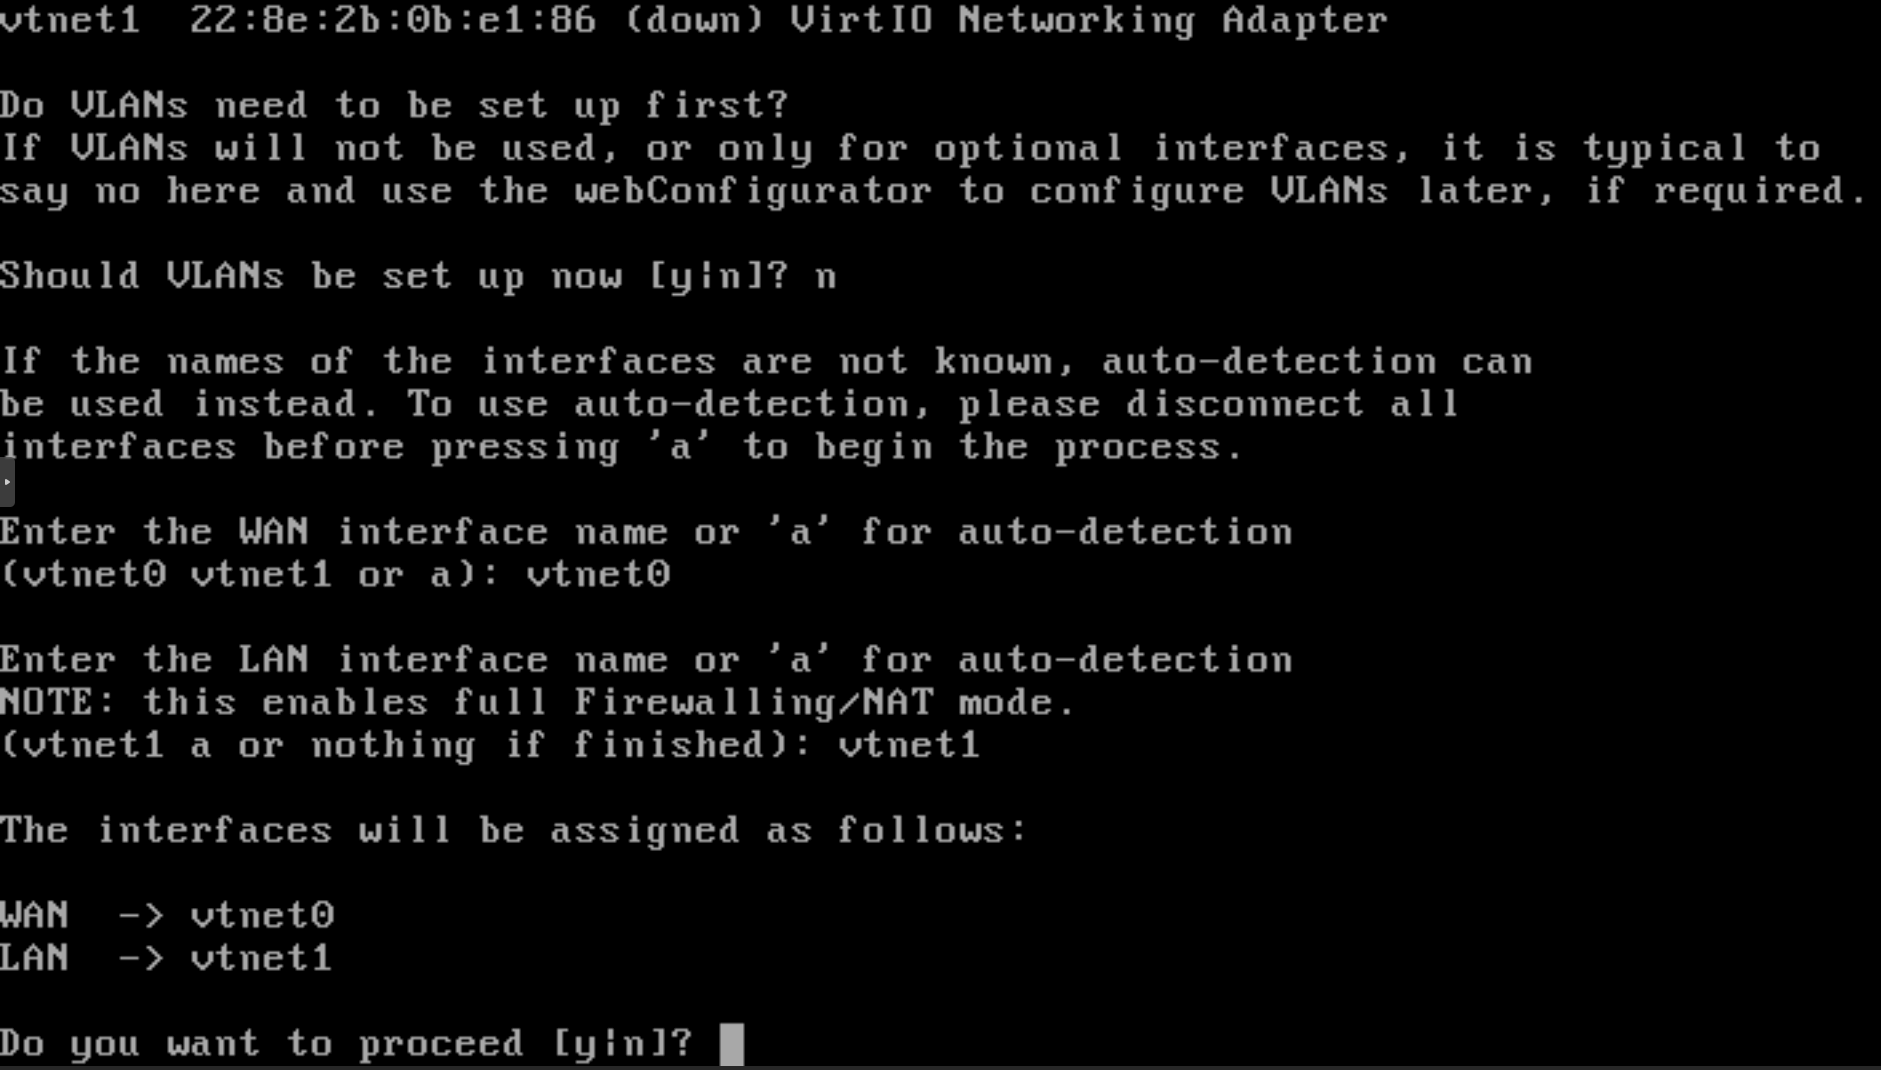
Figure 28. WAN & LAN interface assignment on pfSense CLI
All of the network interfaces on your pfSense firewall are assigned to the proper networks.
IP Address Settings for pfSense Firewall
After assigning the network interfaces to the corresponding networks (WAN and LAN), you should configure the IP address for the network interfaces of your pfSense firewall.
In our pfSense firewall, we will configure the WAN and LAN interfaces as given below.
| Network | Interface name | IP assignment method | IP address |
|---|---|---|---|
| WAN | vtnet0 | Automatic via DHCP server | - |
| LAN | vtnet1 | static | 10.1.1.1/24 |
We will enable a DHCP server for LAN on our pfSense firewall. The DHCP server assigns the IP address in the range 10.1.1.11-200/24 for our clients in LAN.
For IP address settings of the pfSense firewall you can follow the next steps:
-
Select
2in the pfSense options menu toSet interface IP address.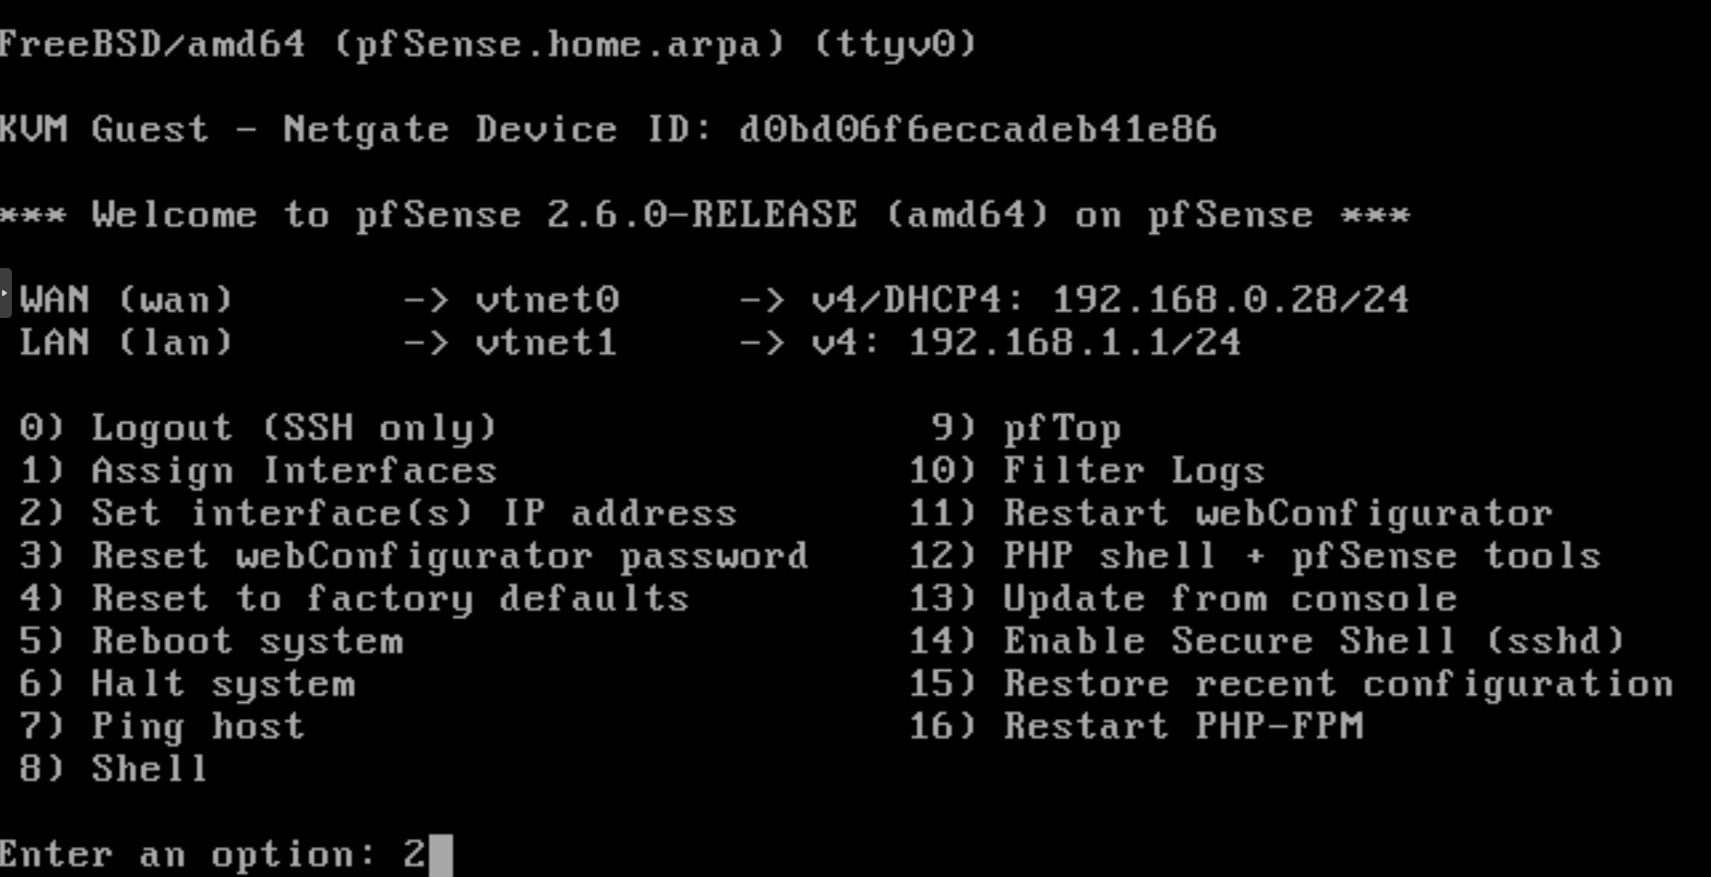
Figure 29. Setting IP address for network interface of pfSense on CLI
-
Selecting interface to configure: Available interfaces will be displayed. Press
1to configure the LAN interface.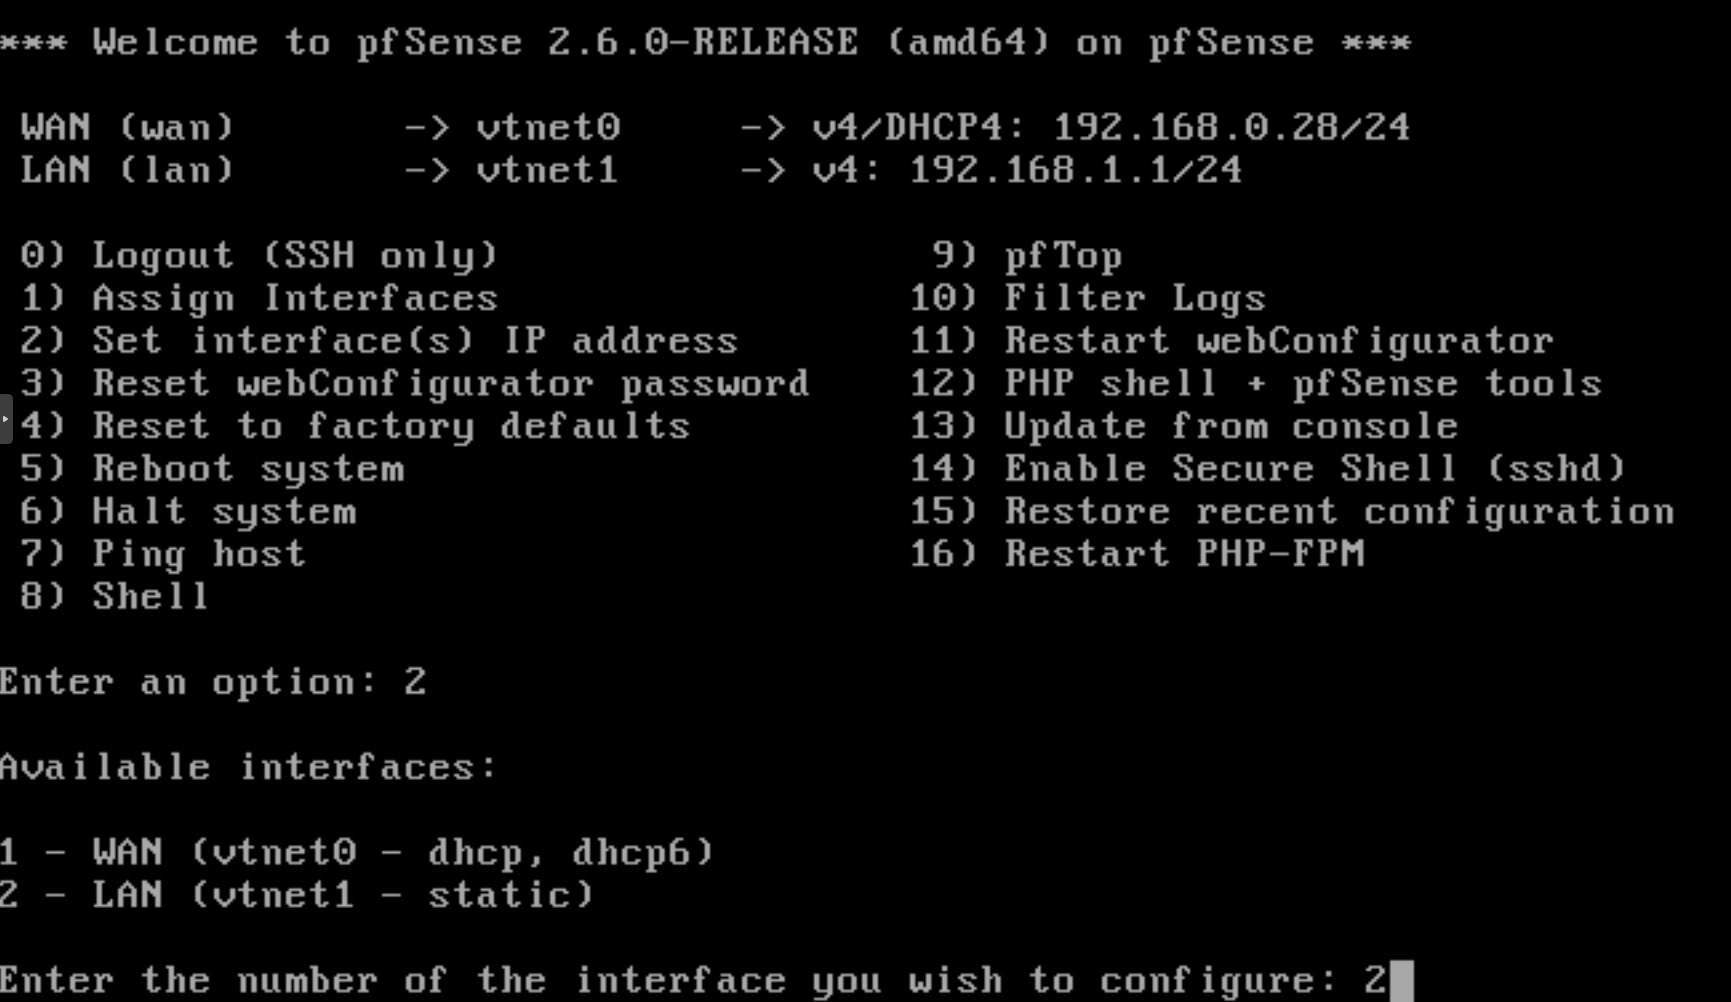
Figure 30. Selecting LAN interface to configure on pfSense CLI
-
Setting IP address: Enter the IPv4 address for the LAN interface. For example,
10.1.1.1.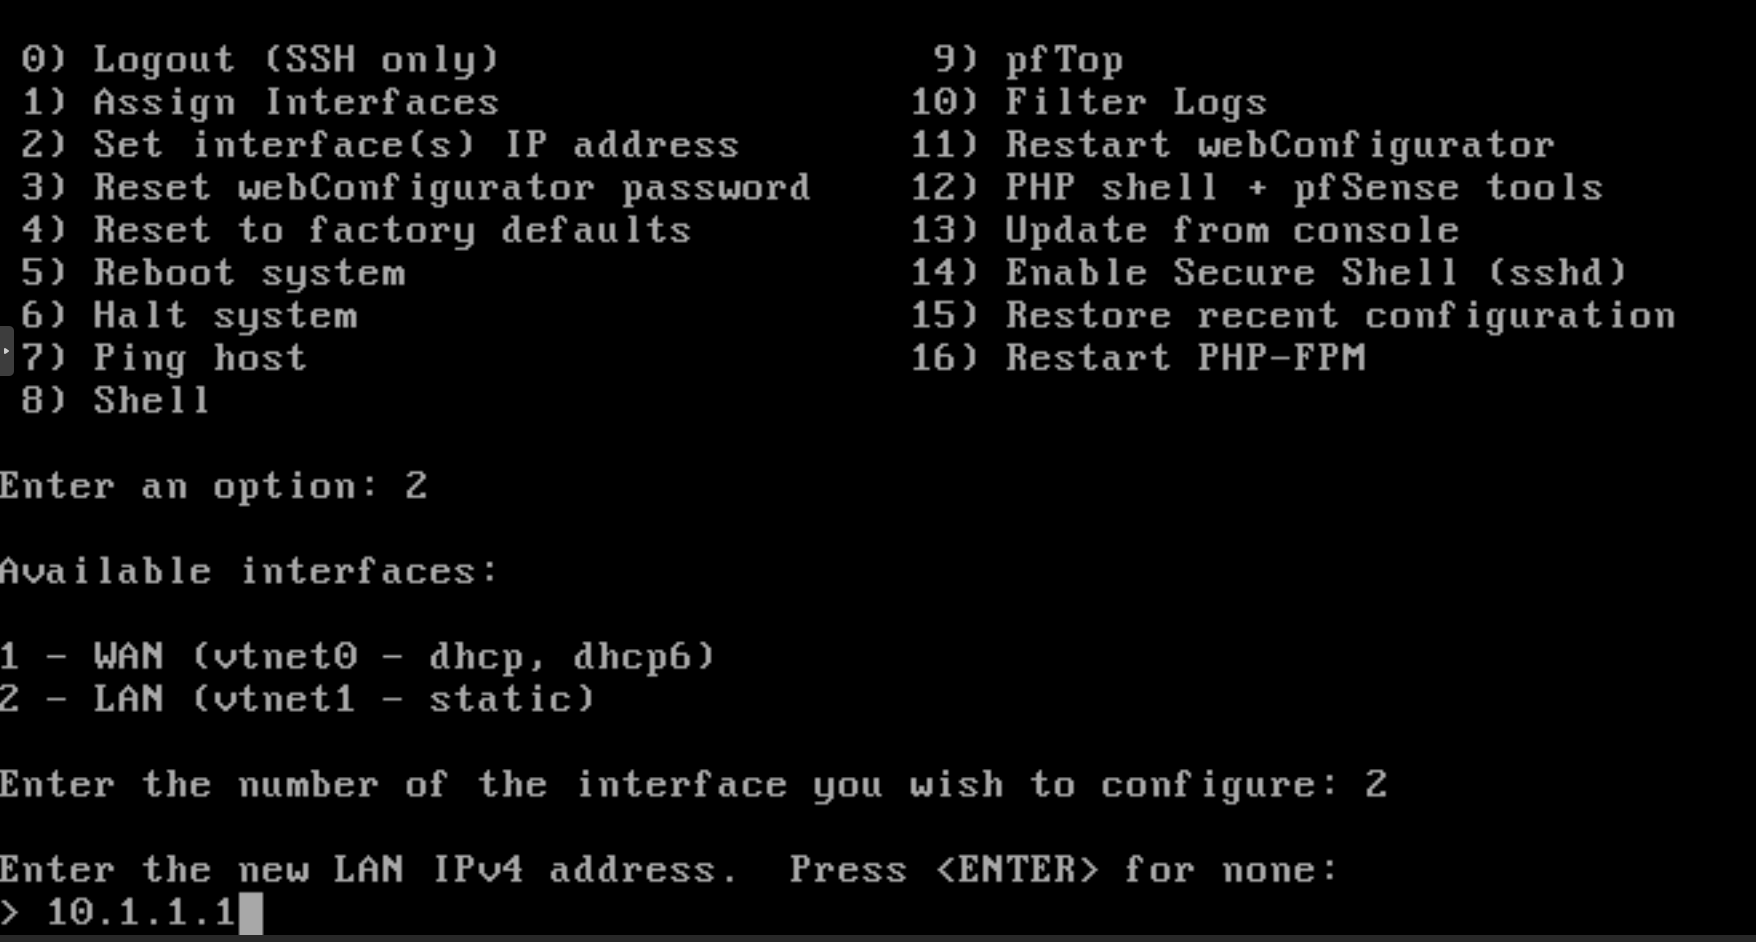
Figure 31. Setting IP address for LAN interface on pfSense CLI
-
Setting subnet mask: Enter the subnet mask for the LAN interface. For example,
24.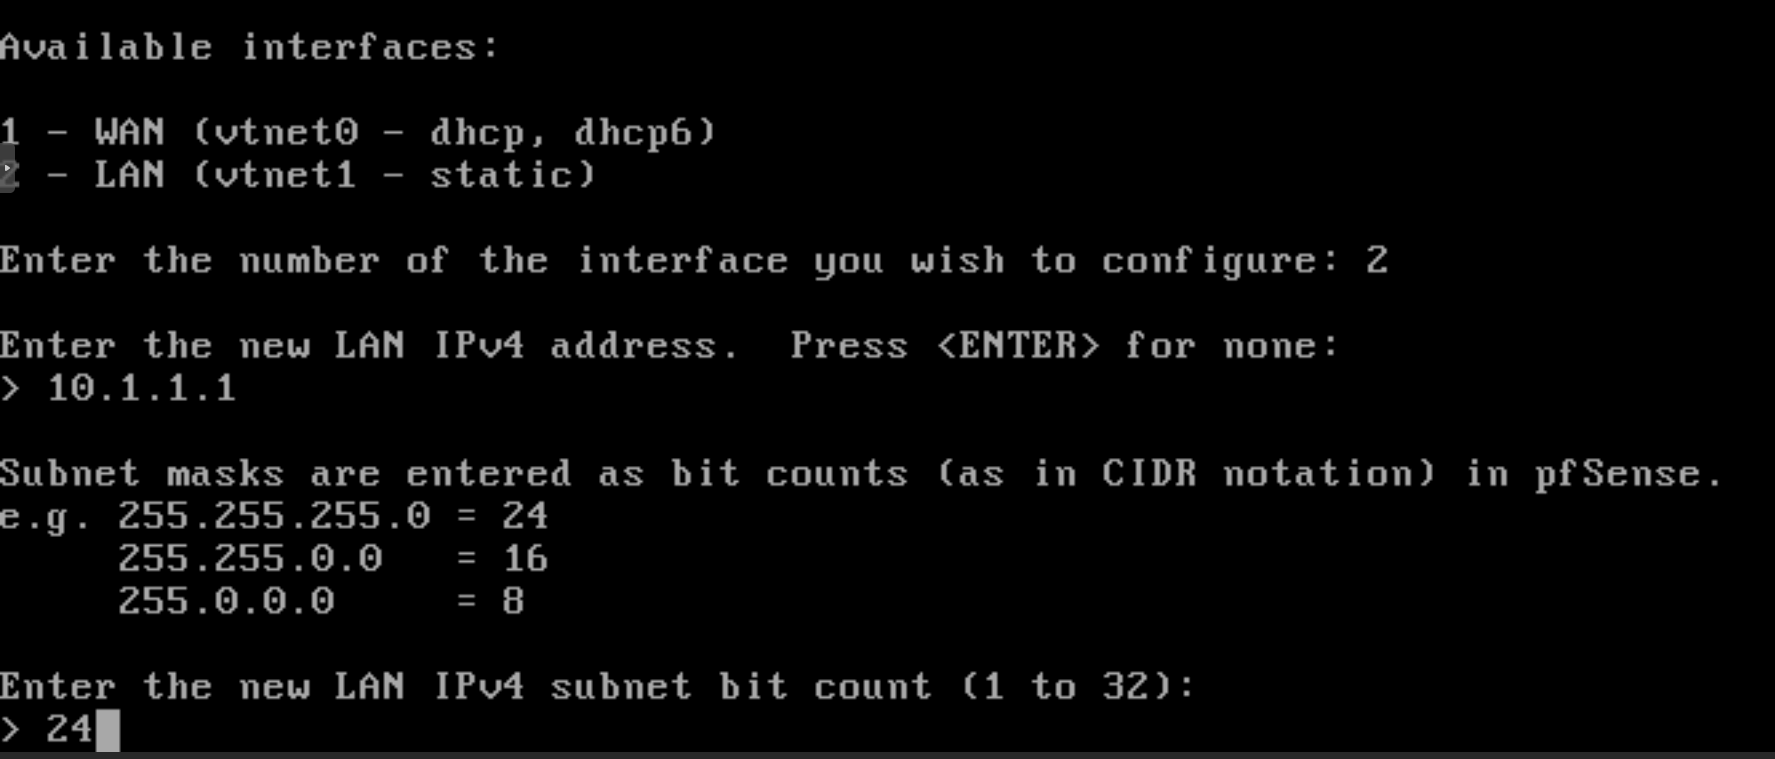
Figure 32. Setting subnet mask for LAN interface on pfSense CLI
-
Setting gateway: Press
enter. -
Setting new IPv6 addres: You may press
n.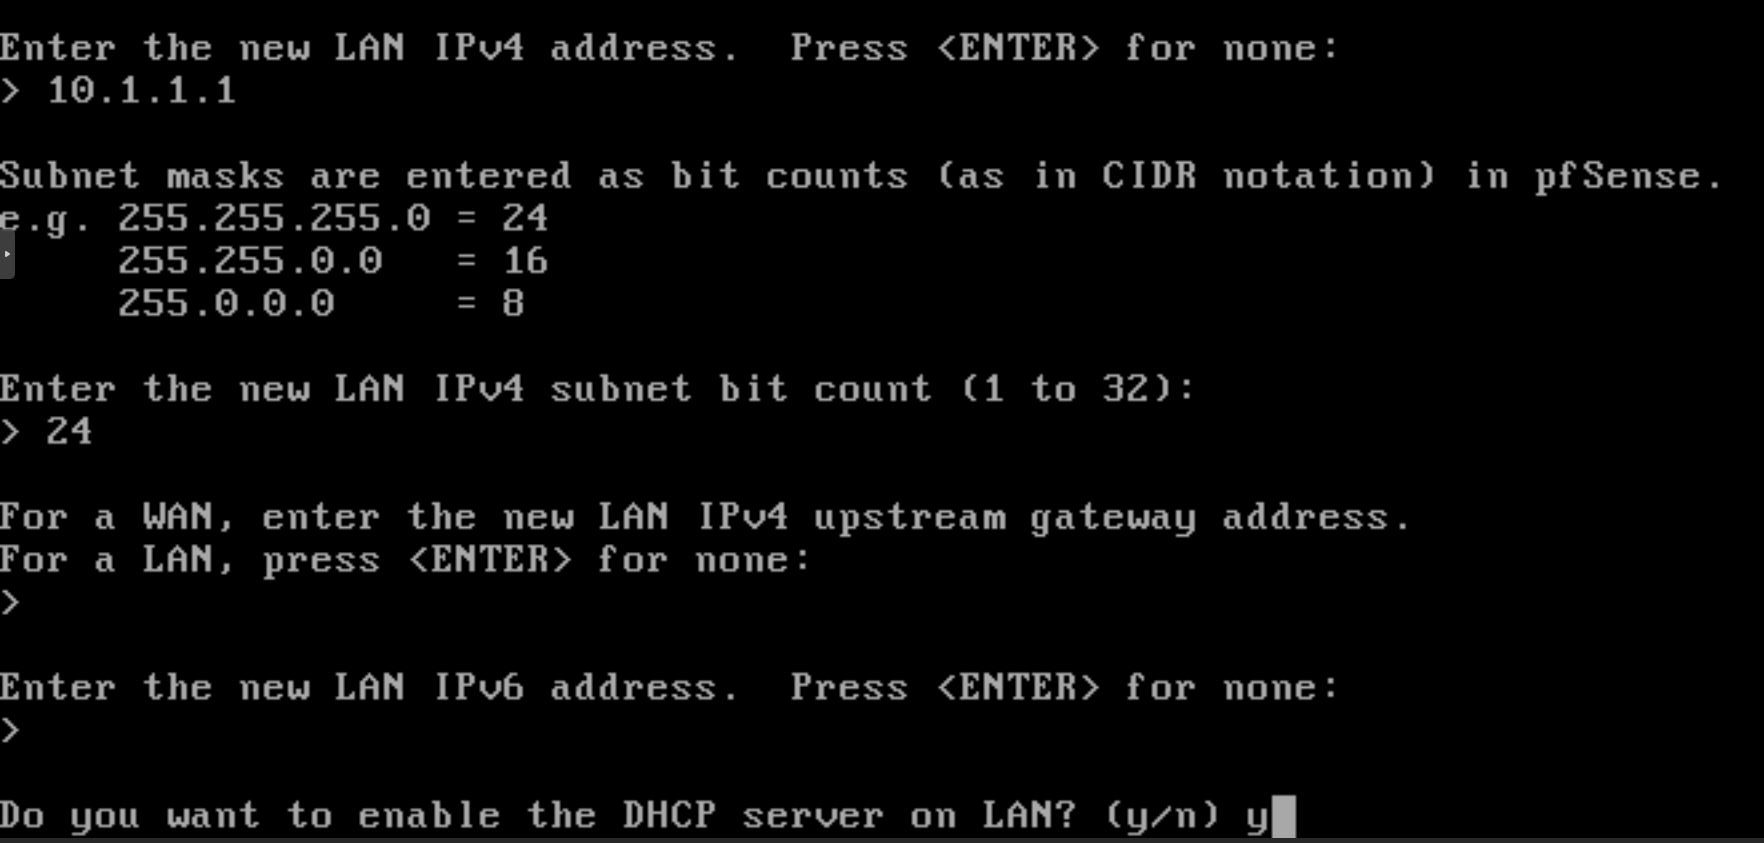
Figure 33. Setting gateway/IPv6 for LAN interface and enable DHCP
-
Enable DHCP server: To enable DHCP server on your LAN, press
y. -
Setting start address of the IPv4 client address range: Enter the start address of the IPv4 client address range such as 10.1.1.11.
-
Setting end address of the IPv4 client address range: Enter the end address of the IPv4 client address range such as 10.1.1.200.

Figure 34. Configuring DHCP server on LAN interface of pfSense
-
Setting WebConfigurator Protocol: Press
nto access the pfSense GUI via HTTPS protocol which is secure. If you wish to use the web interface with HTTP you may pressy. You may now access your pfSense Web UI by opening[https://10.1.1.1/](https://10.1.1.1/)URL via your web browser
Figure 35. HTTPS setting for the pfSense web GUI
-
Press enter to return the pfSense boot menu.
Default username and password on pfSense software is given below:
- Default username: admin
- Default password: pfsense
Updating pfSense Firewall on CLI
After completing the pfSense firewall installation on Proxmox VE, you should update your firewall. You can easily update the pfSense system by selecting 13) Update from console in the options menu on CLI.

Figure 36. Updating pfSense firewall from the console
Beware that some critical updates require your system to reboot.
Accessing the pfSense Web GUI
Congratulations! You have successfully completed the installation of the pfSense firewall. You can access the web GUI of your pfSense firewall from a client in LAN using a browser. https://10.1.1.1 .
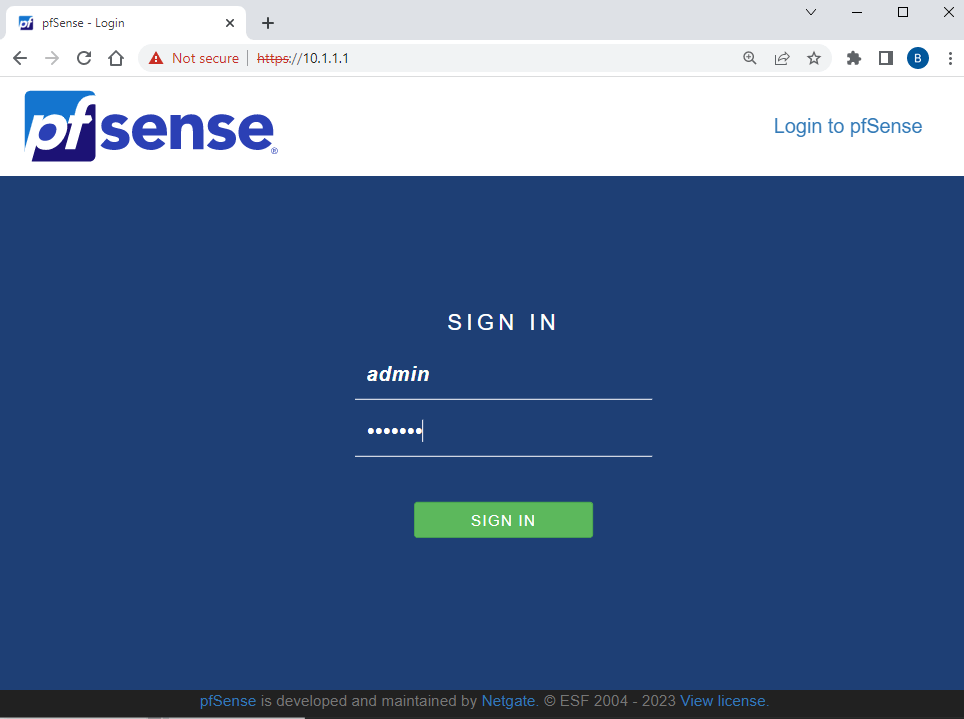
Figure 37. Login pfSsense GUI
For security reasons ssh is disabled by default and the console access is password protected on the pfSense firewall.
Initial Configuration of the pfSense Firewall
To complete the initial configuration of your pfSense firewall, you can complete the wizard:
-
Click the
Nextbutton.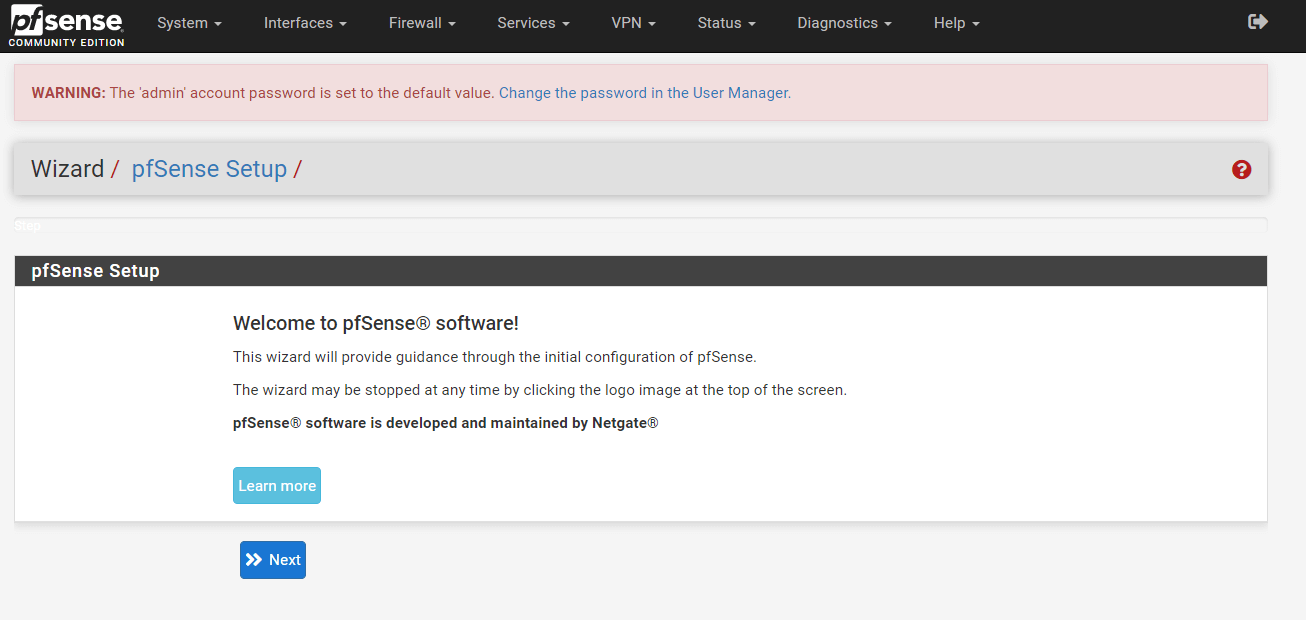
Figure 38. pfSense Setup Welcome page
-
Click
Next. You may also clickLearn morebutton to get detailed information about Netgate Global Support.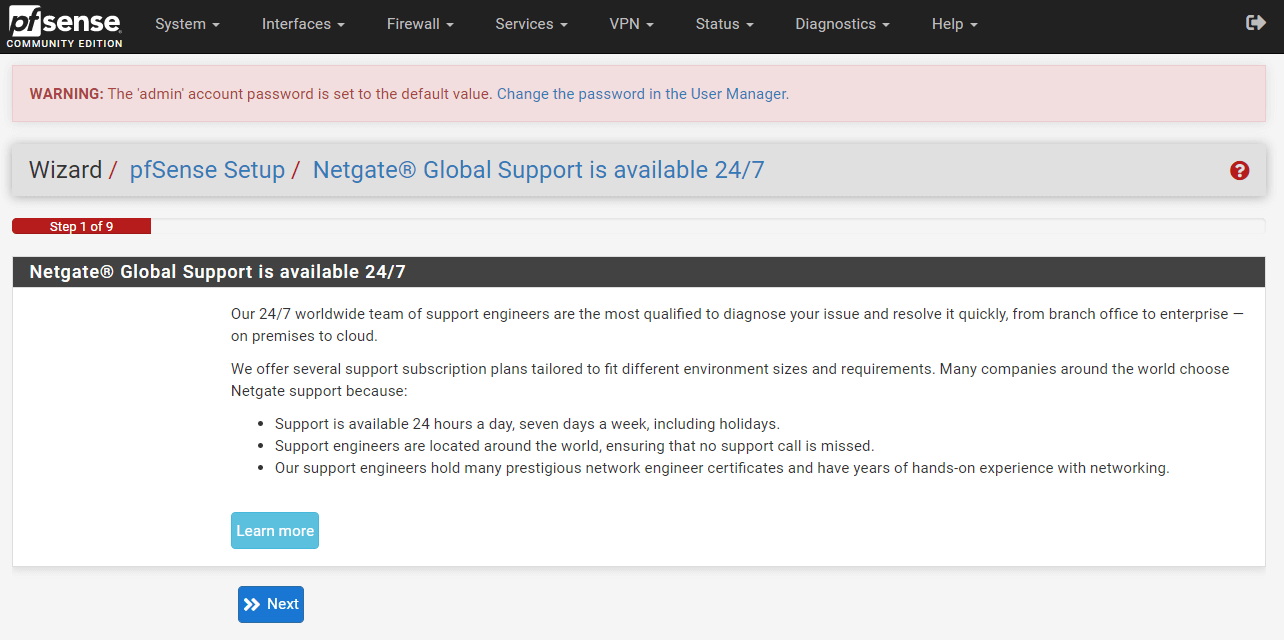
Figure 39. pfSense Setup Netgate Global Support page
-
You may set your hostname and domain name for your device. You may leave the Override DNS option selected. This will enable the pfSense firewall to obtain DNS information from the ISP over the WAN interface. Then, click the Next button.
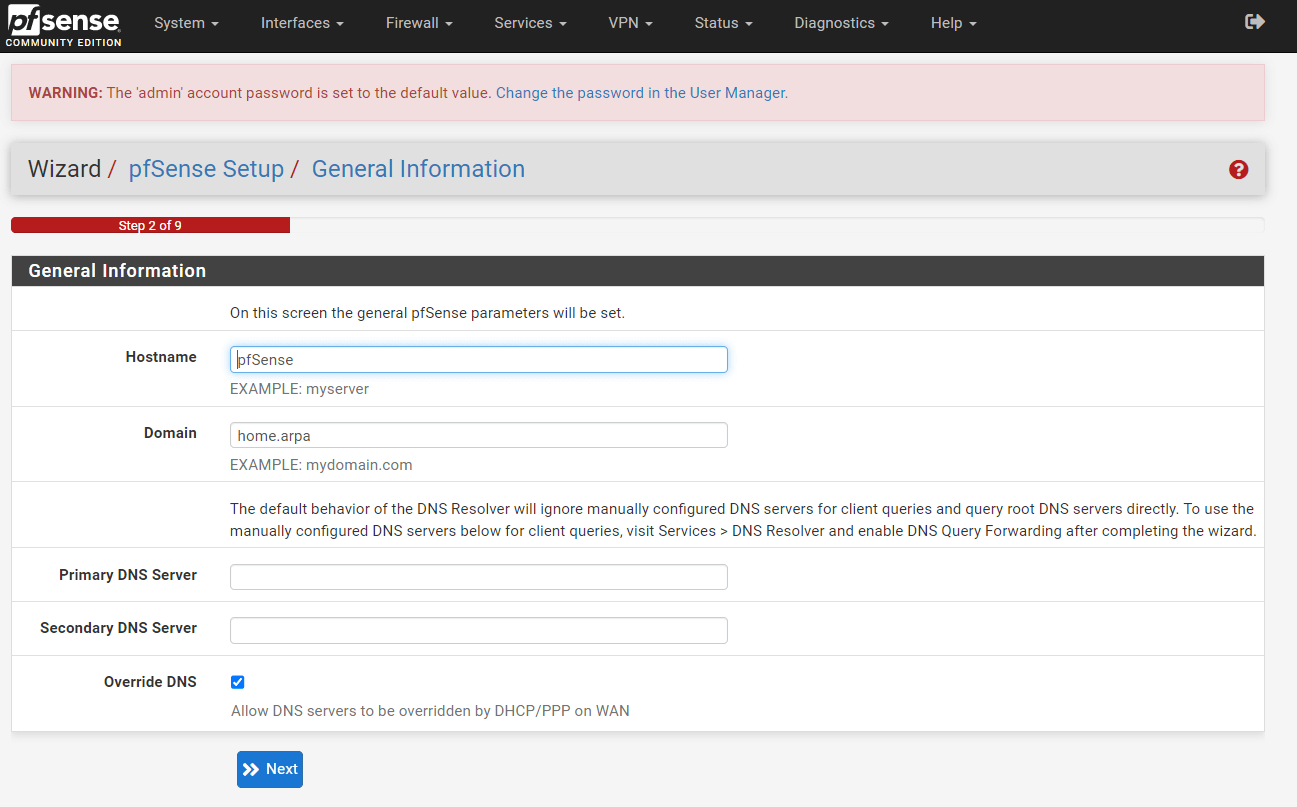
Figure 40. Setting Hostname-Domain and DNS on pfSense Setup GUI
-
Set NTP server and timezone for your pfSense firewall. If you do not have your own NTP systems, pfSense will provide a default set of NTP server pools. Then, click the Next button.
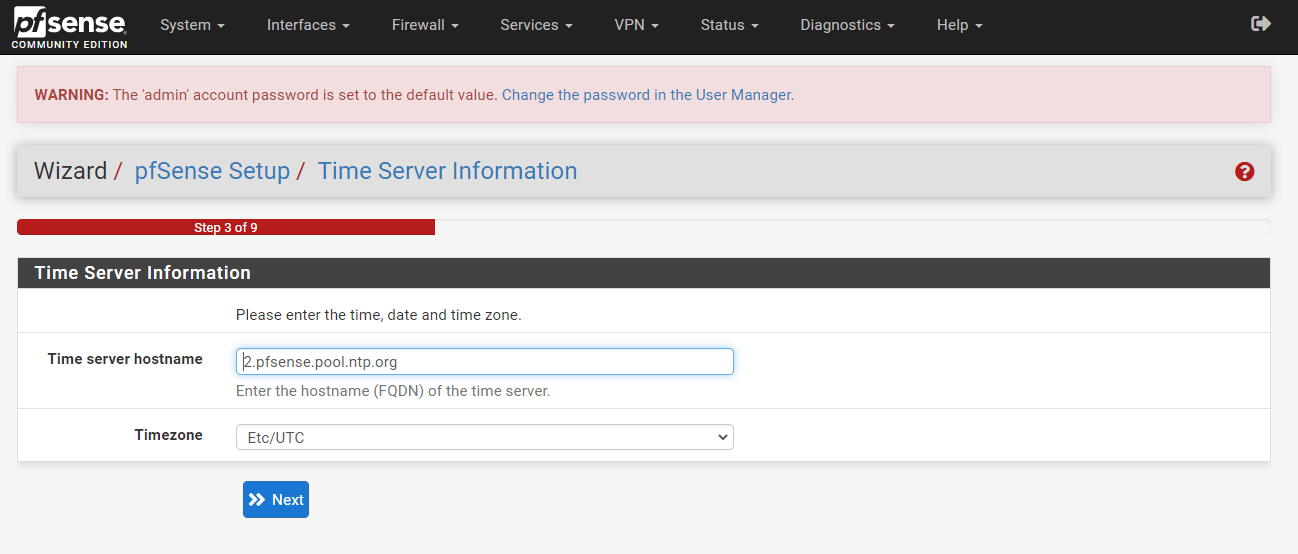
Figure 41. Setting NTP server and Timezone on pfSense Setup GUI
-
You may change the WAN interface configurations or leave them as default. You should leave RFC1918 Networks settings as checked for security reasons.

Figure 42. WAN interface configuration on pfSense Setup GUI
-
You may change the LAN interface configurations or leave it as default.
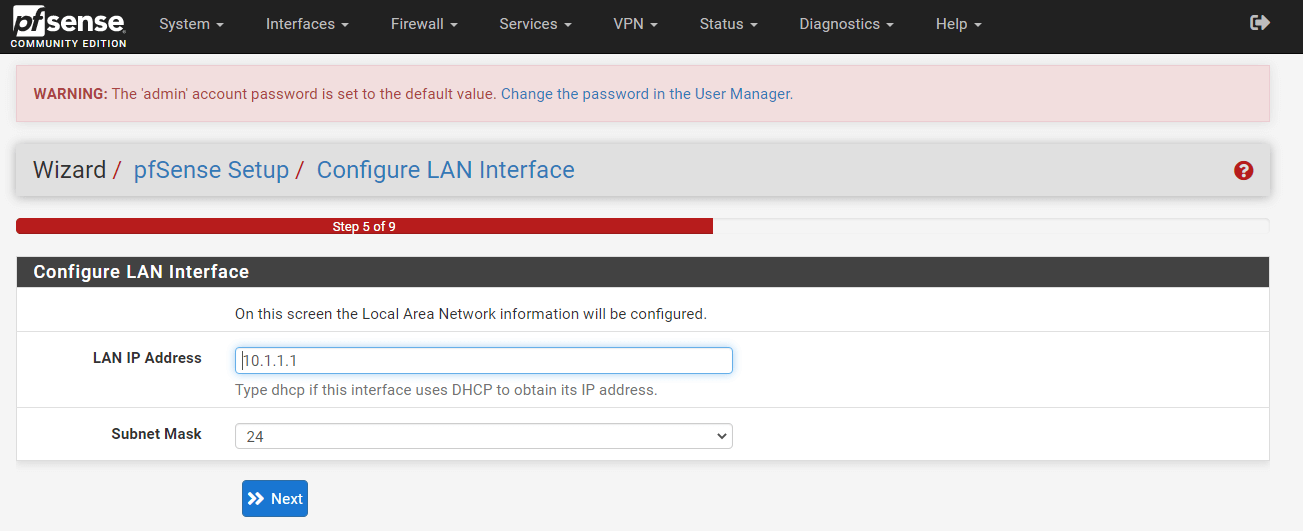
Figure 43. LAN interface configuration on pfSense GUI
-
You may change the admin web GUI password or leave it as before.
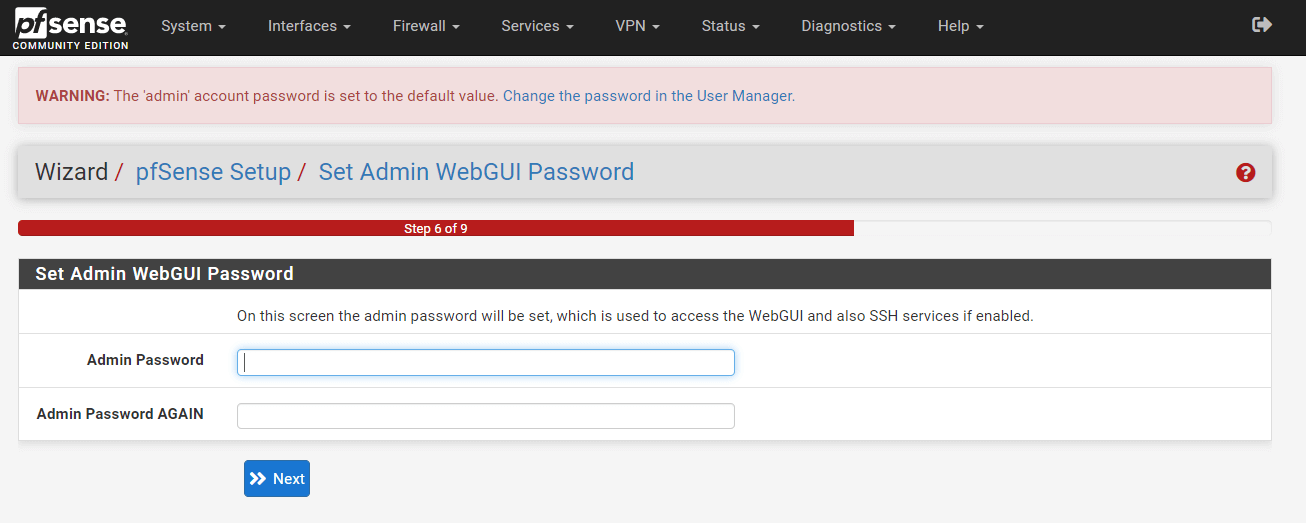
Figure 44. Setting admin web GUI password on pfSense GUI
-
Click Reload to apply the changes.

Figure 45. Reloading pfSense configuration on Web UI
-
Wizard is completed successfully. You may click
Check for updatesbutton. -
Click
Finish.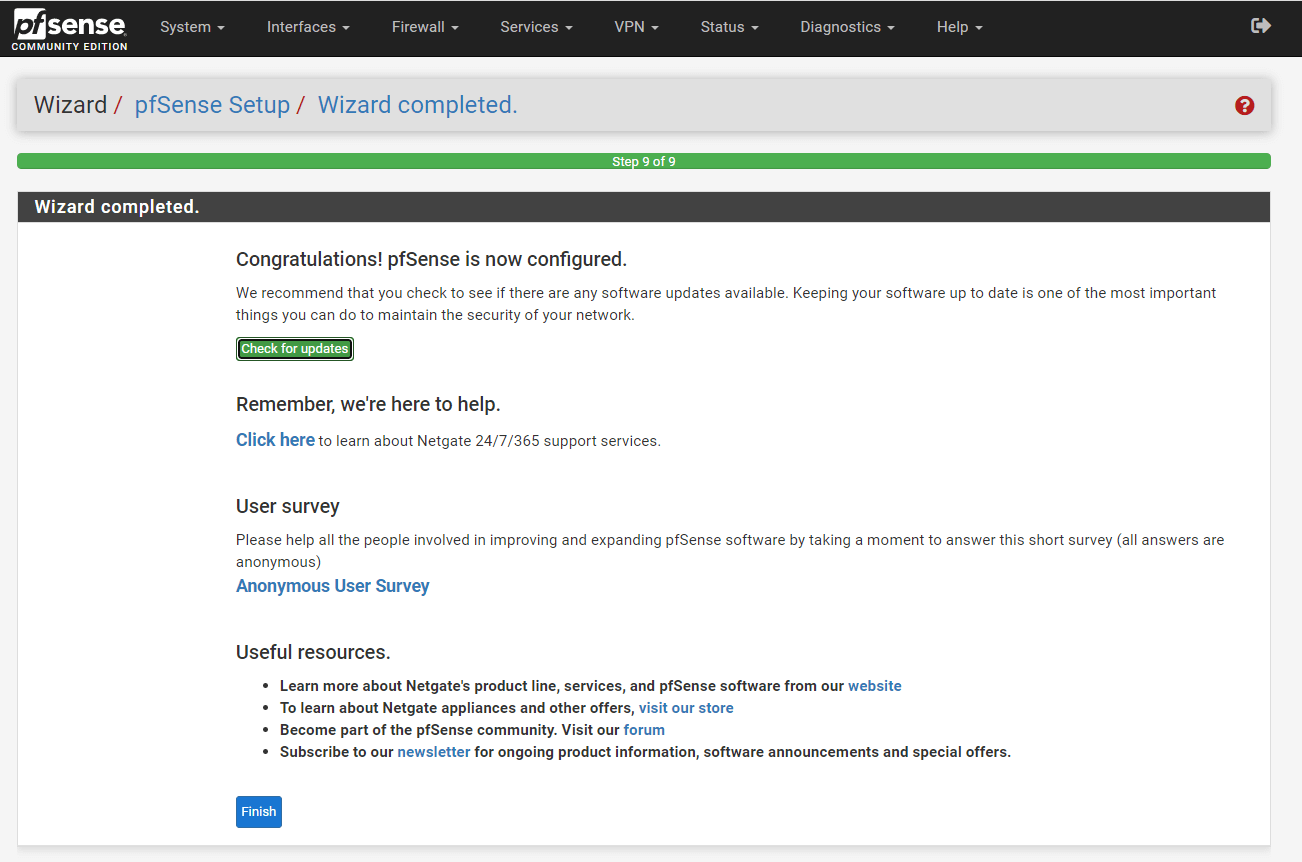
Figure 45. Finished initial configuration of pfSense firewall
-
Accept copyright and trademark notice.
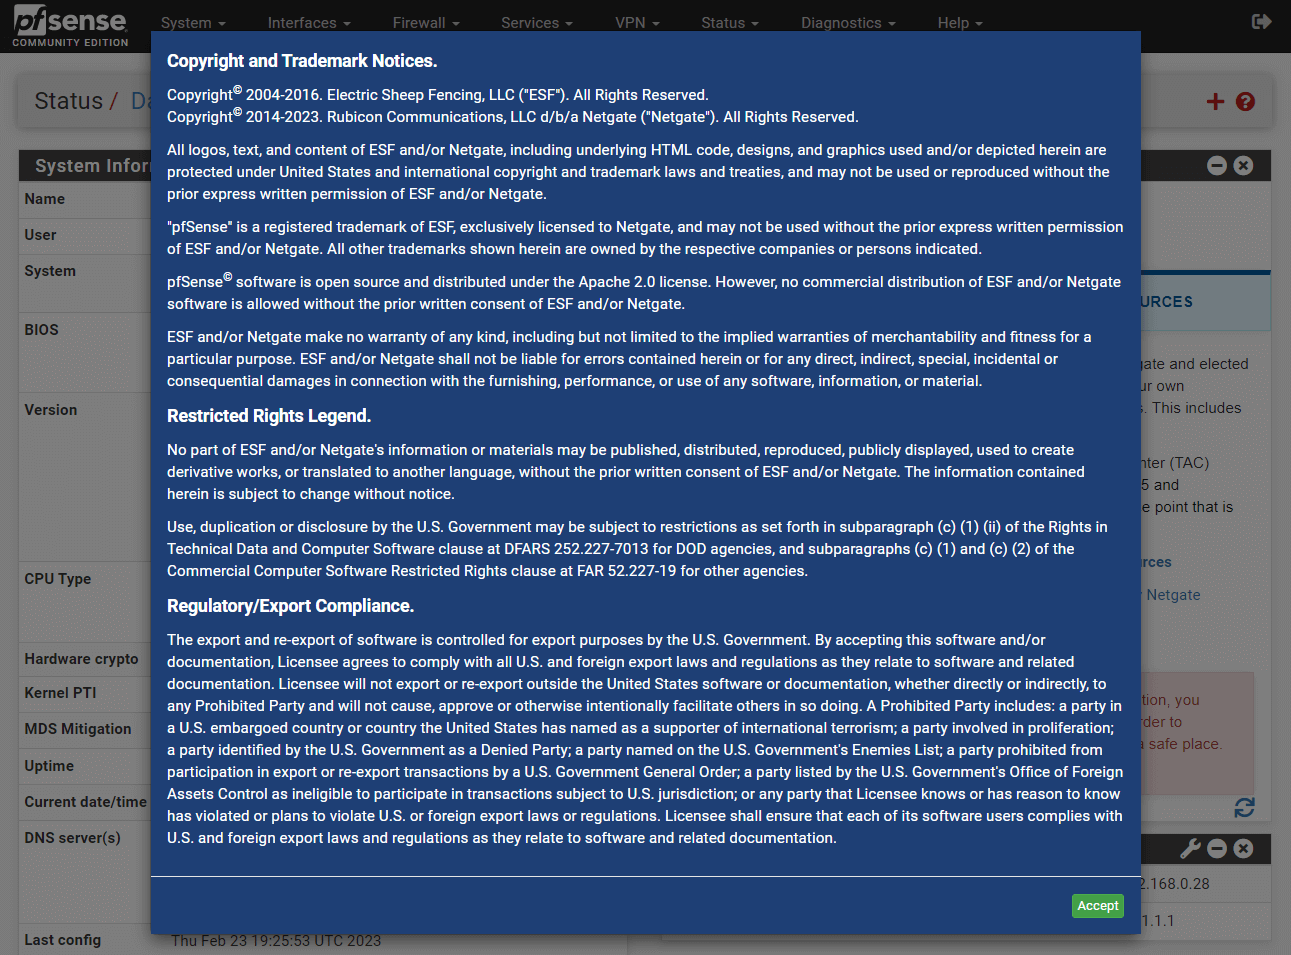
Figure 46. Accepting copyright and trademark notice of pfSense firewall
-
You may join the
User Surveyor clickCloseto access the pfSense dashboard.
Figure 47. pfSense GUI Setup Thank you page
Now, you can define firewall rules and install the Zenarmor NGFW plugin on your pfSense node to protect your network.
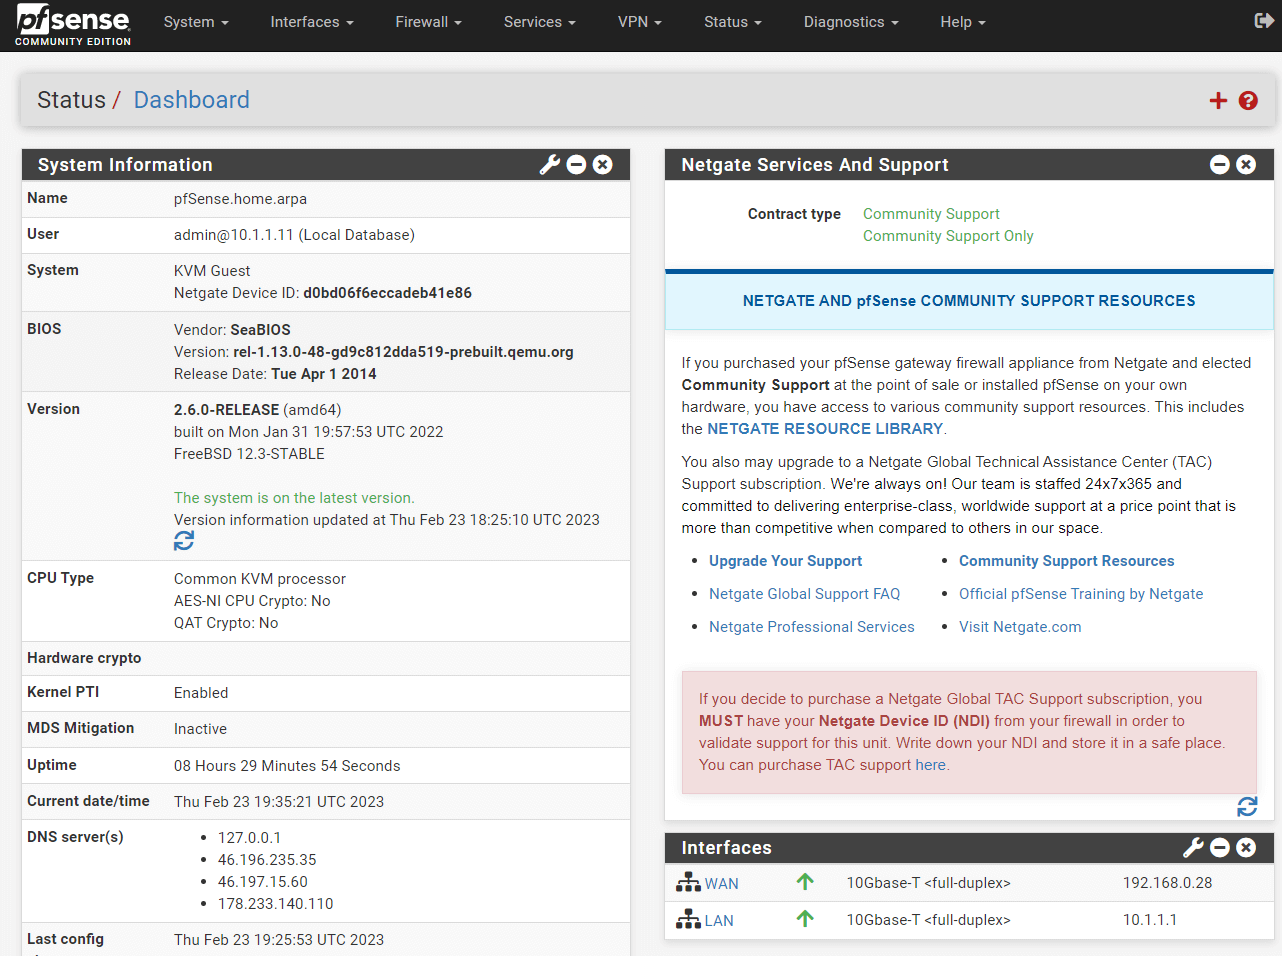
Figure 48. pfSense Web GUI Dashboard
The following video shows pfSense Software 2.5.2 installation:
What are the Best Practices for pfSense on Proxmox VE?
The best practices for installing pfSense software firewall on Proxmox VE are expleined below:
-
Apply pfSense security hardening best practices. To prioritize security, configure pfSense with robust passwords, disable superfluous services, and deploy a firewall filtering rules. Ensure that the software and firmware are regularly updated in order to mitigate vulnerabilities.
-
Enhance network performance by allocating a distinct physical Network Interface Card (NIC) to the Wide Area Network (WAN) interface and another to the Local Area Network (LAN) interface. If necessary, set up VLANs to create distinct networks. It is advisable to use a bridge in order to enhance network administration.
-
Ensure adequate allocation of resources to the pfSense virtual machine, including CPU, RAM, and storage. Monitor the use of resources and make necessary adjustments to guarantee seamless functioning.
How to Resolve pfSense "Not enough disks selected" Issue?
The error message "Not enough disks selected" indicates that an insufficient number of disks has been specified for the ZFS setup in pfSense. Ensuring a minimal number of drives is essential for efficient functioning of ZFS.
Minimum Disk Requirements: The minimum number of disks required is contingent upon the ZFS configuration you select. For instance, a mirror setup requires a minimum of two drives, but a RAID-Z setup mandates a minimum of three disks.
You may follow the next tips for resolving disk issues on pfSense installation:
- Ensure compatibility: Ensure that your drives are compatible with ZFS. Certain antiquated disks may not be compatible.
- Confirm Disk Selection: Ensure that you have verified the accurate selection of disks in the ZFS settings menu. Utilize the arrow keys to emphasize disks and utilize the space bar to choose them.
- Verify Disk Availability: If you are using a virtual machine, it is essential to verify that an adequate number of virtual disks are accessible for ZFS.