How to Set Up Caching Proxy on pfSense Software?
pfSense software offers a comprehensive caching proxy service with extensive Access Control Lists, category-based web filtering, and transparent mode support. It offers HTTP and HTTPS support. Additionally, the proxy server can be combined with the traffic shaper to enhance the user experience. By caching and repurposing frequently visited websites, response times are improved and bandwidth usage is optimized. The ICAP interface permits integration with the vast majority of professional anti-virus products.
In addition to its Caching Proxy capabilities, pfSense software CE offers next-generation firewall features such as web control and application control. This is supplied by the external utility Zenarmor.
The Zenarmor NGFW extension for pfSense allows you to convert your firewall to a Next Generation Firewall in a matter of seconds. Next-Generation Firewalls (NGFWs) enable you to combat increasingly sophisticated cyberattacks of the present day.
Layer-7 application/user awareness barring, granular filtering policies, commercial-grade web filtering with cloud-delivered AI-based Threat Intelligence, parental controls, and the industry's finest network analytics and reporting are a few of the capabilities.
Zenarmor Free Edition is offered without charge to all pfSense CE users.
In this tutorial, we will briefly explain the following topics:
-
What are the Features of the Caching Proxy on pfSense software?
-
How to Set Up Basic Caching Proxy on pfSense software?
-
How to Enable Web Filtering Using SquidGuard on pfSense Proxy?
-
How to Enable Transparent HTTP and SSL mode on pfSense Proxy?
-
How to Import an Internal CA Certificate into Windows 10 as a Trusted Root CA?
Beware that caching proxy service relies heavily on CPU load and disk-cache writes. Therefore it is recommended to have an SSD drive for caching proxy service.
What is Cache / Proxy?
Proxy servers function as intermediaries between clients and servers. A client connects to a proxy, which then determines whether the client can access a server's content. In this case, the proxy establishes its own connection to the server and then sends data back to the client. There are two principal categories of proxy servers:
-
Forward Proxy: The typical location of a proxy server is between local clients and remote Internet servers. It is used to restrict which websites clients are permitted to access or to record the servers and URLs clients visit. These primarily operate with HTTP but can work with HTTPS in certain circumstances. Squid is predominantly used for client access control as a forward proxy. However, it can be used as a reverse proxy if necessary.
-
Reverse Proxy: Generally, a proxy server stands between remote clients and local servers. These enable intelligent connection routing, load balancing, and failover for public services such as web servers. HAProxy is a potent reverse proxy capable of handling a variety of duties and scaling well for large deployments.
What is HAProxy Package?
HAProxy is a free, incredibly quick, and dependable solution that provides high availability, load balancing, and proxying for TCP, HTTP, and HTTPS applications. It is ideally suited for websites that struggle with extremely high traffic and require persistence or Layer7 processing.
Supporting tens of thousands of connections is evidently feasible with the hardware available today. It has been demonstrated that HAProxy scales extremely well with threads, reaching 2 million requests per second over SSL and 100 Gbps for forwarded traffic. Its mode of operation makes integrating it into existing architectures simple and risk-free, while retaining the option to shield vulnerable web servers from the Internet.
HAProxy defines five primary configuration sections on pfSense firewall.
-
Global: Defines options that are typically OS-specific and process-wide.
-
Defaults: Establishes default parameters for all sections that follow its declaration.
-
Frontend: Describes a collection of client-accepting listening sockets.
-
Backend: Identifies the collection of servers to which the proxy will communicate in order to forward incoming connections.
-
Listen: Defines a comprehensive proxy by combining its interface and backend into a single component. It is beneficial for TCP-only traffic in general.
There are tabs to define "frontends" and "servers" in the pfSense software bundle, but the resulting configuration is composed entirely of listen sections. This is acceptable in most cases, but it prevents sophisticated usages that require references to multiple backends and the like.
With HAProxy, a single server directive with an empty port will listen on all assigned frontend ports. This is implied by the package's graphical user interface leaving the port vacant.
Instead, a singular server directive is generated for each port on which the interface is responding. This is a significant distinction when the ports being eavesdropped on cannot be interchanged. For example:
Define a client interface for SMTP connections on ports 25 and 465. The server is listening on both ports, but port 25 does not support SSL/TLS while port 465 does. When a user connects to port 25, they should be connected to the server on port 25, and when they connect to port 465, they should be connected to the server on port 465.
In a standard HAProxy configuration in which the frontend is configured to listen on both ports and a single server directive with no port is specified, it will function as expected.
The pfSense software will generate two server directives, one for each port. HAProxy does not transmit connections in an anticipated manner. It will load balance between them regardless of whether the frontend and server ports are the same.
As they are fundamentally distinct services, a separate interface must be established in the pfSense software. Ports 25 and 2525 can be combined if it does not matter if a client connected to one port is redirected to the other.
Separating the servers by port results in a distinct entry for each server on the statistics page, with the port omitted. In an HAProxy configuration where a single server directive has no ports but manages multiple (due to inheritance from the frontend), it will only appear once in the statistics.
What are the Features of the Caching Proxy on pfSense?
The primary features of the pfSense caching proxy service are outlined below:
- Authentication: The proxy can be set up as a transparent proxy by using the following authentication methods:
- No authentication
- Local Database
- Radius
- LDAP
- Captive Portal
You can configure pfSense caching proxy authentication options by navigating to the Services > Squid Proxy Server > Authentication.

Figure 1. Authentication Settings on pfSense Proxy Server
- Access Control: It supports Access Control Lists by using the following criteria:
- Subnets
- Ports
- MIME types
- Unrestricted IPs
- Banned Hosts Addresses
- Whitelists
- Blacklists
- Browser/User Agents
- Support for blacklists
- Google Accounts Domains
- YouTube SafeSearch Restrictions
You can configure pfSense caching proxy Access Control Lists by navigating to the Services > Squid Proxy Server > ACLs.
- Transparent Mode: The transparent mode routes all requests to the proxy without requiring client configuration. The transparent mode functions well with HTTP traffic that is not encrypted. For SSL-encrypted HTTPS connections, however, the proxy becomes a man-in-the-middle because the client "talks" to the proxy and the proxy encrypts the network packets with its master key, which the client must trust.
Using a transparent HTTPS proxy can be risky and may not be allowed for some web applications, such as e-commerce.
-
Web Filter: pfSense SquidGuard package includes category-based web filtering support with the following features:
- Fetch data from a remote URL
- Use the built-in scheduler to be kept up-to-date
- Compatibility with the most widely used blacklists
- Flat file lists and category-based compressed lists are supported
- Convert category-based blacklists to squid ACLs automatically.
-
Traffic Management: The proxy can be used in conjunction with the traffic shaper to fully utilize its shaping capabilities. It provides the following options:
- Maximum file size for download/upload
- Limiting overall bandwidth
- Limiting bandwidth per host
- Limiting Specific Extensions
- Quick abort settings
You can configure pfSense caching proxy Traffic Management options by navigating to the Services > Squid Proxy Server > Traffic Management.
- Antivirus: pfSense provides ClamAV Anti-Virus Integration Using C-ICAP. It offers the following unofficial virus signatures as well:
- URLhaus
- InterServer
- SecuriteInfo
- SecuriteInfo Premium
You can configure pfSense caching proxy Antivirus options by navigating to the Services > Squid Proxy Server > Antivirus.
How to Set Up Basic Caching Proxy on pfSense Software?
You may set up a basic caching proxy service on your pfSense firewall easily by following the 10 main steps given below:
- Install Squid Package
- Enable/Disable Local Caching
- Enable/Disable Proxy Server
- Configure Proxy Interface(s) and Proxy Port
- Configure Proxy Listening Port
- Enable SSL Filtering
- Configure Authentication Method
- Enable Logging
- Define Access Control List
- Define Firewall Rules to Prevent Clients from Bypassing Proxy Server
- Configure Proxy in Your Windows Client or Browser
We will briefly explain these steps below.
1. Install Squid Package
Squid can function as a cache to improve web performance, and integrate with SquidGuard for content filtering, and its archives provide the foundation for reporting on where users go on the web. You can easily install the Squid package by following the next steps:
- Access your pfSense® software WebGUI.
Default username and password for pfSense® software is admin and pfsense. It is strongly recommended that you change your password with a strong one.
-
Navigate to the System > Package Manager** > Available Packages.
-
Type squid into the search field and then click Search.
-
Click +Install button at the end of the package.

Figure 2. Search and install squid package
- Click Confirm to let the package install. This will take some time because it needs to download several files and databases.

Figure 3. Confirmation for installing squid package
- Once the installation is complete, you should see success after a few minutes.

Figure 4. Squid package installation completed successfully
2. Enable/Disable Local Caching
To configure local cache on your proxy server, you may follow the next steps given below:
-
Navigate to Services > Squid Proxy Server > Local Cache.
-
You may check Disable Caching option if your Squid is only used as a proxy to audit website access. Local Caching is enabled by default.
-
You may type domain(s) and/or IP address(es) that should never be cached into the Do Not Cache filed. You must put each entry on a separate line.

Figure 5. Squid cache general settings
-
You may increase the Hard Disk Cache Size depending on your system, such as 1024. It is 100 MB by default.
-
You may increase the Maximum object size (MB) as default which is 4MB.

Figure 6. Squid hard disk cache settings
-
You may increase the Memory Cache Size depending on your system. It is 64 MB by default.
-
You may increase the Memory Object Size in RAM depending on your system. It is 256 KBytes by default. Objects greater than this size will not be attempted to keep in the memory cache.
-
You may leave other settings as default.

Figure 7. Saving squid local cache settings
- Click Save to activate the settings.
Other Squid Cache General Settings are explained below:
-
Cache Replacement Policy: The cache replacement policy determines which cached objects will remain and which will be supplanted to make room for new objects. The following cache replacement policy options are available:
Heap LFUDA: Maintains popular objects in the cache regardless of their size, optimizing the byte hit rate at the cost of the hit rate. The default option isHeap LFUDA.Heap GDSF: Optimizes the object-hit rate by caching popular and lesser objects.LRU: Stores recently accessed objects. (i.e., replaces the object that has not been accessed for the longest time).Heap LRU: Similar to LRU, but uses a heap.
-
Low-Water Mark in %: The minimum cache object eviction threshold for AUFS/UFS/diskd by the cache_replacement_policy algorithm. Cache replacement begins when the swap usage exceeds this low-water mark and attempts to keep usage close to this threshold. It is 90 by default.
-
High-Water Mark in %: The maximum cache object eviction rate for AUFS/UFS/diskd by the cache_replacement_policy algorithm. As swap utilization approaches this maximum level, object eviction becomes more aggressive.
-
Enable Offline Mode: Enable this option to prevent the proxy server from validating cached objects. Offline mode enables access to more cached data than is normally permitted. (e.g., expired cached versions where the origin server should have been contacted otherwise).
-
External Cache Managers: Enter the IP addresses of the external Cache Managers to which access to this proxy will be granted.
3. Enable/Disable Proxy Server
On the pfSense firewall, the proxy server comes with reasonable default settings for quick setup. To enable the proxy service on your pfSense firewall, you may follow the steps below:
-
Navigate to Services > Squid Proxy Server > General.
-
Check the Enable Squid proxy option.
-
Click Save button at the end of the page to activate the proxy server.
The proxy will be enabled without User Authentication and will run on port 3128 of the LAN interface by default.

Figure 8. Enabling Proxy on pfSense
How to Start/Restart/Stop Proxy Server?
You can view the status of the proxy service by navigating to Status >* Services on pfSense Web UI. The status and action buttons are available on the Services page.
When the proxy server is running, the status button is displayed as a green circle with a white check icon.
You may click on the Restart service button to restart the proxy server.
You may click on the Stop service button to stop the proxy server.

Figure 9. Restarting/Stopping Squid Proxy Service on pfSense
When the proxy server is stopped, the status button is displayed as a red circle with a white cross icon.
You may click on the Start button to start the proxy server.

Figure 10. Starting a Stopped Proxy Service on pfSense
You may manage squid service status by using the actions buttons at the upper right corner of the Squid Proxy Server settings page.

Figure 11. Managing Service Status on Squid Proxy Server settings page
4. Configure Proxy Interface(s) and Proxy Port
If you need to change the interfaces (subnets) to which the proxy will bind, you may follow the steps below:
-
Navigate to Services > Squid Proxy Server > General.
-
Select interfaces in the Proxy Interface(s) field under
Squid General Settingspane. You can add as many interfaces as you wish or remove one. -
Click Save to activate the settings.
5. Configure Proxy Listening Port
By default, the proxy will listen on port 3128. To change the proxy listening port, you may follow these steps:
-
Navigate to Services > Squid Proxy Server > General.
-
Set Proxy port under the
Squid General Settingspane to an appropriate value as you wish, such as 8080. -
Click Apply to activate the settings.
6. Enable SSL Filtering
You may enable HTTPS/SSL Interception on Squid proxy by following the next instructions:
- Go to System > Cert Manager > CAs to create a CA certificate which will be used to intercept HTTPS traffic.

Figure 12. Managing Certificate Authorities on pfSense
-
Click +Add button to create a new CA certificate.
-
Type Descriptive Name, such as
SquidCA. -
Select the Country Code, such as
US. -
Fill in the State or Province field.
-
Fill in the City field.
-
Fill in the Organization field.
-
Fill in the Organizational Unit field.
-
You may leave other settings as default.

Figure 13. Adding new CA certificate on pfSense
- Click Save to add a new CA certificate.

Figure 14. Viewing new CA certificate on pfSense
-
Navigate to Services > Squid Proxy Server > General.
-
Check
Enable SSL filteringfor the HTTPS/SSL Interception option.. -
You may change SSL Proxy port to which the SSL proxy service will listen. It is 3129 by default.
-
You may select newly created Certificate Authority,
SquidCA, from the CA option to use for SSL inspection. -
You may leave other settings as default.

Figure 15. Enabling SSL filtering on pfSense
7. Configure Authentication Method
To change the authentication method for your proxy service on pfSense, you may follow the steps given below:
-
Navigate to Services > Squid Proxy Server > Authentication.
-
Select the desired Authenticator(s) in the *Authentication Method field. If you do not want to use any authentication, click on the None link. If you select
Localmethod, you must add Squid users manually. -
You may set Enforce local group to restrict access to users in the selected (local)group if you want. We leave it as default.
-
You may fill in the Authentication Prompt as you wish. It will be displayed in the authentication request window.
-
Set Authentication TTL to 240. This specifies how long the proxy server assumes an externally validated username and password combination is valid (in minutes) (Time To Live). When the TTL expires, the user will be prompted to enter their credentials once more. It is 5 by default.
-
You may Authentication processes leave as default. The total number of authenticator processes that will be launched.
-
Click Save to activate the settings.

Figure 16. Setting Authentication Method for Proxy on pfSense
-
If you select
Localauthentication method, click Users tab at the top header to add a Squid user manually. -
Click +Add button.
-
Fill in the Username field.
-
Fill in the Password field.
-
Fill in the Description field.
-
Click Save.

Figure 17. Adding Squid User on pfSense
8. Enable Logging
To enable logging for your proxy service on pfSense, you may follow the steps given below:
-
Navigate to Services > Squid Proxy Server > General.
-
Check Enable Access Logging option in the
Logging Settingspane. -
You may leave Log Store Directory setting as default.
-
Set the Rotate Logs option as you wish such as 7. It defines how many days of log files will be kept. Rotation is disabled if left empty.
-
You may check the Log Pages Denied by SquidGuard option which makes it possible for SquidGuard-denied logs to be included on Squid logs.
-
Click Save at the bottom of the page to activate the settings.

Figure 18. Enable Logging for Squid Proxy Service
9. Define Access Control List
To define Access Control Lists for your proxy service on pfSense, you may follow the steps given below:
-
Navigate to Services > Squid Proxy Server > ACL.
-
You may set Allowed Subnets by typing subnets you want to allow access to the proxy server. All the other subnets won't be able to use the proxy. The proxy interfaces are allowed by default.
-
You may add Unrestricted IP addresses. For these IP addresses, no authentication and no blacklisting are applied.
-
You may Type IP addresses you want to deny access to the proxy server into the Banned Hosts addresses field.
-
You may add domains to the Whitelist so that they aren't blocked by the proxy server, such as unharmful.com

Figure 19. Setting ACLs for Proxy Service on pfSense-1
-
You may add domains to the Blacklist so that they are blocked by the proxy server, such as harmful.com.
-
You may set Block User Agents to block specific browsers. For example, "Mozilla" will block "all Mozilla-based browsers" and "(.)+Macintosh(.)+Firefox/36.0" will block the "Macintosh version of Firefox revision 36.0". We will block MS Internet Explorer from 6 to 10 which has critical security vulnerabilities.

Figure. Setting ACLs for Proxy Service on pfSense-2
-
You may set Block MIME types (Reply Only) to block HTTP replies based on the servers' content MIME Type reply, such as image, text, HTML, flash, music, MPEG, etc. For example, entering "video/Flv" will block Youtube flash video content, and "application/x-javascript" blocks "javascript".
-
You may add ACL SafePorts.
-
You may add ACL SSLPorts.
-
You may enter the domain that will be permitted to use Google GSuite to the Google Accounts Domains field. All accounts that do not belong to this domain will be barred from using it.
-
You use Youtube restrictions by setting YouTube Filter field to Moderate or Strict.
-
Click Save.

Figure 20. Setting ACLs for Ports and Advanced Filtering on Proxy Service
10. Define Firewall Rules to Prevent Clients from Bypassing Proxy Server
A firewall rule must be added to ensure that no one can bypass the proxy. Since all clients must access the Internet via the pfSense proxy server running on port 3128, all HTTP(S) requests sent to the 80/433 ports must be blocked. You may prevent your users to bypass your proxy server by following the three main steps given below:
-
Add a firewall rule to block outgoing HTTP traffic on port 80.
-
Add a firewall rule to block outgoing HTTPS traffic on port 443.
-
Activate the new firewall rules.
1. Add a firewall rule to block outgoing HTTP traffic on port 80
To add a firewall rule to prevent clients to bypass proxy servers by blocking outgoing HTTP traffic on port 80, you may follow the next steps given below:
-
Navigate to Firewall > Rules in your pfSense web UI.
-
Click on the interface to which your proxy is bound, such as LAN.
-
Click the green Add button with UP arrow icon,
, at the top right corner of the rule list to add a rule to the top of the list. This will redirect you to the rule configuration page.
-
Set Action to Block.
-
Make sure that the Interface is set to the interface to which your proxy is bound, such as LAN.
-
Set Protocol to TCP.
-
Set Source to LAN net

Figure 21. Adding Firewall Rule to block outgoing HTTP traffic on port 80 on pfSense-1
-
Set Destination port range to HTTP.
-
You may enable logging by checking Log packets that are handled by this rule in the Log option.
-
Enter Block HTTP Bypass for the Description field.
-
You may leave other settings as default.
-
Click the Save button at the bottom of the page.

Figure 22. Adding Firewall Rule to block outgoing HTTP traffic on port 80 on pfSense-2
2. Add a firewall rule to block outgoing HTTPS traffic on port 443
To add a firewall rule to prevent clients to bypass proxy servers by blocking outgoing HTTPS traffic on port 443, you may follow the next steps given below:
-
Clone the newly created firewall rule to block outgoing HTTP traffic in the previous step by clicking on the clone button. This will redirect you to the firewall rule editing page.
-
Set Destination port range to HTTPS.
-
Change the Description field to Block HTTPS Bypass.
-
You may leave other settings as default.
-
Click the Save button at the bottom of the page

Figure 23. Adding Firewall Rule to block outgoing HTTPS traffic on port 443 on pfSense-2
3. Activate the new firewall rules
To activate new firewall rules, you will need to click on the Apply Changes button at the upper right corner of the firewall rules LAN interface page.

Figure 24. Applying Firewall Rules pfSense
11. Configure Proxy in Your Windows Client or Browser
You can easily configure proxy settings in your Windows client to route web surfing traffic through your proxy server by following the next steps given below:
- Open Network & Internet Settings by right-clicking on the network icon on the taskbar in your Windows 10 PC. Or click on the hamburger icon at the top right corner of your Chrome browser and navigate to Settings > Advanced > System > Open your computer's proxy settings.

Figure 25. Accessing proxy server settings in Chrome Browser
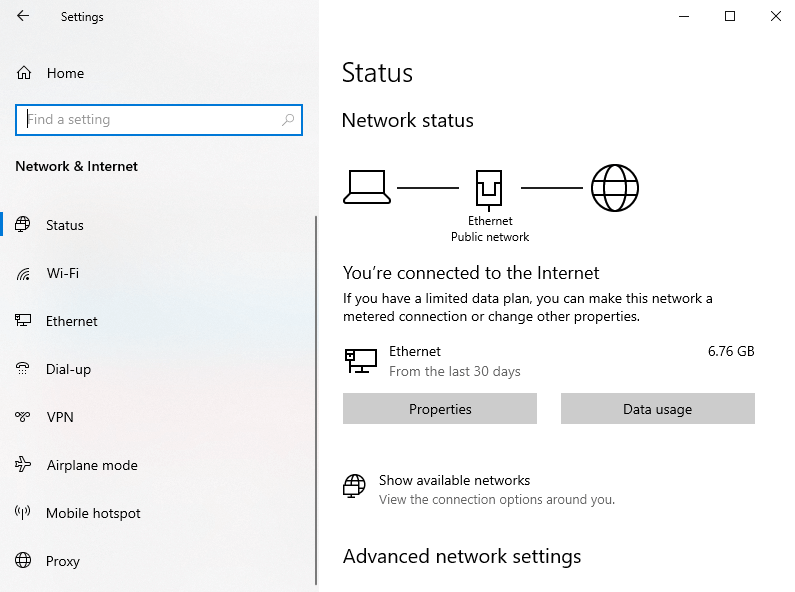
Figure 26. Accessing proxy server settings in Windows 10 client
-
Click on Proxy.
-
Toggle on Use a proxy server in Manual proxy setup pane.
-
Enter your proxy server IP address in the Address field, such as 10.1.1.1.
-
Enter your proxy server port number you've set in the previous section in the Port field, such as 3128.
-
Click Save to activate the settings.

Figure 27. Setting up proxy in Windows 10 client
Your proxy server and client configurations are completed. Now, you can test your settings.
Testing Proxy Configuration
You may test your proxy configuration by following the next steps below:
- Open your browser on your client's PC. This will pop up a dialog box similar to figure 27 for user authentication if you have enabled authentication in your proxy settings.

Figure 28. Proxy Client authentication in Windows 10 PC
- Connect to the
[https://www.lagado.com/tools/cache-test](https://www.lagado.com/tools/cache-test)page via your browser.

Figure 29. Proxy Cache Test Page
-
Write down the page serial number somewhere.
-
Clear your browser's cache.
-
Click on this link to load this page again. (Alternatively, you may browse to this page or use a bookmark. Do not hit refresh.) If the page serial number is the same as when you noted it at step 3 you are most likely using a caching proxy.
How to Enable Web Filtering Using SquidGuard?
The SquidGuard program provides highly effective URL filtering and access control. It can utilize blacklists or custom lists of websites to selectively permit or deny access to those sites. To get the benefit of SquidGuard you must have already installed and configured the Squid package.
How to Install SquidGuard on pfSense?
You can easily install the SquidGuard package by following the next steps:
-
Access your pfSense® software WebGUI.
-
Navigate to the System > Package Manager** > Available Packages.
-
Type squidguard into the search field and then click Search.
-
Click +Install button at the end of the package.

Figure 30. Search and install SquidGuard package
-
Click Confirm to let the package install. This will take some time because it needs to download several files and databases.
-
Once the installation is complete, you should see success after a few minutes.
How to Enable SquidGuard on pfSense?
You can easily enable the SquidGuard service by following the next steps:
-
Navigate to the Services > SquidGuard Proxy Filter on your pfSense web UI.
-
Check Enable in the General Options pane.
-
Check Enable GUI log to log the access to the Proxy Filter GUI.
-
Scroll down to the Logging options pane.
-
Check Enable log to log the proxy filter settings like blocked websites in Common ACL, Group ACL, and Target Categories. This option is usually used to check the filter settings.
-
Check Enable log rotation to rotate the logs every day. This is recommended if you enable any kind of logging to limit file size and do not run out of disk space.
-
Check Clean Advertising in the Miscellaneous pane to display a blank gif image instead of the default block page. With this option, the user gets a cleaner webpage.

Figure 31. Setting logging options for SquidGuard
-
Click Save at the bottom of the page.
-
Click Apply in the General Options pane at the top of the page.

Figure 32. Enable SquidGuard
How to Use Blacklists on SquidGuard?
Blacklists are predefined lists of websites in particular categories, such as Social, Adult, Music, and Sports websites. To use blacklists on SquidGuard, you may follow the next steps:
-
Navigate to the Services > SquidGuard Proxy Filter on your pfSense web UI.
-
Check Blacklist in the Blacklist Options pane at the bottom of the page.
-
Fill in the Blacklist URL, such as
https://github.com/maravento/blackweb/blob/master/blackweb.tar.gz.

Figure 33. Setting Blacklist options
-
Click Save.
-
Click Apply in the General Options pane at the top of the page.
-
Click the Blacklist tab at the top of the page.

Figure 34. Downloading Blacklist
- Click Download to start downloading the blacklist.
How to Define Target Categories?
Target Categories are custom collections of websites or other expressions that define a group of items for which access can be granted or denied. They are maintained on the tab labeled "Target Categories."
Adding a new Target Category requires the following options:
-
Name: The Name of the category as it will appear on ACLs for selection. The name must consist of two to fifteen alphanumeric characters, with the first character being a letter.
-
Domain List: This is the list of blocked domains, such as
google.com,microsoft.com, etc. You may input multiple domains, separated by a space. -
Redirect mode: This option determines what occurs when a site on this list blocks a user. The default value of none will not cause a redirection. The most frequent configuration is int error page.
-
Redirect: Enter the error message that will be displayed to the user if the user is redirected using int error page. If an external redirect type is selected, input the complete URL to the desired destination site, including the appropriate protocol (
http://orhttps://).
To define Target Categories, you may follow the next steps:
-
Navigate to the Services > SquidGuard Proxy Filter > Target Categories on your pfSense web UI.
-
Click +Add to add a new target category.
-
Fill in the Name option, such as
Google_Whitelist. -
Fill in the Domain List option. We will enter google domains.
Figure 35. Defining Target Categories
-
Fill in the Description option, such as
Google Domains. -
Check Log option o enable logging for this ACL.
-
Click Save.
How to Block Download by Extension?
In the squidGuard GUI (Services > Proxy Filter):
To block download by extension, you may follow the next steps:
-
Navigate to the Services > SquidGuard Proxy Filter > Target Categories on your pfSense web UI.
-
Fill in the Name option, such as
Google_Whitelist. -
Click +Add to add a new target category.
-
Enter a name for the category, such as
BlockExt -
Add Regular Expression, like
(.*\/.*\.(asf|wm|wma|wmv|zip|rar|cab|mp3|avi|mpg|swf|exe|mpeg|mp.|mpv|mp3|wm.|vpu)) -
Check Log option to enable logging for this ACL

Figure 36. Defining Target Category to Block Extensions
-
Click Save.
-
Go to Common ACL or Groups ACL page .
-
Click Target Rule List to expand the list of categories. The newly created category should show alphabetically in the list, above any blacklist categories. Find the BlockExt entry in the list and select deny.

Figure 37. Defining Common ACL to Block Extensions
-
Click Save.
-
Goto the General Settings tab and press Apply.
How to Define Access Control List?
In SquidGuard, there are two categories of ACL entries:
- Common ACL: Common ACL is the default ACL applied to all users on SquidGuard.
- Group ACL: Group ACL entries are applied to specific IP addresses, IP address groups, or Networks.
Visit the Common ACL tab first. Select the default actions for all categories from blacklists or locally-defined lists. To accomplish this, click Target Rules List 
Change to the Group ACL tab after saving the settings to create an entry for a specific user or group of users. Using a Group ACL, it is possible to create an exception to the Common ACL rules, either to block access to a site that others can reach, or to allow access to a site that others cannot view.
To create a Group ACL, you may follow the next steps:
-
Change to the Group ACL tab
-
Click
Add to start a new entry and configure it as follows:
- Name: The name of the ACL
- Client (source): Enter the user’s IP address, subnet, etc. Multiple values can be entered, separated by spaces.
- Target Rules List: Defines the list of actions for this specific set of users
-
Click Save.
-
Return to the General Settings tab.
-
Click Apply
How to Enable Transparent SSL Mode on pfSense Proxy?
It is only feasible to intercept HTTP traffic transparently when using a proxy. That is, only HTTP traffic may be automatically captured and routed through a proxy without user intervention or knowledge. This is convenient because it does not require the user to configure any settings on their computer. The disadvantage of this technique is that only HTTP traffic can be captured; HTTPS cannot be intercepted in the same manner.
Attempting to transparently intercept HTTPS would break the chain of trust created by SSL, resulting in a frightening certificate warning when the user attempts to access a secure website. In such a scenario, this warning is appropriate, as the proxy is essentially conducting a man-in-the-middle attack in order to scrutinize the user's traffic.
The Squid proxy software is capable of intercepting HTTPS, but it cannot be done without the user's knowledge or computer modifications. Intercepting HTTPS necessitates the implementation of a trusted root CA created specifically for this purpose, so that the proxy can appear to use genuine certificates.
The optimal method is to configure the proxy settings on the user's computer and/or web browser. This task can be accomplished manually, via GPO on a Windows Domain, DHCP, or automatically via WPAD.
In this section, we will explain how to configure HTTP and HTTPS (SSL bump) transparent proxy modes in the pfSense firewall.
Using a transparent HTTPS proxy can be hazardous and may be restricted by the services you use, such as eCommerce because the Transparent SSL/HTTPS proxy mode exploits a method known as a man-in-the-middle. If you're confident in your abilities, only configure and use transparent mode. When configured wrong, your security defenses may be severely weakened rather than strengthened.
You may enable transparent SSL mode in your pfSense proxy service easily by following 4 main steps given below:
-
Create a Certificate Authority for Transparent SSL
-
Disable Authentication for Proxy Server
-
Enable Transparent HTTP and SSL mode
-
Configure Proxy Client
We'll assume you've already configured a basic caching proxy in your pfSense by following the instructions in the first section.
We will briefly explain each of the main steps for enabling transparent SSL mode in your pfSense proxy below.
1. Create a Certificate Authority for Transparent SSL
Before enabling transparent SSL mode in your proxy server, you need to create an internal Certificate Authority if you don't have one.
2. Disable Authentication for Proxy Server
When operating in transparent mode, proxy authentication is not possible. Because the browser is unaware that a proxy is being used, it is unable to respond to a proxy authentication request. To change the authentication method for your proxy service on pfSense, you may follow the steps given below:
-
Navigate to Services > Squid Proxy Server > Authentication.
-
Select the None in the *Authentication Method field.
-
Click Save to activate the settings.
3. Enable Transparent HTTP and SSL mode
You may easily enable transparent HTTP mode by following the next steps given below:
-
Navigate to Services > Squid Proxy Server > General.
-
Check Transparent HTTP Proxy option.
-
You may check Bypass Proxy for Private Address Destination option
-
You may enter Bypass Proxy for These Source IPs. This option does not forward traffic from these source IPs, CIDR nets, hostnames, or aliases through the proxy server but lets it pass directly through the firewall.
-
You may enter Bypass Proxy for These Destination IPs. This setting does not proxy traffic going to these destination IPs, CIDR nets, hostnames, or aliases, but lets it pass directly through the firewall. To ensure that known sites are not bumped and retain their original security layer, you should add them to this field.
-
Check *HTTPS/SSL Interception option in the SSL MAN in the Middle Filtering.
-
Select Splice All for the SSL/MTM Mode.
-
Select newly create CA certificate for CA option
-
Click the Save button to apply settings.

Figure 38. Enabling Transparent HTTP and SSL mode on pfSense proxy
4. Configure Proxy Client
Since your internal CA is not trusted by the browser, you will get a warning message like Your connection isn't private. Attackers might be trying to steal your information NET::ERR_CERT_AUTHORITY_INVALID for each SSL site you visit.

**Figure 39. ** ERR_CERT_AUTHORITY_INVALID warning message
To solve this issue, you must add the CA certificate as a trusted root CA certificate in your client OS. You can import the Key into a Windows 10 PC and set it as a trusted root CA certificate by following the steps given below:
-
Navigate to System > Certificate Manager > CAs in your pfSense Web UI.
-
Click on the Export CA icon to export the CA certificate.
-
Copy CA certificate to the client PC, in our example it is a Windows 10 PC.
-
You may import the CA certificate as a Trusted Root CA certificate by using MMC tool in your Windows 10 PC. Type mmc in the search bar and press enter to run the Microsoft Management Control.
-
Click on the File menu link and select Add/Remove Snap-in.

**Figure 40. ** Add/Remove Snap-in Microsoft Management Control
-
Now under Available snap-ins, click Certificates, and then click Add. The Certificates snap-in allows you to browse the contents of the certificate stores for yourself, a service, or a computer.
-
Click OK.

**Figure 41. ** Adding Certificates snap-in Microsoft Management Control
- In the next dialog box, select Computer account and then on Next.

**Figure 42. ** Adding Certificates snap-in for Computer account
- Now select Local computer and click on Finish.

**Figure 43. ** Adding Certificates snap-in for Local Computer
- Now, back in MMC, in the console tree, double-click on Certificates and then right-click on Trusted Root Certification Authorities Store. Under All tasks, select Import. This will open The Certificate Import Wizard.

**Figure 44. ** Importing Certificates as Trusted Root CA

**Figure 45. ** Certificates Import Wizard-1
-
Click the Next button.
-
Browse and select the CA certificate to import and then click the Next button.

**Figure 46. ** Selecting Certificate file to Import in Certificates Import Wizard
- Click Next.

**Figure 47. ** Selecting Certificate Store in Certificates Import Wizard
- Click the Finish button to complete the certificate import. After the import operation is completed successfully, a dialog box will appear.

**Figure 48. ** Completing the Certificates Import Wizard

**Figure 49. ** CA Certificate Import is completed successfully.
- Click OK.

**Figure 50. ** Internal pfSense CA Certificates Imported as a Trusted Root CA certificate in Windows 10 client
How to Tune Squid?
Some users have reported that implementing the following modification significantly improved performance:
-
Edit
/boot/loader.conf.localfile. -
Change
kern.ipc.nmbclusters="0"tokern.ipc.nmbclusters="32768" -
Reboot the firewall
Using the ufs cache filesystem setting has improved performance for some individuals. Increase vfs.read_max=32 to vfs.read_max=128 in System > Advanced, System Tunables pane, when using ufs filesystem.

**Figure 51. ** Updating vfs System Tunables
Squid maintains a cache index journal named swap.state at the top level of the squid cache folder, which is typically /var/squid/cache/swap.state. This file can grow very large and occupy all available capacity on the hard drive. To prevent this from occurring, configure Log Rotate in the squid configuration.
By specifying the number of days to retain the logs, the squid package will activate a nightly cron job that executes the following commands:
squid -k rotate
As part of the rotation procedure, the swap.state file is compressed to prevent it from becoming too large.
It is possible to delete this file while squid is operating if it is excessively enormous. After the file has been deleted, run nex command:
squid -k rotate
This will result in its being rewritten (but compacted). Alternately, you can instruct squid to perform a complete termination using next command:
squid -k shutdown
This will rewrite the swap.state file, but squid will halt and need to be resumed, making it the least desirable option.
If the swap.state file is deleted while squid is not operating, squid will need to rescan the cache folder in order to reconstruct it. This can be a time-consuming and protracted process. It may be preferable to delete the cache folder's contents and recreate its structure using the command:
squid -z
How to Cache Windows Updates on pfSense?
If a number of local PCs require Windows Updates but a WSUS server is unavailable, squid can cache them.
-
Navigate to the Services > Squid Proxy Server> General.
-
Click Show Advanced Options button at the bottom of the page.
-
Enter the following lines into the Custom Options field:
refresh_pattern -i windowsupdate.com/.*\.(cab|exe|ms[i|u|f|p]|[ap]sf|wm[v|a]|dat|zip|psf) 43200 80% 129600 reload-into-ims
refresh_pattern -i microsoft.com/.*\.(cab|exe|ms[i|u|f|p]|[ap]sf|wm[v|a]|dat|zip|psf) 43200 80% 129600 reload-into-ims
refresh_pattern -i windows.com/.*\.(cab|exe|ms[i|u|f|p]|[ap]sf|wm[v|a]|dat|zip|psf) 43200 80% 129600 reload-into-ims
refresh_pattern -i microsoft.com.akadns.net/.*\.(cab|exe|ms[i|u|f|p]|[ap]sf|wm[v|a]|dat|zip|psf) 43200 80% 129600 reload-into-ims
refresh_pattern -i deploy.akamaitechnologies.com/.*\.(cab|exe|ms[i|u|f|p]|[ap]sf|wm[v|a]|dat|zip|psf) 43200 80% 129600 reload-into-ims
range_offset_limit none
For caching MAC Updates you may add the following lines:
refresh_pattern ([^.]+.|)(download|adcdownload).(apple.|)com/.*\.(pkg|dmg) 4320 100% 43200 reload-into-ims
For caching AVG and other updates you may add the following lines:
refresh_pattern ([^.]+.|)avg.com/.*\.(bin) 4320 100% 43200 reload-into-ims
refresh_pattern ([^.]+.|)spywareblaster.net/.*\.(dtb) 4320 100% 64800 reload-into-ims
refresh_pattern ([^.]+.|)symantecliveupdate.com/.*\.(zip|exe) 43200 100% 43200 reload-into-ims
refresh_pattern ([^.]+.|)avast.com/.*\.(vpu|vpaa) 4320 100% 43200 reload-into-ims
-
Click Save
-
Go to Local Cache tab of the Squid configuration:
-
Change Hard Disk Cache size to something large, such as
3000or4000(3GB or 4GB), to accommodate the updates. -
Change the Maximum object size to something big, such as
512000for 512MB. Going bigger may be needed if any updates larger than that size are released. -
Click Save

**Figure 52. ** Setting Squid Harddisk Cache Size for Windows Updates