Configuring Cloud Threat Intelligence on Zenconsole
Cloud Reputation & Web Categorization page provides you with the ability to manage the cloud threat intelligence servers for querying real-time information about threat intelligence and web categorization.
The following options are available on this page:
- Enabling/Disabling the Cloud Reputation & Web Categorization
- Excluding the Local Domains
- Clearing the Cache
To configure the Zenarmor Cloud Reputation & Web Categorization options, follow the steps given below:
- Select your firewall on Zenconsole.
- Click
Settingsmenu on the left-hand sidebar. - Click
Cloud Threat Intelligencemenu.

Figure 1. Zenconsole - Configuring Cloud Reputation & Web Categorization
Enabling Cloud Reputation & Web Categorization
By default, Cloud Reputation & Web Categorization option is enabled.
To disable updates from cloud threat intelligence servers:
- Click
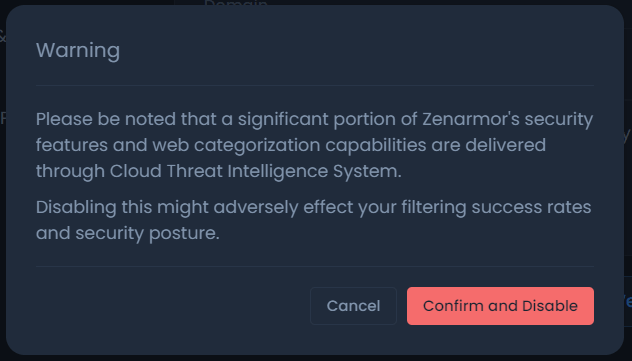
Enabledbutton upper right corner of the page. This will display a warning message.
Figure 2. Zenconsole - Confirming and Disabling Cloud Reputation & Web Categorization
- Click
Confirm and Disableto disable the Cloud Reputation & Web Categorization.
It is not recommended to disable this feature for effective application and web filtering.
A substantial percentage of Zenarmor's security features and web categorization capabilities are provided by Cloud Threat Intelligence System.
This might negatively impact your filtering success rates and security posture if disabled.
If you disabled Cloud Reputation & Web Categorization option and need to re-enable it, you can quickly enable this feature by clicking on the Disabled button upper right corner of the page. This will automatically activate Cloud Threat Intelligence System.
Excluding Local Domain From CTI
You can configure your local domain names to be excluded from being queried on Cloud Server. This might be handy if you see that your local domain is being categorized as Firstly Seen Sites.
Domains entered here will match all subdomains and FQDNs. For instance: example.com will also cover sub.example.com and host.sub.example.com. You don`t need to add each subdomain separately.
If you want to exclude your domain from cloud threat intelligence queries, you may follow the steps given below:
- Click
Exclude Local Domainbutton. This will open a dialog box. - Enter the local domain, such as
mycompany.io, to exclude from cloud queries into theLocal Domainfield. - Click
Submitto activate the settings. This will add the domain to the excluded domains list (cloud threat intelligence exclusion list) on the page.
Figure 3. Zenconsole - Excluding Local Domain From Cloud Queries
Editing a Domain in CTI Exclusion List
Zenconsole allows you to edit the excluded local domains. You can easily edit a local domain excluded from cloud threat intelligence queries by following the steps:
- Click on the
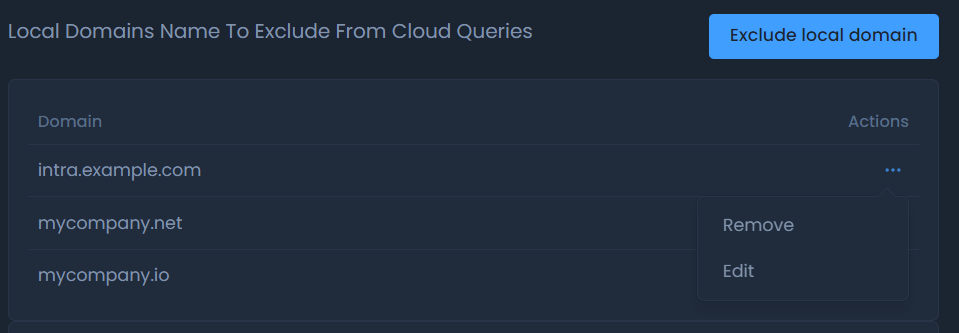
Actionsbutton with...(3 dot) icon next to the domain you wish to edit. This will open a drop-down menu. - Click on the
Editmenu. This will open a dialog box to allow you to edit the domain. - Make the required changes on the domain name and click the
Submitbutton to save the changes.

Figure 4. Zenconsole - Editing/Removing Local Domain From Cloud Queries
Removing a Domain From CTI Exclusion List
Zenconsole allows you to remove domains from cloud threat intelligence exclusion list. You can easily remove a local domain from the excluded list and start cloud threat intelligence queries for this domain by following the steps:
- Click on the
Actionsbutton with...(3 dot) icon next to the domain you wish to remove in the cloud threat intelligence exclusion list. This will open a drop-down menu. - Click on the
Removemenu. This will open a dialog box for confirmation. - Click the
Submitbutton to remove the domain.
Clearing Cache
Zenarmor caches the query results for better performance, and periodically checks for updates on the cached items. Zenconsole allows you to delete all cached categorization information.
To remove locally cached cloud threat intelligence data, click on the Clear Cache button at the bottom of the pane. This will automatically delete cache files on your firewall.
Clearing the cache might come handy if you want some particular categorization change to get applied immediately.