Managing CA Certificates on Zenconsole
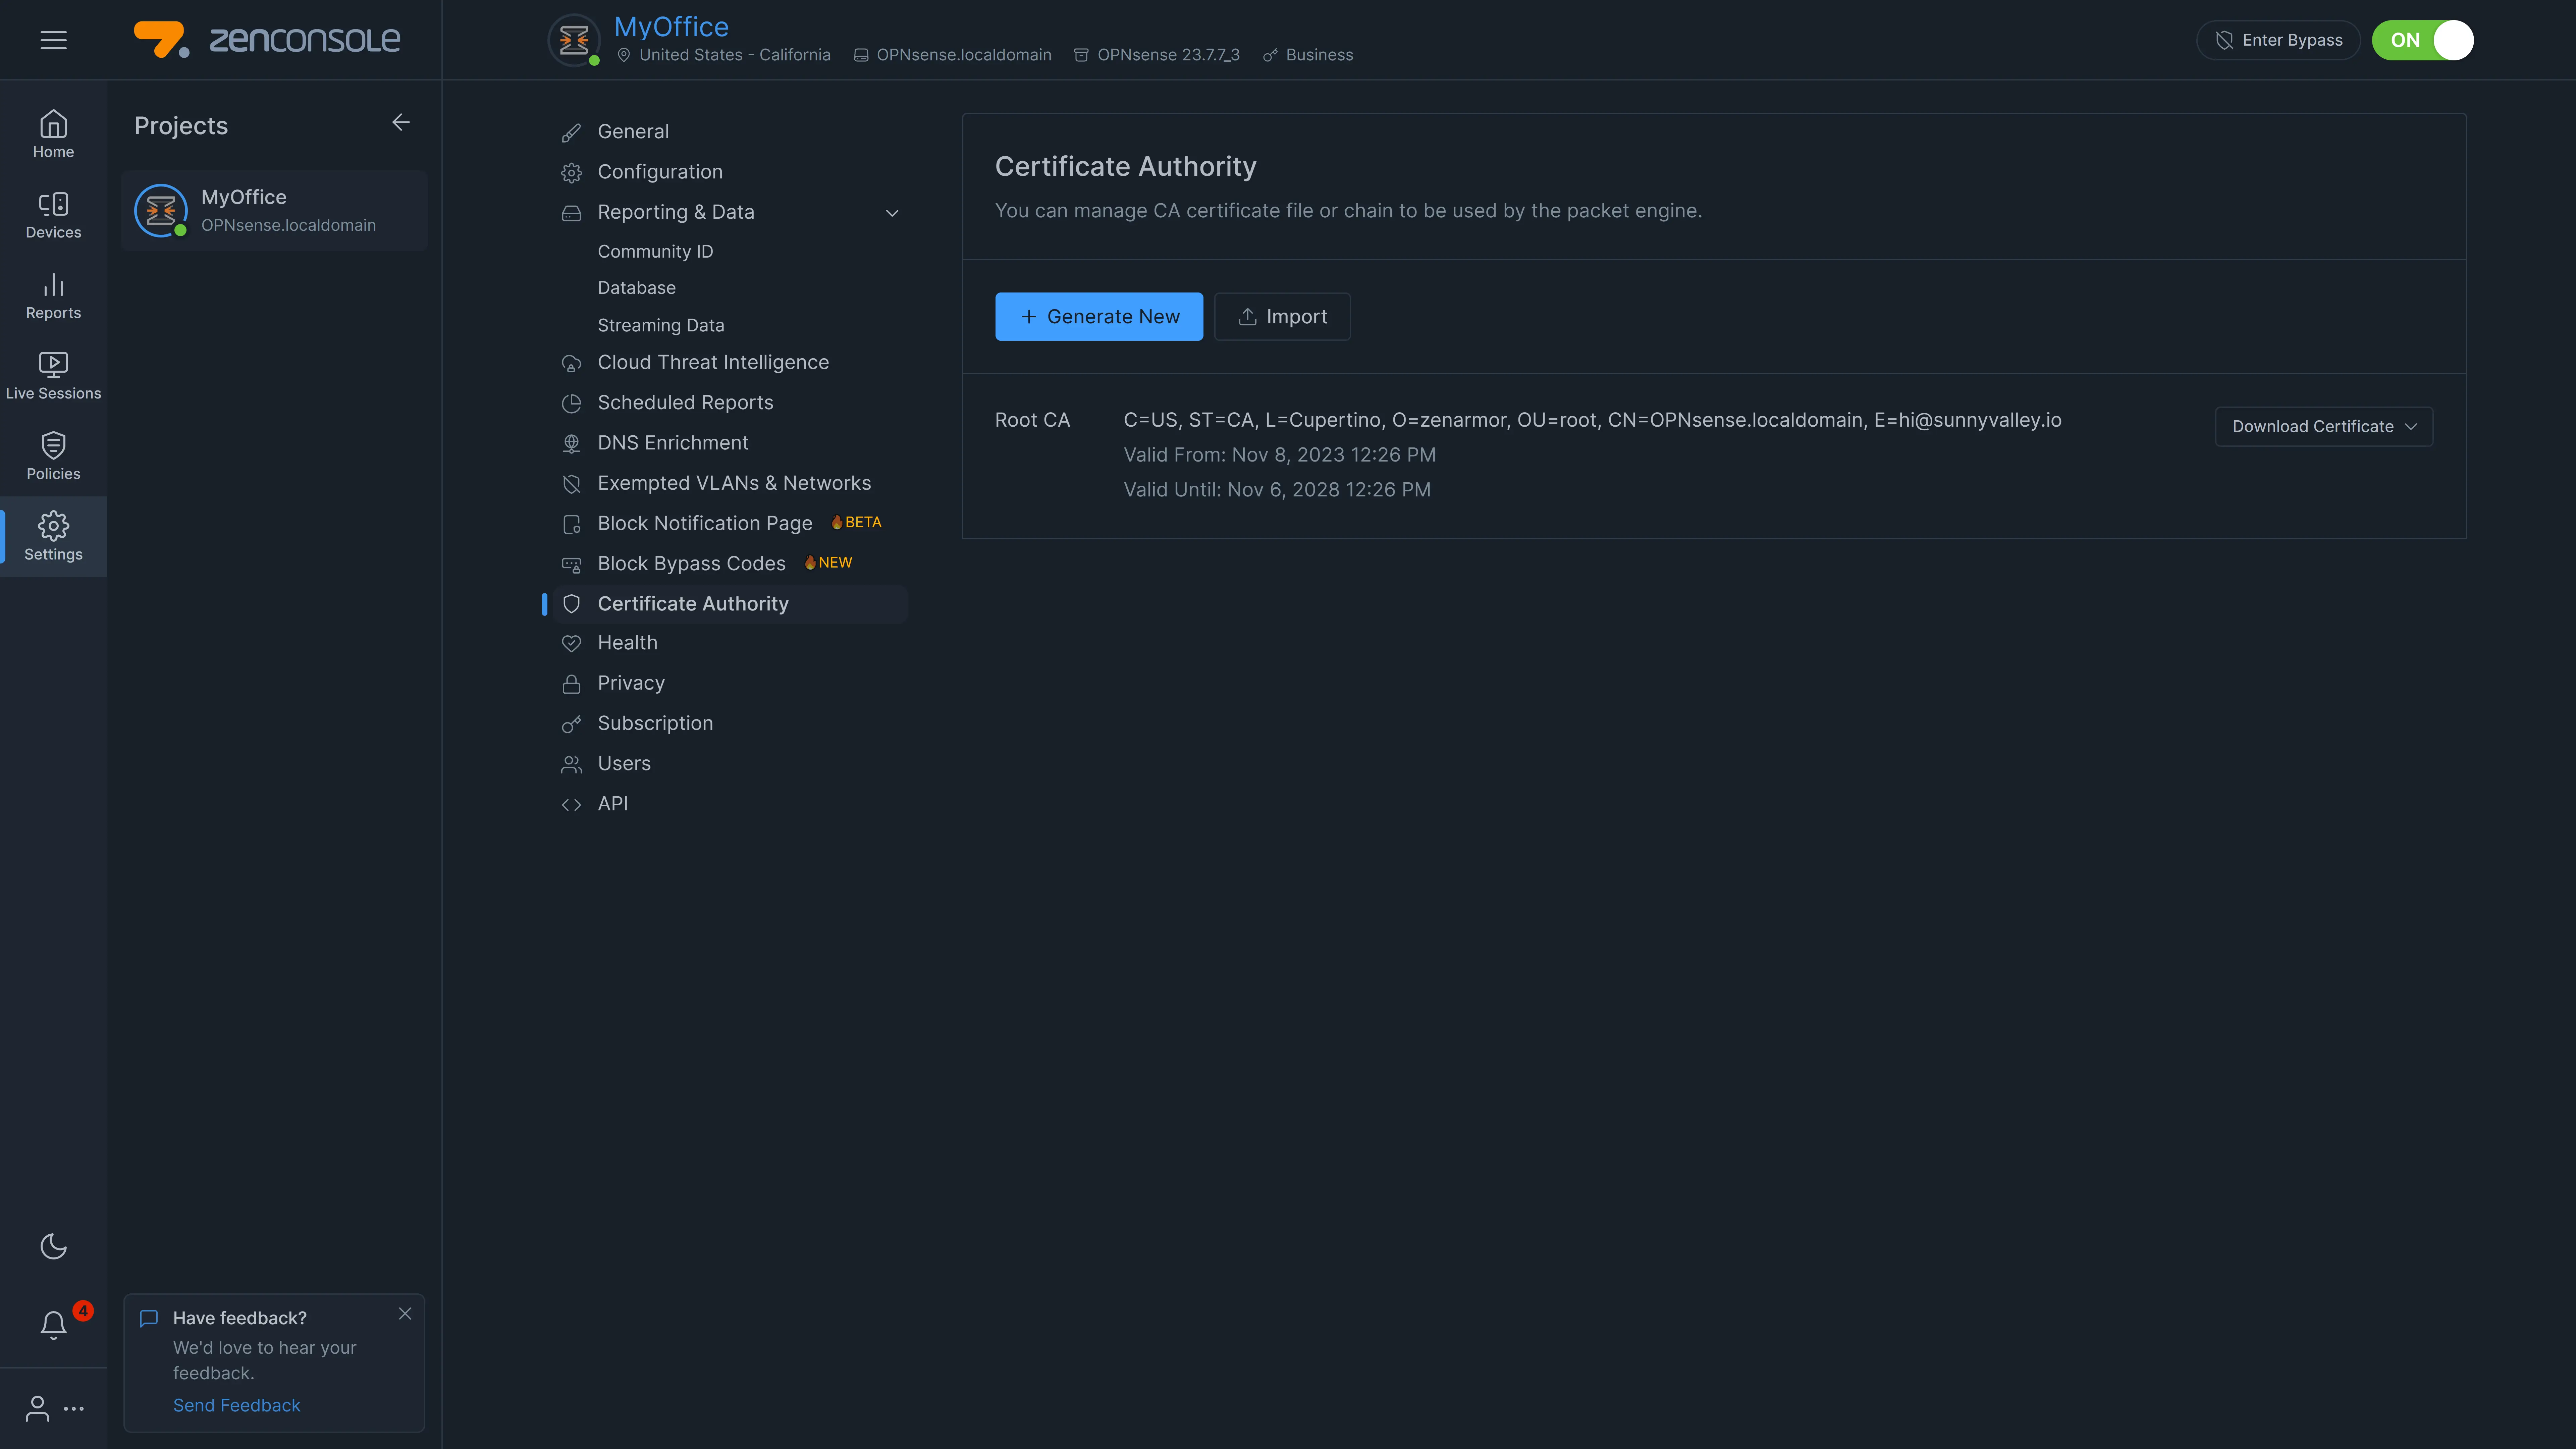
Zenconsole allows you to generate, import, and download CA (Certificate Authority) certificates.
As of version 1.16, Zenarmor supports internal CA certificates, enhancing security in packet inspection.

Figure 1. CA Certificate Settings Page
It is advisable to implement an intermediate Certificate Authority (CA) for Zenarmor. So that, you would be deploying your own root certificate authority on the endpoint devices.
If the firewall is compromised/reinstalled and the private key of the intermediate CA used for Zenarmor is lost, you may sign a new Zenarmor intermediate CA key using your own ROOT CA. Since the endpoints already own the customer's own ROOT CA, no issues will arise.
Generate CA Certificate
To generate a new CA certificate in Zenarmor NGFW, you may follow the next steps:
-
Select your firewall on the Zenconsole UI.
-
Navigate to the Settings → Certificate Authority (CA).
-
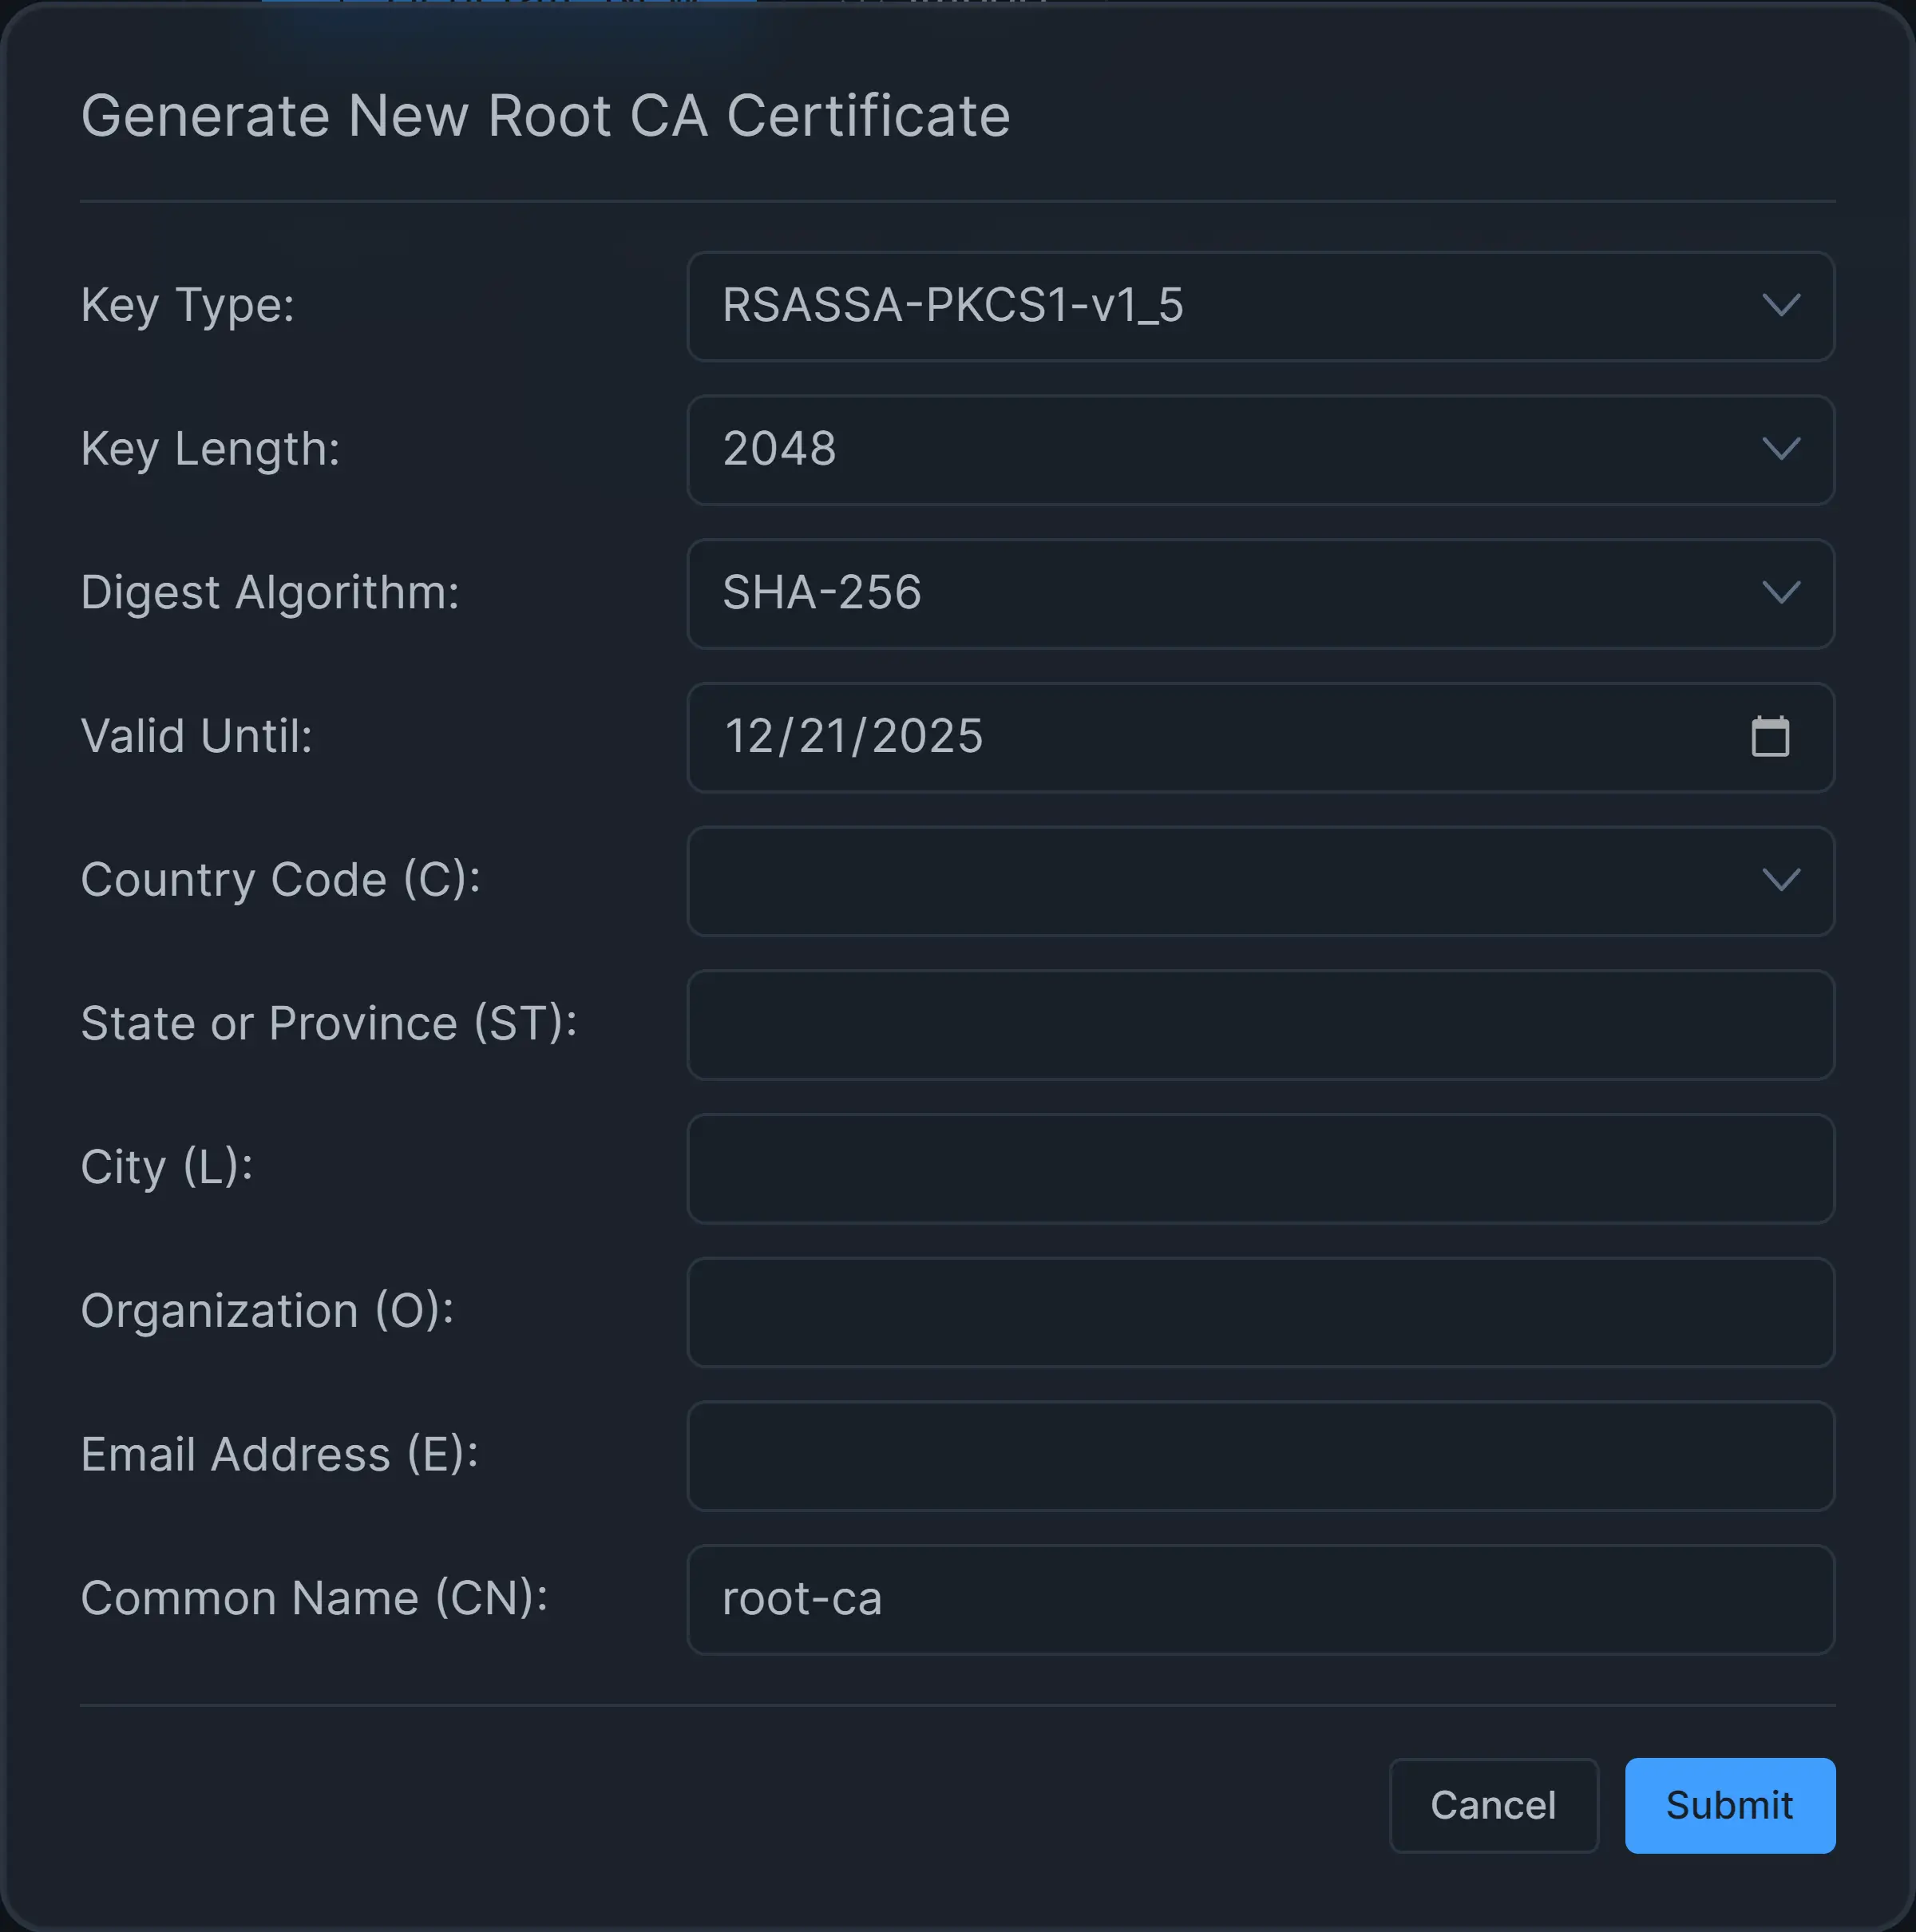
Click +Generate New button. This will open a dialog box for entering CA details.

Figure 2. Generate CA Certificate and Private Key
-
You may leave Key Type as default.
-
You may leave Key Length as default, 2048.
-
You may leave Digest Algorithm as the default, SHA-256.
-
Set the certificate expiration date via the Valid Until option.
-
Select Country Code, such as US.
-
Set State, such as California.
-
Set City, such as Sunnyvale.
-
Set Organization, such as MyCompany. 12.Set the Email Address.
-
Set Common Name, such as internal-zenarmor-ca.
-
Click Submit.
Import CA Certificate
To import your own CA certificate and private key into Zenarmor NGFW, you may follow the next steps:
-
Select your firewall on the Zenconsole UI.
-
Navigate to the Settings → Certificate Authority (CA).
-
Click Import button. This will open a dialog box for entering CA details.
-
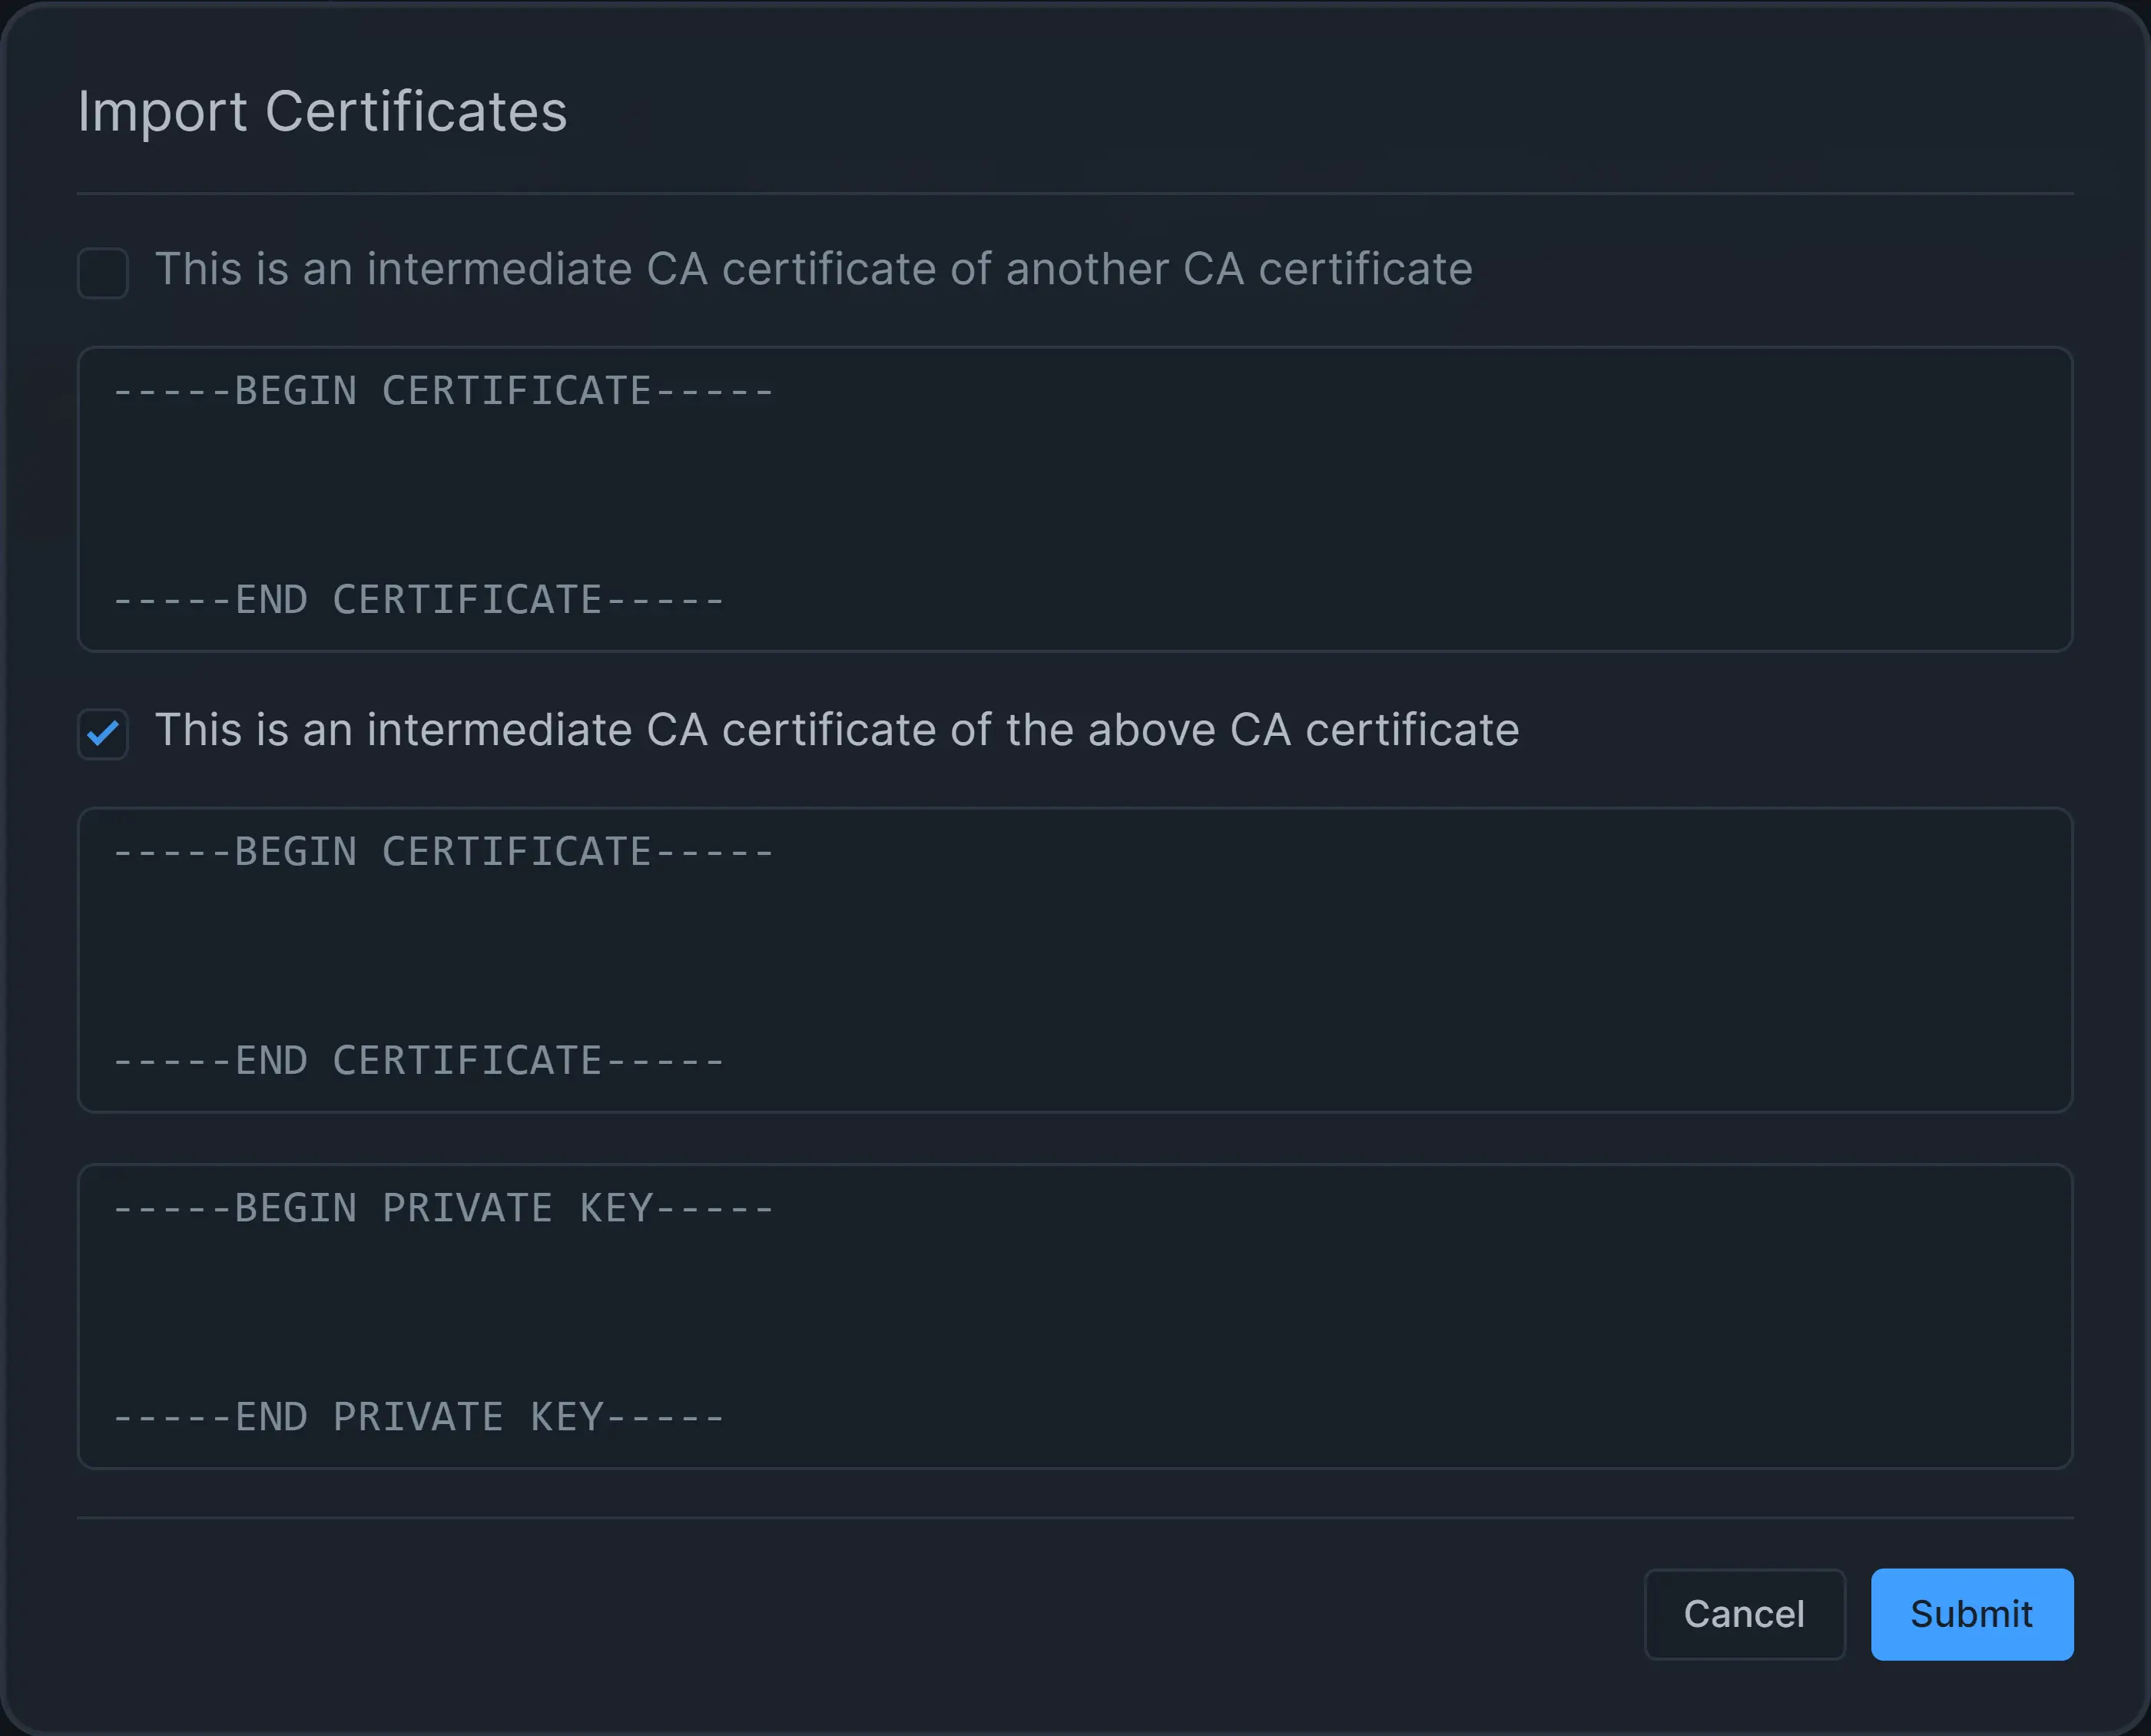
You may select the intermediate CA certificate option if it is an internal CA certificate. This will open a new field for entering internal CA details.
-
Copy and paste your CA certificate information details into the Certificate data field.
-
Copy and paste your private key information details into the Private key data field.
-
Click Submit.
-
Restart the Zenarmor packet engine to start using your CA certificate for SSL inspection.

Figure 3. Import CA Certificate and Private Key
Download CA Certificate
Zenarmor allows you to download available CA certificates in both PEM and CRT Format. To download the TLS CA certificate generated by Zenarmor internally, you may follow the next steps:
-
Select your firewall on the Zenconsole UI.
-
Navigate to the Settings → Certificate Authority (CA).
-
Click on the Download Certificate button next to the certificate that you want to save on your local disk. This will open a drop-down menu.
-
Select the format, PEM or CRT.
-
Click Save button to download the certificate. After downloading this certificate you may import it to your browser or operating system as a trusted CA.
Figure 4. Download CA Certificate
For inspecting TLS traffic or viewing the Zenarmor block notification page for TLS traffic, you need to install the Zenarmor internal CA certificate on your client devices as a trusted certificate.
If you reinstall your OPNsense firewall or Zenarmor node, you will need to import this CA certificate to your Zenarmor.
To be able to import the CA certificate, you must have not only the certificate file in PEM or CRT format you that you obtained from the Zenarmor Certificate Authority Settings page but also private key for the CA certificate.
These files, internal_ca.pem, and internal_ca.key, are located in the path /usr/local/zenarmor/etc/cert on your node.
It is highly advisable to duplicate and store these certificate files on a separate secure device that is not publicly accessible while enabling TLS inspection or blocking notice page functionalities. Automating this task may be achieved by using the backup and restore functionality of Zenarmor.