Adding Zenarmor Certificate to a Trust Store
Zenarmor allows administrators to utilize the certificate generated by the organization for full TLS inspection. In such cases, the end user's system certificate store already contains the root and intermediate certificates, which are necessary for trusting the organization's generated certificate. Nevertheless, if you prefer to utilize the Zenarmor internal CA certificate or do not have a previously generated certificate on your clients, you must install the Zenarmor internal CA certificate on your client devices as a trusted certificate to inspect TLS traffic or view the Zenarmor block notification page for TLS traffic.
When a client, such as a web browser, establishes a connection with a website, Zenarmor transmits its certificate to the browser as a component of the TLS negotiation process. In order for the client to authenticate the validity of this certificate, it is necessary to install Zenarmor's certificate on all clients and devices. The certificate may be downloaded from the Certificate Authority Settings page. Make sure to install the Zenarmor CA certificate on all client devices that need TLS traffic inspection.
In this guide, we will provide the steps for adding the Zenarmor CA certificate to the following operating systems and applications:
- MS Windows
- Linux
- FreeBSD
- Mozilla Firefox
- Microsoft Edge

How to Add Certificate to MS Windows Trust Store
You may import your CA certificate as a Trusted Root CA certificate by following the next steps in your Windows client:
-
Type
mmcin the search bar and press enter to run the Microsoft Management Control. -
Click on the File menu link and select Add/Remove Snap-in.

Figure 1. Add/Remove Snap-in Microsoft Management Control
-
Now under Available snap-ins, click Certificates, and then click Add. The Certificates snap-in allows you to browse the contents of the certificate stores for yourself, a service, or a computer.
-
Click OK.

Figure 2. Adding Certificates snap-in Microsoft Management Control
-
In the next dialog box, select Computer account and then on Next.

Figure 3. Adding Certificates snap-in for Computer account
-
Now select Local computer and click on Finish.

Figure 4. Adding Certificates snap-in for Local Computer
-
Now, back in MMC, in the console tree, double-click on Certificates and then right-click on Trusted Root Certification Authorities Store. Under All tasks, select Import. This will open the Certificate Import Wizard.

Figure 5. Importing Certificates as Trusted Root CA

Figure 6. Certificates Import Wizard-1
-
Click the Next button.
-
Browse and select the CA certificate to import and then click the Next button.

Figure 7. Selecting Certificate file to Import in Certificates Import Wizard
-
Click Next.

Figure 8. Selecting Certificate Store in Certificates Import Wizard
-
Click the Finish button to complete the certificate import. After the import operation is completed successfully, a dialog box will appear.

Figure 9. Completing the Certificates Import Wizard

Figure 10. Zenarmor CA Certificate Import is completed successfully.
-
Click OK.

Figure 11. Internal Zenarmor CA Certificates Imported as a Trusted Root CA certificate in Windows 10 client
How to Add Certificate to Linux Trust Store
Linux-based systems, there is a built-in system command to add self-signed certificates, like Zenarmor CA certificate, to the trust store. Trusted certificate location may differ depending on your Linux distribution.
Debian/Ubuntu
To add your certificate as a trusted certificate on Debian or Ubuntu Linux distributions you may follow the next steps:
- Copy your certificate in PEM format into
usr/local/share/ca-certificates/directory. - Run the following command to update the CA store on your Linux client:
sudo chmod 644 <root certificate file path>
RHEL, Fedora, or CentOS
To add your certificate as a trusted certificate on RHEL, Fedora, or CentOS Linux distributions you may follow the next steps:
- Copy your certificate in PEM format into
/etc/pki/ca-trust/source/anchors/directory. - Run the following command to update the CA store on your Linux client:
update-ca-trust
OpenSUSE
To add your certificate as a trusted certificate on OpenSUSE Linux distribution you may follow the next steps:
- Copy your certificate in PEM format into
/etc/pki/ca-trust/source/anchors/directory. - Run the following command to update the CA store on your Linux client:
update-ca-trust
How to Add Certificate to FreeBSD
To add your certificate as a trusted certificate on FreeBSD you may follow the next steps:
- Copy your certificate into
/usr/local/etc/ssl/certsdirectory (create if necessary). - Run the following command to update the CA store on your FreeBSD client:
certctl rehash
How to Add Certificate to Mozilla Firefox Trust Store
You may add your root certificate to the Mozilla Firefox Trust store in two ways.
- Manual
- Automatic
1. Manual Method
You may manually import your certificate as a trusted certificate into the certificate store of the Mozilla Firefox browser by following two main steps:
- Import the certificate into the Firefox browser of a user.
- Copy the certificate into the users' Firefox profiles to automatically install the root certificate.
1. Import the certificate into the Firefox browser of a user
The Firefox profile contains a cert#.db file, where # denotes the version number of the .db file that is accessible with your Firefox profile. This file contains all of the security certificates that have been installed on the browser. The cert#.db file is promptly updated with the newly installed certificate when the Zenarmor certificate is deployed in the browser.
To import your certificate as a trusted certificate into the certificate store of the Firefox browser, you may follow the next steps:
-
Launch the Firefox browser, and click the gear icon in the upper-right corner.
-
Click Manage More Settings menu.
-
Type
certificateinto the search box.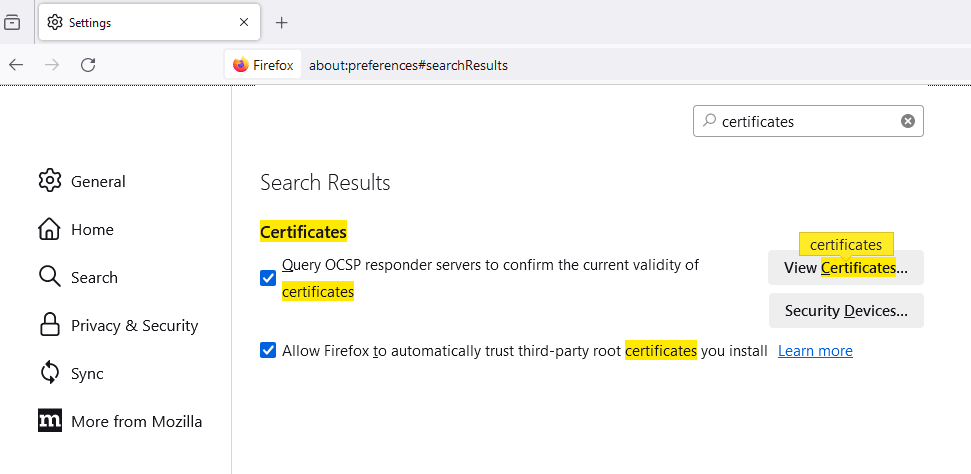
Figure 12. Accessing Firefox Certificates Settings
-
Click View Certificates.. menu button. This will open Certificate Manager window.
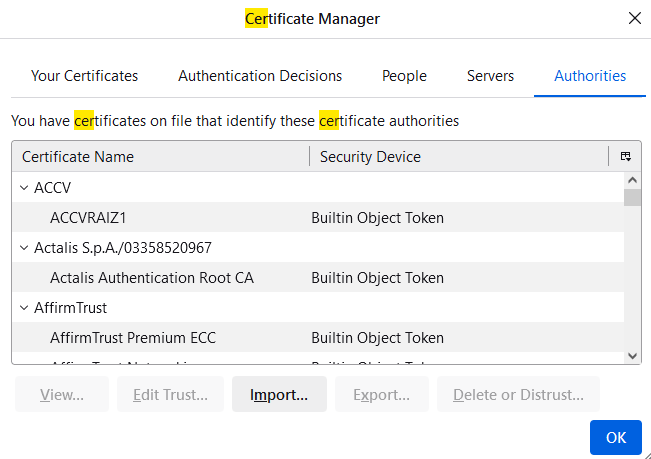
Figure 13. Firefox Certificate Manager
-
Click Import in the Authorities tab to browse and select the Zenarmor root certificate from your local folder.
-
Select Trust this CA to identify websites option and click OK.
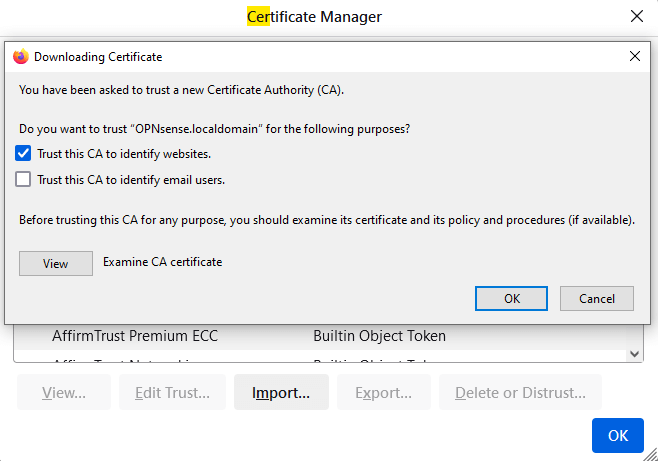
Figure 14. Firefox Importing Certificates
-
Click OK to store the imported certificate automatically in the Application Data folder, which is hidden by default.
2. Copy the certificate into the users' Firefox profiles to automatically install the root certificate
You may copy the certificate into the users' Firefox profiles on MS Windows machines by following the next steps:
-
Open the Run prompt, type
%AppData%, and click OK. -
Navigate to
Mozilla/Firefox/Profiles/xxxxx.default-xxxx/cert#.db. In our example, the Firefox profile uses thecert9.dbfile.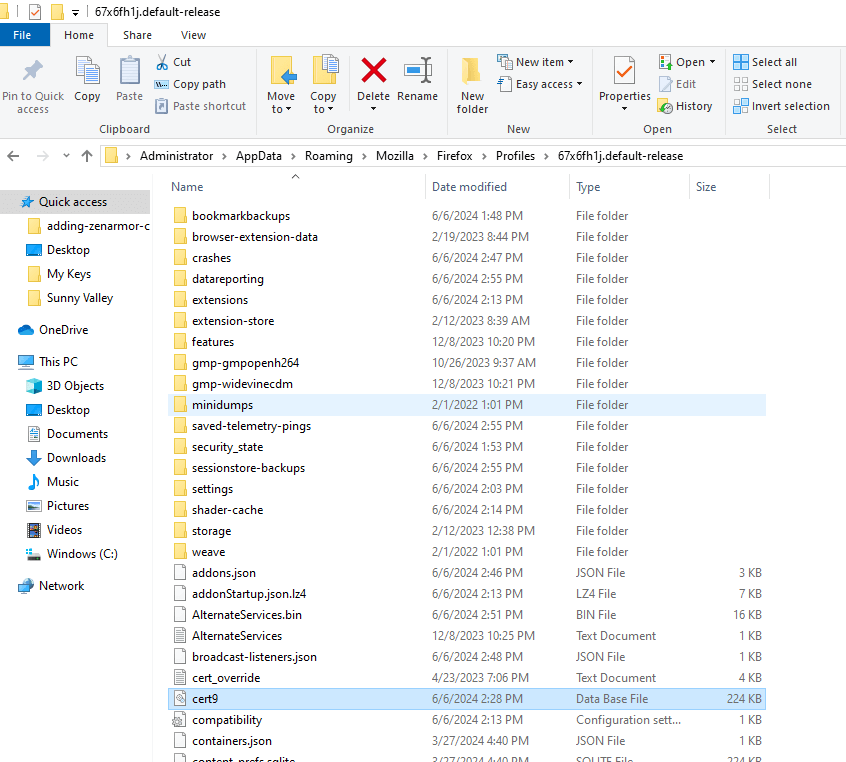
Figure 15. Accessing Firefox Certificates DB File
-
Copy this file into the Firefox profiles of your other users.
2. Automatic Method
Mozilla Firefox versions 49 or later can be configured to automatically import and install SSL root certificates for your user by utilizing the Windows root certificate store. To configure Mozilla Firefox browser settings for automatically importing your certificates from the Windows trust store, you may follow the next steps:
-
Run the Mozilla Firefox browser and enter
about:configin the address bar. This will display a caution prompt.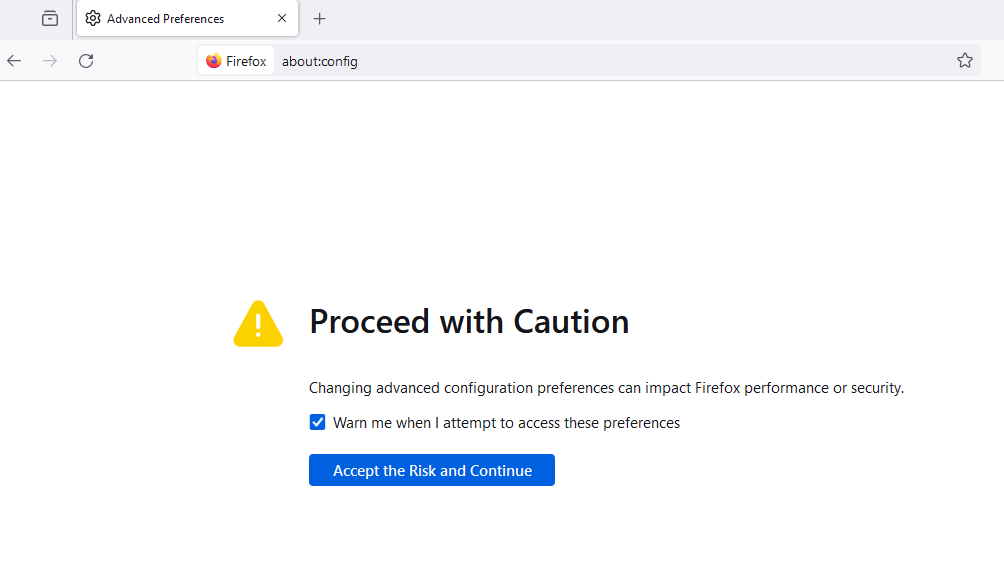
Figure 16. Firefox Config Caution Prompt
-
Click Accept the Risk and Continue button.
-
Type
security.enterprise_roots.enabledin the search bar. You will see that the value is set tofalseby default. -
Click the toggle icon to set the value to
true.
Figure 17. Firefox Enabling Enterprise Root Certificates
How to Add Certificate to Microsoft Edge Trust Store
To import your certificate as a trusted certificate into the certificate store of the Microsoft Edge browser, you may follow the next steps:
-
Launch the Microsoft Edge browser, click the menu icon in the upper-right corner.
-
Click on the Settings menu.
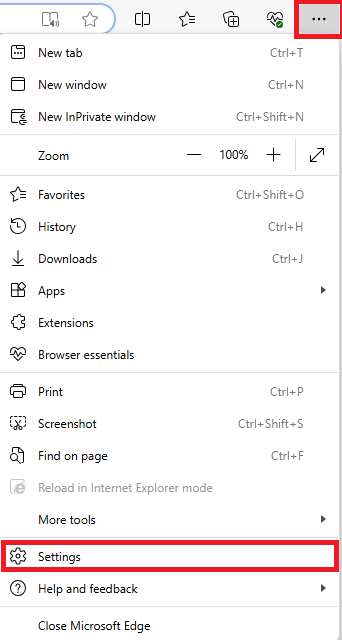
Figure 18. Accessing MS Edge Browser Settings
-
Navigate to the Privacy, search, and services.
-
Scroll down to the Security section.
-
Click Manage certificates. This will open the certificate management window.

Figure 19. Accessing MS Edge Browser Security Settings
-
Navigate to the Trusted Root Certification Authorities tab.
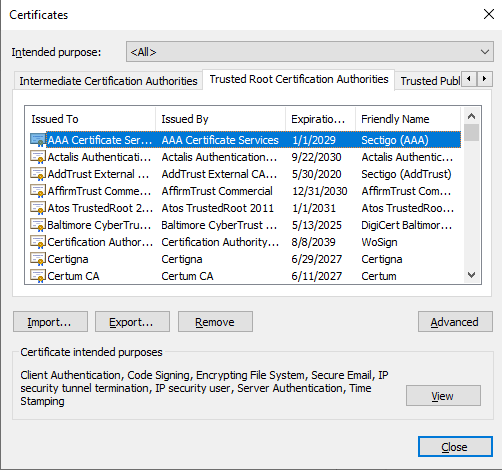
Figure 20. Accessing MS Edge Trusted Root Certification Authorities Settings
-
Click Import. This will launch the Certificate Import Wizard.
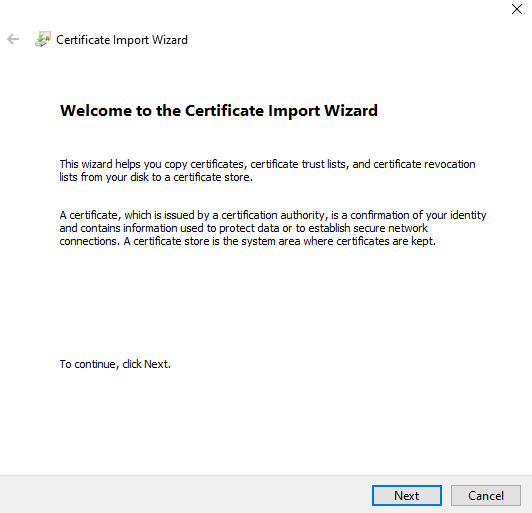
Figure 21. MS Edge Certificate Import Wizard
-
Click Next.
-
Click Browse to select the Zenarmor root certificate from your local directory.
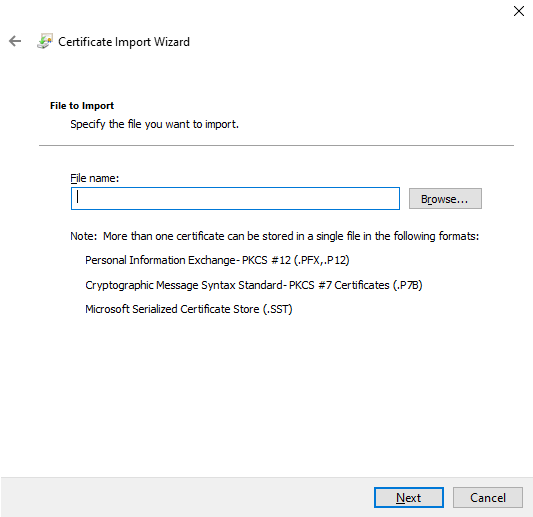
Figure 22. Browsing Certificate via MS Edge Certificate Import Wizard
-
Click Next.
-
Select Place all certificates to the following store option to place the Zenarmor certificate in the Trusted Root Certification Authorities store and click Next.
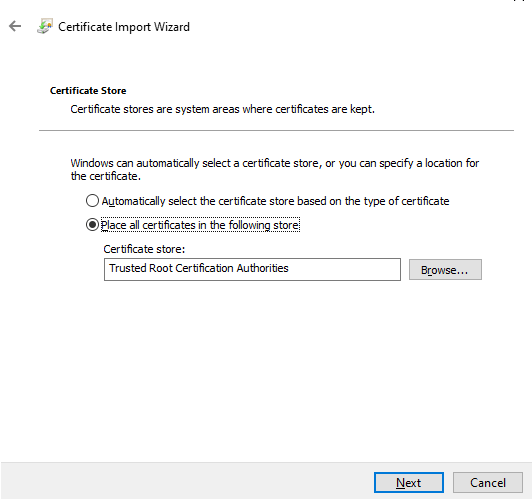
Figure 23. Placing certificate to Trusted Root Certification Authorities
-
Click Finish to complete the import process. The Zenarmor root certificate is successfully imported to the Microsoft Edge browser.
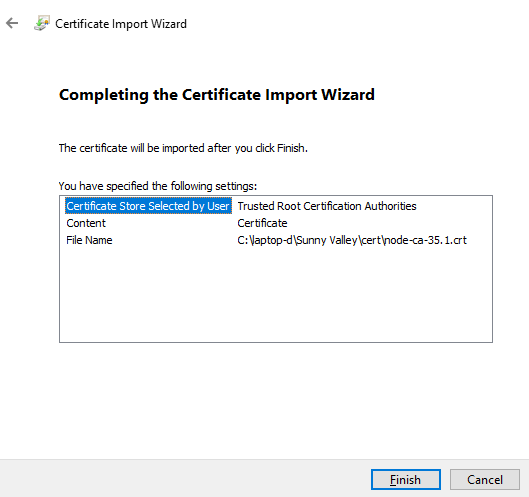
Figure 24. Completing MS Edge Certificate Import Wizard
How to Add Certificate to Android
To import your certificate as a trusted certificate into the certificate store of the Android device, you may follow the next steps:
- To download the certificate file on the device, send it as an email attachment or host it on a secure website.
- You may click the certificate file to allow the Android system to install it or follow the steps given below.
- Open your device's Settings app.
- Tap Security & privacy > More security settings > Encryption & credentials.
- Tap Install a certificate > CA certificate. A warning message may be displayed to elucidate the potential security risks associated with the addition of a CA certificate.
- After reviewing the warning, select Install anyway. In order to proceed, the phone may require the credentials.
- Locate the certificate file in the file browser of the device and select it. The certificate should automatically install in the trusted CA store of the phone.
To verify, select Trusted Credentials on the Encryption & credentials page, then select the User button. The Zenarmor CA certificate should be displayed, indicating that it has been effectively installed on the Android device.
How to Add Certificate to iOS
To import your certificate as a trusted certificate into the certificate store of the iOS device, you may follow the next steps:
- To download the certificate file on the device, send it as an email attachment or host it on a secure website.
- You may click the certificate file to allow the iOS system to install it.
- Check that the certificate was properly installed under Settings > General > Profiles > Configuration Profiles. Ensure that the iOS device lists the Zenarmor CA as a trusted certificate authority.