Zenarmor Paid Editions Feature Guide
Premium in this guide refers to the Zenarmor Paid Subscription Tiers (Home, SOHO, Business, and SSE) and some features may vary depending on the type of Subscription. Please see "Plans & Pricing" for a complete feature comparison.
Zenarmor® Premium Features extend the capabilities of OPNsense to include advanced security and threat protection with near-real-time threat feeds, web, user and policy-based filtering, SIEM data integration, API access, reporting, and compliance capabilities as well as 24/7 help desk support.
Security
Zenarmor provides Advanced Threat Protection and Suspicious domain blocking features.
Advanced Threat Protection
Zenarmor Premium provides Advanced Threat Protection against the latest malware, viruses and phishing attacks by blocking websites that are known to host malware and viruses and launch phishing attacks. With Sunny Valley`s Advanced Threat Protection feed, users are provided with near-real-time commercial-grade threat tracking and protection.
To enable Advanced Security options on Zenarmor, you may follow the next steps:
-
Navigate to the Zenarmor → Policies on OPNsense UI.
-
Select the policy that you want to edit.
-
Click on the Security tab.
-
Click on the options that you want to block in the Advanced Security pane.
-
Click Apply Changes button at the top right of the window.
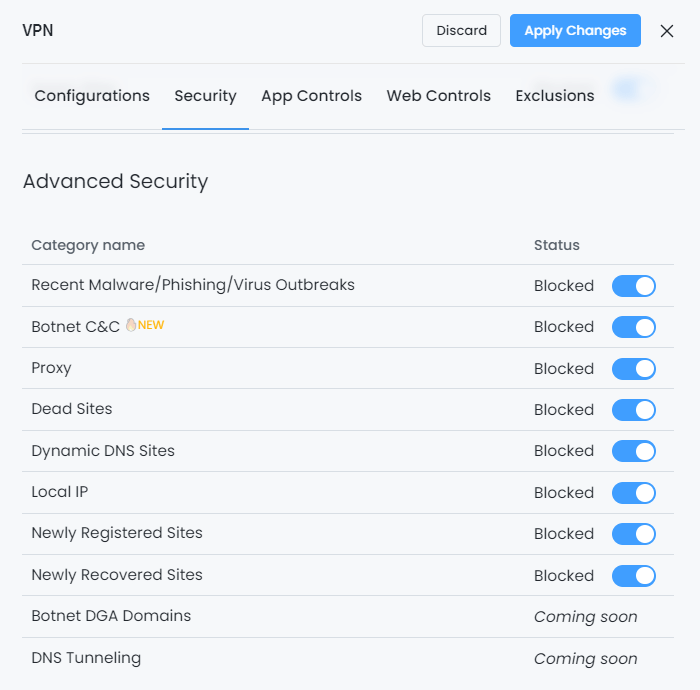
Figure 1. Enabling Advanced Threat Protection
Suspicious Domain Blocking
Zenarmor Premium blocks suspicious domains including expired domains, hacked and newly registered domains (NRDs) favored by threat actors for launching malicious campaigns. Research shows that NRDs, for example, are risky, revealing malicious usage of NRDs for phishing, malware, and online scams. In addition, Zenarmor Premium blocks any expired DynDNS sites.
To enable suspicious domain blocking in the Zenarmor, you may follow the next steps:
- Navigate to the Zenarmor → Policies on OPNsense UI.
- Select the policy that you want to edit.
- Click on the Security tab.
- Click on the options that you want to block, such as
Newly Registered SitesorNewly Recovered Sitesin the Advanced Security pane. - Click Apply Changes button at the top right of the window.
Filtering & Compliance
Zenarmor provides efficient Web Filtering feature that meets your compliance requirements.
Customized Landing Pages for Blocked Sessions
With Zenarmor Premium, IT administrators can create custom response web pages that are displayed when a user tries to access a blocked URL. With custom HTML pages, messages are displayed when a user requests a web page or file.
To enable or upload/view custom landing page, you may follow the next steps:
-
Navigate to the Zenarmor → Settings on OPNsense UI.
-
Click on the Block Notification Page.
-
Switch on the Display Block Notification Pages for TLS encrypted connections option to enable TLS landing page.
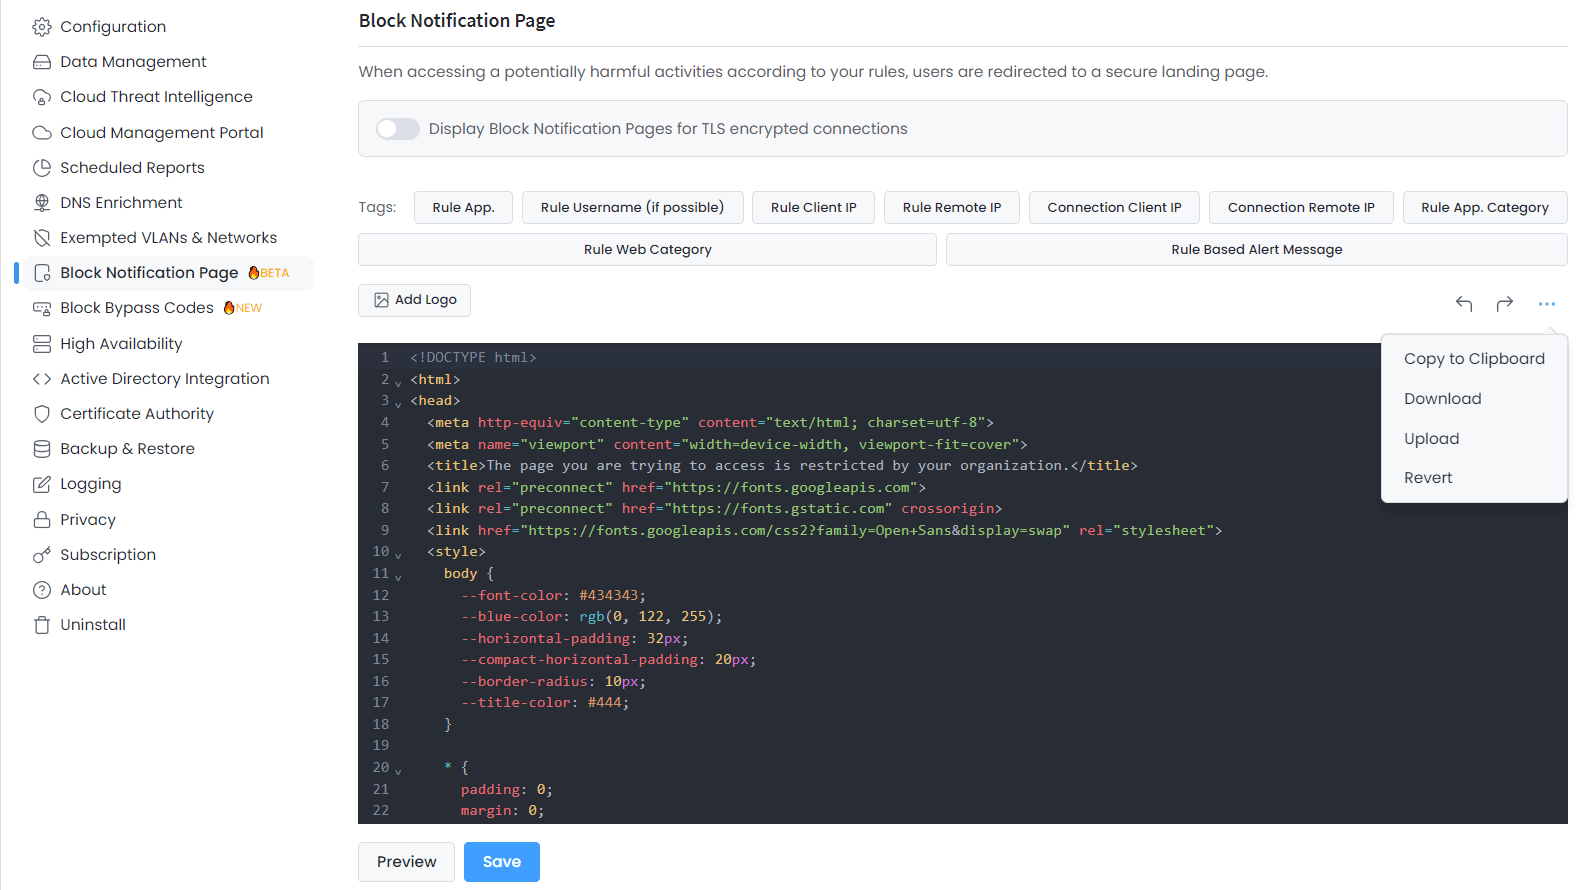
Figure 2. Enabling Landing Page
-
Click Preview button at the left bottom of the window to view the landing page template.
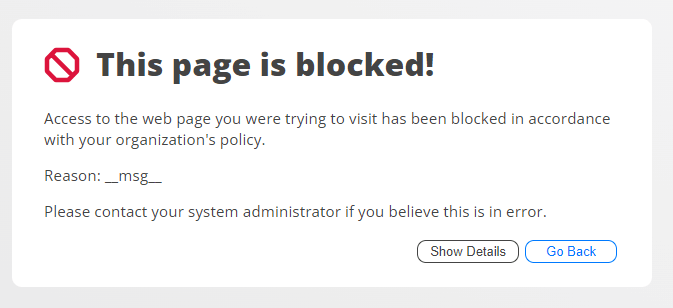
Figure 3. Landing Page
-
Click Save to activate settings.
Web and URL Filtering
Zenarmor Premium lets administrators create customizable web filtering profiles and policies based on a cloud-based web categorization of 300+ Million web sites under 60+ categories.
Enable or disable web and URL filtering controls by navigating to the Web Controls tab in the Policies section. Preset profiles allow for permissive to custom controls.
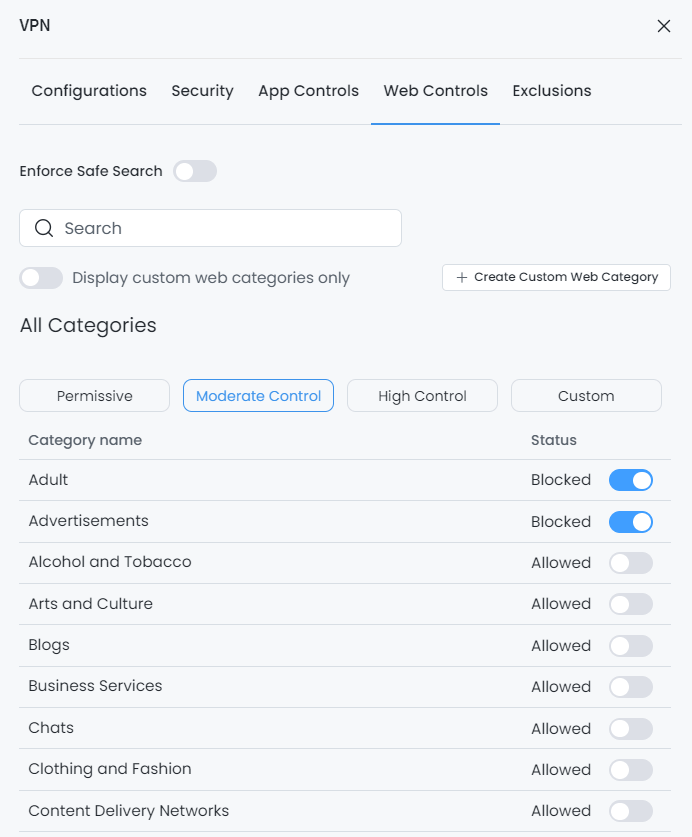
Figure 4. Web Filtering Profiles
Policy-based Filtering
Policy-based controls let users create an unlimited number of policies to customize filtering and controls for different groups of users. With Zenarmor Premium, an unlimited number of policies can be created based on Network Interfaces, VLANs, Subnet / IP addresses and users/groups. All policies are controlled via the Policy Wizard.
To add a new policy you may follow the next steps:
-
Click on +Create New Policy in the Zenarmor Policies section of OPNsense.

Figure 5. Creating a new policy
-
Click on the Configurations tab in the Zenarmor Policy Wizard.

Figure 6. Configuring a new policy
Filtering Policies by Interface/VLAN and IP/Network Address.
Enter the VLAN number and IP/Network Address.

Figure 7. Filtering Policies by Interface/VLAN
Filtering Policies based on MAC Address and Users and Groups and Schedule
Enter the MAC Address or Group or User and create a Schedule.

Figure 8. MAC Address based filtering
Once the Policy has been saved by clicking on the Apply Changes button on the top right of the window, the policy can be managed and edited in the main Policy window.
For more information, please refer to the Managing Policies
User-based Filtering
By enabling Captive Portal or installing the Zenarmor Active Directory Agent on an Active Directory server, users can be added to OPNsense for User-based filtering.
Integrations
Zenarmor Premium can stream data to external remote Elasticsearch or MongoDB servers for log parsing and Security Information and Event Management (SIEM) system integration. In the Settings section of the Zenarmor OPNsense portal select the Reporting & Data tab.
Scroll down to the Stream Reporting Data to External Elasticsearch section and enter the URI of the external Elasticsearch Server.

Figure 9. Streaming Reporting Data to An External ECS Database
API Access
Zenarmor Premium provides API access for Zenarmor engine configuration and management. Rest API keys can be created by following next steps:
-
Select the firewall on your Zenconsole.
-
Navigate to Settings > API.
-
Click +Generate API Key button. This will pop up a dialog box.

Figure 10. Generating API Key on Zenconsole
Full TLS Inspection
The Full TLS Inspection approach entails Zenarmor interrupting the TLS connection, decrypting the packet contents, doing a thorough packet inspection, and then re-encrypting the packet contents. A significant security feature, Zenarmor's Full TLS inspection capability improves visibility and control over encrypted network traffic. Attackers frequently employ encrypted traffic to obfuscate their malevolent endeavors, owing to its widespread adoption.
-
Navigate to the Zenarmor → Policies on your OPNsense web UI.
-
Select the policy that you want to enable TLS inspection.
-
Go to TLS Controls tab.
-
Click on the toggle bar next to the Enable Full TLS Inspection for this policy option. This will display the full TLS inspection settings below.
-
Click Apply Changes button to activate the full TLS Inspection for this policy after selecting the TLS inspection settings depending on your needs.
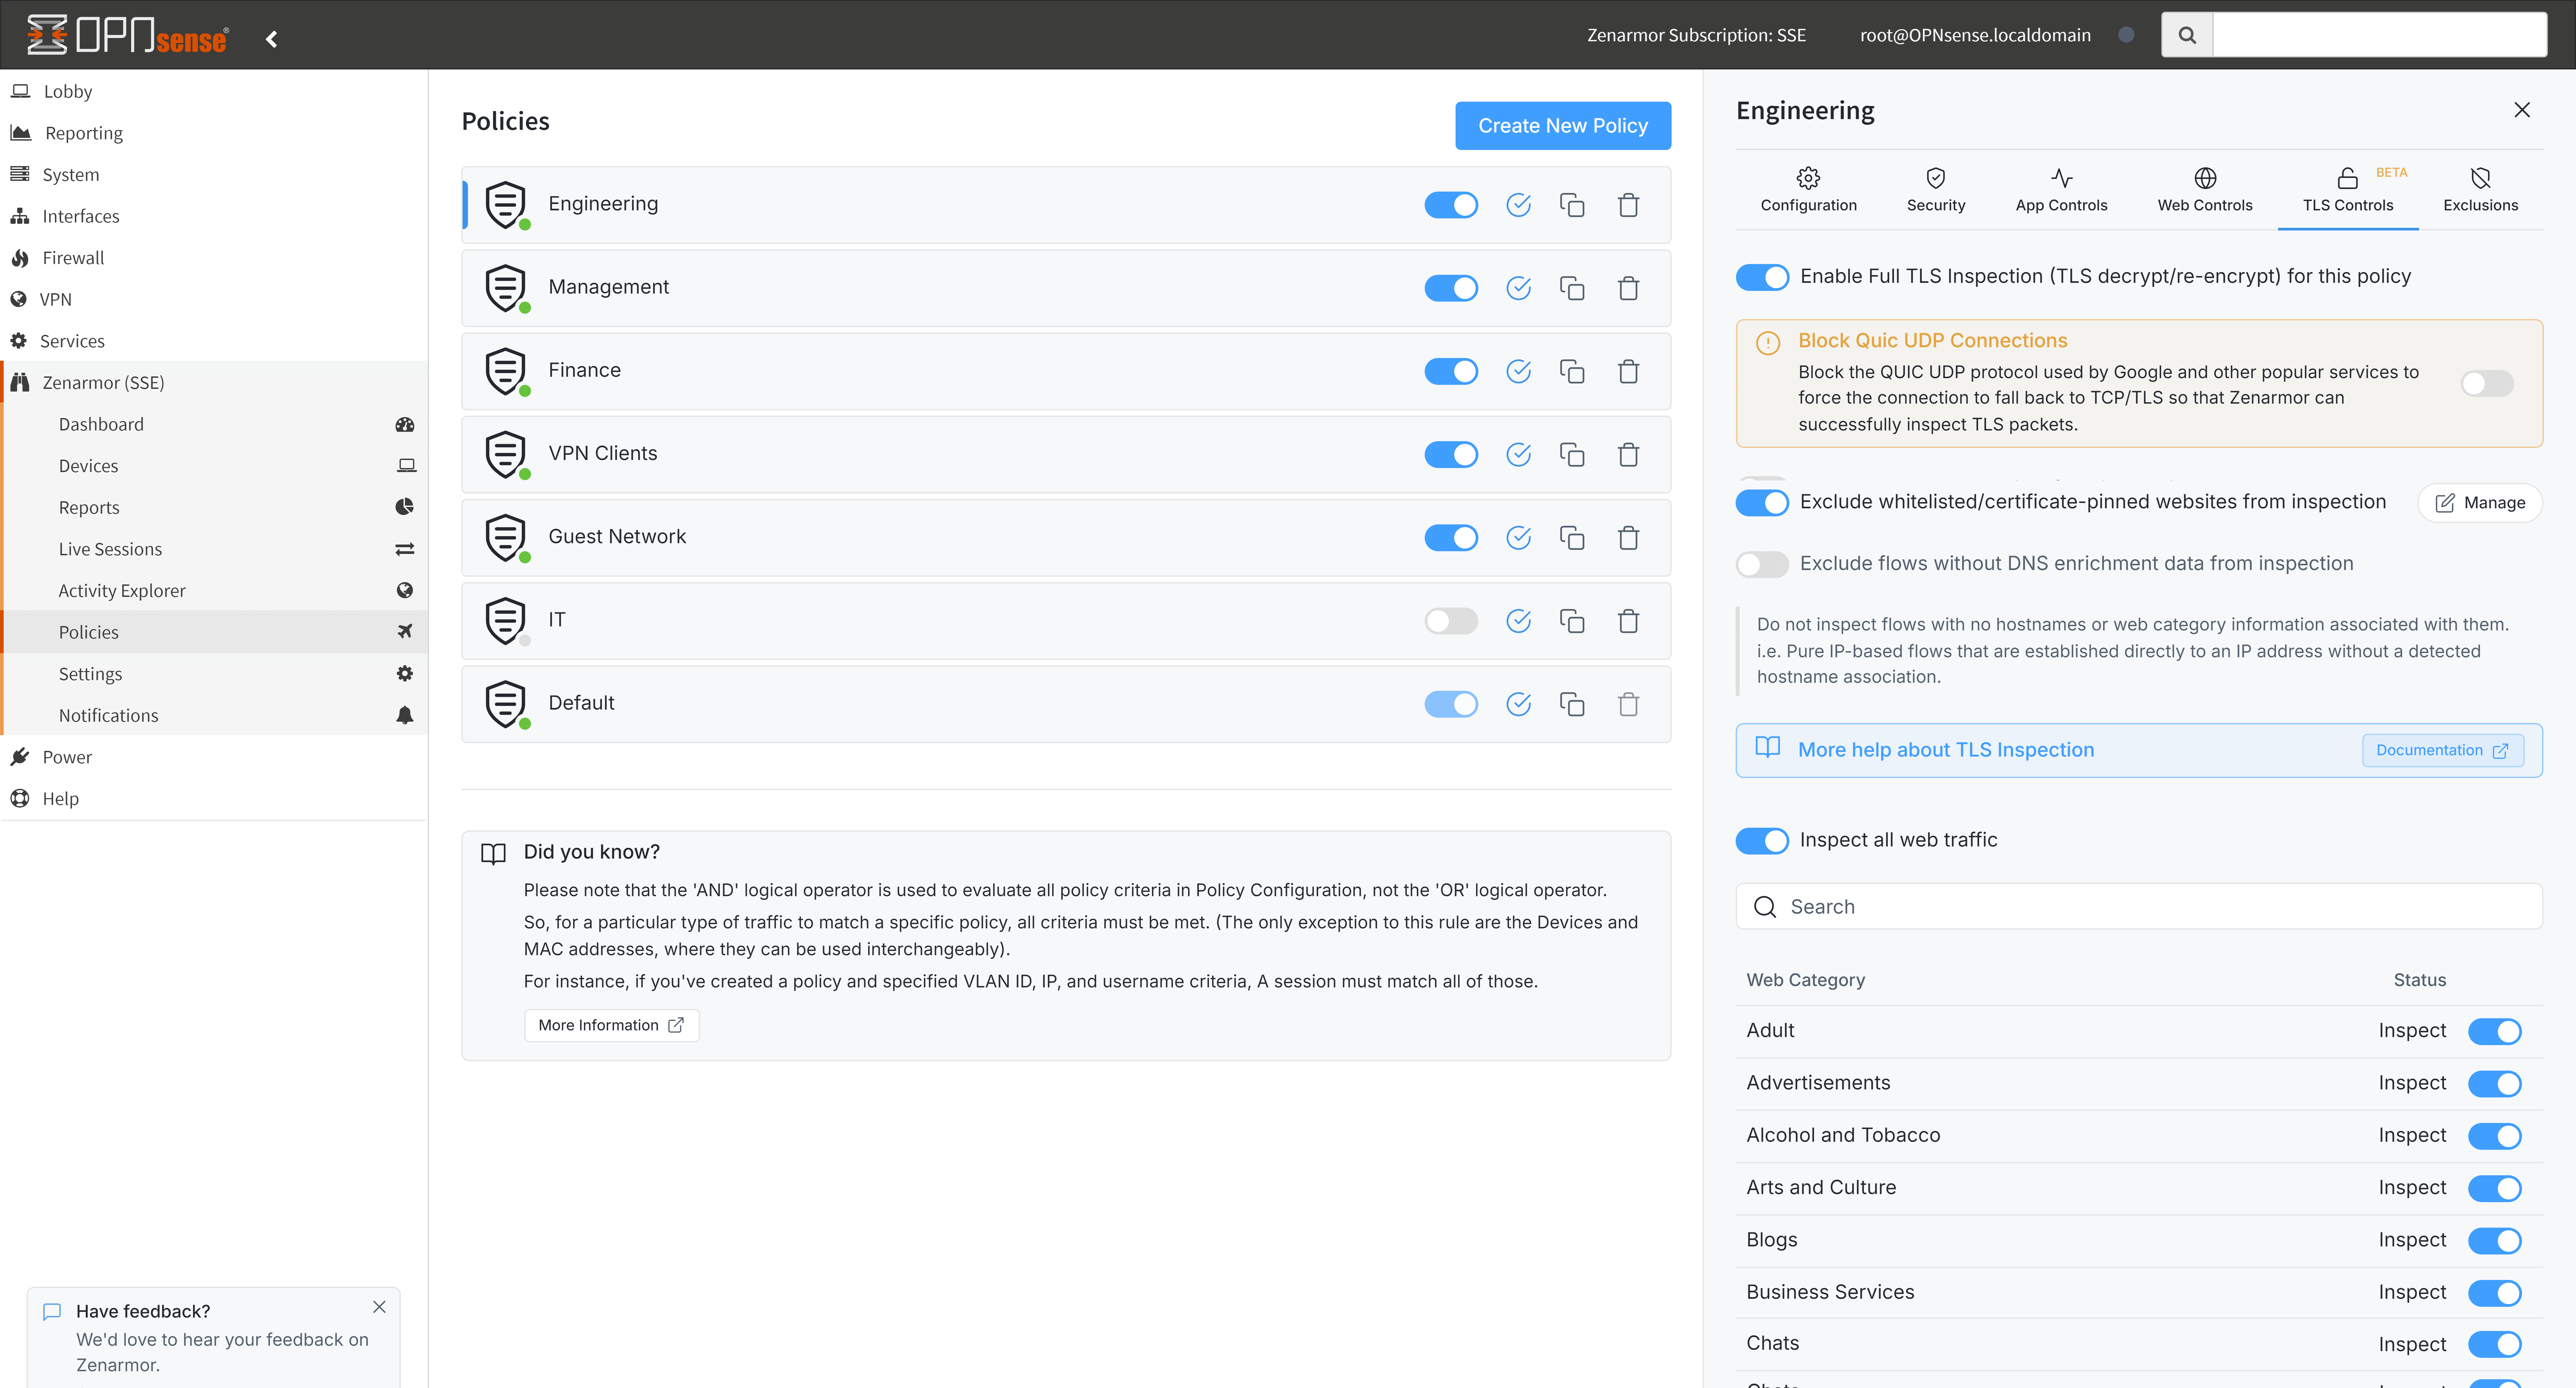
Figure 11. TLS Inspection Rules in a Policy
Cloud Access Security Broker (CASB)
Zenarmor has a Cloud Access Security Broker (CASB) feature which allows you to define cloud access rules on your policies. CASB) enhances cloud security by offering granular access control over cloud applications. This protects your organization from exposure to unauthorized information in cloud environments by allowing detailed management of individual application components and enforcing specific security policies. By utilizing Zenarmor's CASB capability, you can prevent hazardous sharing that may result in the loss of sensitive data or noncompliance.
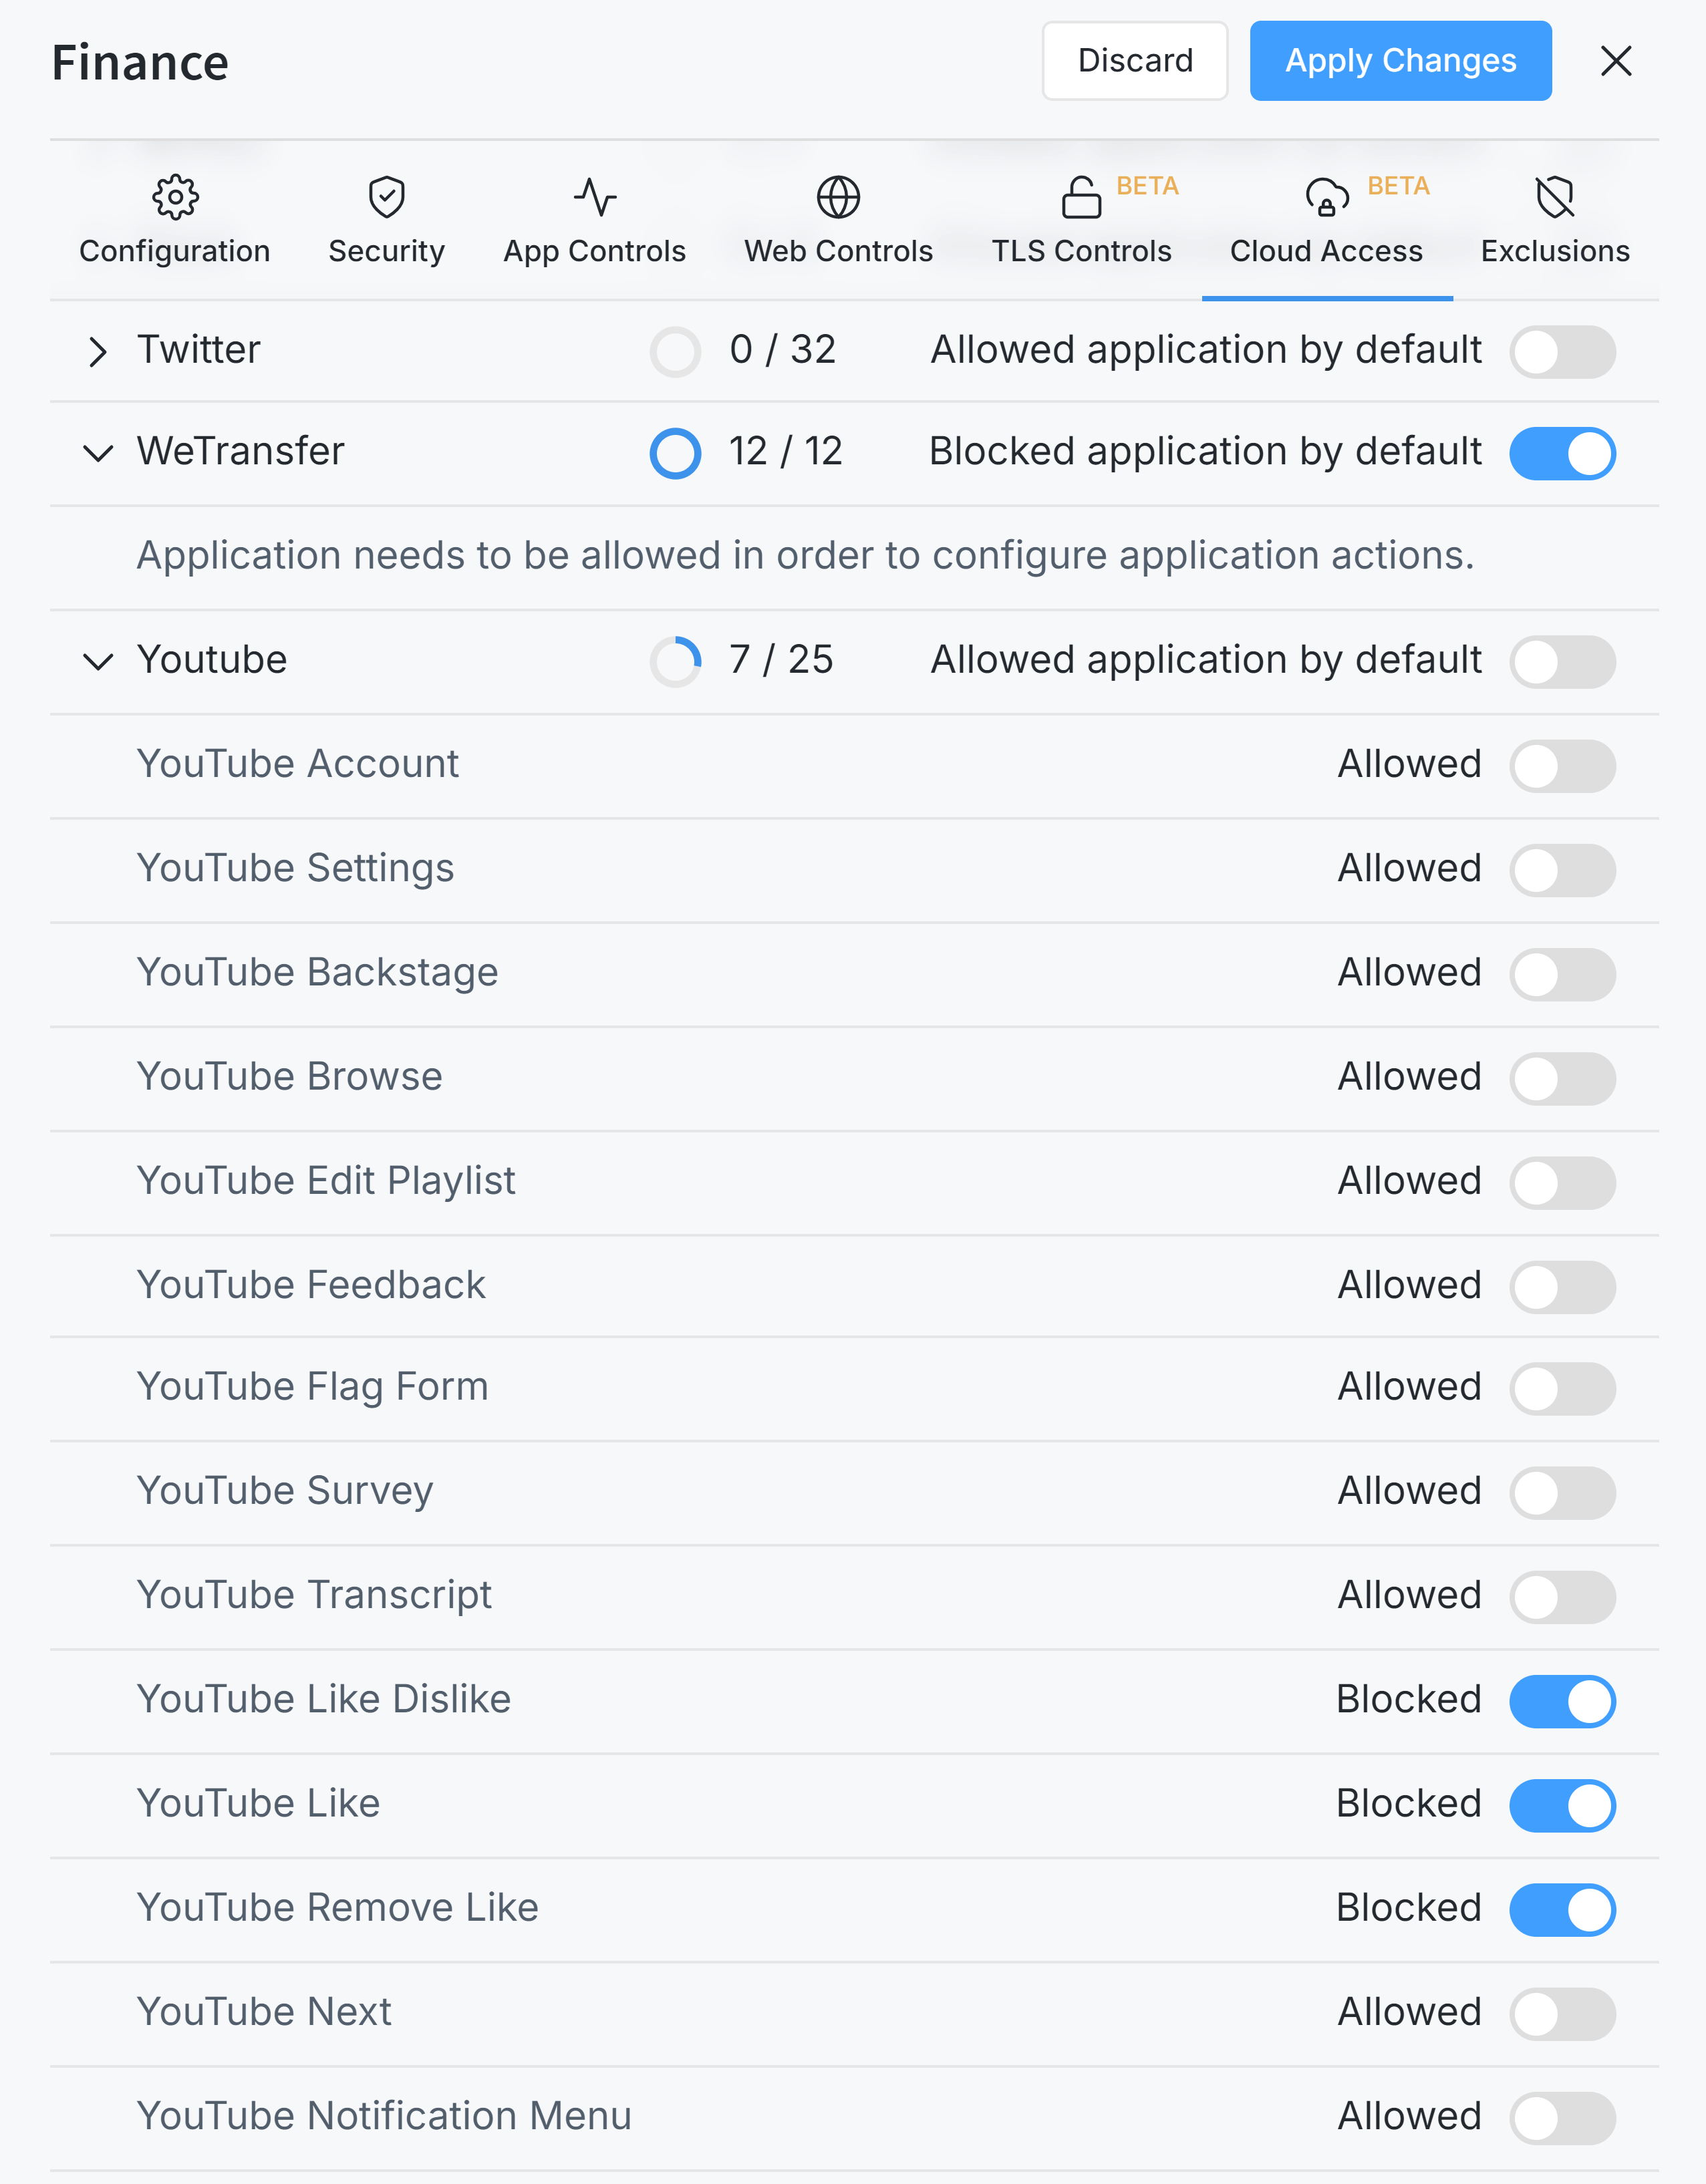
Figure 12. Cloud Access Rules in a Policy
You may easily block a cloud application entirely on your network by following these steps:
- Navigate to the Zenarmor → Policies on your OPNsense web UI.
- Select the policy that you want to configure CASB.
- Go to Cloud Access tab. You will see that all cloud applications are allowed by default.
- Find the cloud application that you want to block.
- Click on the toggle bar located in the Status column. This will block the application entirely.
- Click the Apply Changes button to activate the settings.
Support
Premium Support provides access to the Sunny Valley Help Desk. Through the SVN Help Desk, users can access configuration and access information, create high-priority support tickets for SVN engineers that are available 24/7.