Managing Users
Zenconsole allows you to easily manage users, groups, and administrators associated with your organization. You may easily perform the following tasks for user management on Zenconsole:
- Managing Users
- Approving/Rejecting Pending Users
- Adding Users
- Searching Users
- Removing Users
- Suspending Users
- Editing Users
- Managing Groups
- Adding Groups
- Updating Groups
- Removing Groups
- Viewing Group Members
- Managing Administrators
- Adding Administrators
- Editing Administrators
- Removing Administrators
Managing Users
You may manage organization users by following the next steps.
- Login Zenconsole and then select the organization you want to manage.
- Navigate to the Settings > Users page.
Authorized users who are allowed to sign in to the organization are listed on this page. Initially, there will be no authorized users after you create your organization. You must add organization users either automatically by importing them from your Google Workspace or manually.
Approving/Rejecting Pending Users
When you enable and configure the Google Workspace authentication method for your organization, your organization's users and groups are automatically fetched from Google Workspace. You will see users in a pending state waiting for your authorization. You need to approve these users in order to add them to your organization.
You may follow the next steps to approve/reject pending users for adding them to an organization:
-
Go to Organization Users page by navigating to the Settings > Users page on Zenconsole. You will see a list of pending users fetched from Google.
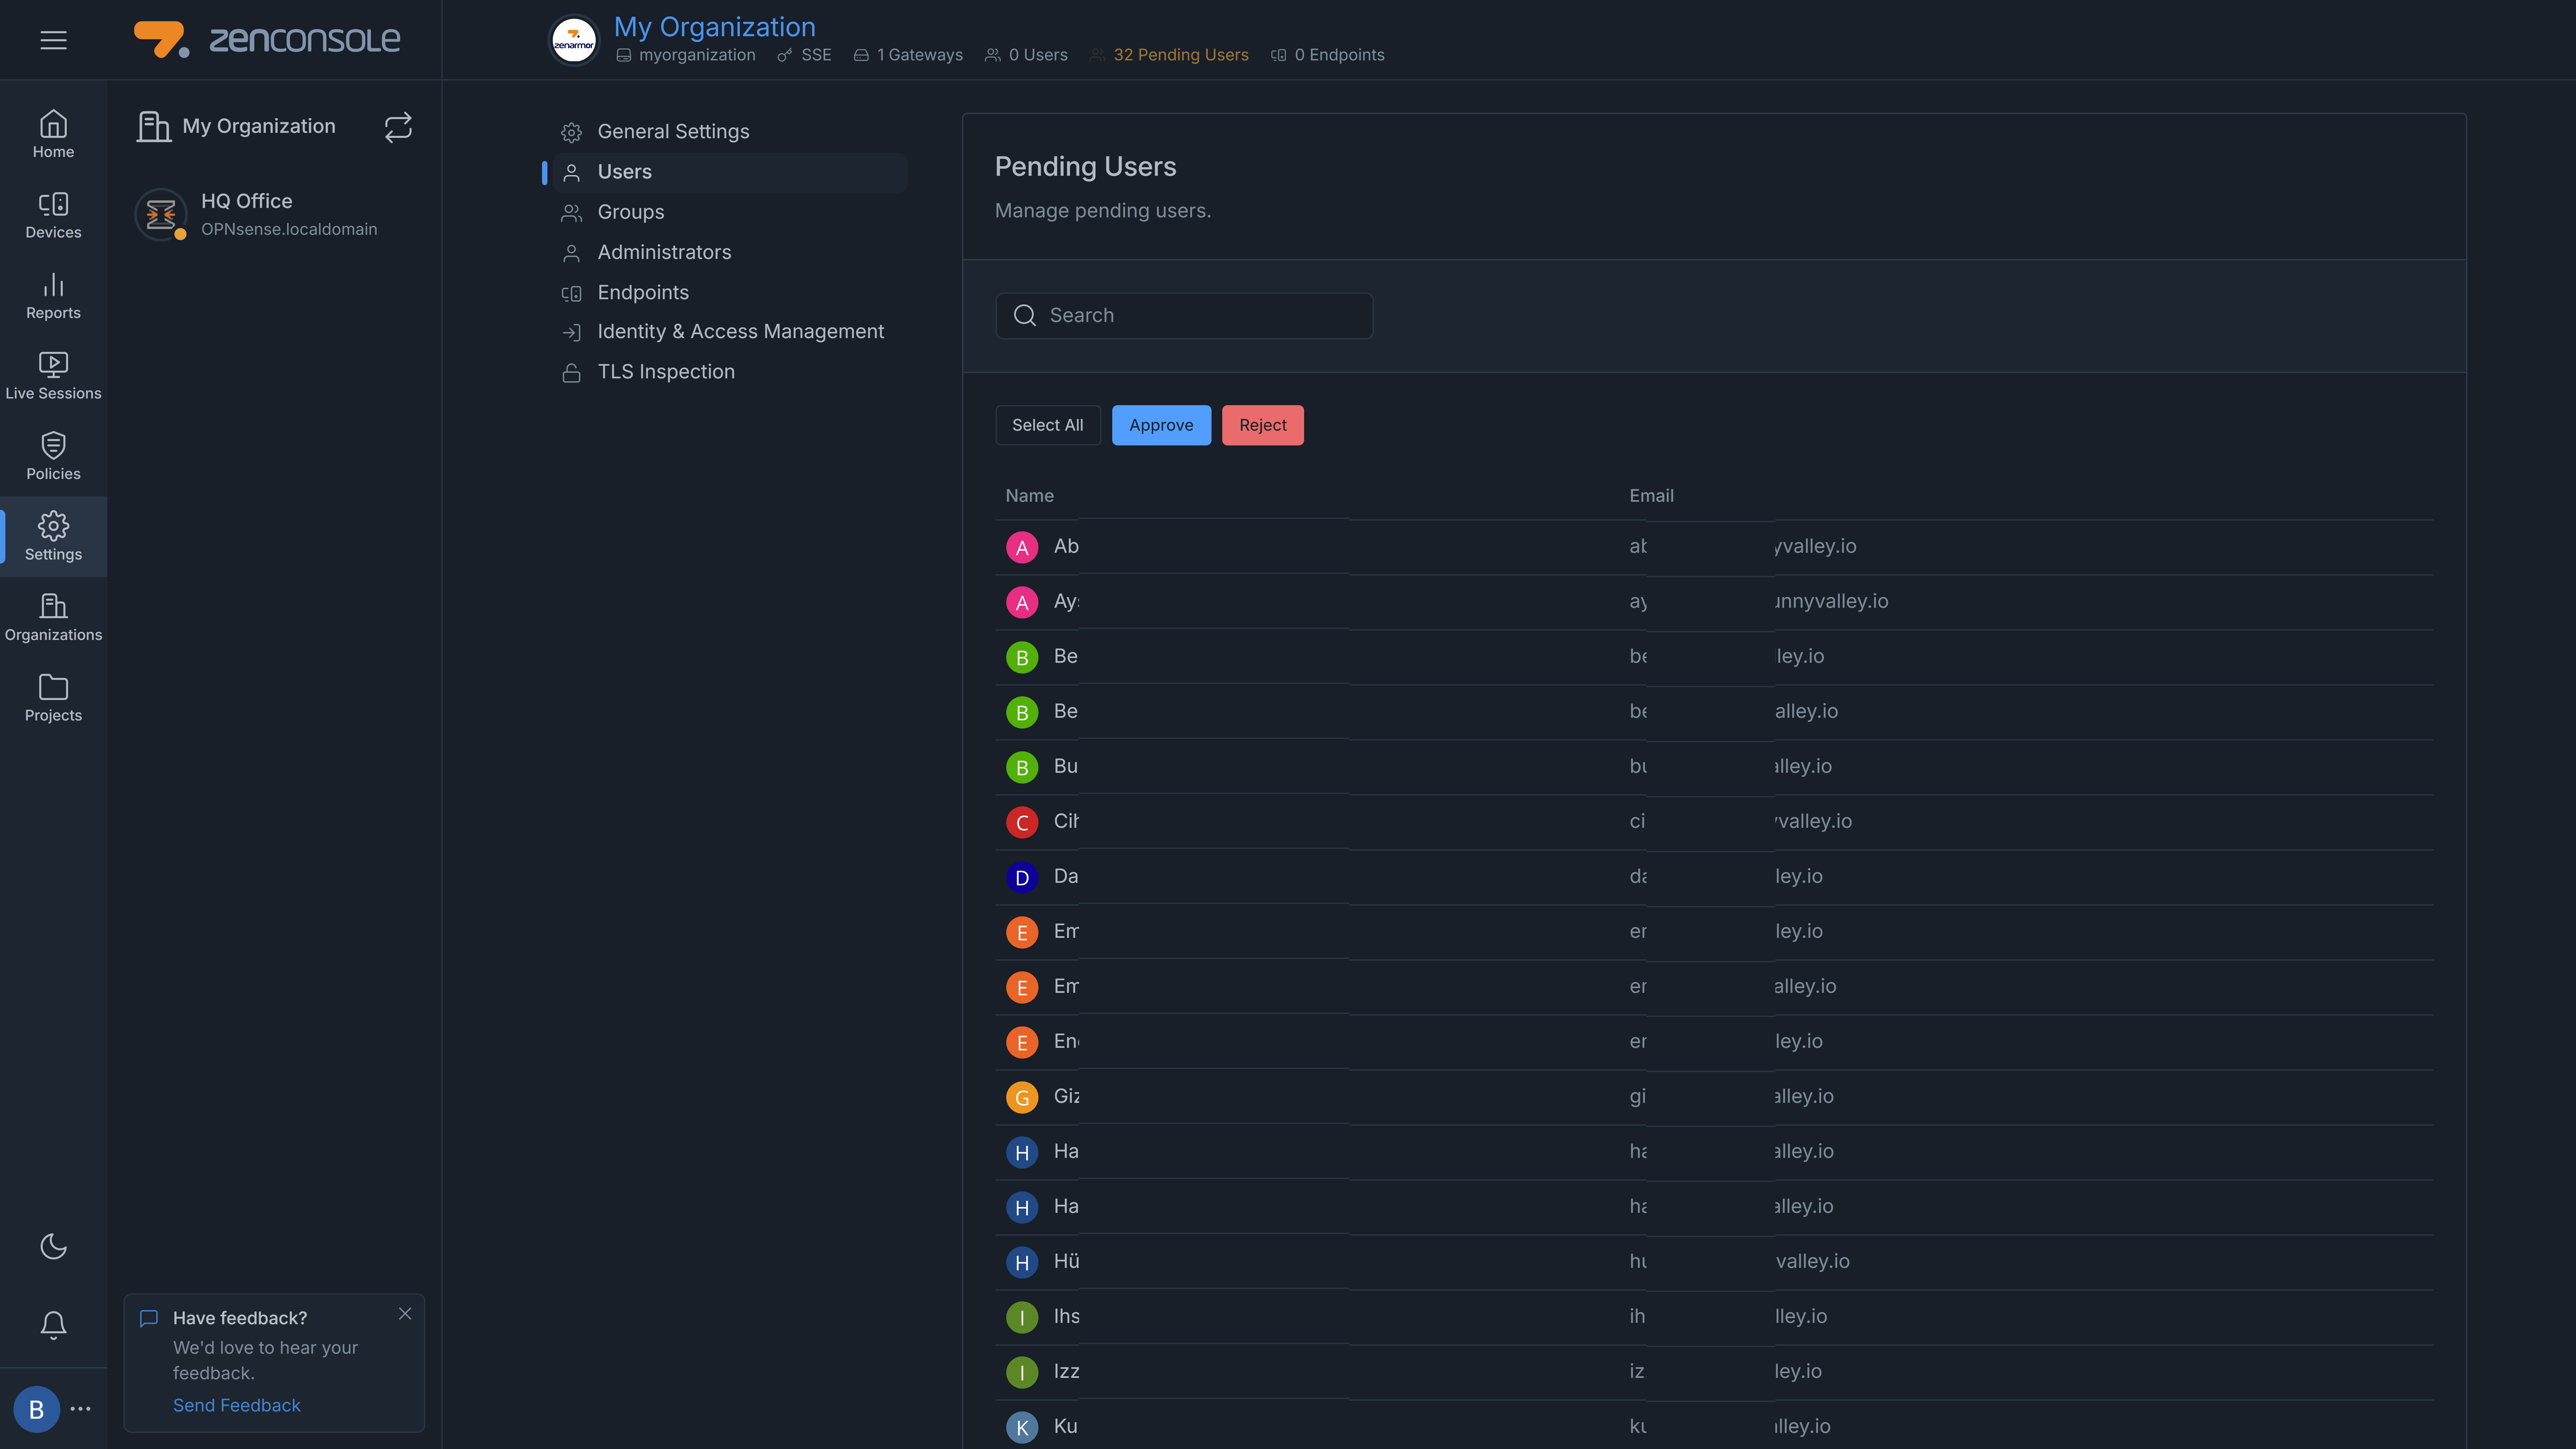
Figure 1. Pending Users
-
You may click Select All button at the top of the list to select all pending users.
-
You may also click on the username to select or unselect the pending users individually.
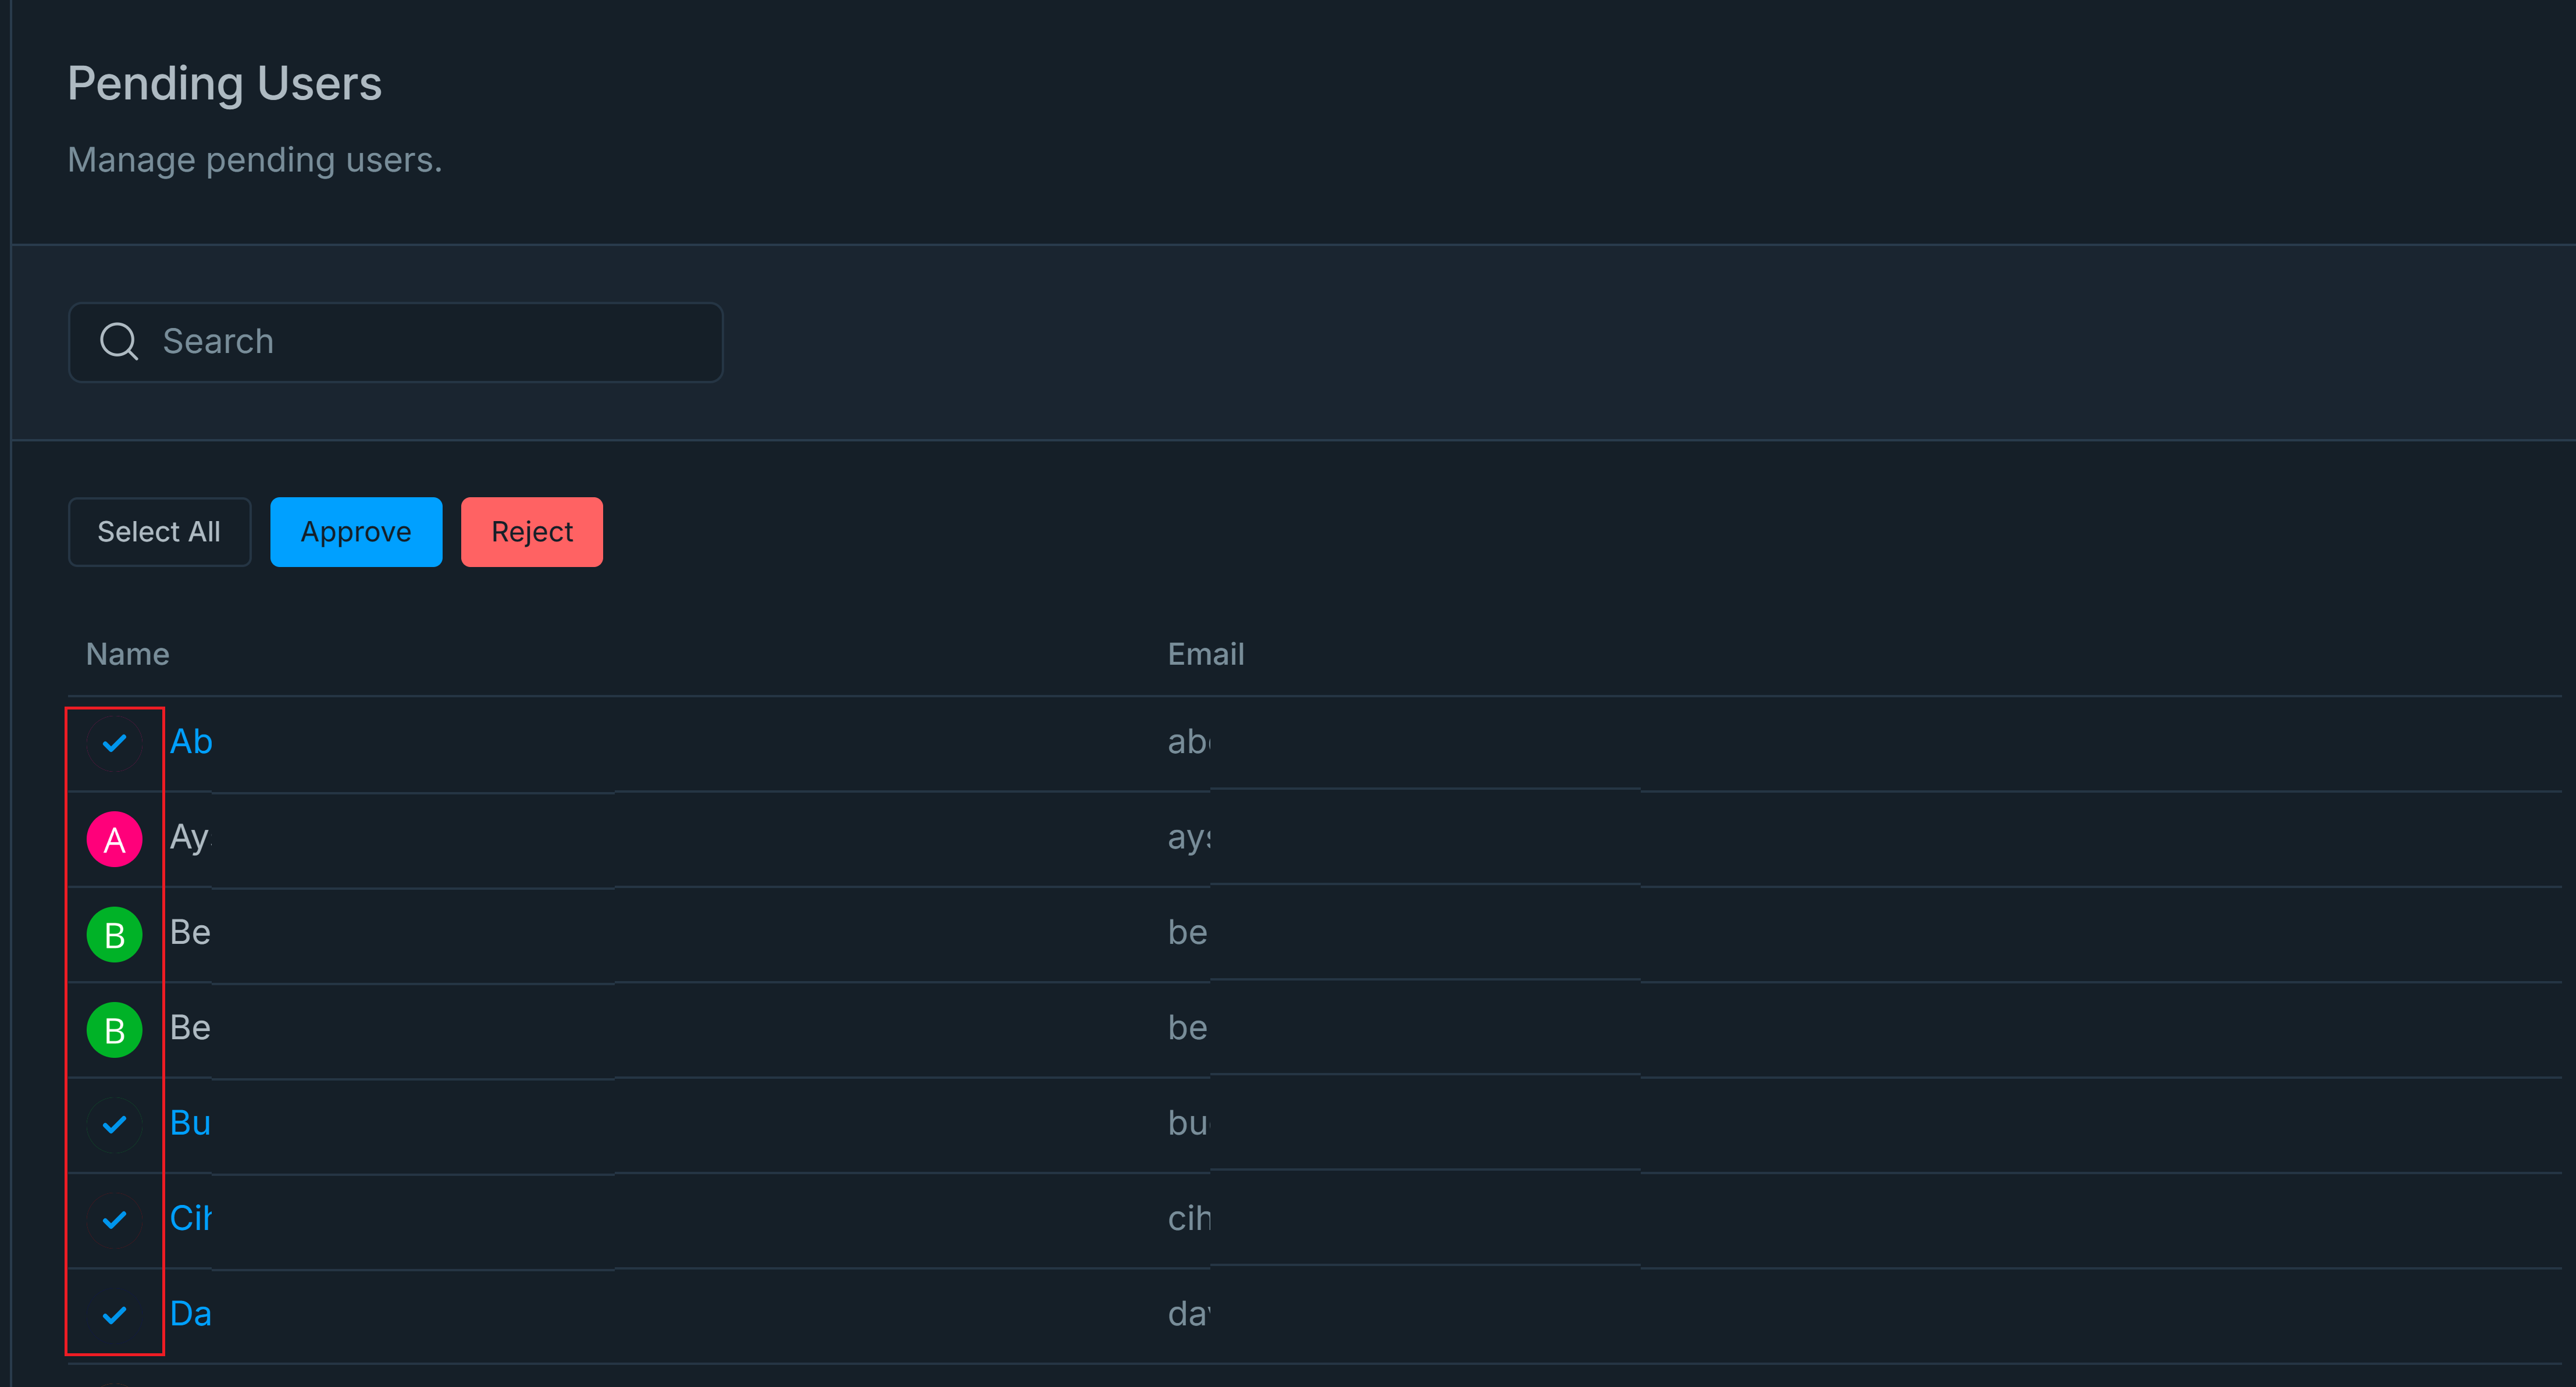
Figure 2. Individual User Selection
-
Click Approve button to add selected users to your organization. Or, you may click Reject button to disregard the users that were retrieved from Google and to prevent their addition to the organization.
-
A notification window appears for confirmation. You may scroll down to the bottom of the window. You may leave Send approval notifications via email option as default. It is advised to notify the users about the organization.
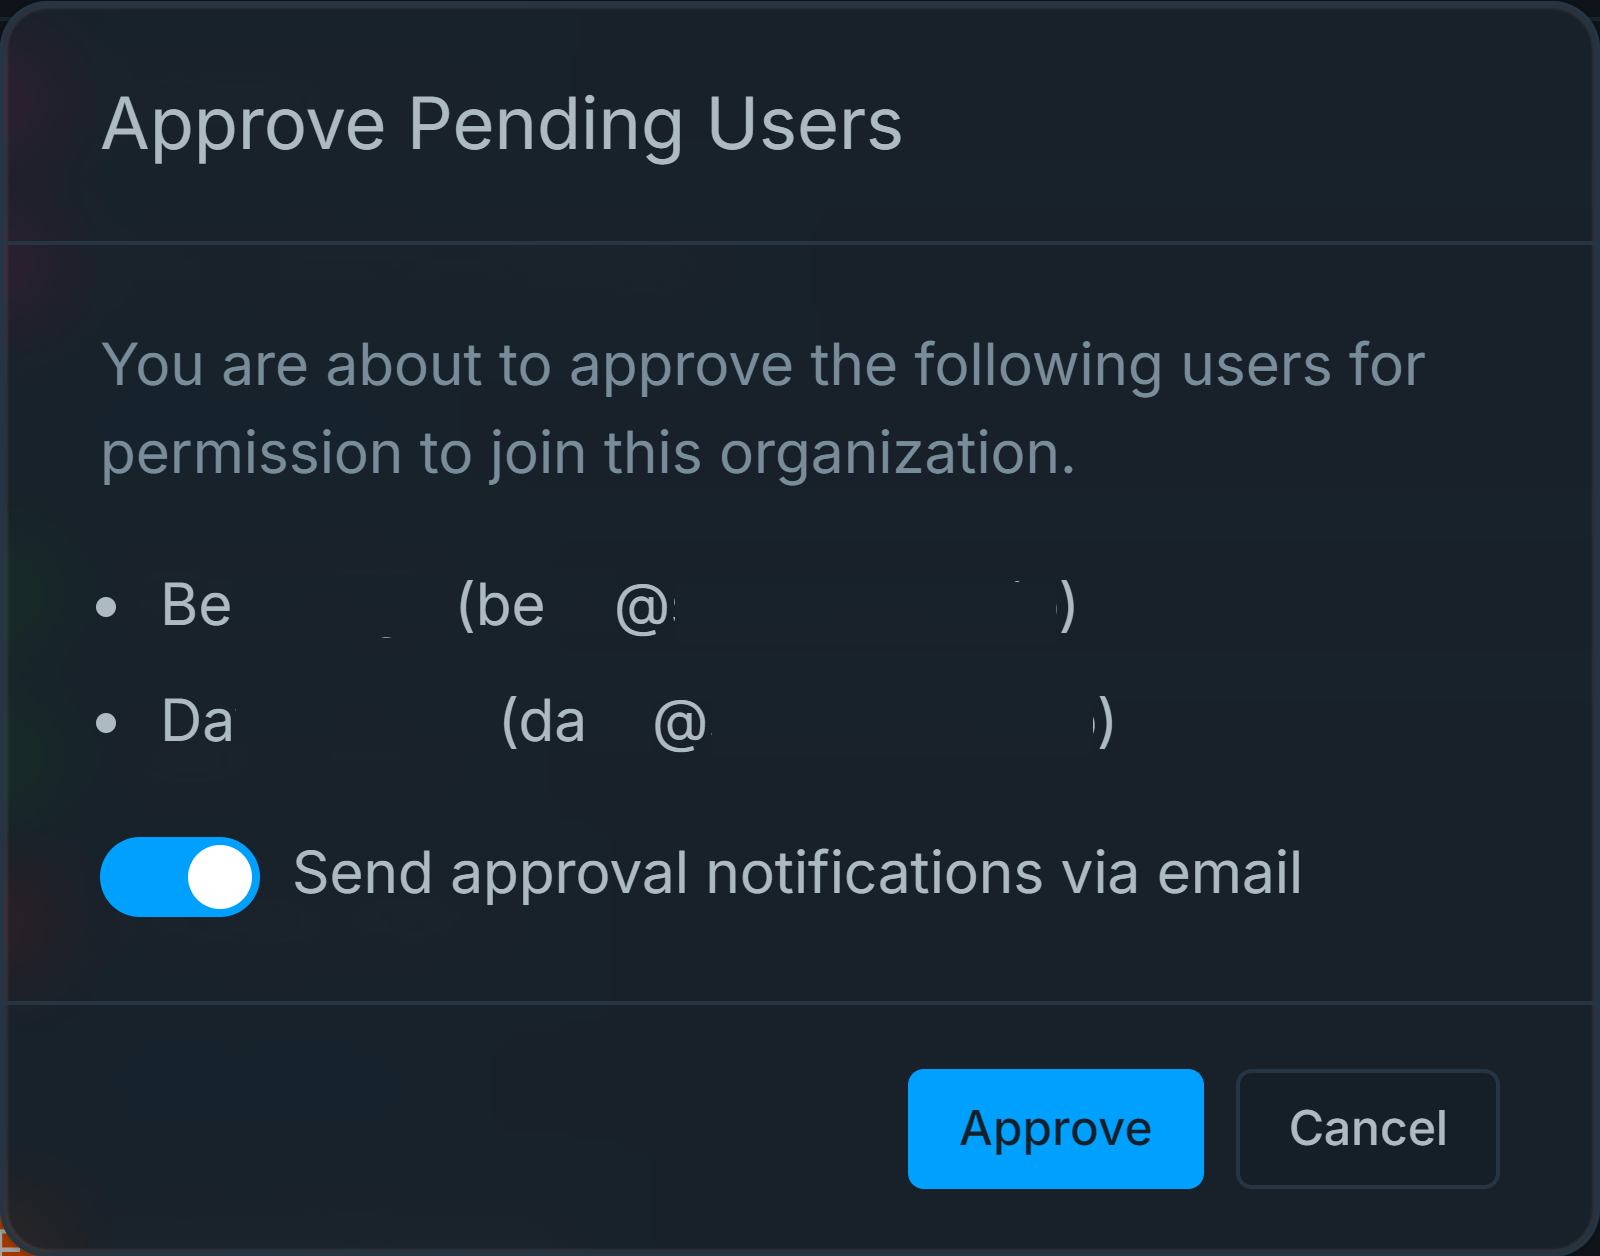
Figure 3. Approve Pending Ysers
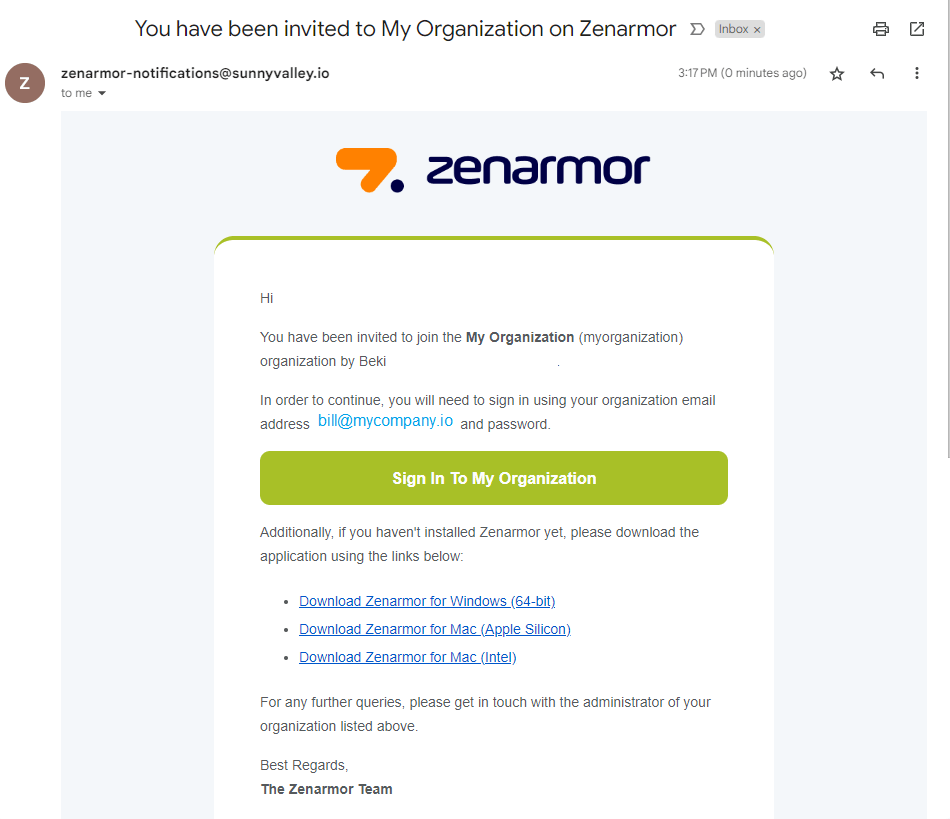
Figure 4. Organization Invitation Email
-
Click Approve button to permit users to join the organization.
Your organization's users are consistently synchronized with Google Workspace, ensuring that all information is accurate and up-to-date without the need for manual intervention.
Adding Users
If you integrate your organization with an IdP provider other than Google using the generic SAML 2.0 authentication protocol, you need to manually add users to the organization. You may follow the next steps to add a user to an organization:
-
Go to Organization Users page by navigating to the Settings > Users page on Zenconsole.
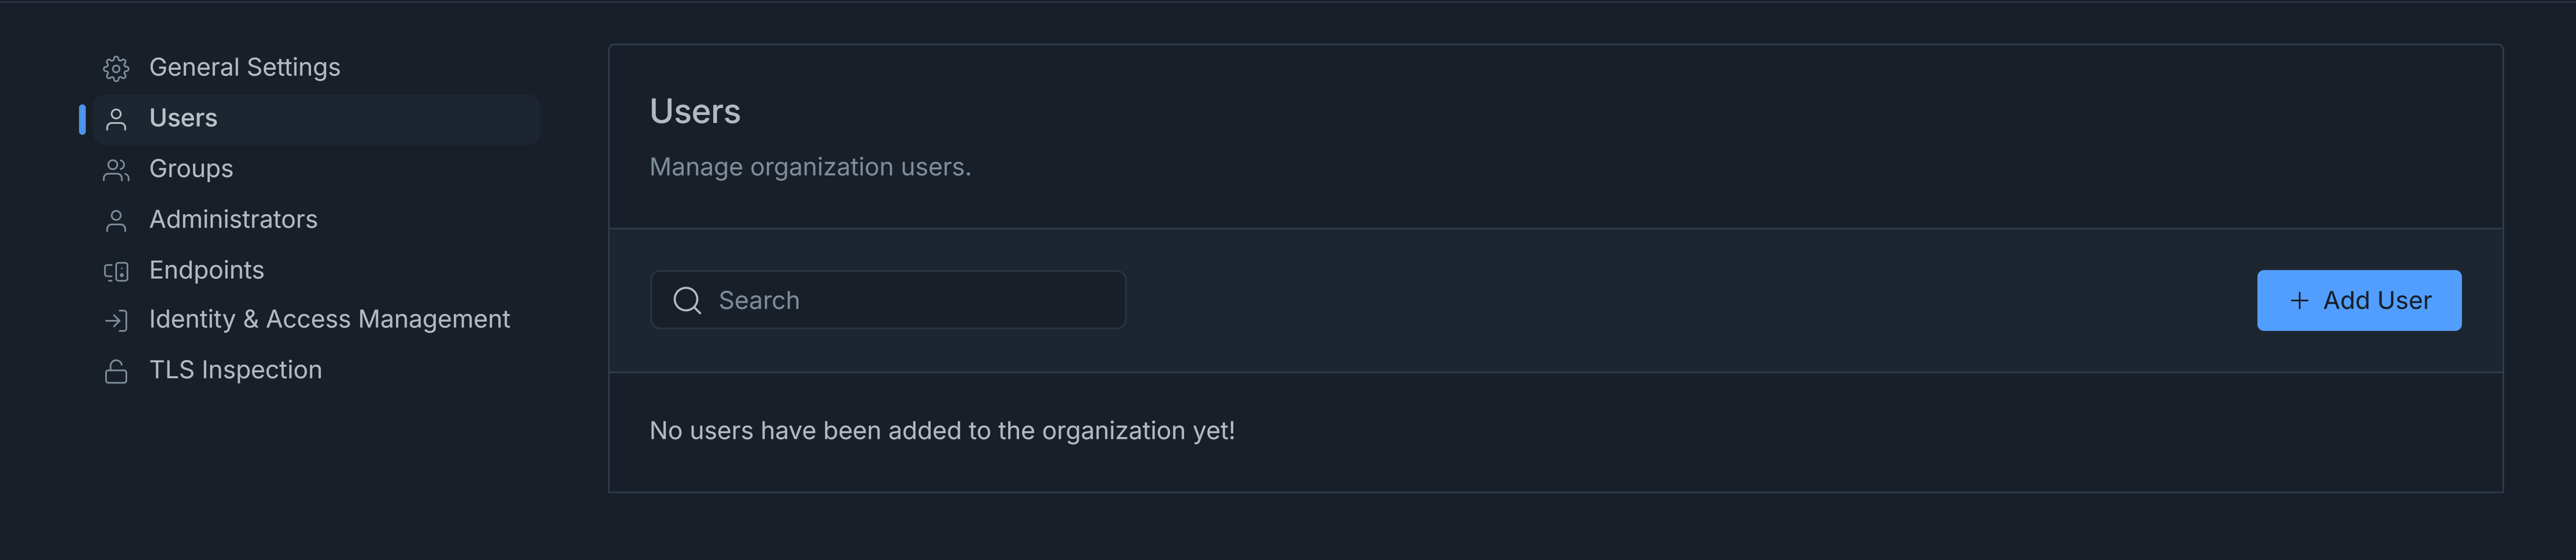
Figure 5. User Management Page
-
Click + Add User button in the Users pane. This will open a window to fill in user details.
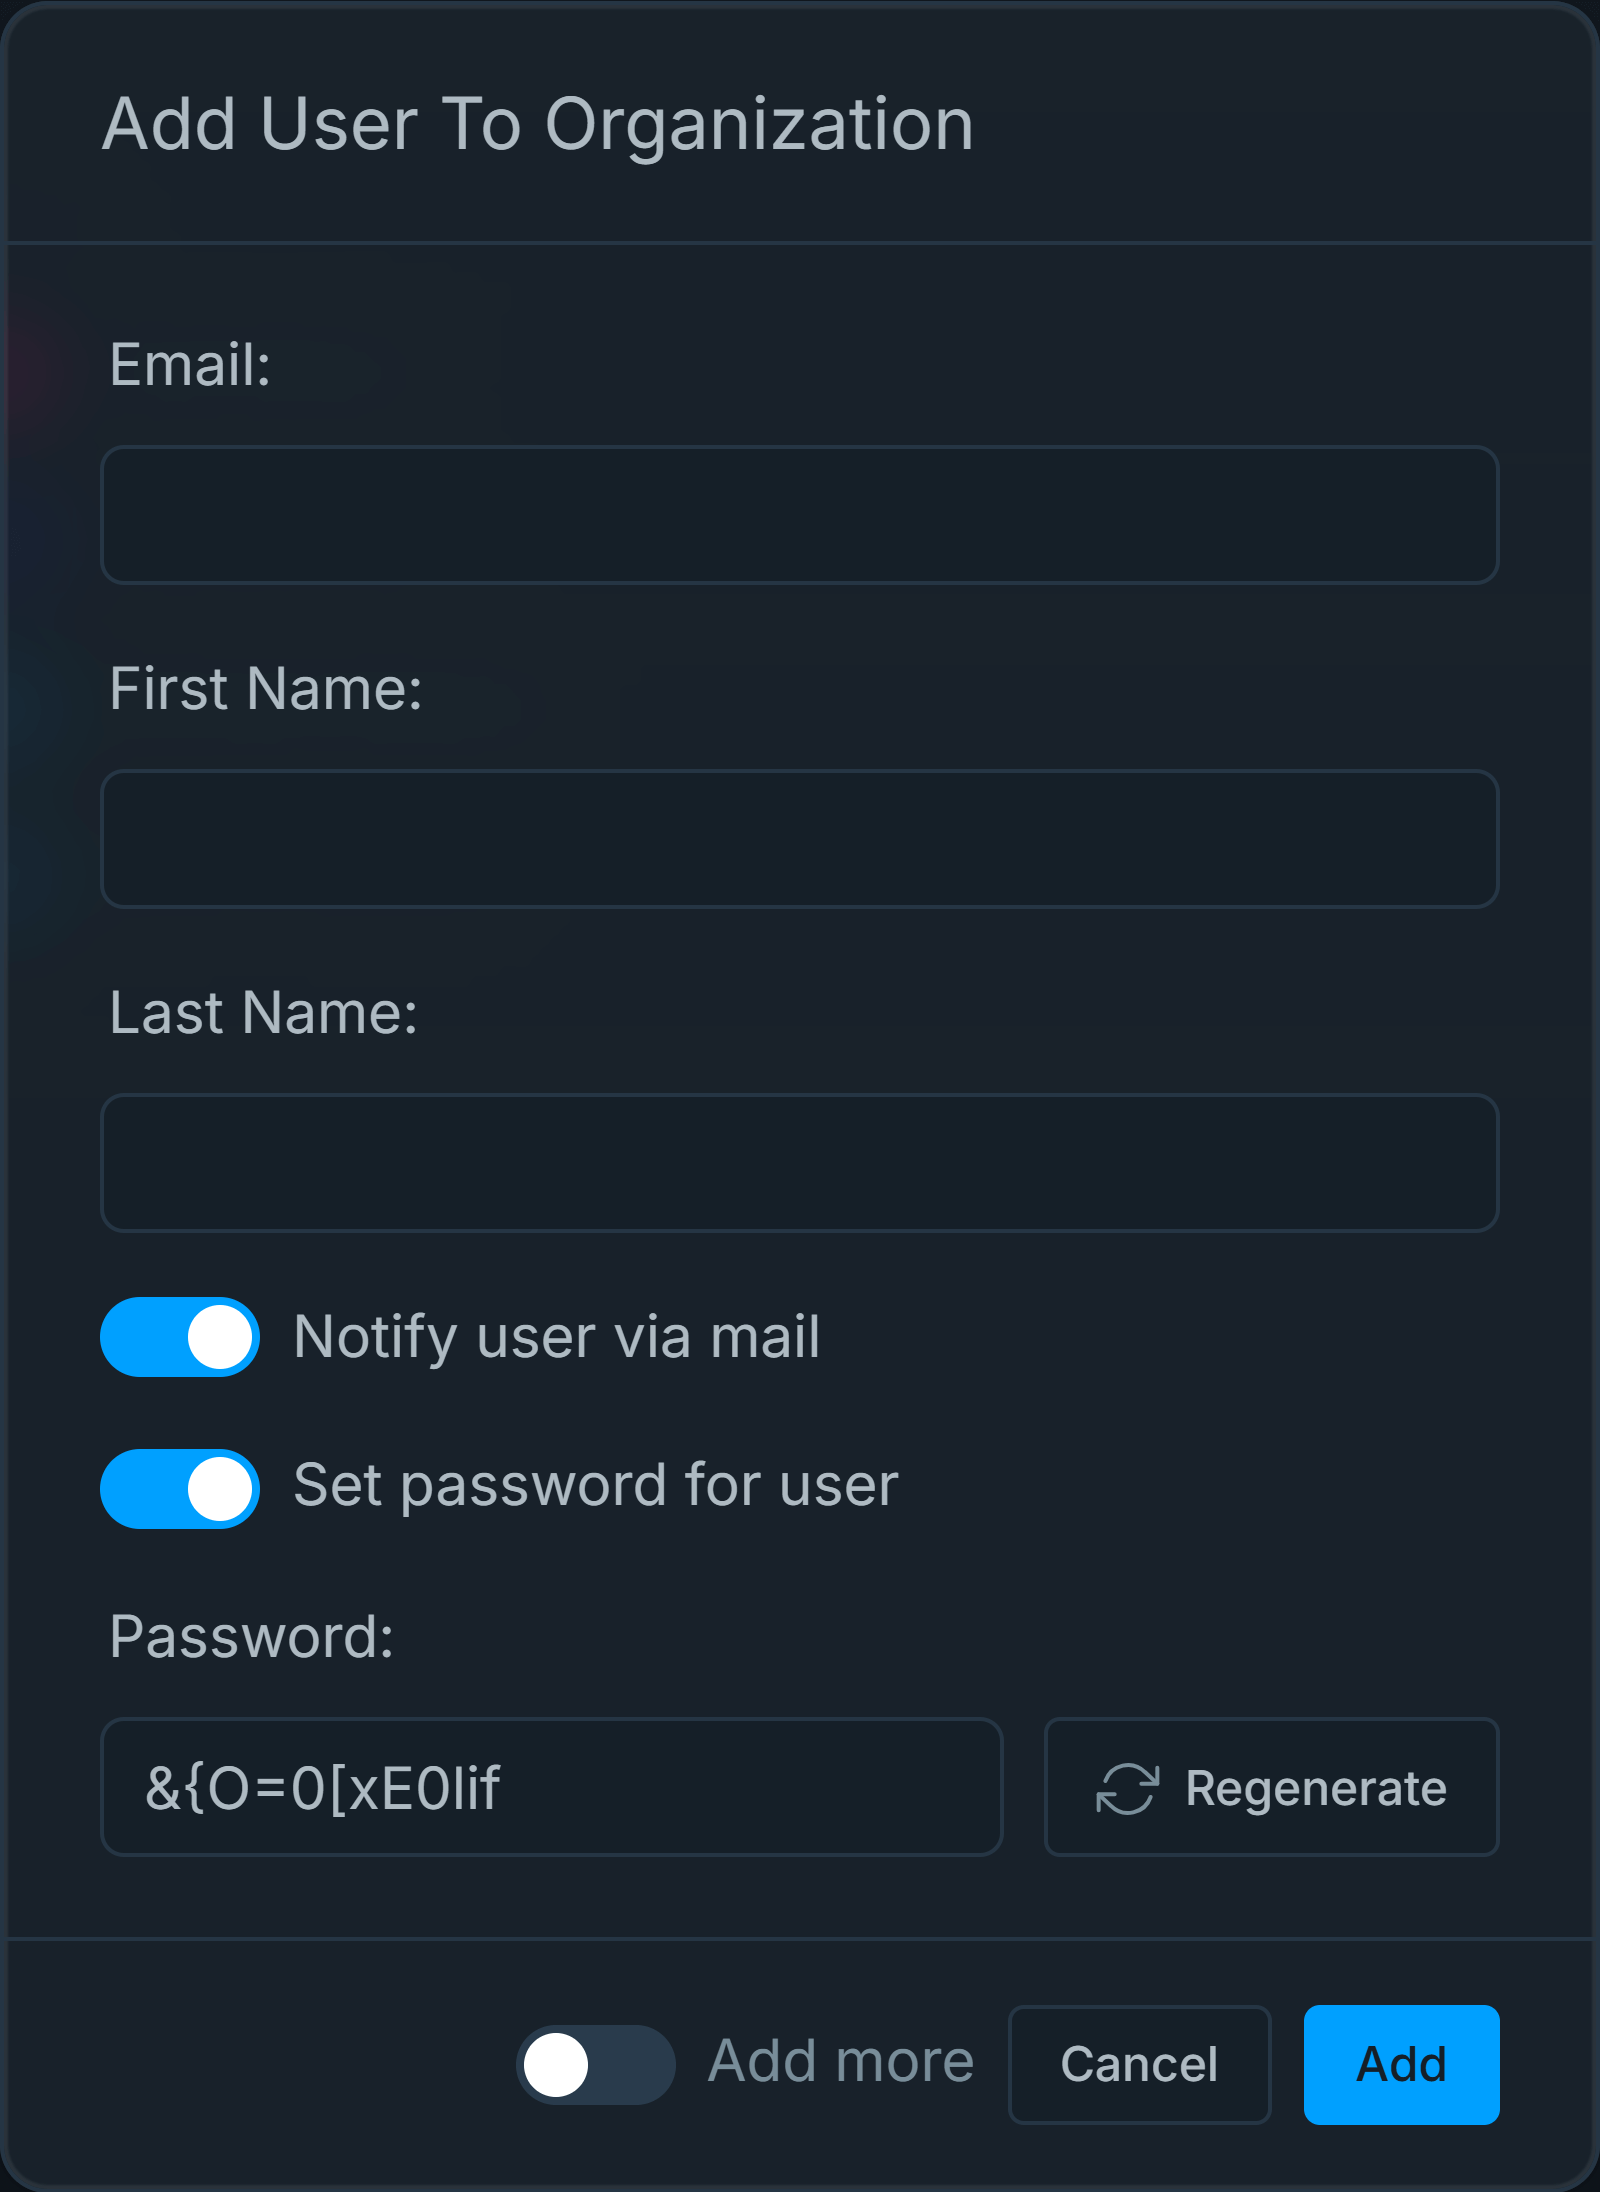
Figure 6. Adding User
-
Type the email address of the user into Email field.
-
Type First Name.
-
Type Last Name.
-
You may leave the Notify user via mail option as enabled. It is advised to notify the users about the organization.
-
You may set password for the user by switching on the Set password for user toogle bar. This will display the automatically generated password.
-
You may renew the automatically generated password by clicking on the Regenerate button.
-
You may click on the Add more toggle bar if you need to create multiple users.
-
Click Add to add the user to permit the user to join the organization. The user will be automatically added to the organization and appear on the organization users page.
Searching Users
Zenconsole enables you to seek a user by their name or email address. To locate a user in your users' list, enter their name or email address into the search field. This will automatically update the user list below, and the user you are seeking will be displayed.
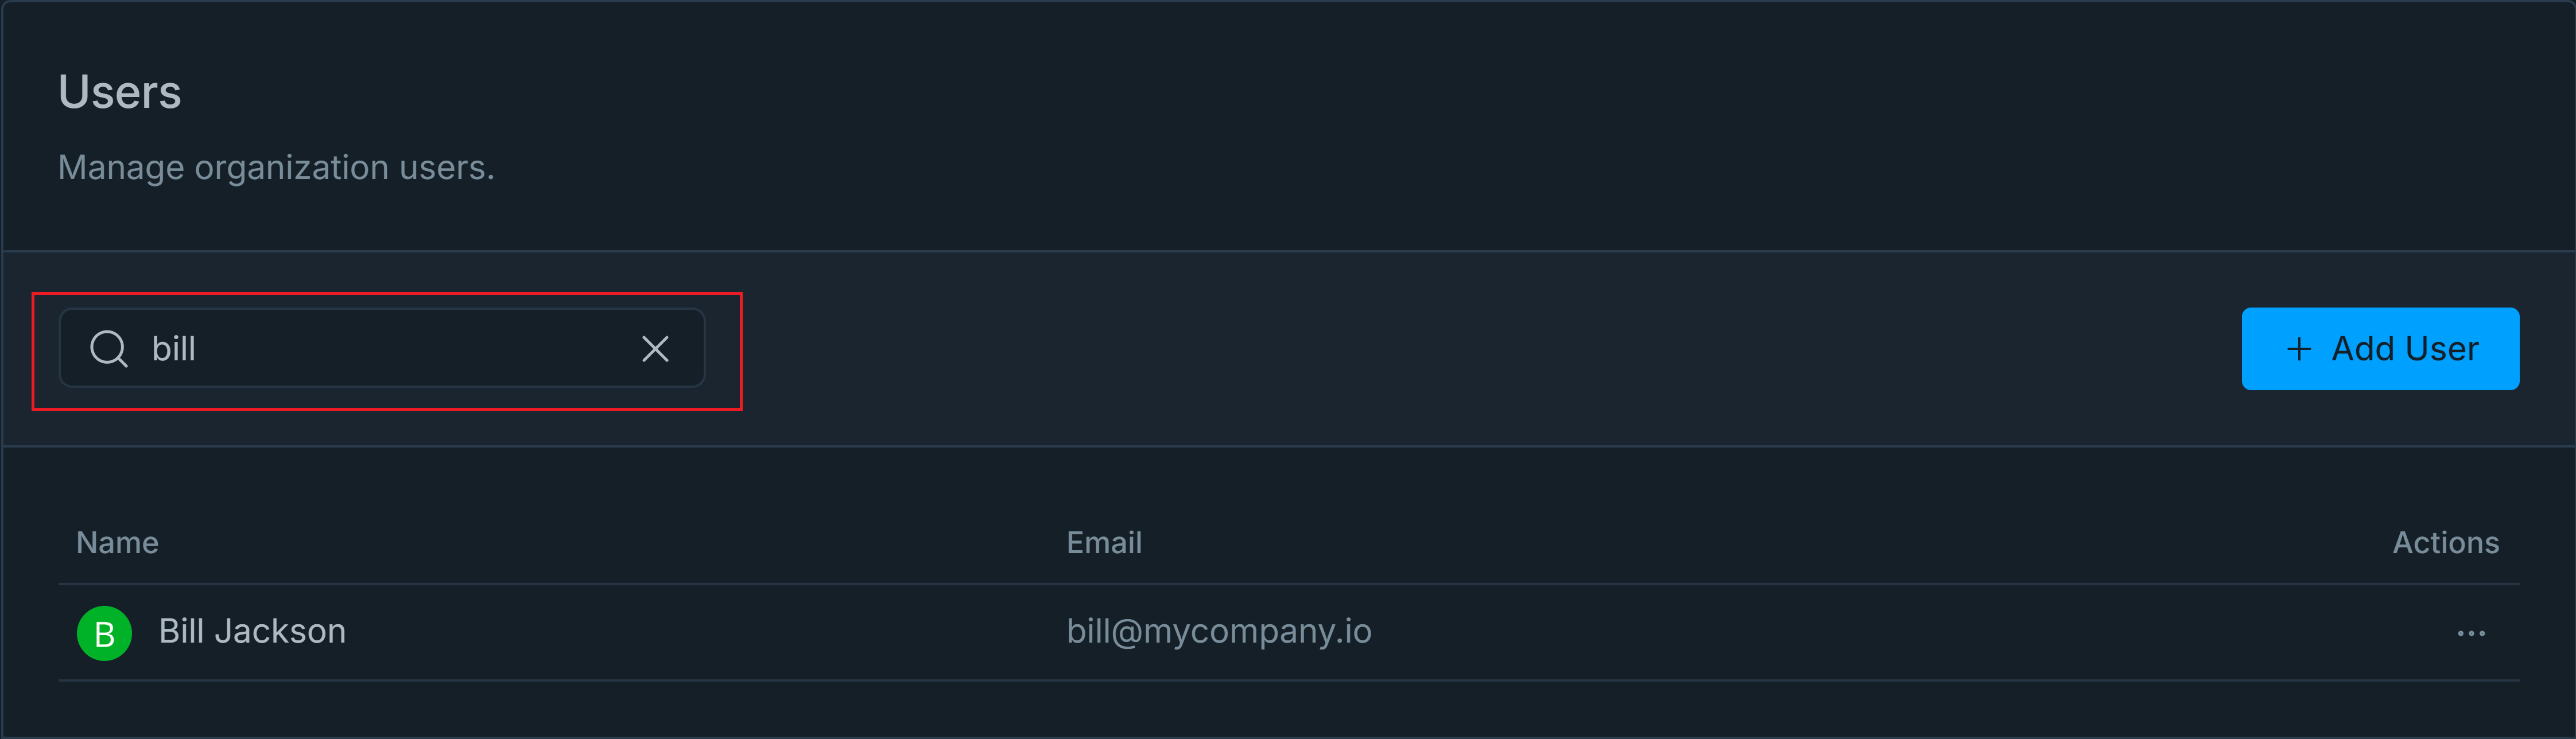
Figure 7. Searching Users
Reauthenticating Users
Zenconsole allows you to force selected organization users to re-authenticate. This operation invalidates all existing sessions belonging to the selected user and requires him/her to re-authenticate. You may follow the next steps to reauthenticate a user.
-
Go to Organization Users page by navigating to the Settings > Users page on Zenconsole.
-
Search for the user that you want to reauthenticate.
-
Click on the settings menu with the 3-dot
...icon in the Action column.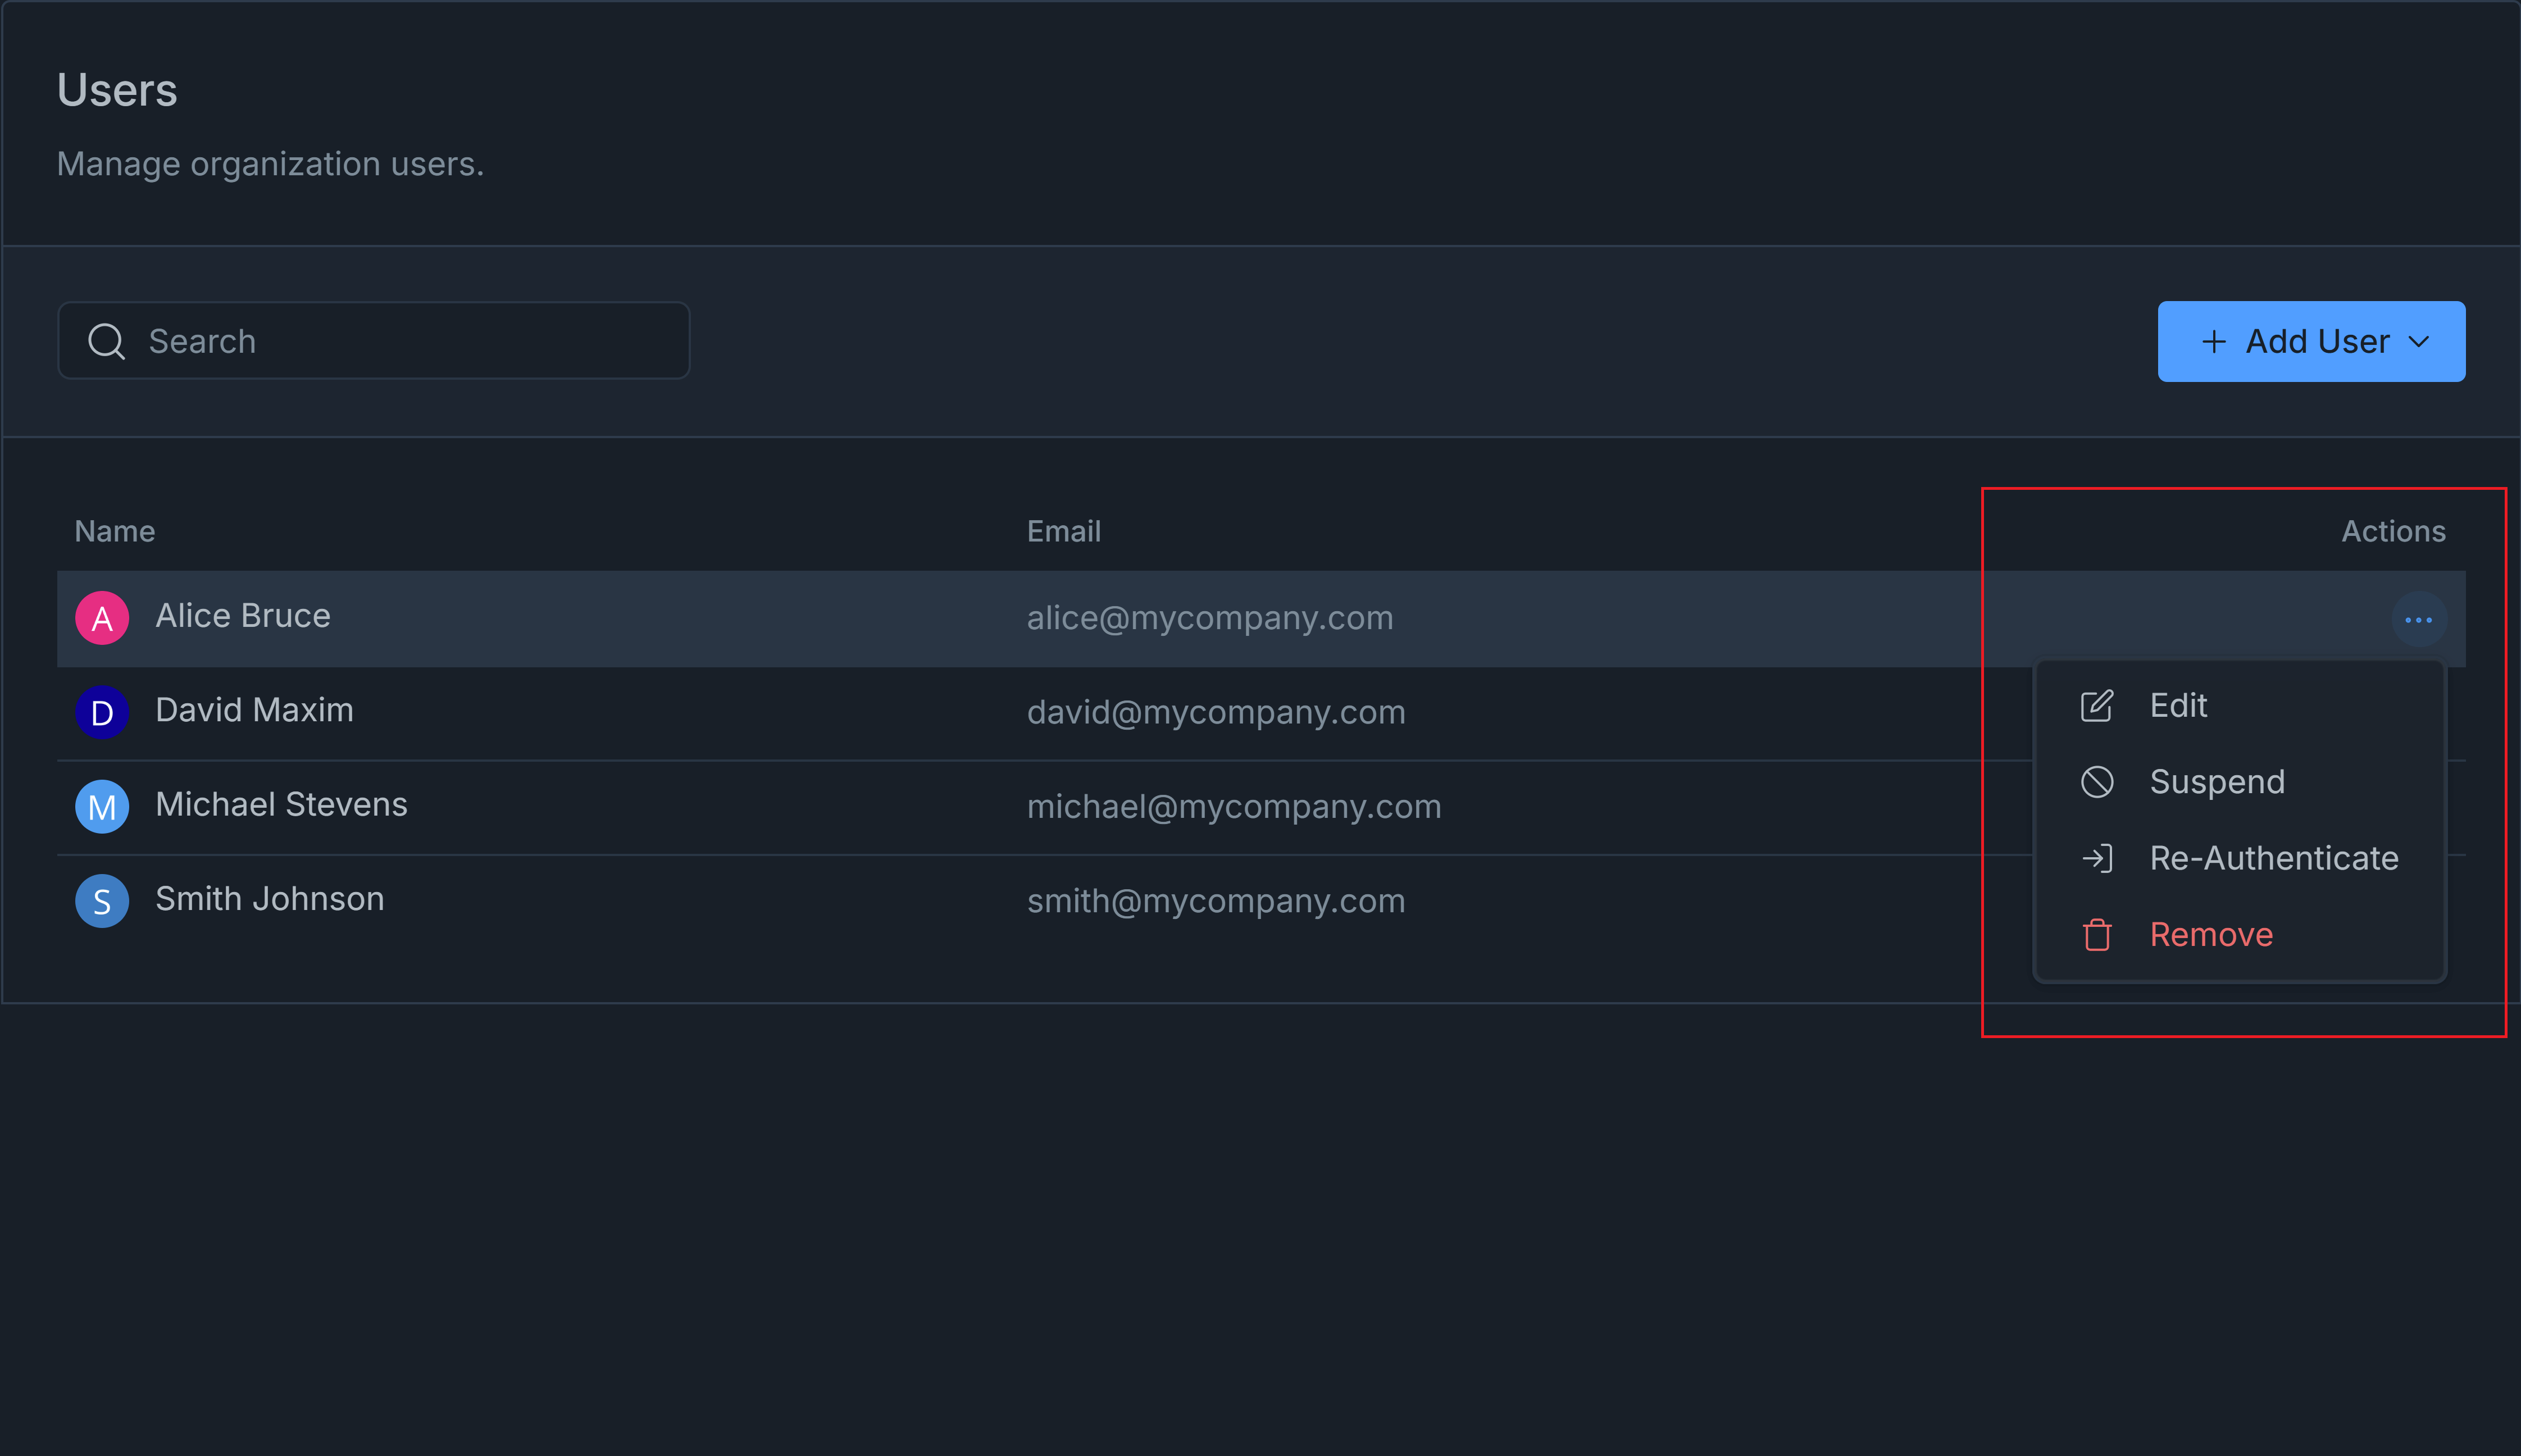
Figure 8. User Actions Menu
-
Click on the Re-authenticate button to reauthenticate the selected user. A dialog box will appear for confirmation.
-
Select the instance that you want to enforce authentication from the Available Instances pane.
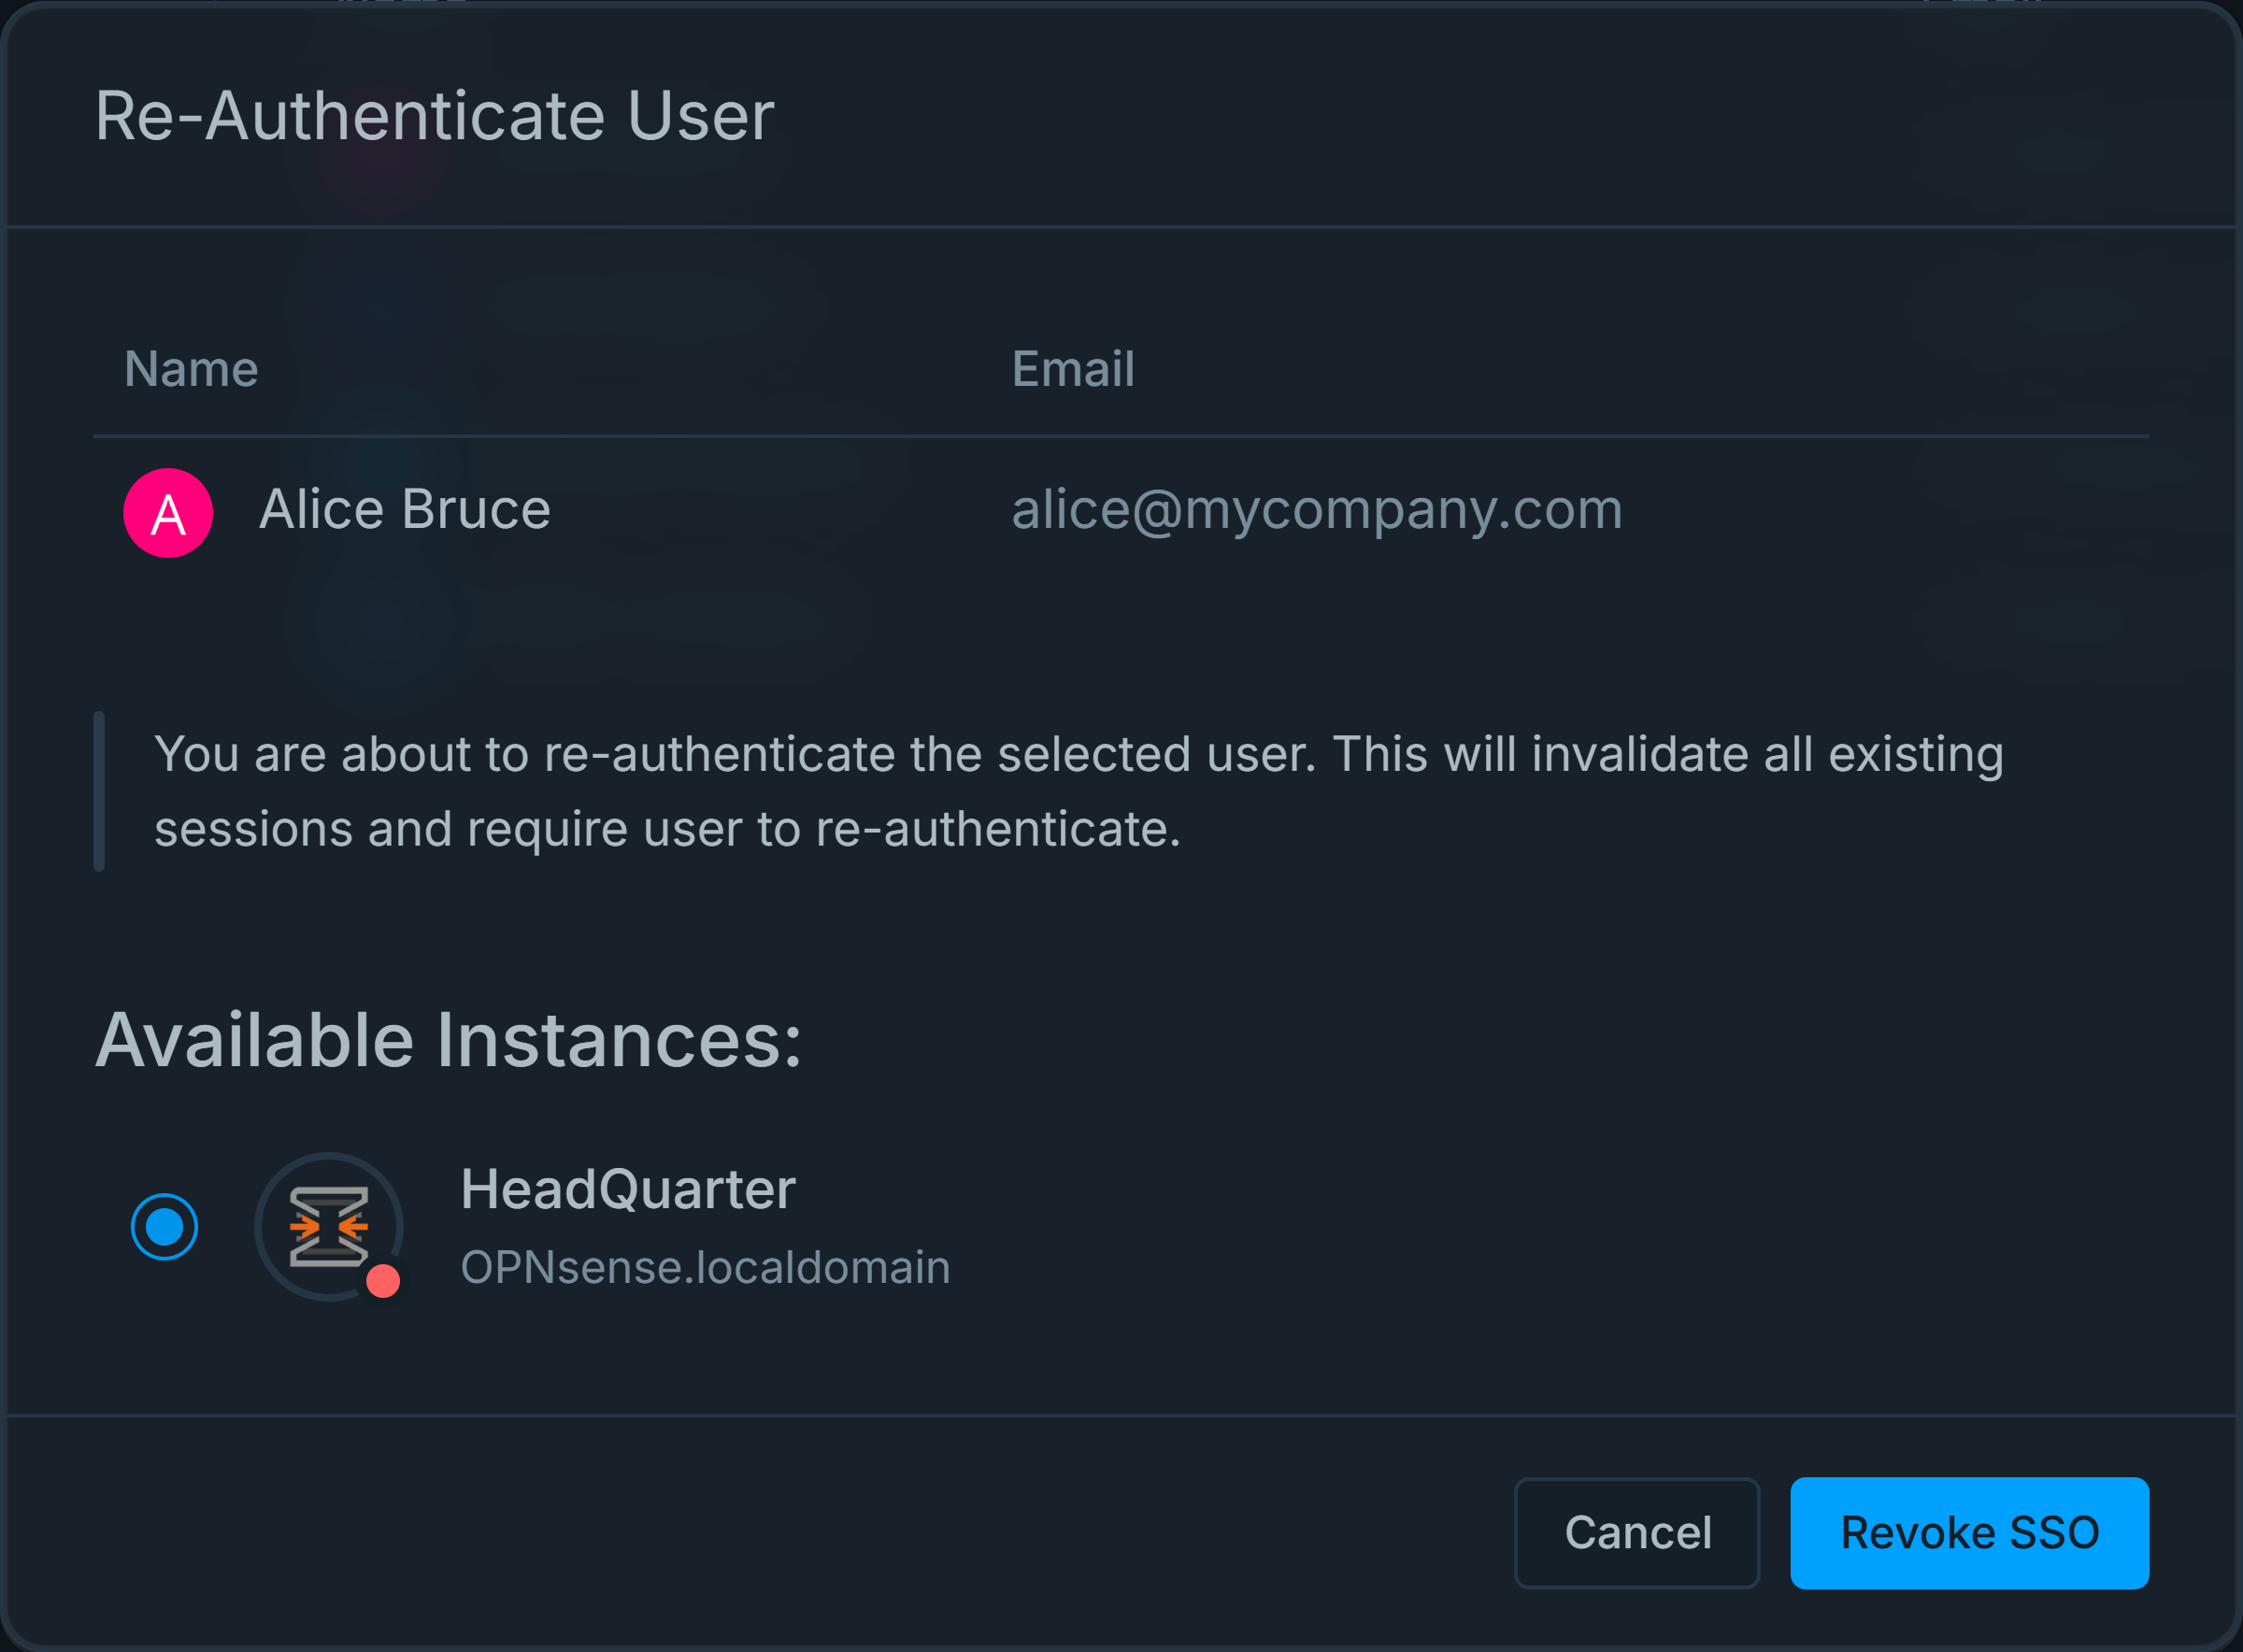
Figure 9. Re-authenticate User
-
Click on the Revoke SSO to force user reauthentication. A dialog box will appear for confirmation.
-
Click Revoke button to activate user reauthentication enforcement
Removing Users
You can easily remove a user from your organization by following these steps:
-
Go to Organization Users page by navigating to the Settings > Users page on Zenconsole.
-
Search for the user that you want to remove.
-
Click on the settings menu with the 3-dot
...icon in the Action column.Figure 10. User Actions Menu
-
Click on the Remove button to remove the selected user from your organization. A dialog box will appear for confirmation.
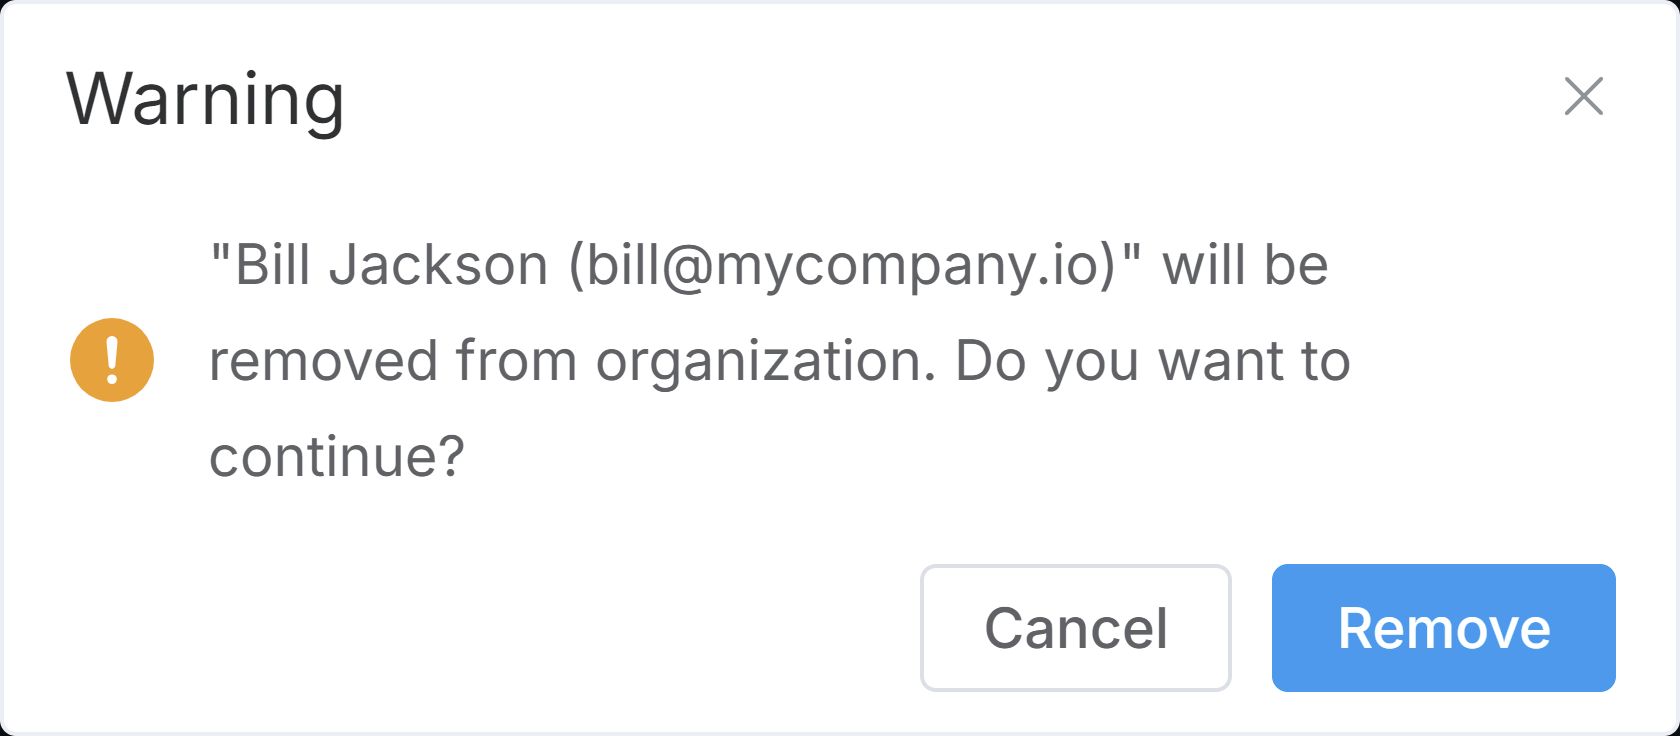
Figure 11. User Delete Notification
-
Click on the Remove to confirm user removal.
Suspending/Unsuspending Users
In certain circumstances, it may be necessary to temporarily disable users and prevent them from accessing your organization. Zenconsole allows you to suspend/unsuspend organization users by following the next steps:
-
Go to the Organization Users page by navigating to the Settings > Users page on Zenconsole.
-
Search for the user that you want to remove.
-
Click on the settings menu with the 3-dot
...icon in the Action column. -
Click on the Suspend / Unsuspend button to disable/enable the selected user in your organization. A dialog box will appear for confirmation.
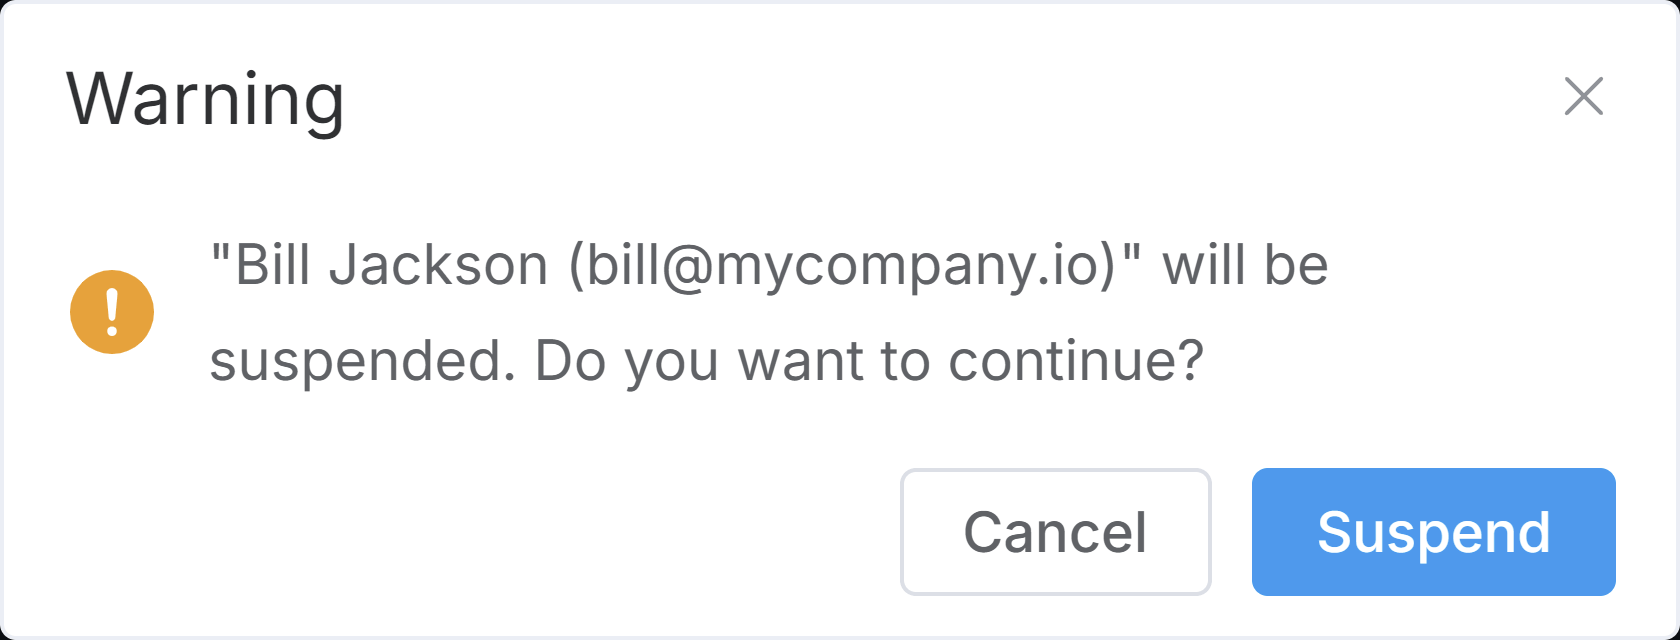
Figure 12. Suspending/Unsuspending Users
-
Click on the Suspend to disable the user.
Editing Users
You can easily update user details by following these steps:
-
Go to the Organization Users page by navigating to the Settings > Users page on Zenconsole.
-
Search for the user that you want to update.
-
Click on the settings menu with the 3-dot
...icon in the Action column. -
Click on the Edit button to update the details of the selected user. A dialog box will appear displaying user information.
-
You may modify the user information field(s) as you want, such as First Name and Last Name.
-
Click Update button to save the new user details.
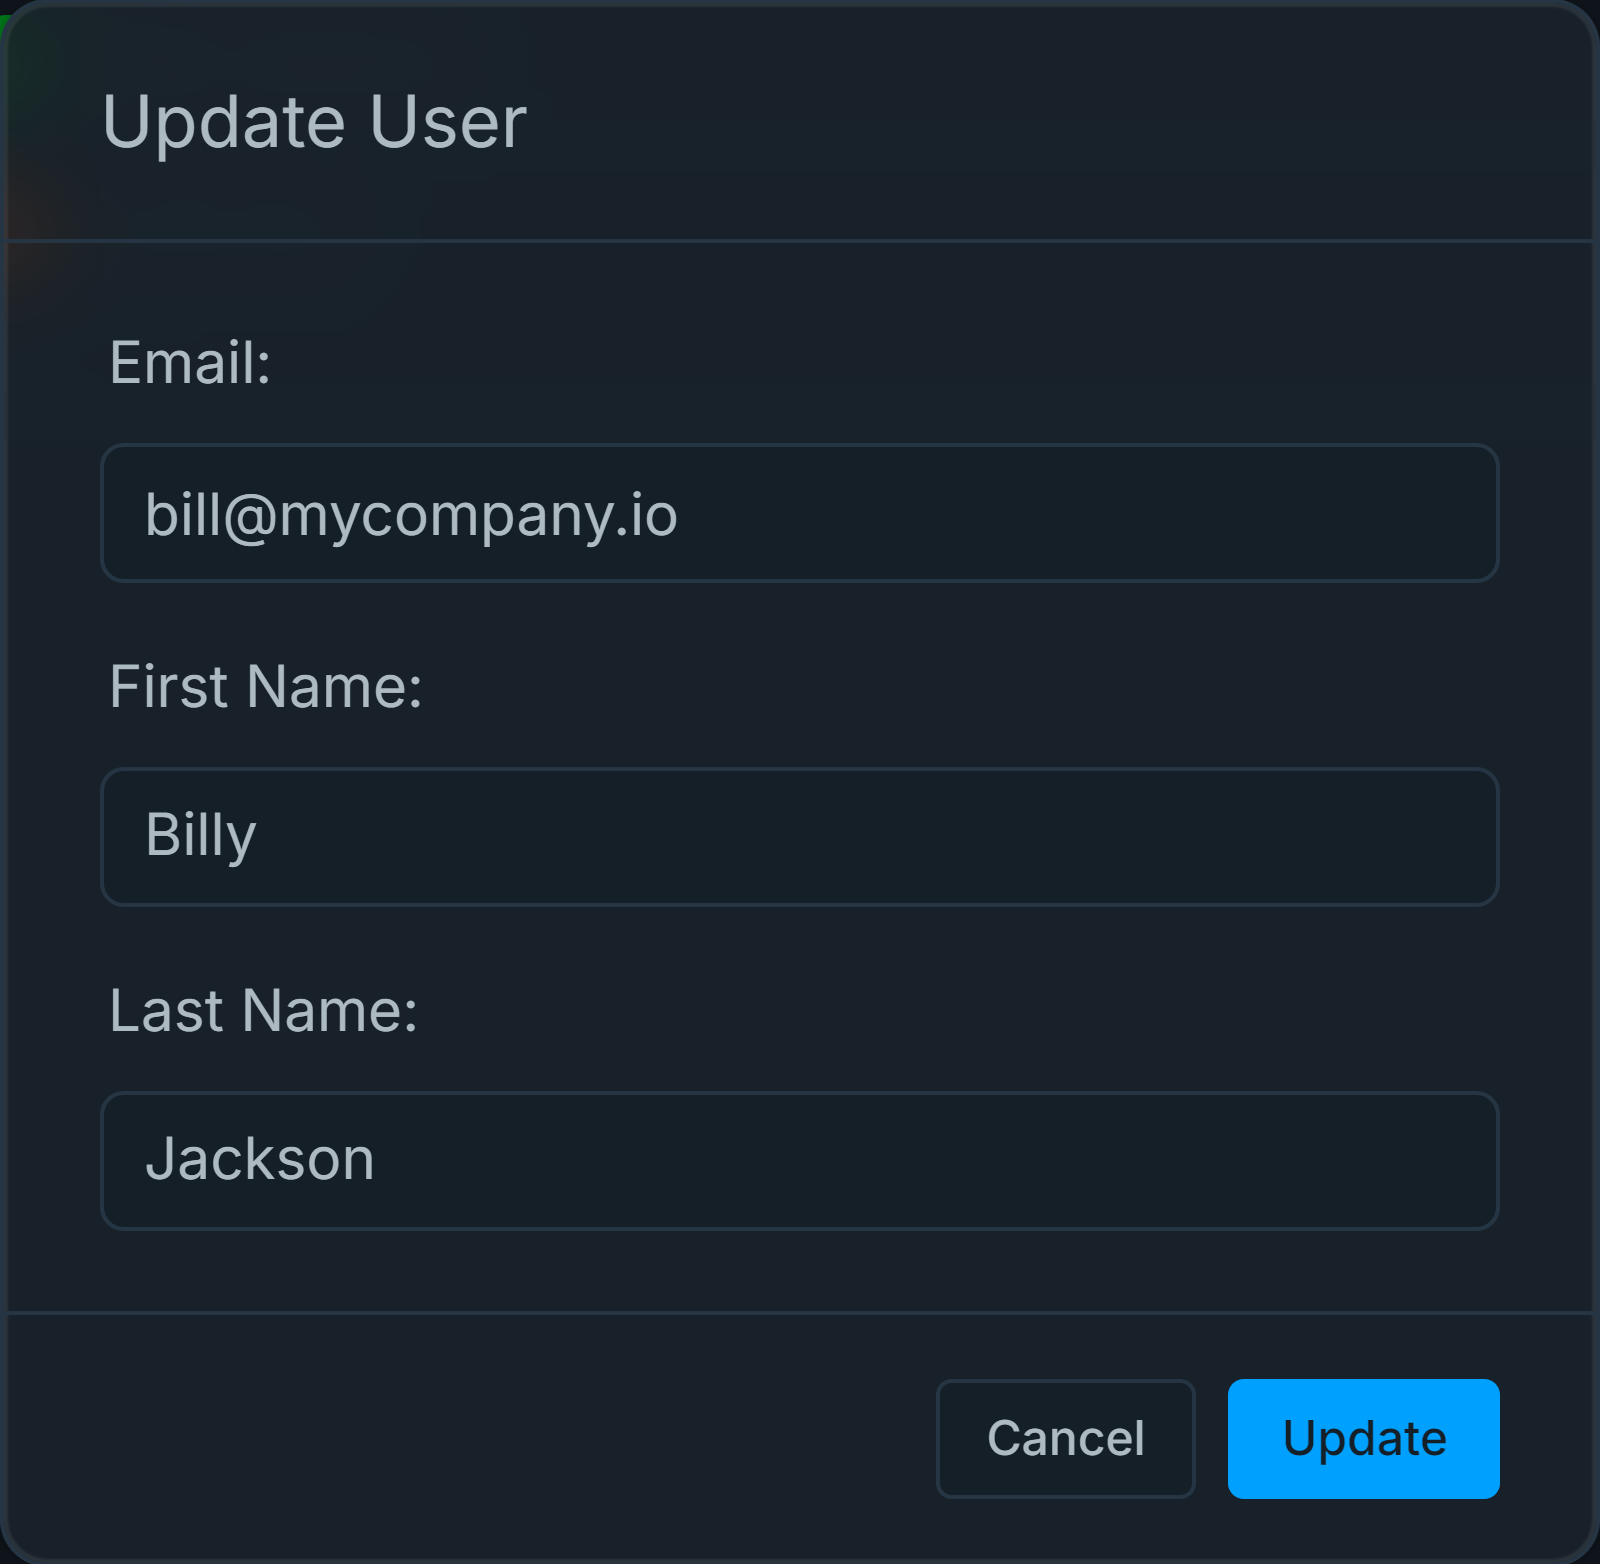
Figure 13. Editing Users
Managing Groups
You may manage organization groups by following the next steps.
-
Login Zenconsole and then select the organization you want to manage.
-
Navigate to the Settings > Groups page.
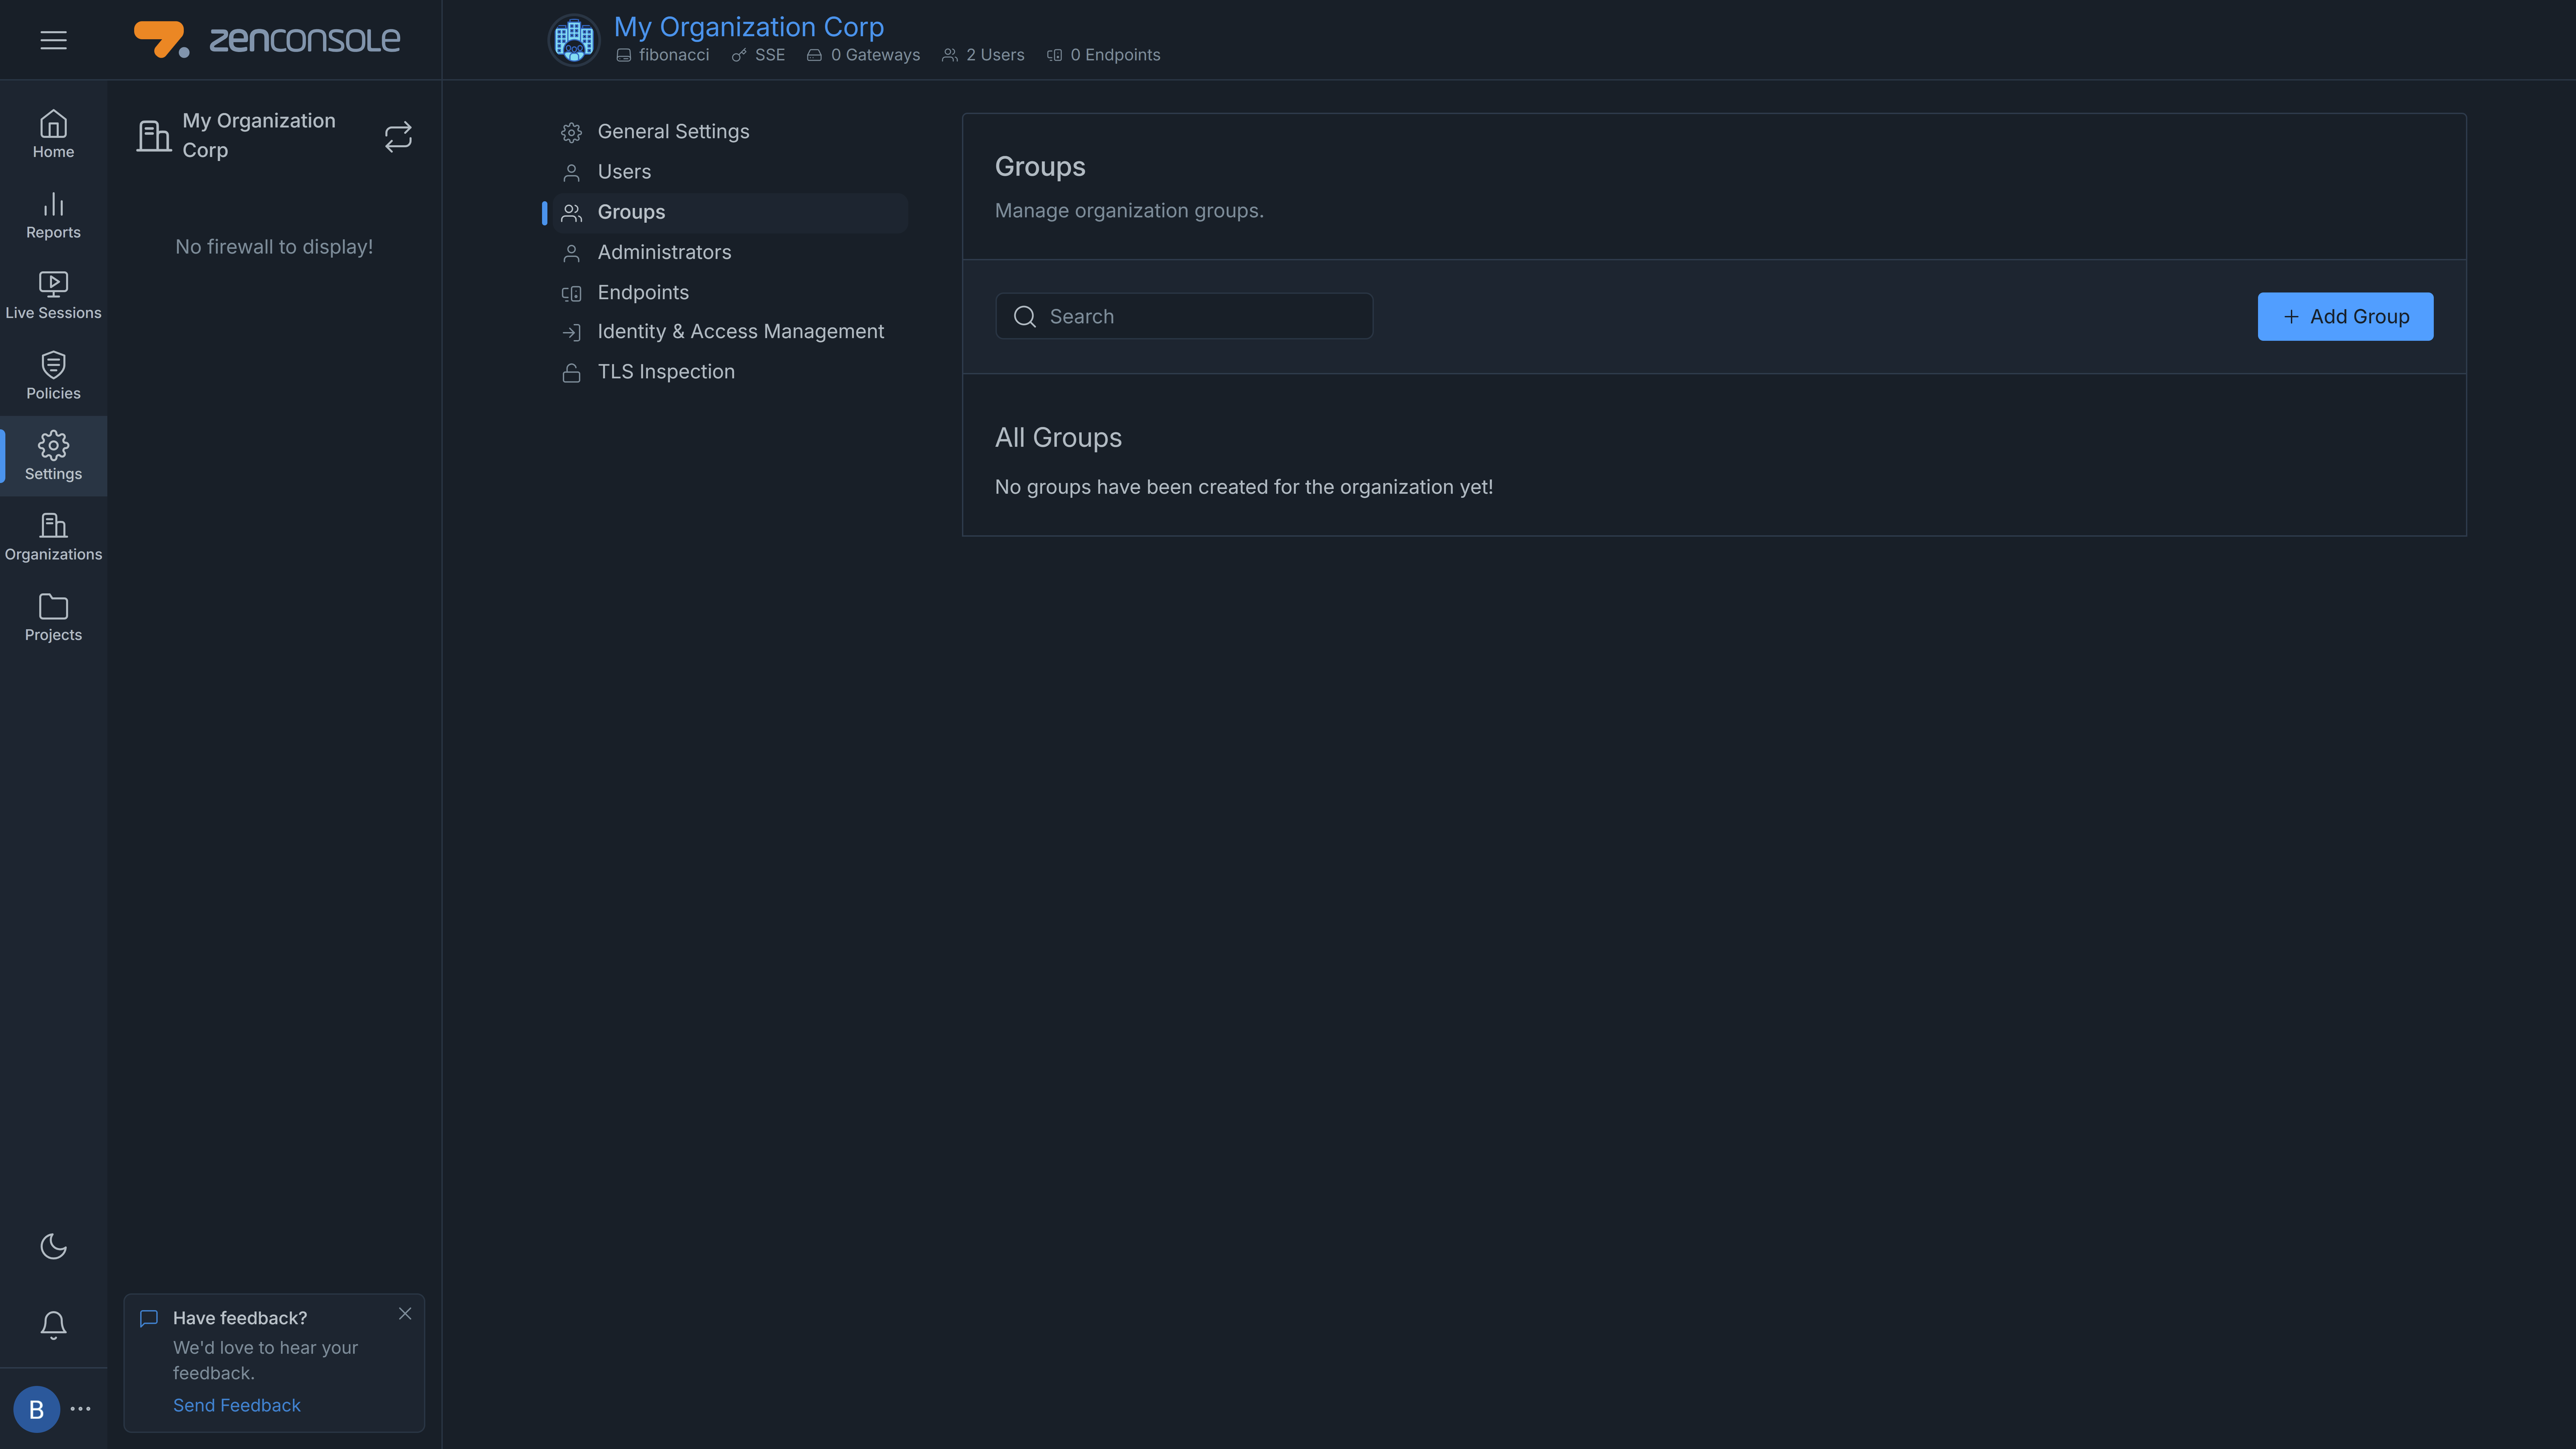
Figure 14. Organization Groups Page
Adding Groups
Your organization's groups are automatically retrieved from Google Workspace when you enable and configure the Google Cloud Identity option for your organization. When utilizing the SAML 2.0 authentication protocol to integrate your organization with an IdP provider other than Google, it is necessary to explicitly add groups to the organization.
You may follow the next steps to add a group to an organization:
-
Go to Organization Groups page by navigating to the Settings > Groups page on Zenconsole.
-
Click + Add Group button in the Groups pane. This will open a window to fill in group details.
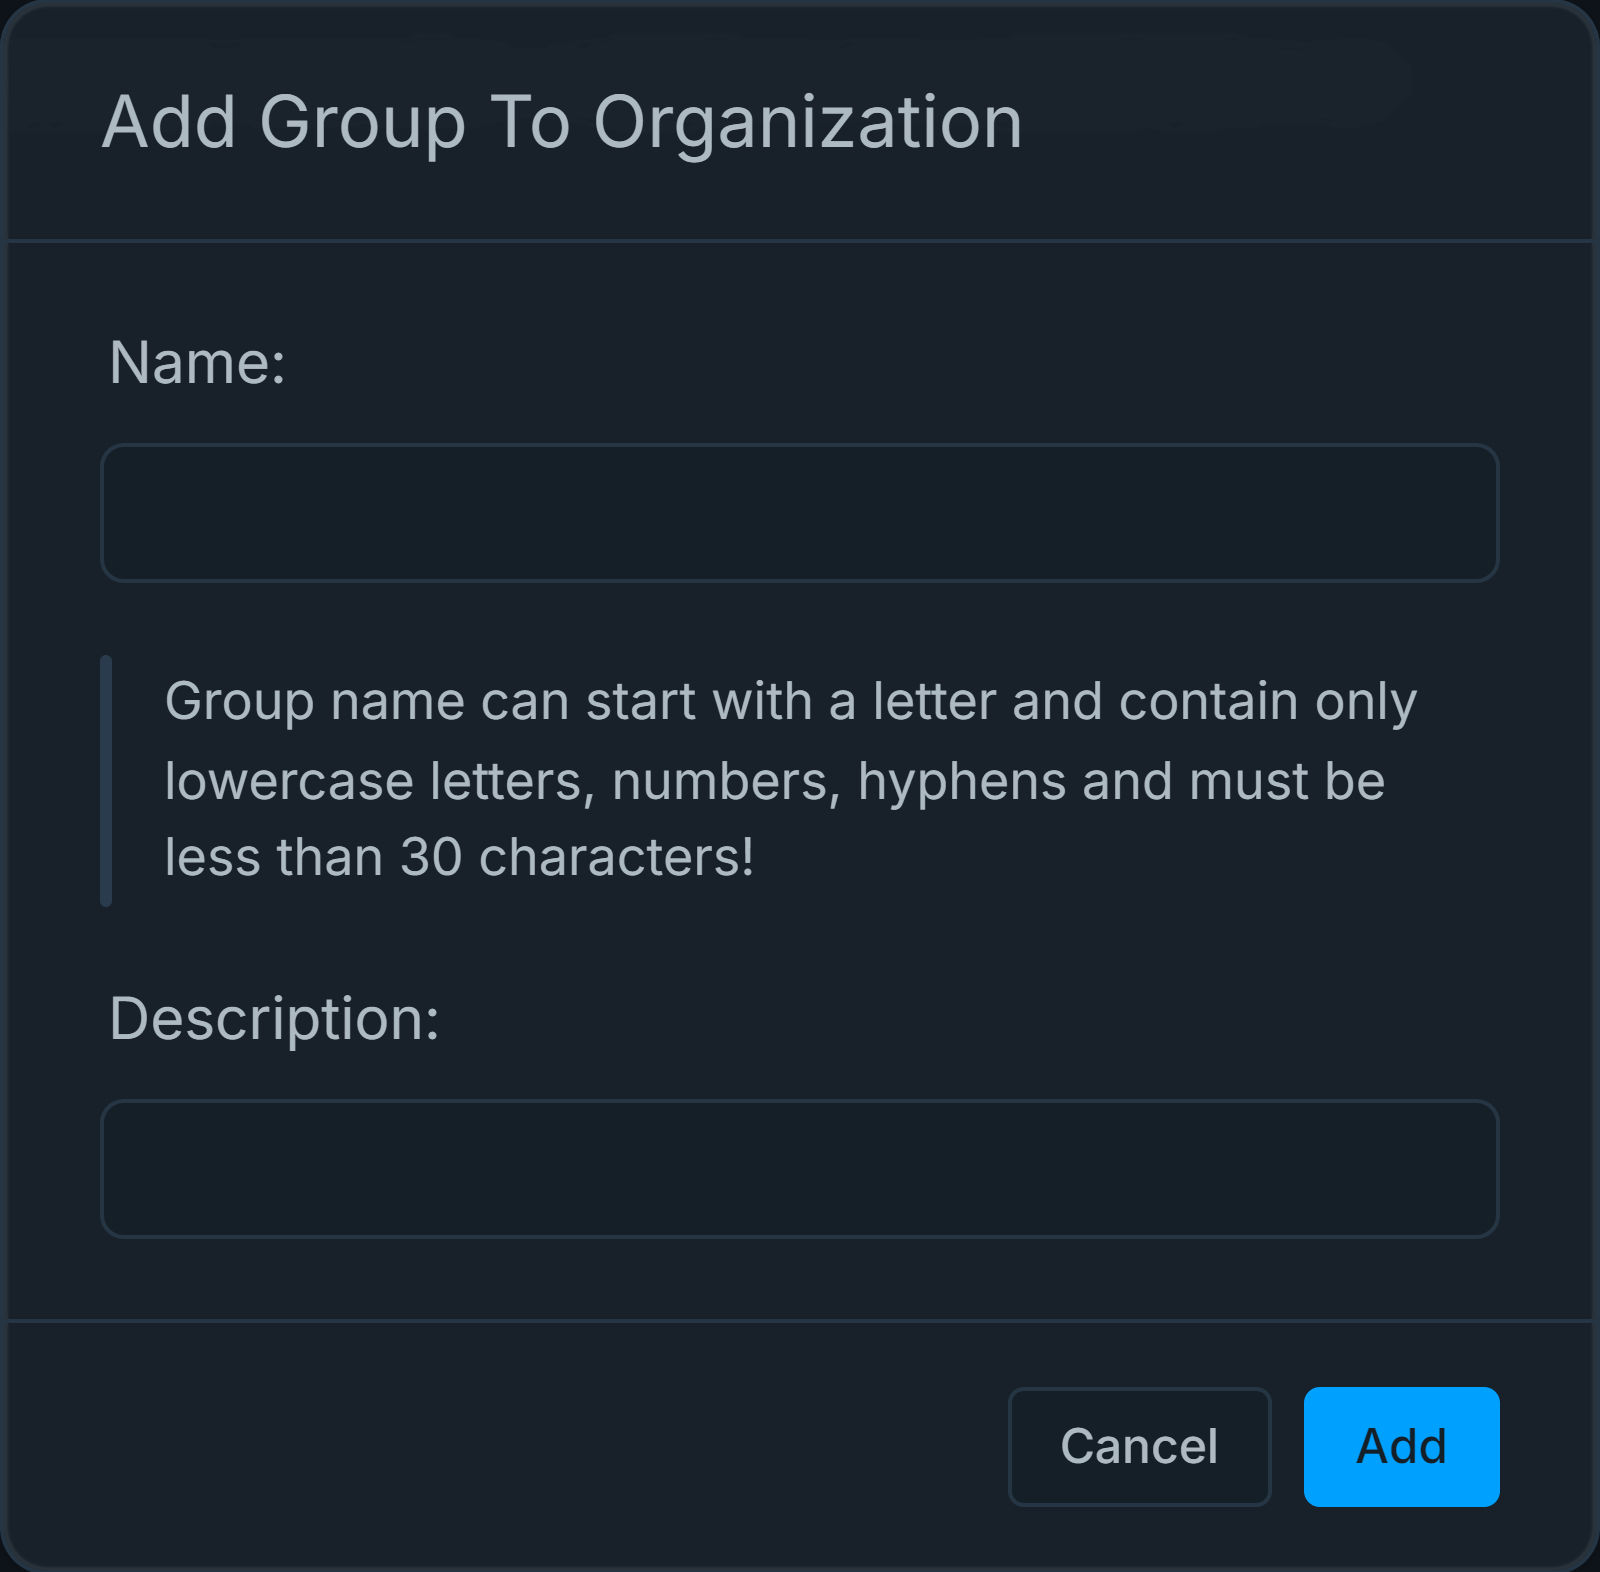
Figure 15. Adding Groups
-
Type the descriptive name of the group in the Name field.
-
Type Description.
-
Click Add to add the group to join the organization. The group will be automatically added to the organization and appear on the organization groups page.
Searching Groups
Zenconsole enables you to seek a group by their name or description fields. To locate a group in your group's list, enter their name or description into the search field. This will automatically update the group list below, and the group you are seeking will be displayed.
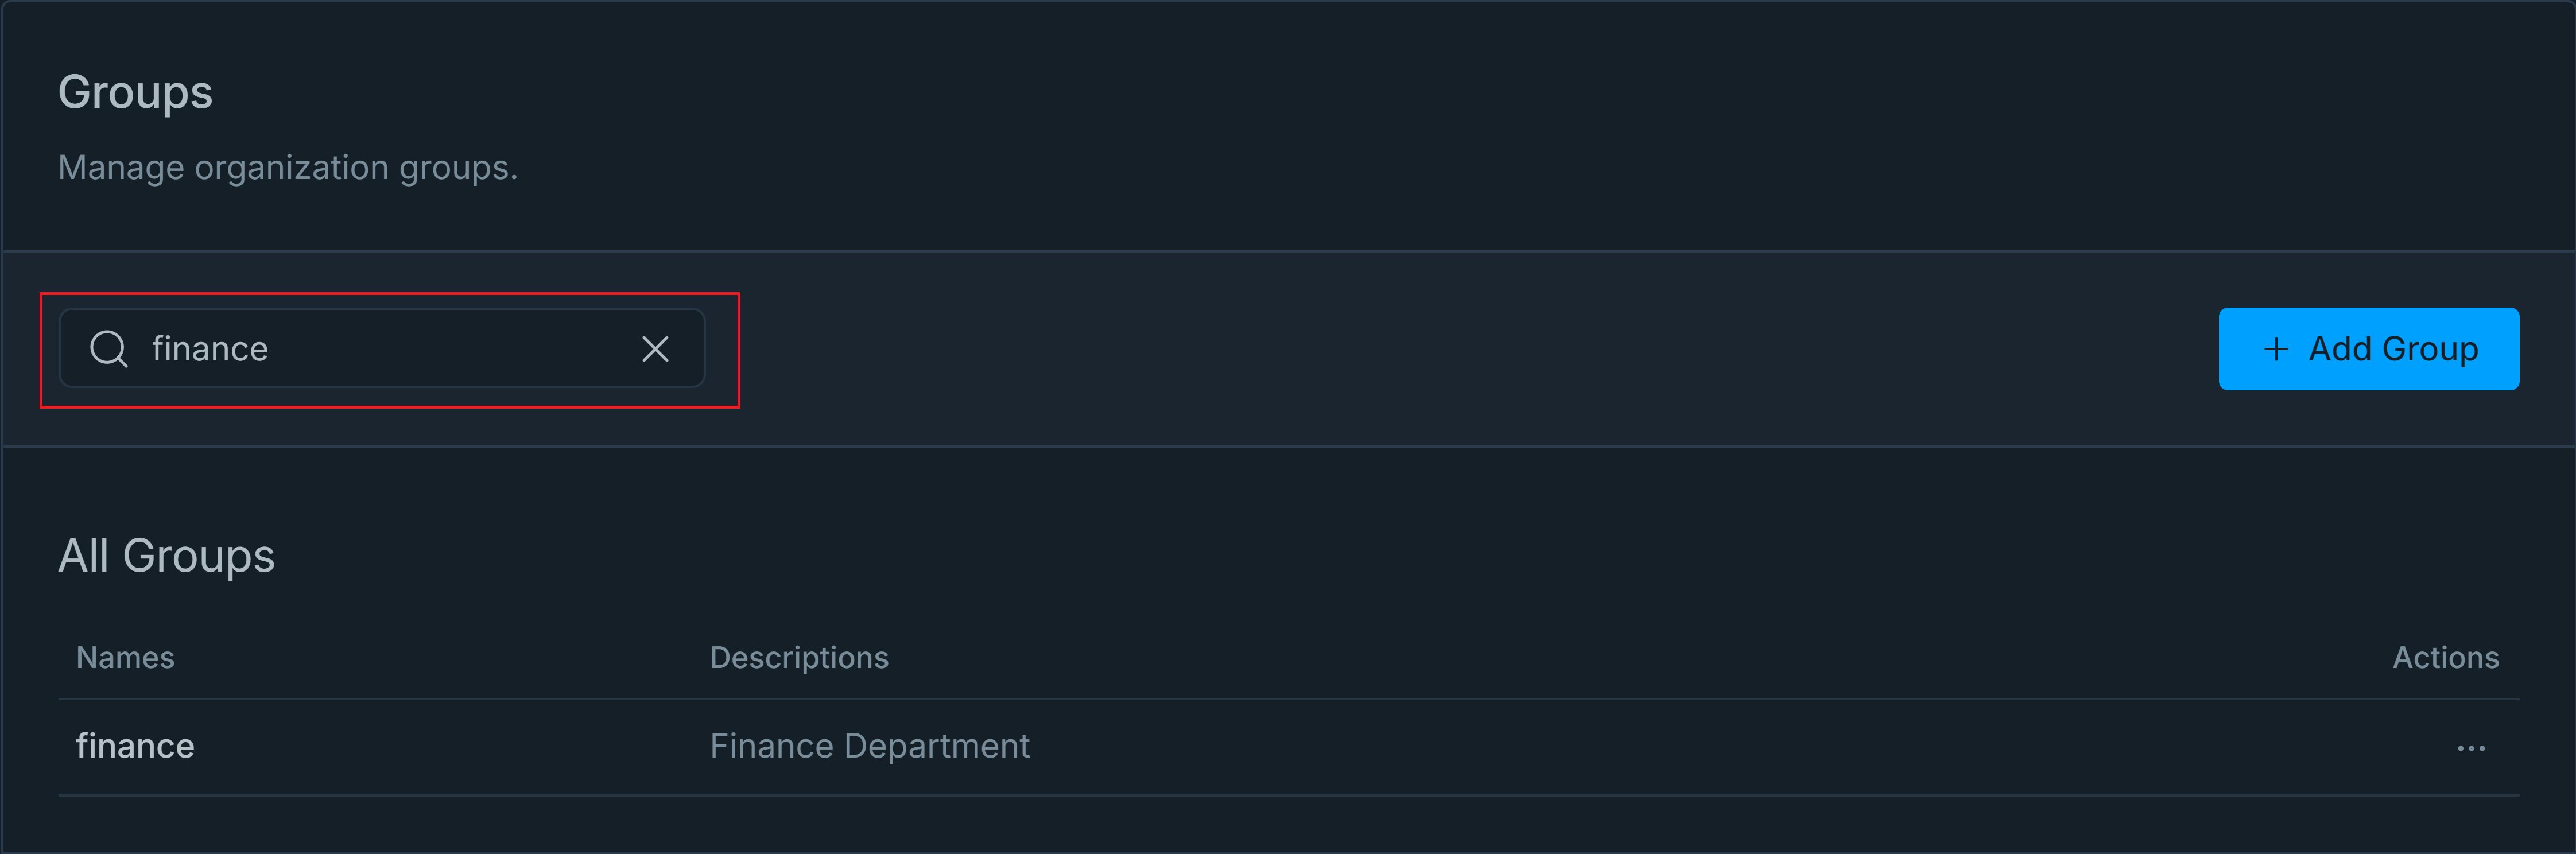
Figure 16. Searching Groups
Viewing Groups
You can easily view organization groups and their members by following these steps:
-
Go to the Organization Groups page by navigating to the Settings > Groups page on Zenconsole. This will display all existing groups in your organization.
-
You may use the search box tool to find the group that you want to view.
-
To access the members of the group, simply click on its name. The following is an alphabetical list of all group members.
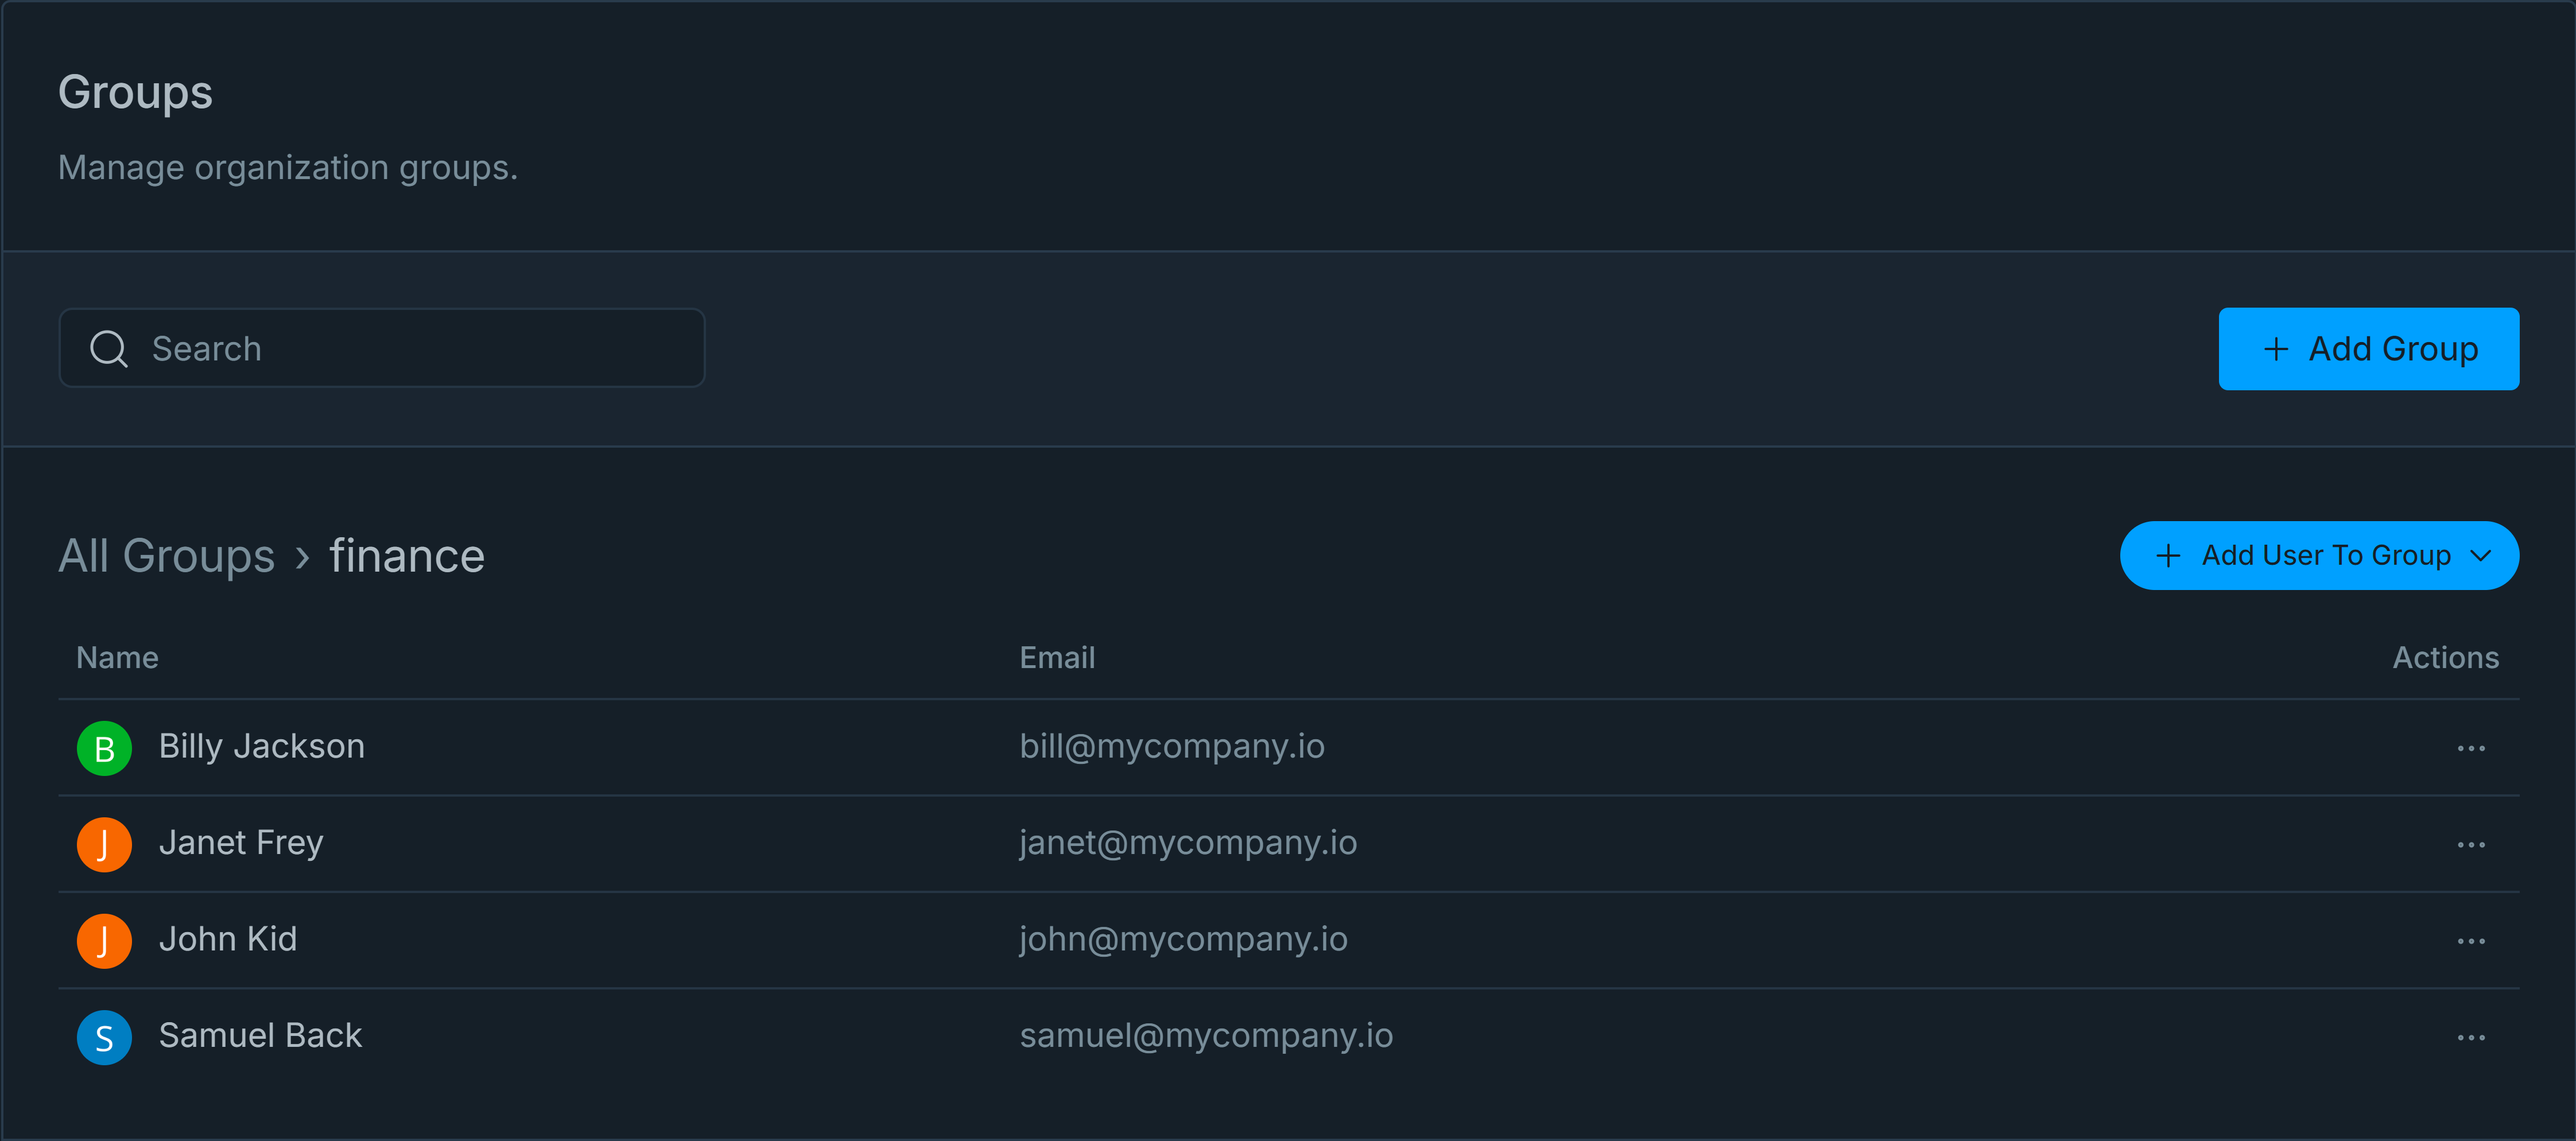
Figure 17. Viewing group members
To return back to the organization groups list, you may click on the All Groups link.
Removing Groups
You can easily remove a group from your organization by following these steps:
-
Go to Organization Groups page by navigating to the Settings > Groups page on Zenconsole.
-
Search for the group that you want to remove.
-
Click on the settings menu with the 3-dot
...icon in the Action column.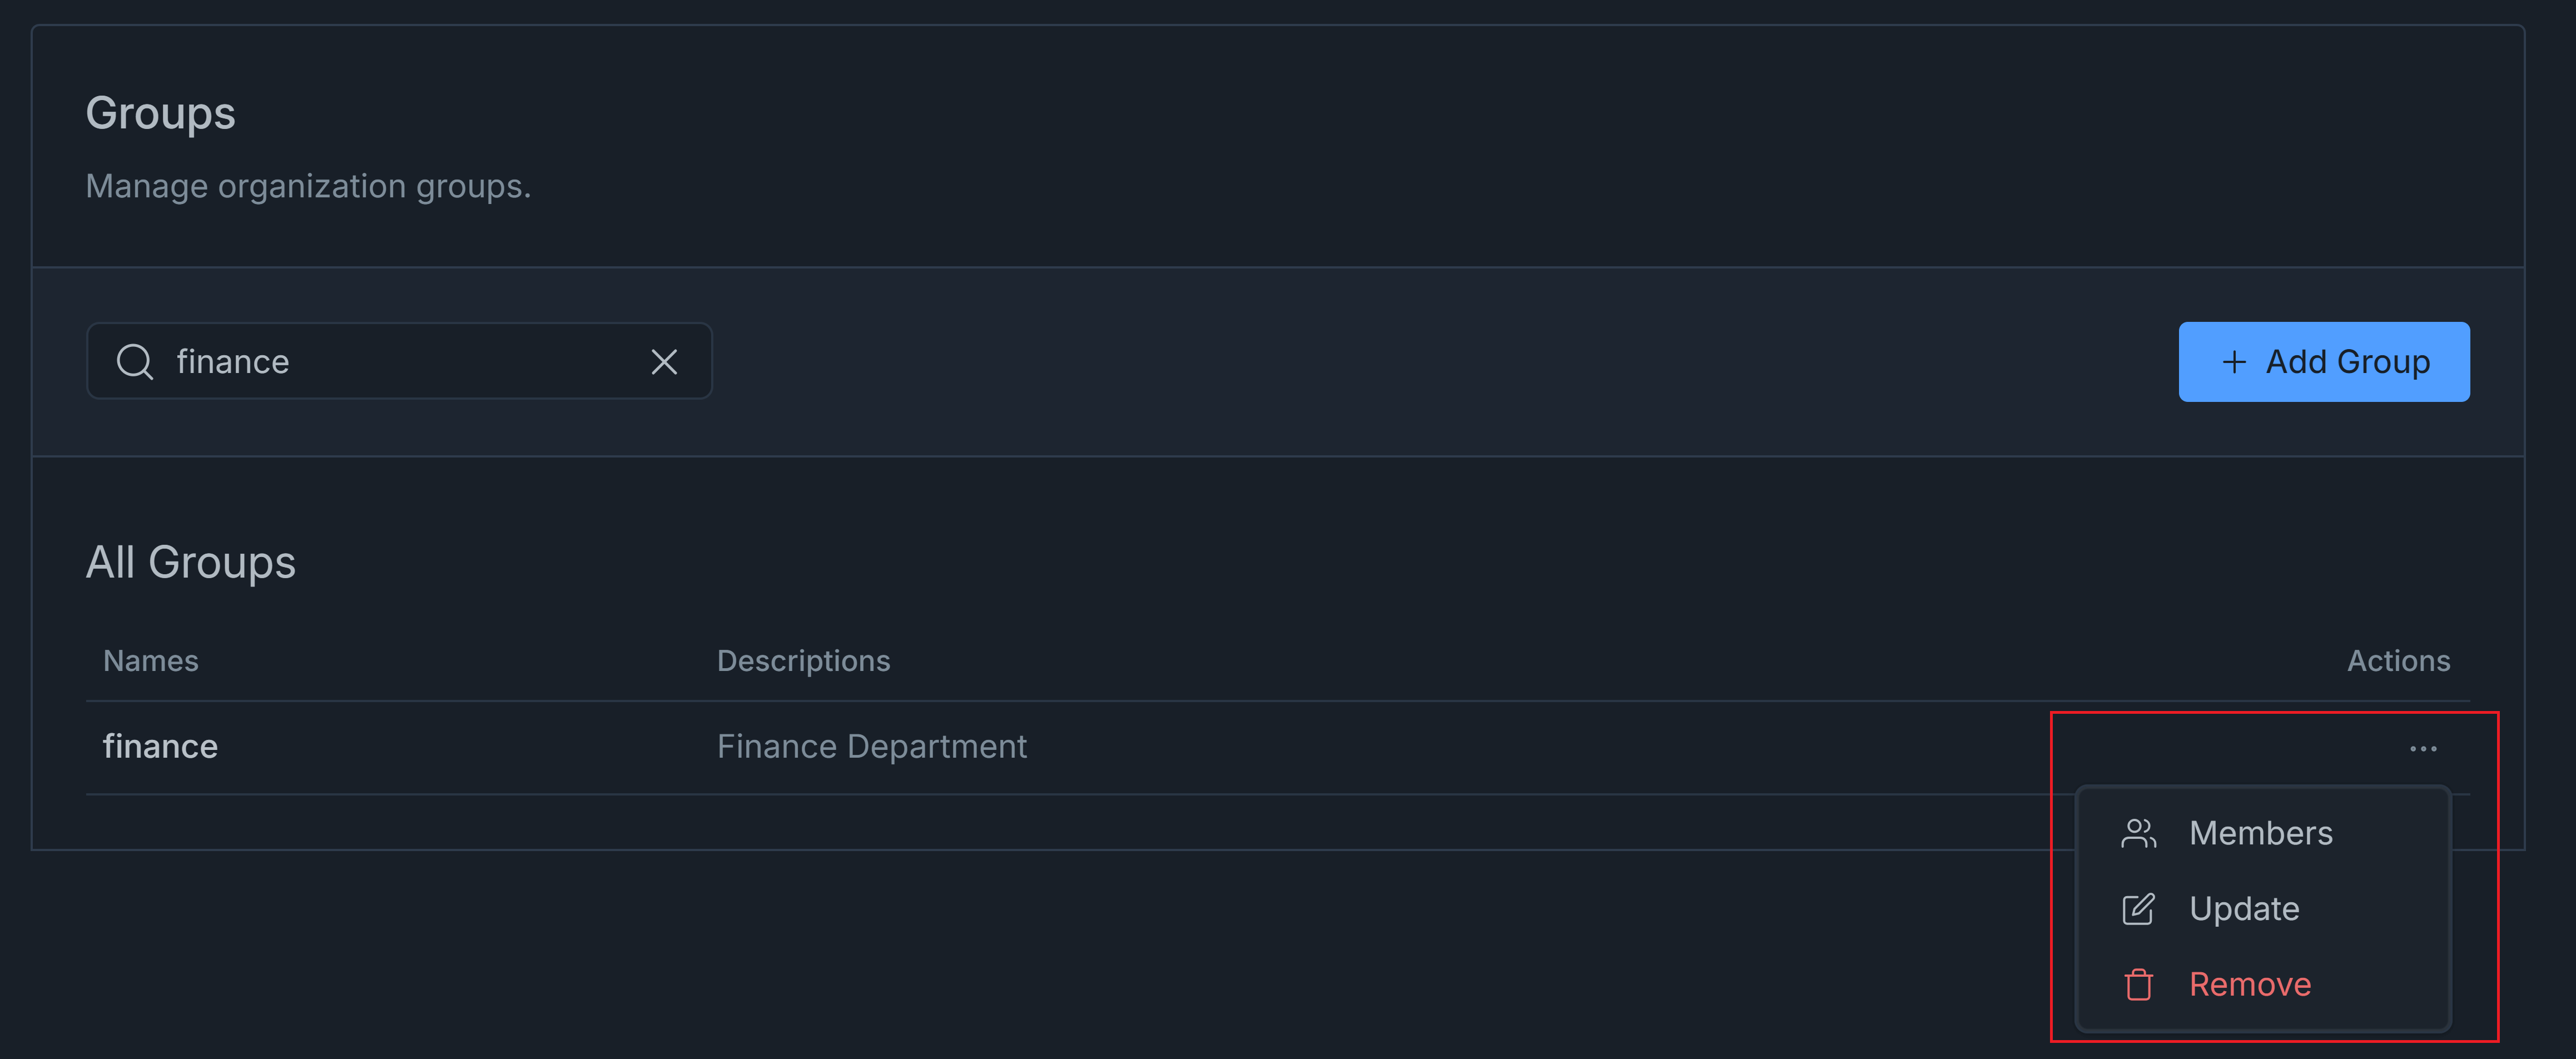
Figure 18. Group Actions Menu
-
Click on the Remove button to remove the selected group from your organization. A dialog box will appear for confirmation.
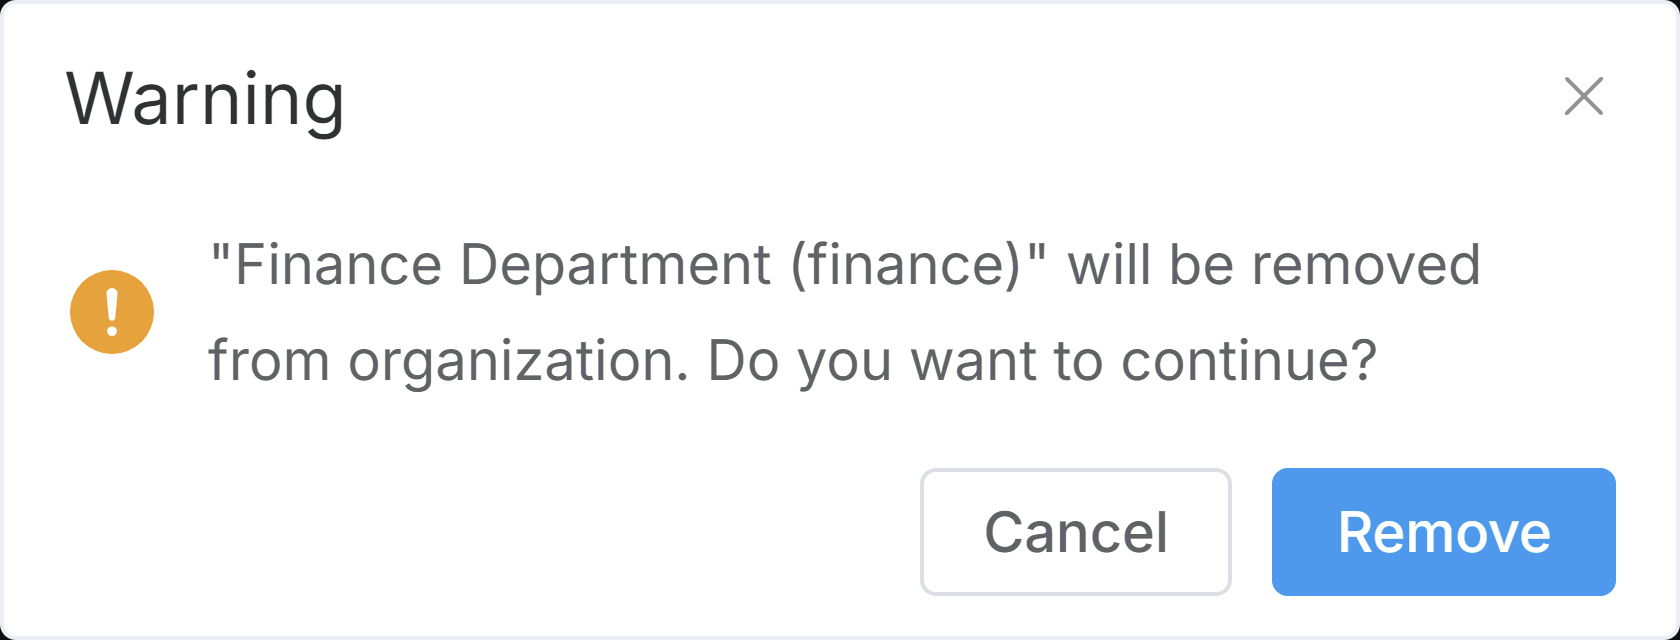
Figure 19. Group Delete Notification
-
Click on the Remove to confirm group removal.
Adding a User to a Group
You can easily add a user to a group in your organization by following these steps:
-
Go to the Organization Groups page by navigating to the Settings > Groups page on Zenconsole.
-
Search for the group to which you want to add a user.
-
Click on the settings menu with the 3-dot
...icon in the Action column. -
Click on the Members button. This will list the users in the group.
-
Click on the + Add User to Group button at the top right of the pane. This will open a drop-down list displaying the available users in your organization.
-
You may use the search box tool to find the user in the list.
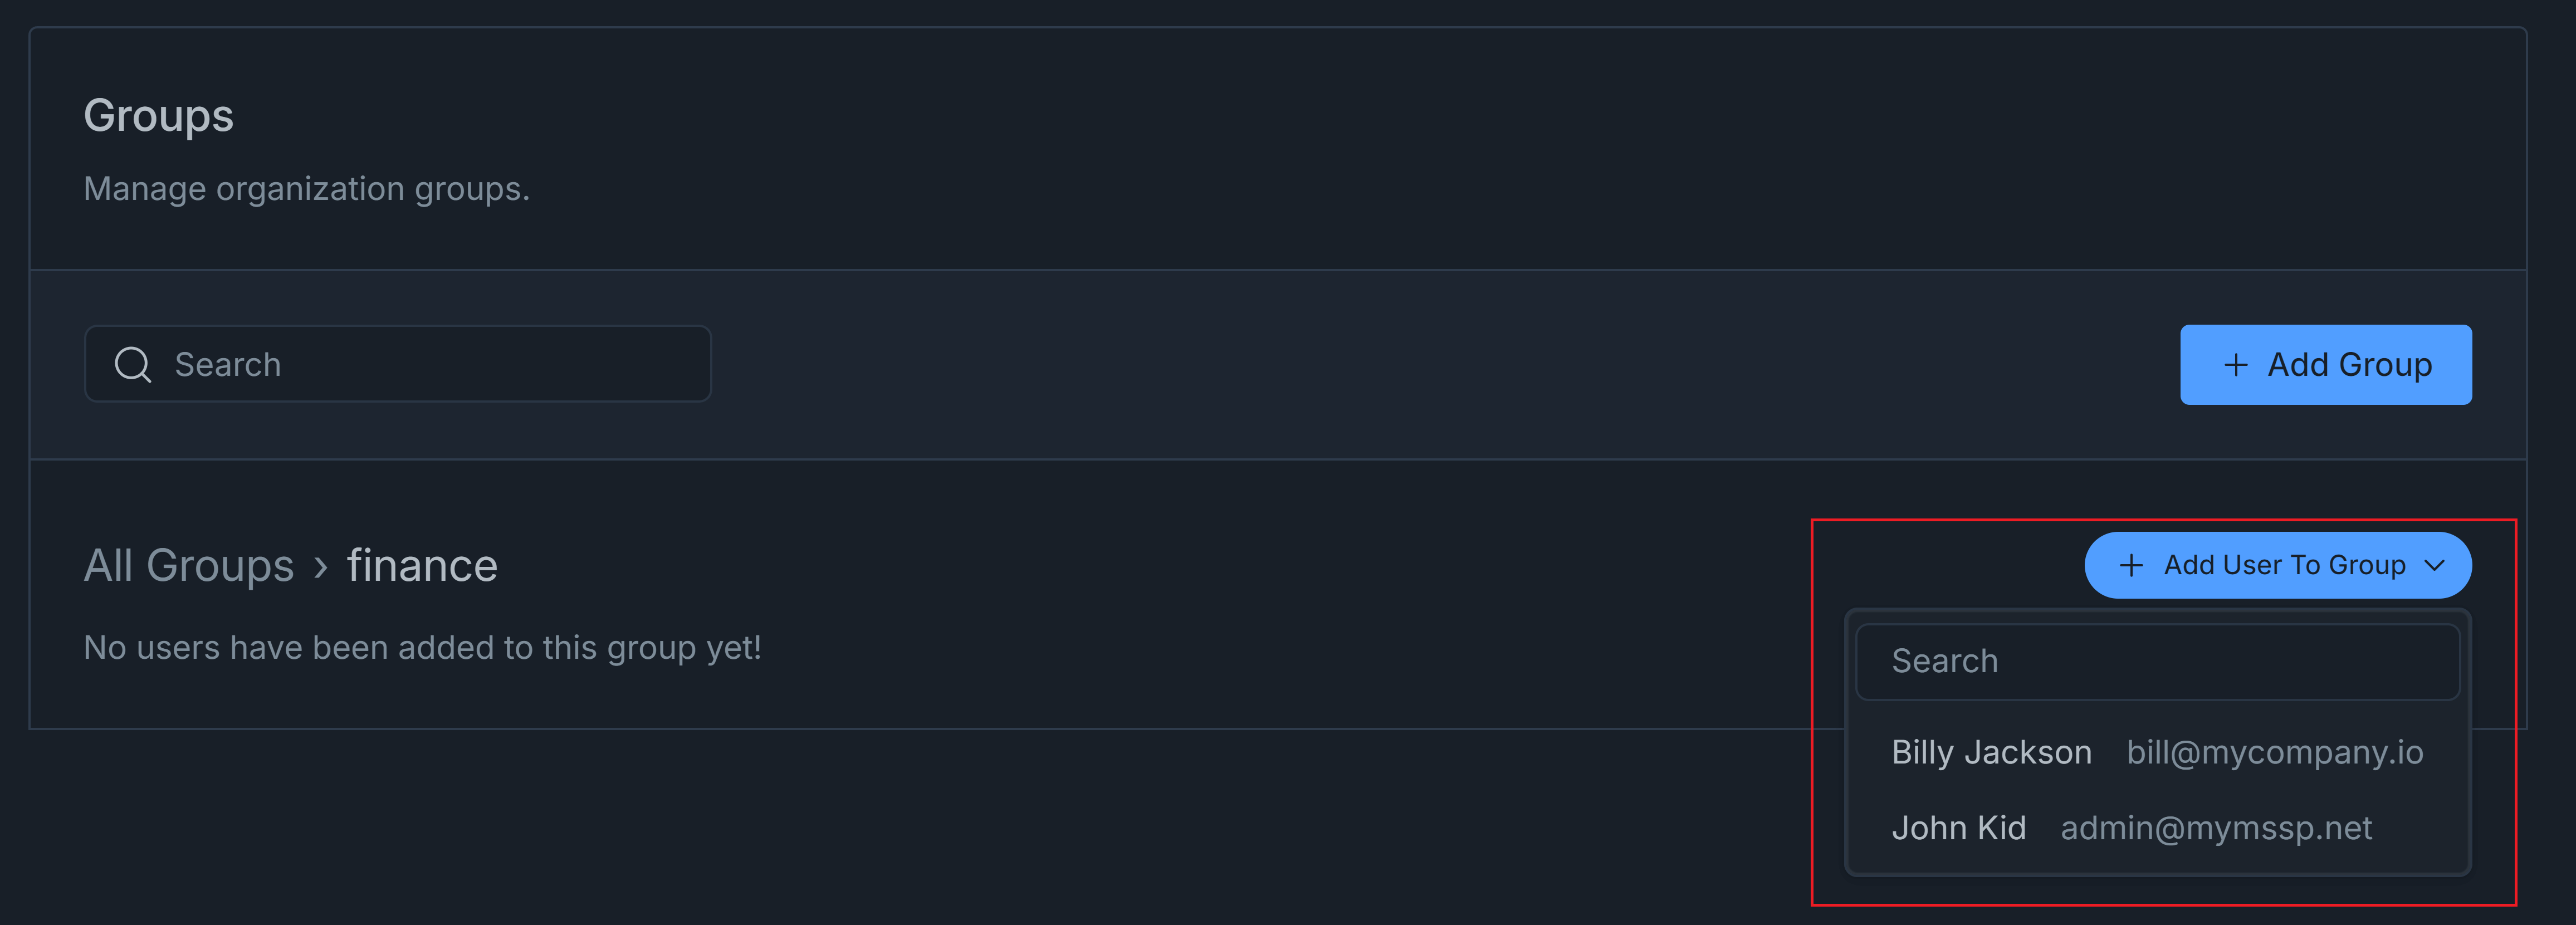
Figure 20. Adding a User to a Group
-
Select the username that you wish to include in the group. The user will be promptly added to the group and visible in the list of group members.
Removing a User from a Group
You can easily remove a user from a group in your organization by following these steps:
-
Go to the Organization Groups page by navigating to the Settings > Groups page on Zenconsole.
-
Search for the group from which you want to remove a user.
-
Click on the settings menu with the 3-dot
...icon in the Action column. -
Click on the Members button. This will list the users in the group.
-
You may use the search box tool to find the user in the list.
-
Click on the settings menu with the 3-dot
...icon in the Action column. The Remove button with a trash icon will appear. -
Click Remove button to remove the user from the group. A dialog box will appear for confirmation.
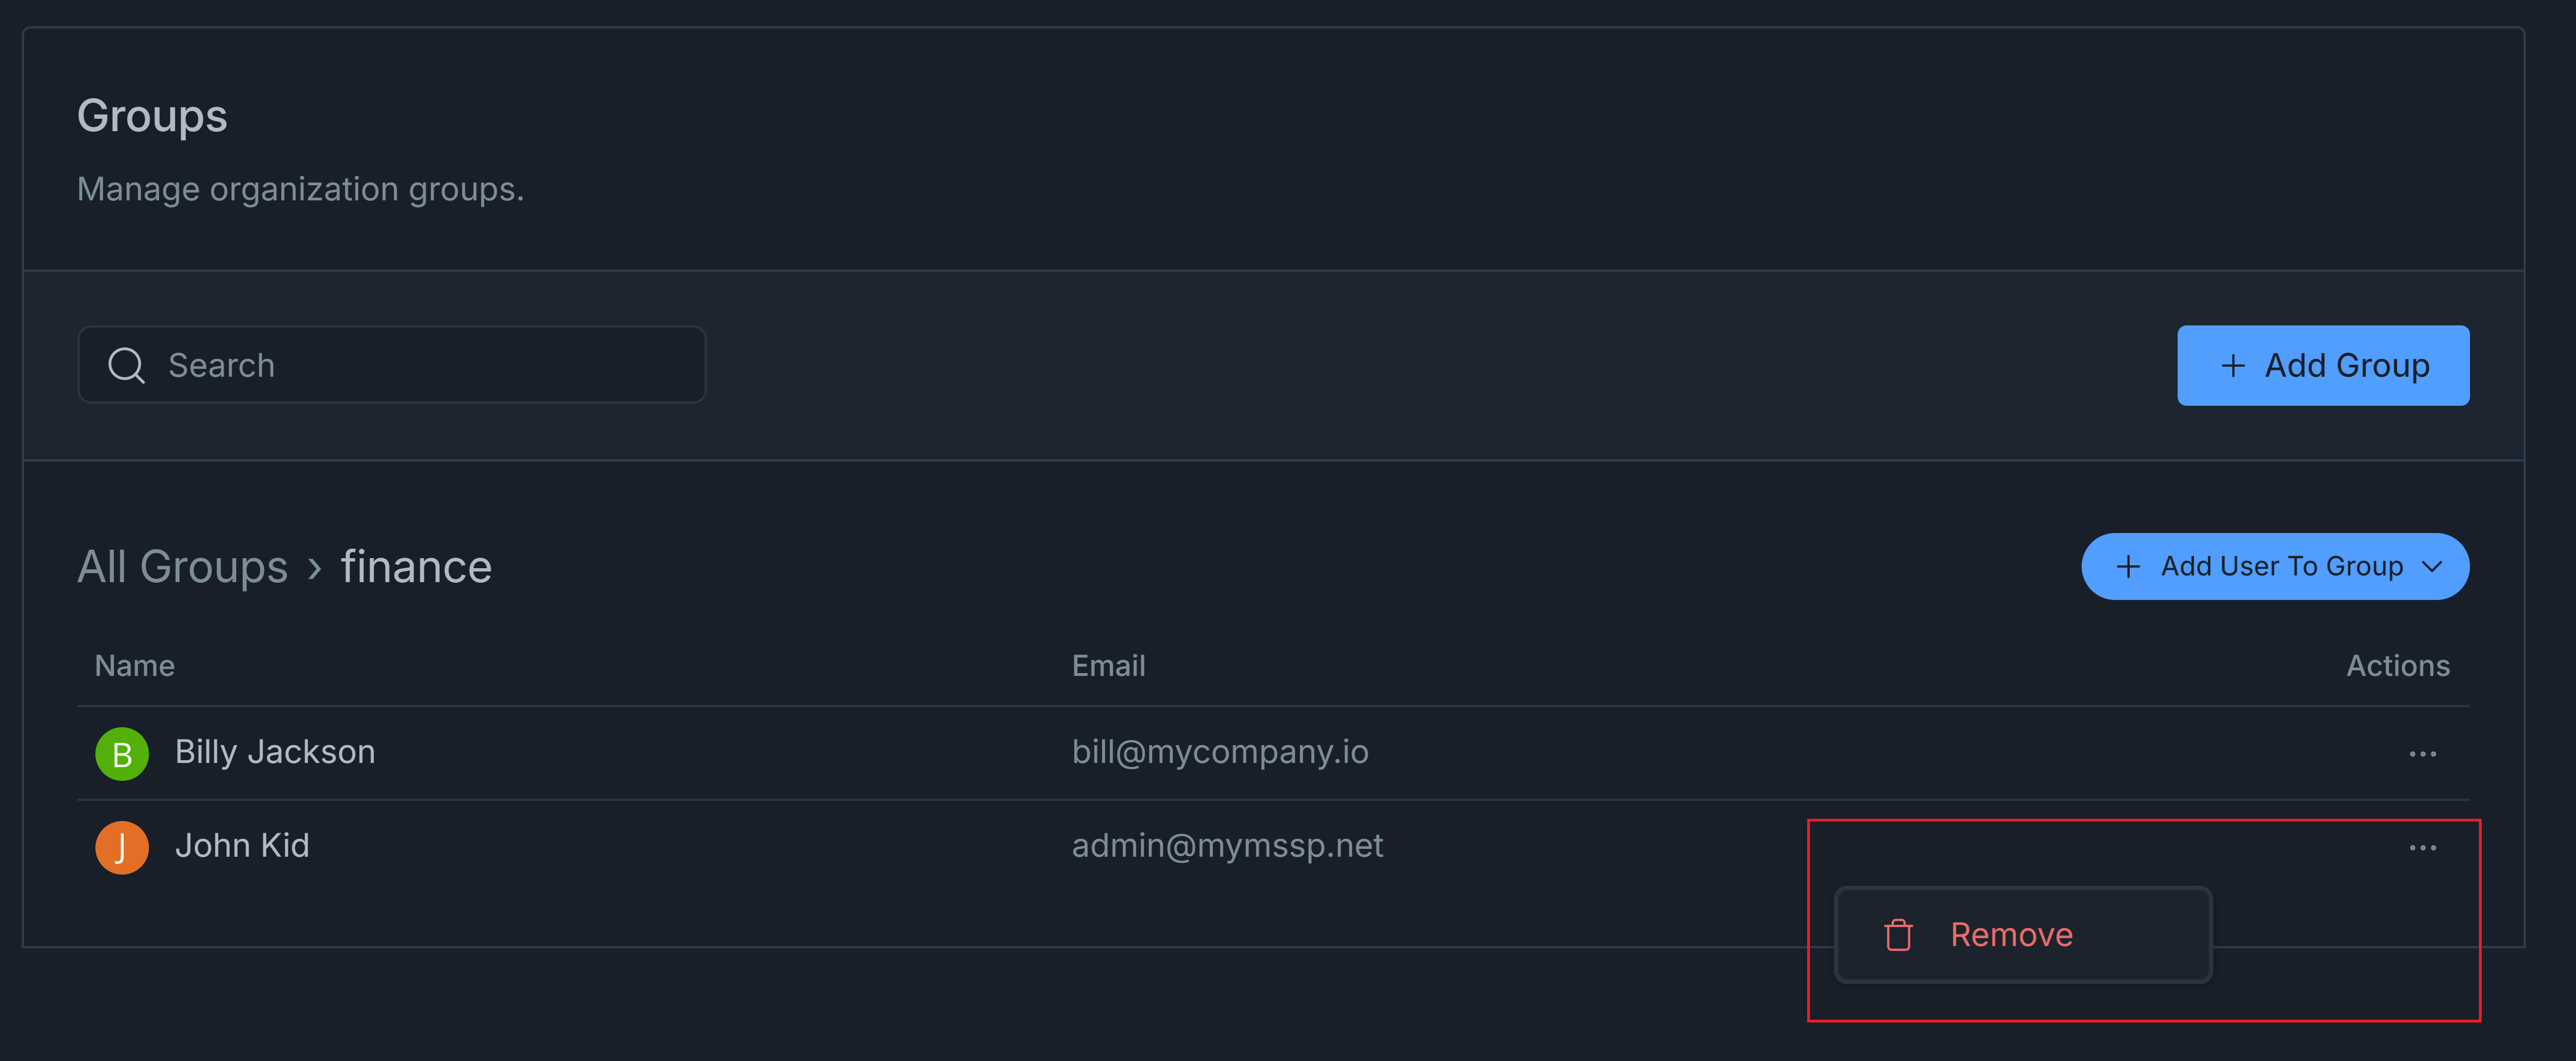
Figure 21. Removing a User from a Group
-
Click Remove for approving user removal from the group.
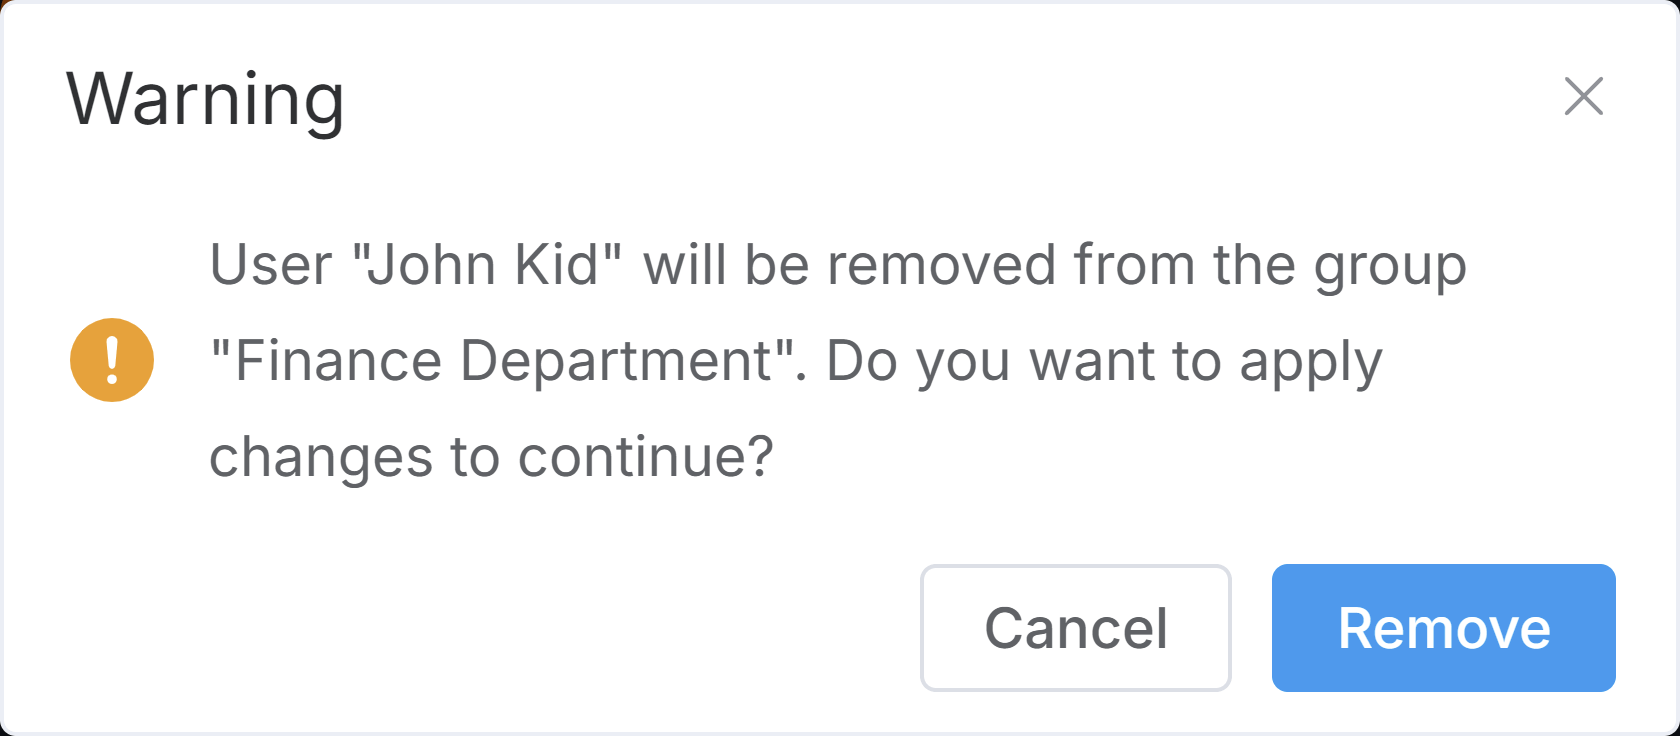
Figure 22. Notification for user removal from group
Editing Groups
You can easily update group details by following these steps:
-
Go to the Organization Groups page by navigating to the Settings > Groups page on Zenconsole.
-
Search for the group that you want to update.
-
Click on the settings menu with the 3-dot
...icon in the Action column. -
Click on the Edit button to update the details of the selected group. A dialog box will appear displaying group information.
-
You may modify the group information field(s), Name and Description, as you want.
-
Click Update button to save the new group details.
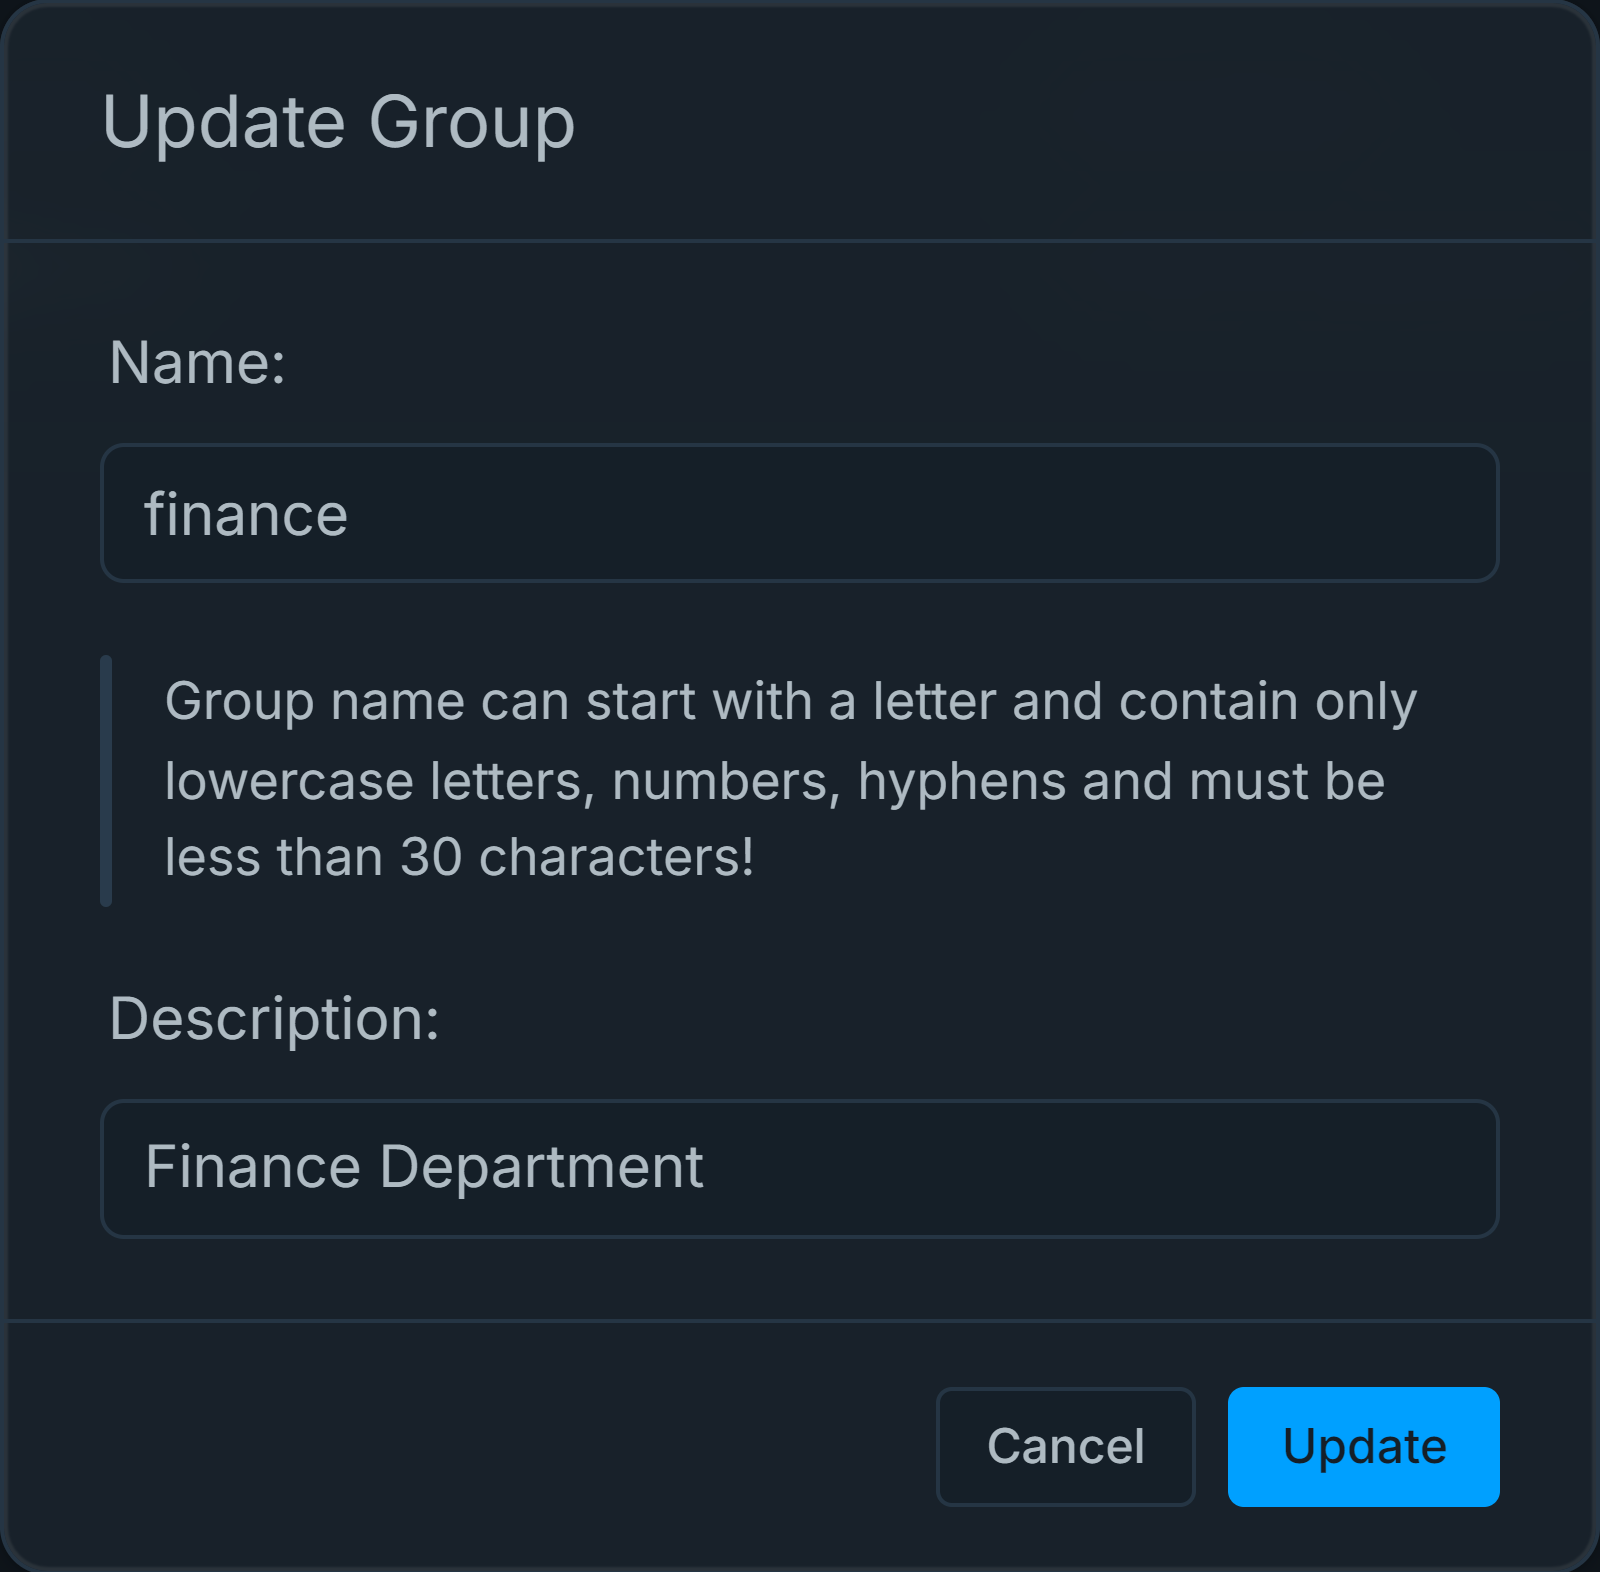
Figure 23. Editing Groups
Managing Administrators
When you purchase an SSE or higher subscription, your organization and its administrator with an owner role are automatically created. The Zenconsole account utilized for the subscription is automatically designated as the administrator. Subsequently, you may manually incorporate new administrators into your organization. Available organization administrator roles are as follows:
- Owner
- Admin
- Viewer
Zenconsole allows for the addition and removal of organization administrators, as well as the modification of their responsibilities. You may view and manage organization administrators by following the next steps.
-
Login Zenconsole and then select the organization you want to manage.
-
Navigate to the Settings > Administrators page.
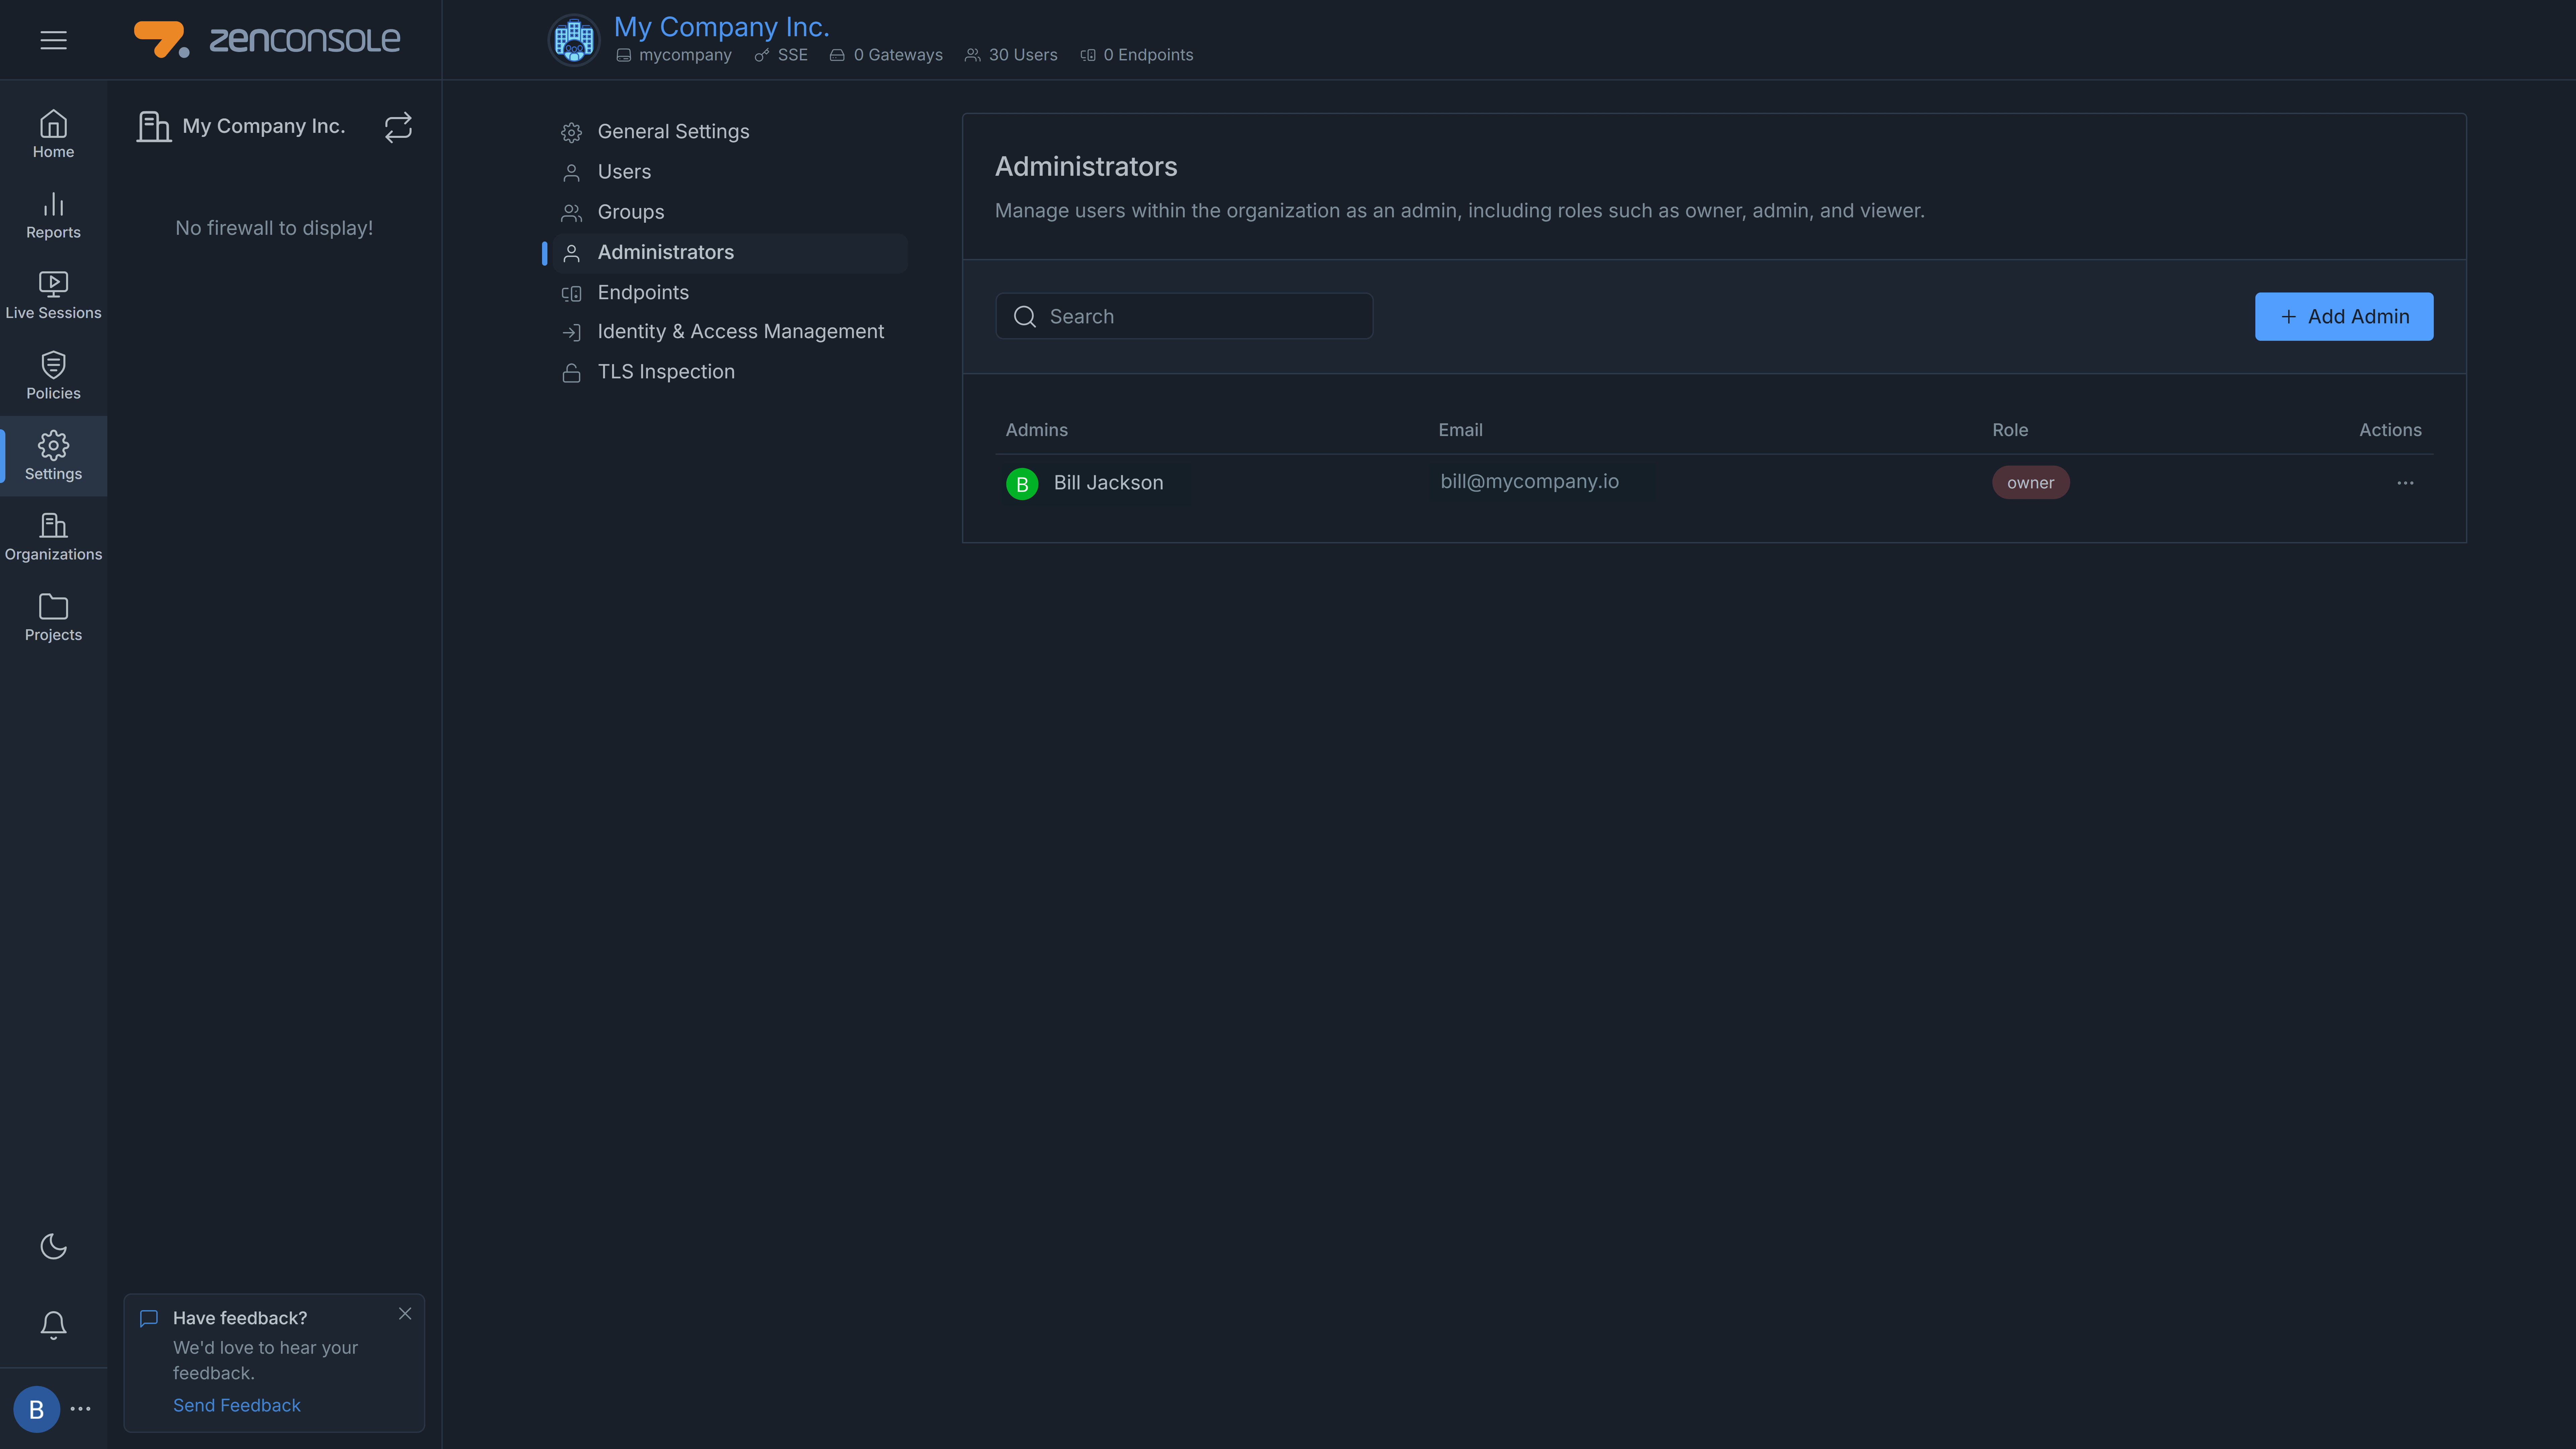
Figure 24. Administrators Page
Adding Administrators
You may follow the next steps to add an administrator to an organization:
-
Go to Organization Administrators page by navigating to the Settings > Administrators page on Zenconsole.
-
Click + Add Admin button in the Administrators pane. This will open a window to fill in admin details.
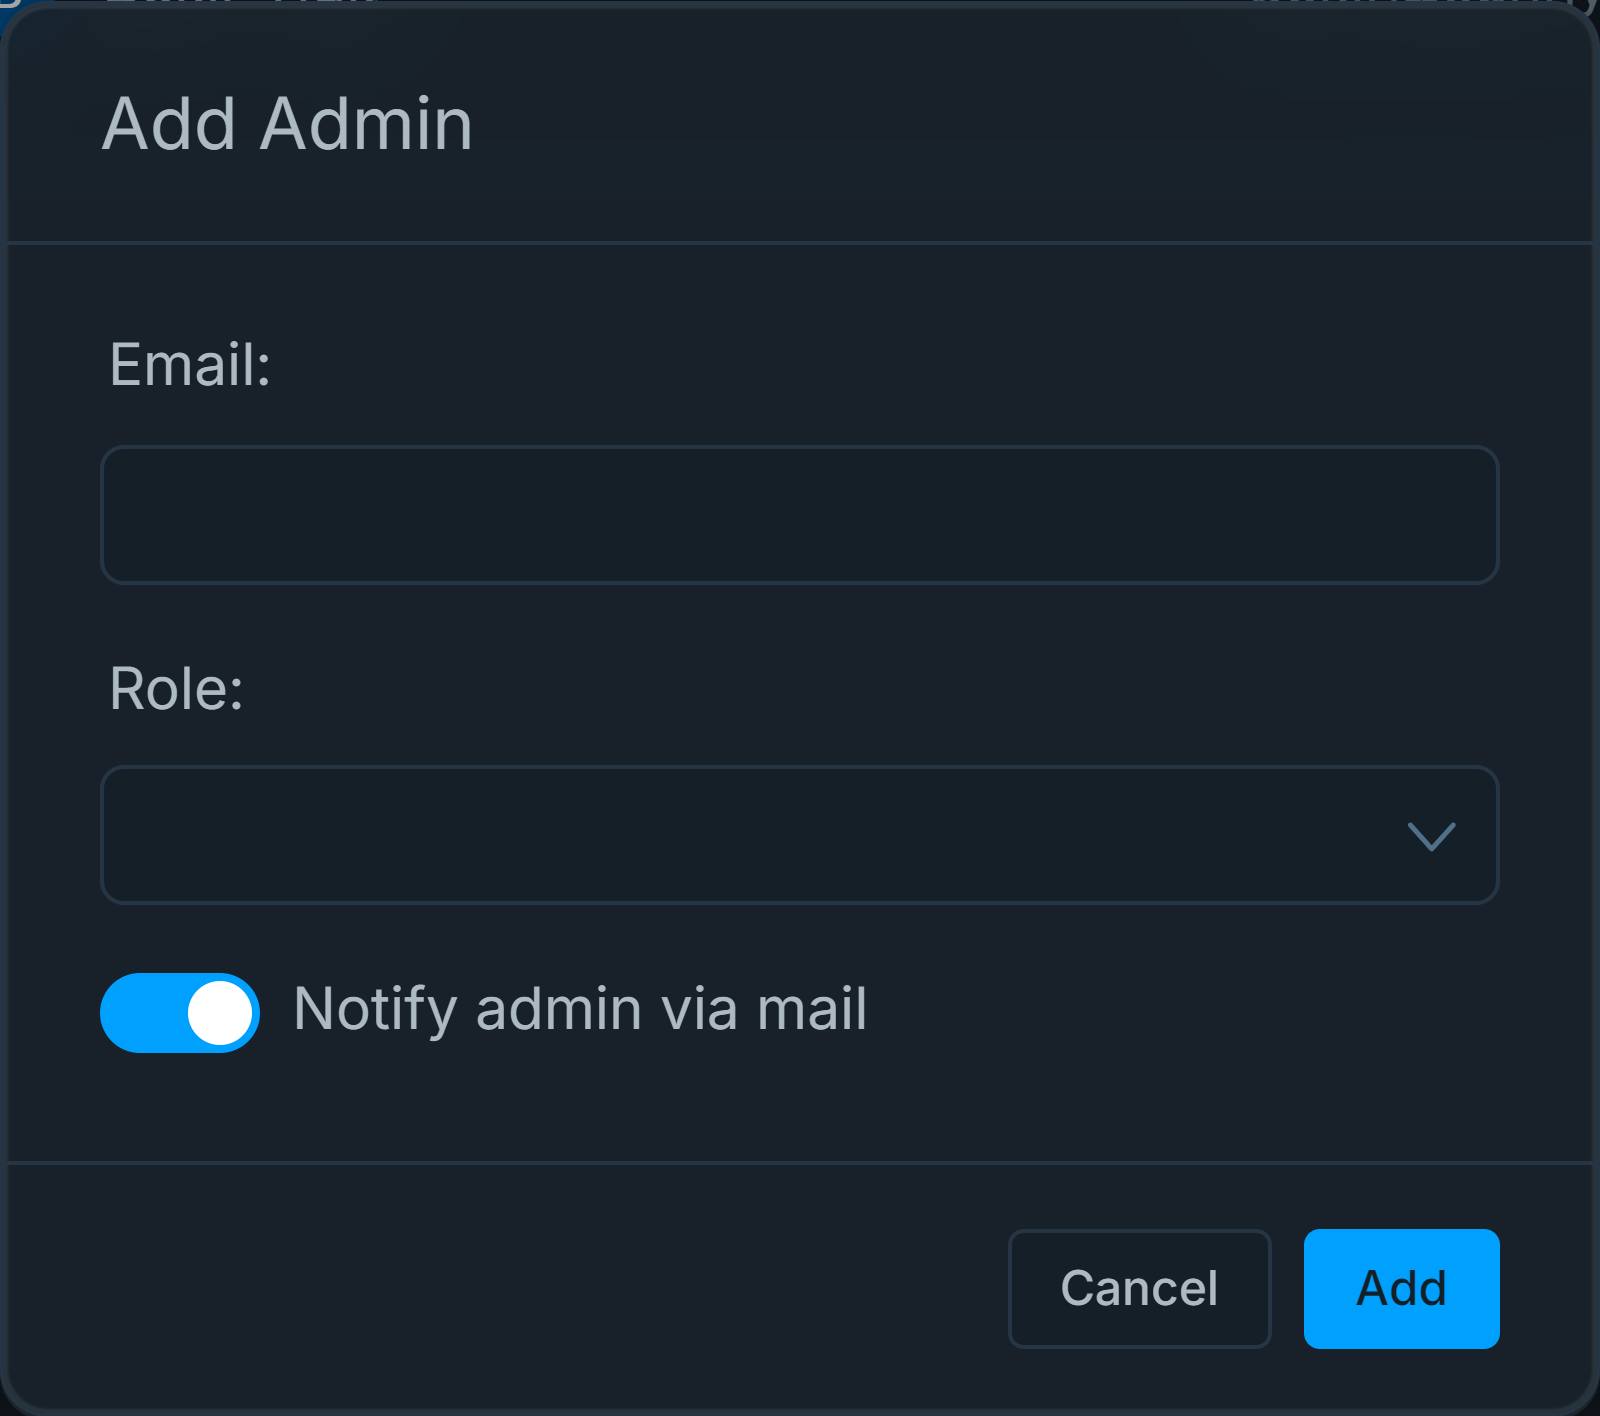
Figure 25. Adding Administrators
-
Type the email address of the new admin in the Email field. This must also be used for Zenconsole login.
-
By selecting an option from the Role drop-down menu, assign one of the available responsibilities to the new admin account. Admin, Viewer, and Owner are viable alternatives.
-
You may leave the Notify admin via mail option as enabled. This option will send an invitation mail to the new administrator.
-
Click Add to add the admin to the organization. The administrator will be automatically added to the organization and appear on the organization administrators page.
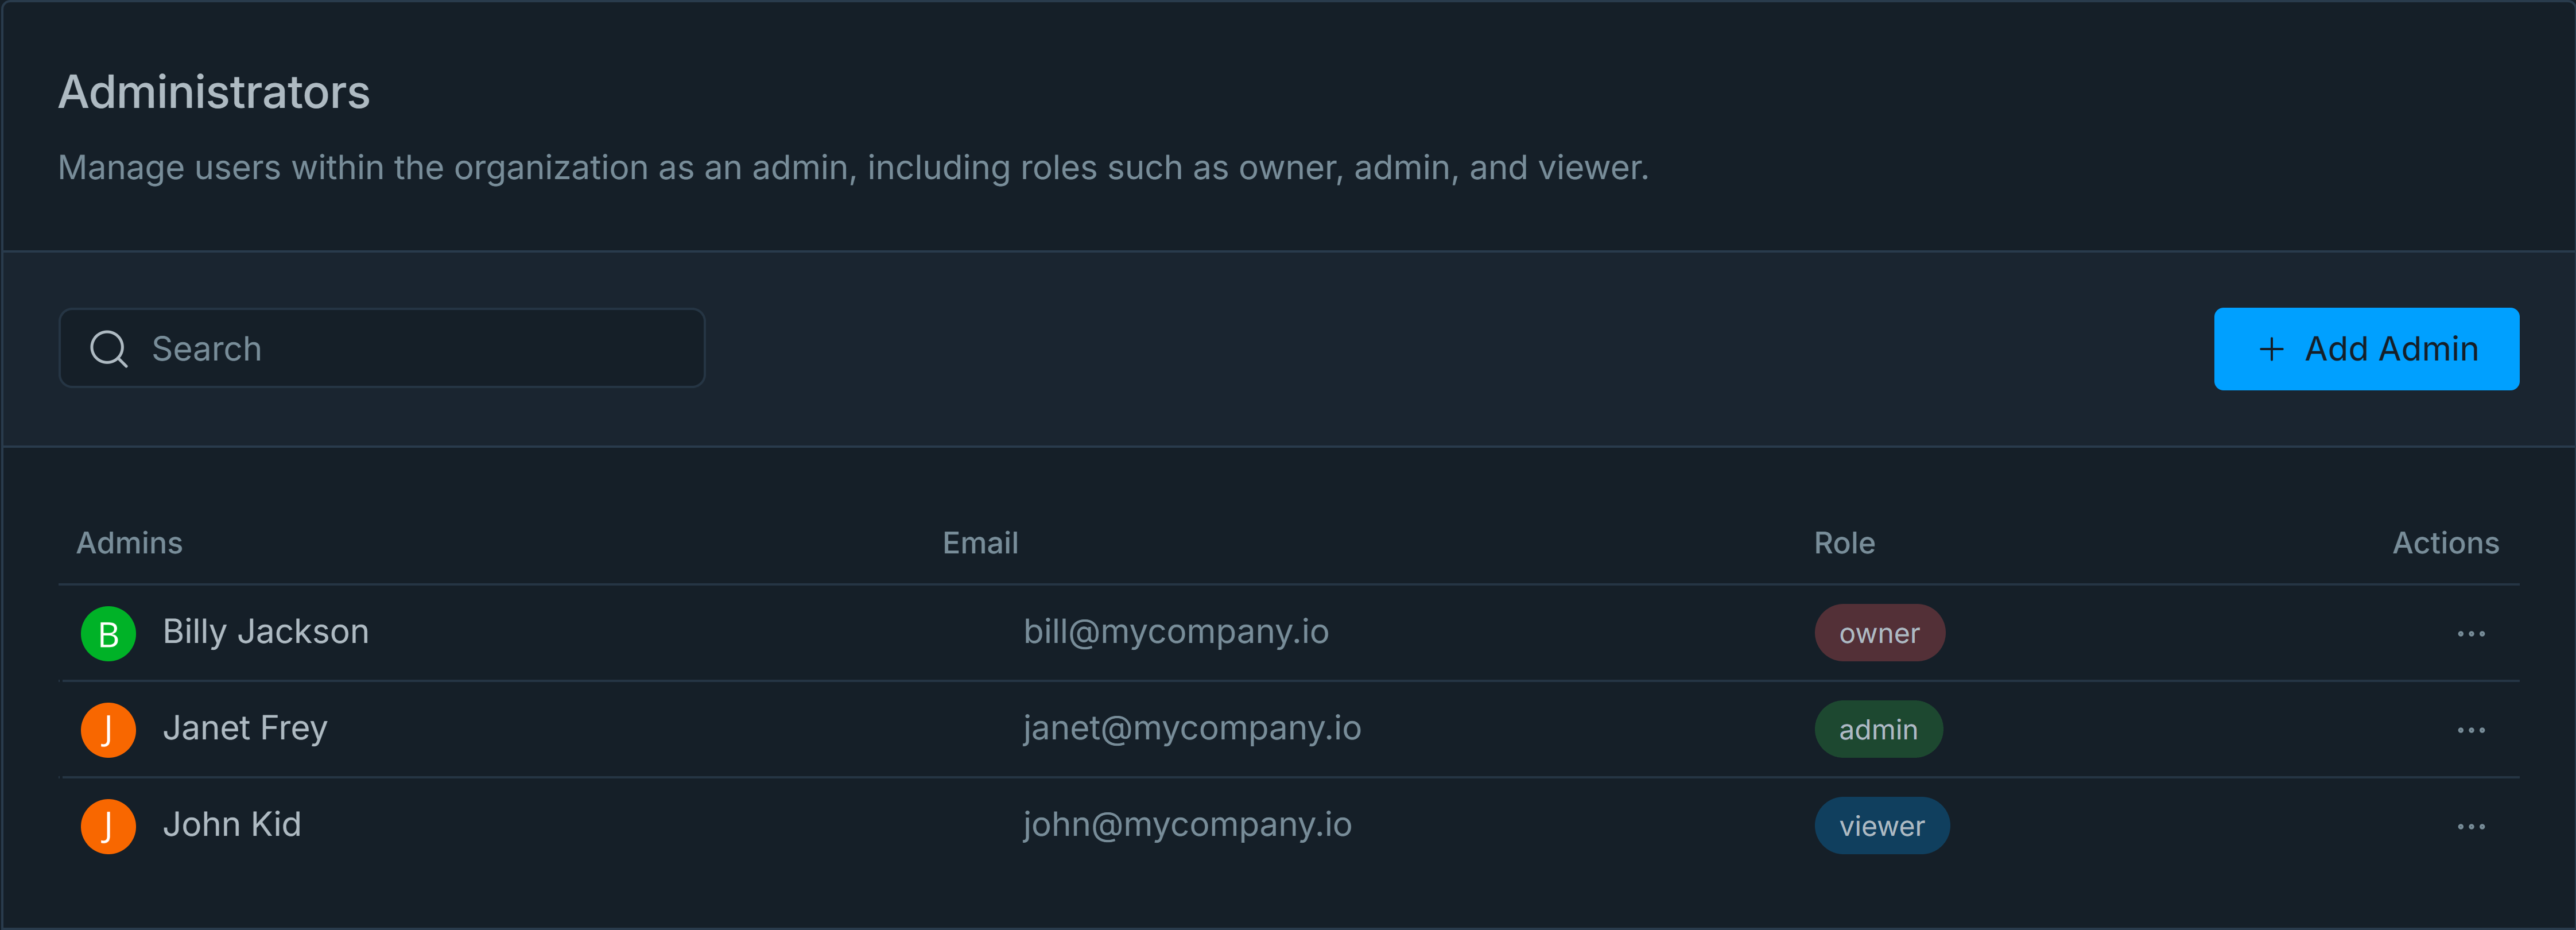
Figure 26. Administrators List
Searching Administrators
Zenconsole enables you to seek an administrator by their name or email address. To locate an admin in your administrators' list, enter his/her name or email address into the search field. This will automatically update the admin list below, and the administrator you are seeking will be displayed.
Changing Administrators Role
You can easily update administrator details by following these steps:
-
Go to Organization Administrators page by navigating to the Settings > Administrators page on Zenconsole.
-
Click on the settings menu with a 3-dot
...icon next to the administrator name you want to update.
Figure 27. Editing Admin
-
Click on the Edit button to update the role of the selected admin. A dialog box will appear displaying admin information.
-
Select the new role for the admin account from the Role drop-down menu.
-
Click Update button to save the new settings.
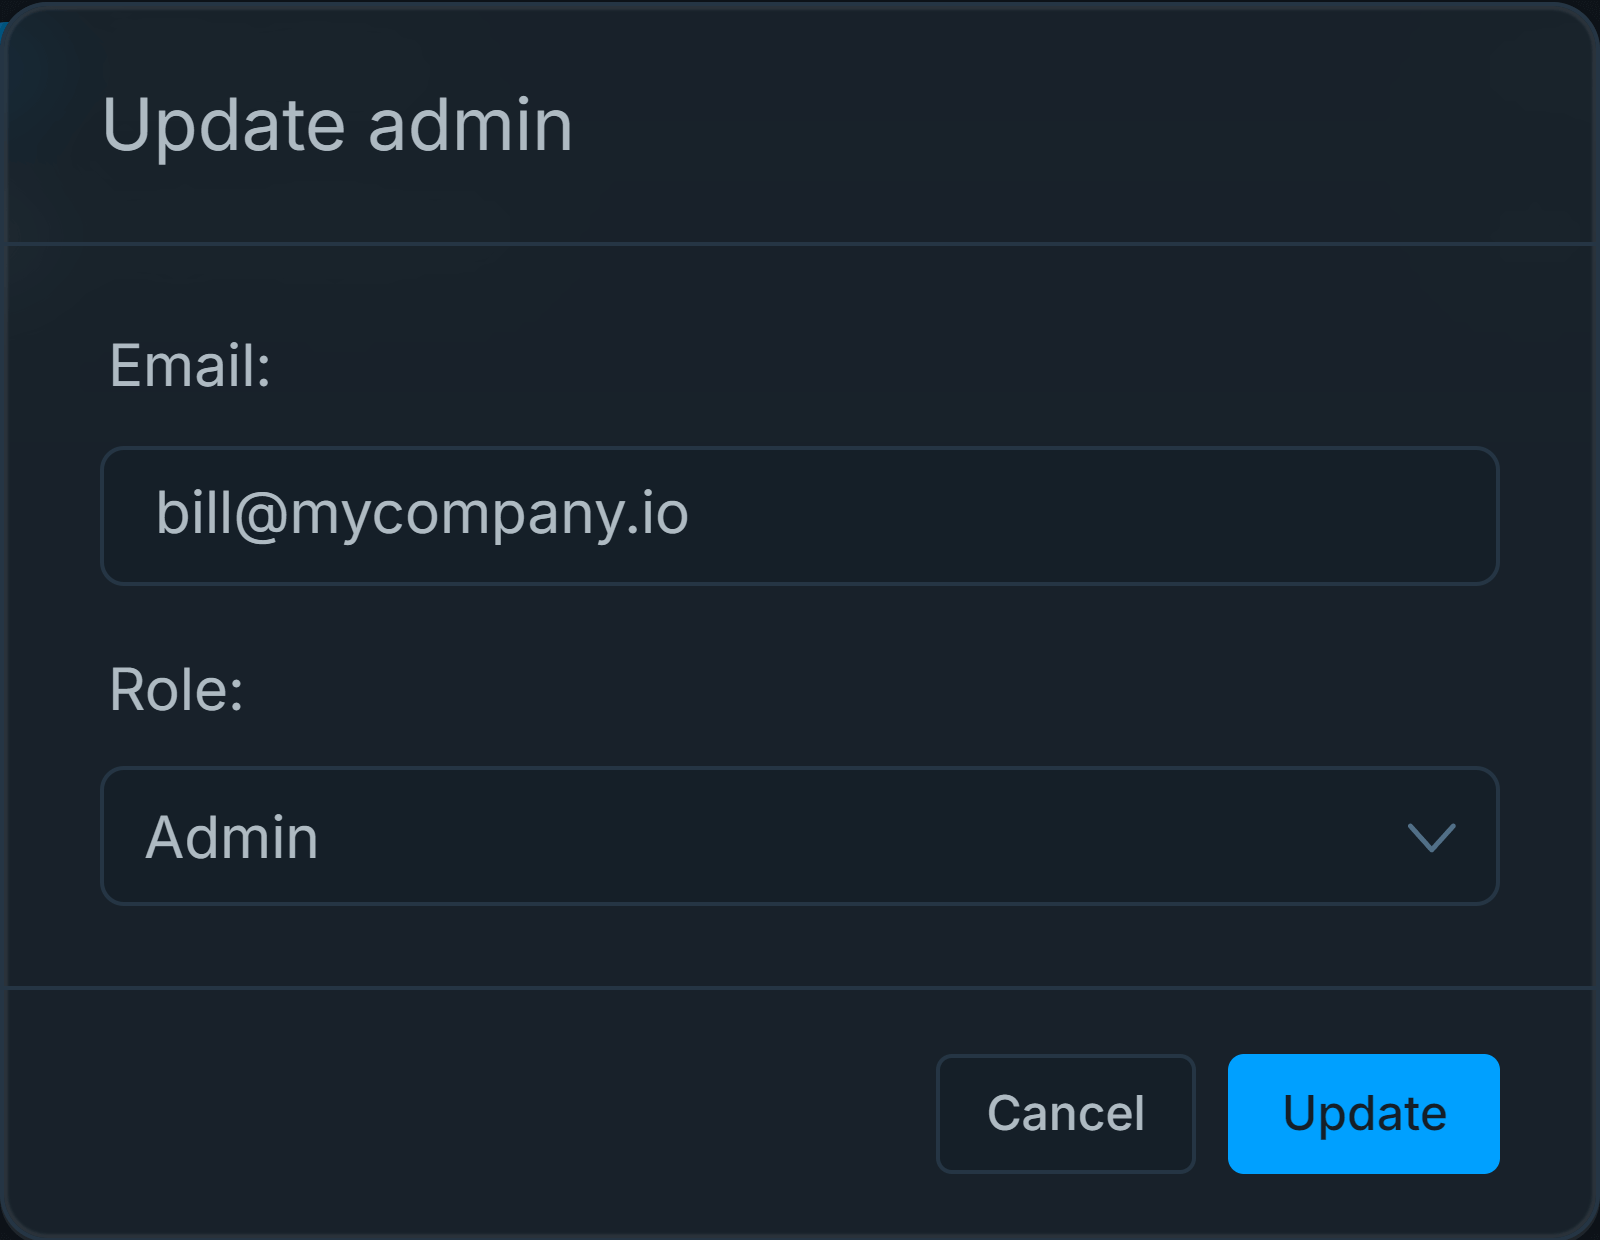
Figure 28. Changing Administrators Role
Removing Administrators
You can easily remove an administrator from your organization by following these steps:
-
Go to Organization Administrators page by navigating to the Settings > Administrators page on Zenconsole.
-
Search for the user that you want to remove.
-
Click on the settings menu with the 3-dot
...icon in the Action column. -
Click on the Remove button to remove the selected user from your organization. A dialog box will appear for confirmation.
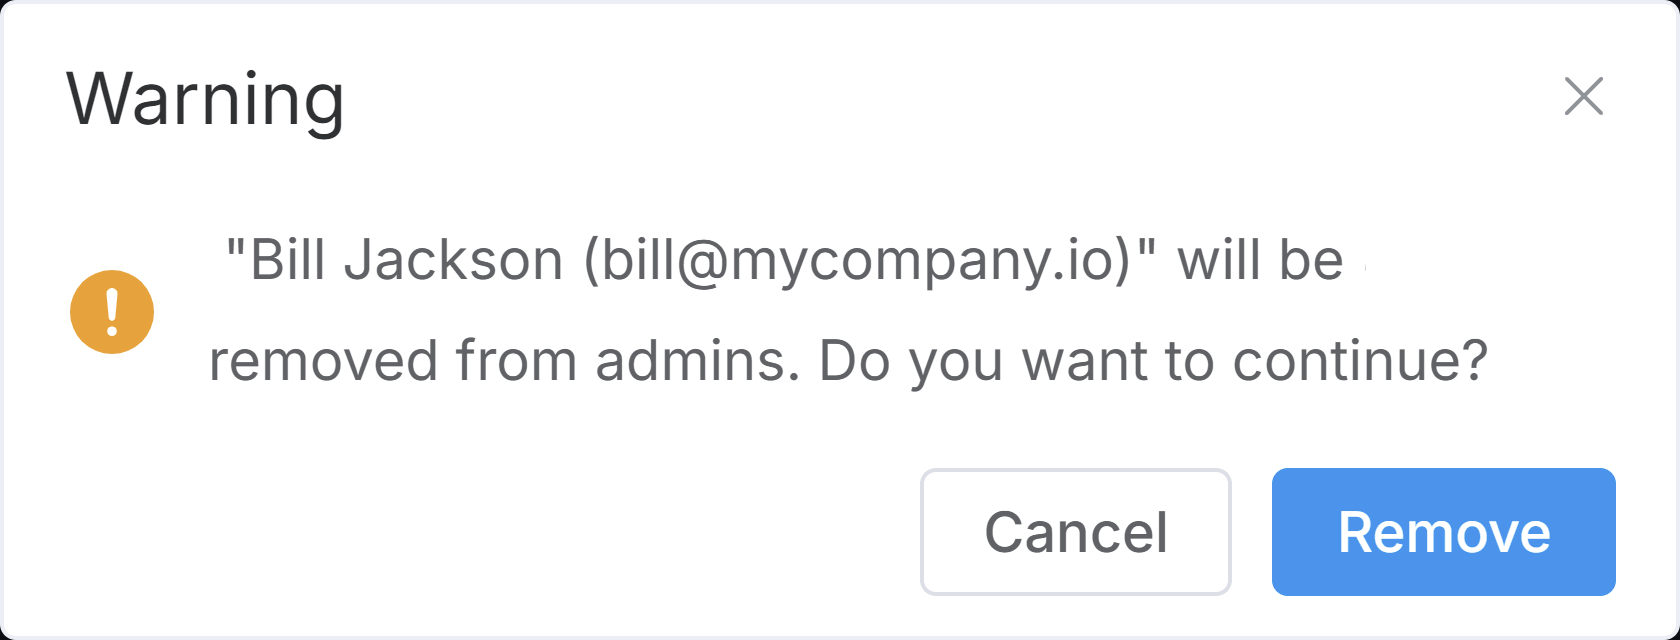
Figure 29. Removing Administrators
-
Click on the Remove to confirm administrator removal.