Central Reporting Geo-Aware Data Residency on Zenconsole
Geo-Aware Data Residency ensures that your Zenarmor reporting and analytics data are stored in a geographical region aligned with your organization’s registration location.
This feature helps maintain data sovereignty and regulatory compliance by automatically selecting the most appropriate regional storage location. It also optimizes query performance by keeping data physically close to your operations, minimizing latency, and meeting regional compliance requirements such as GDPR, SOC 2, and financial data residency mandates.
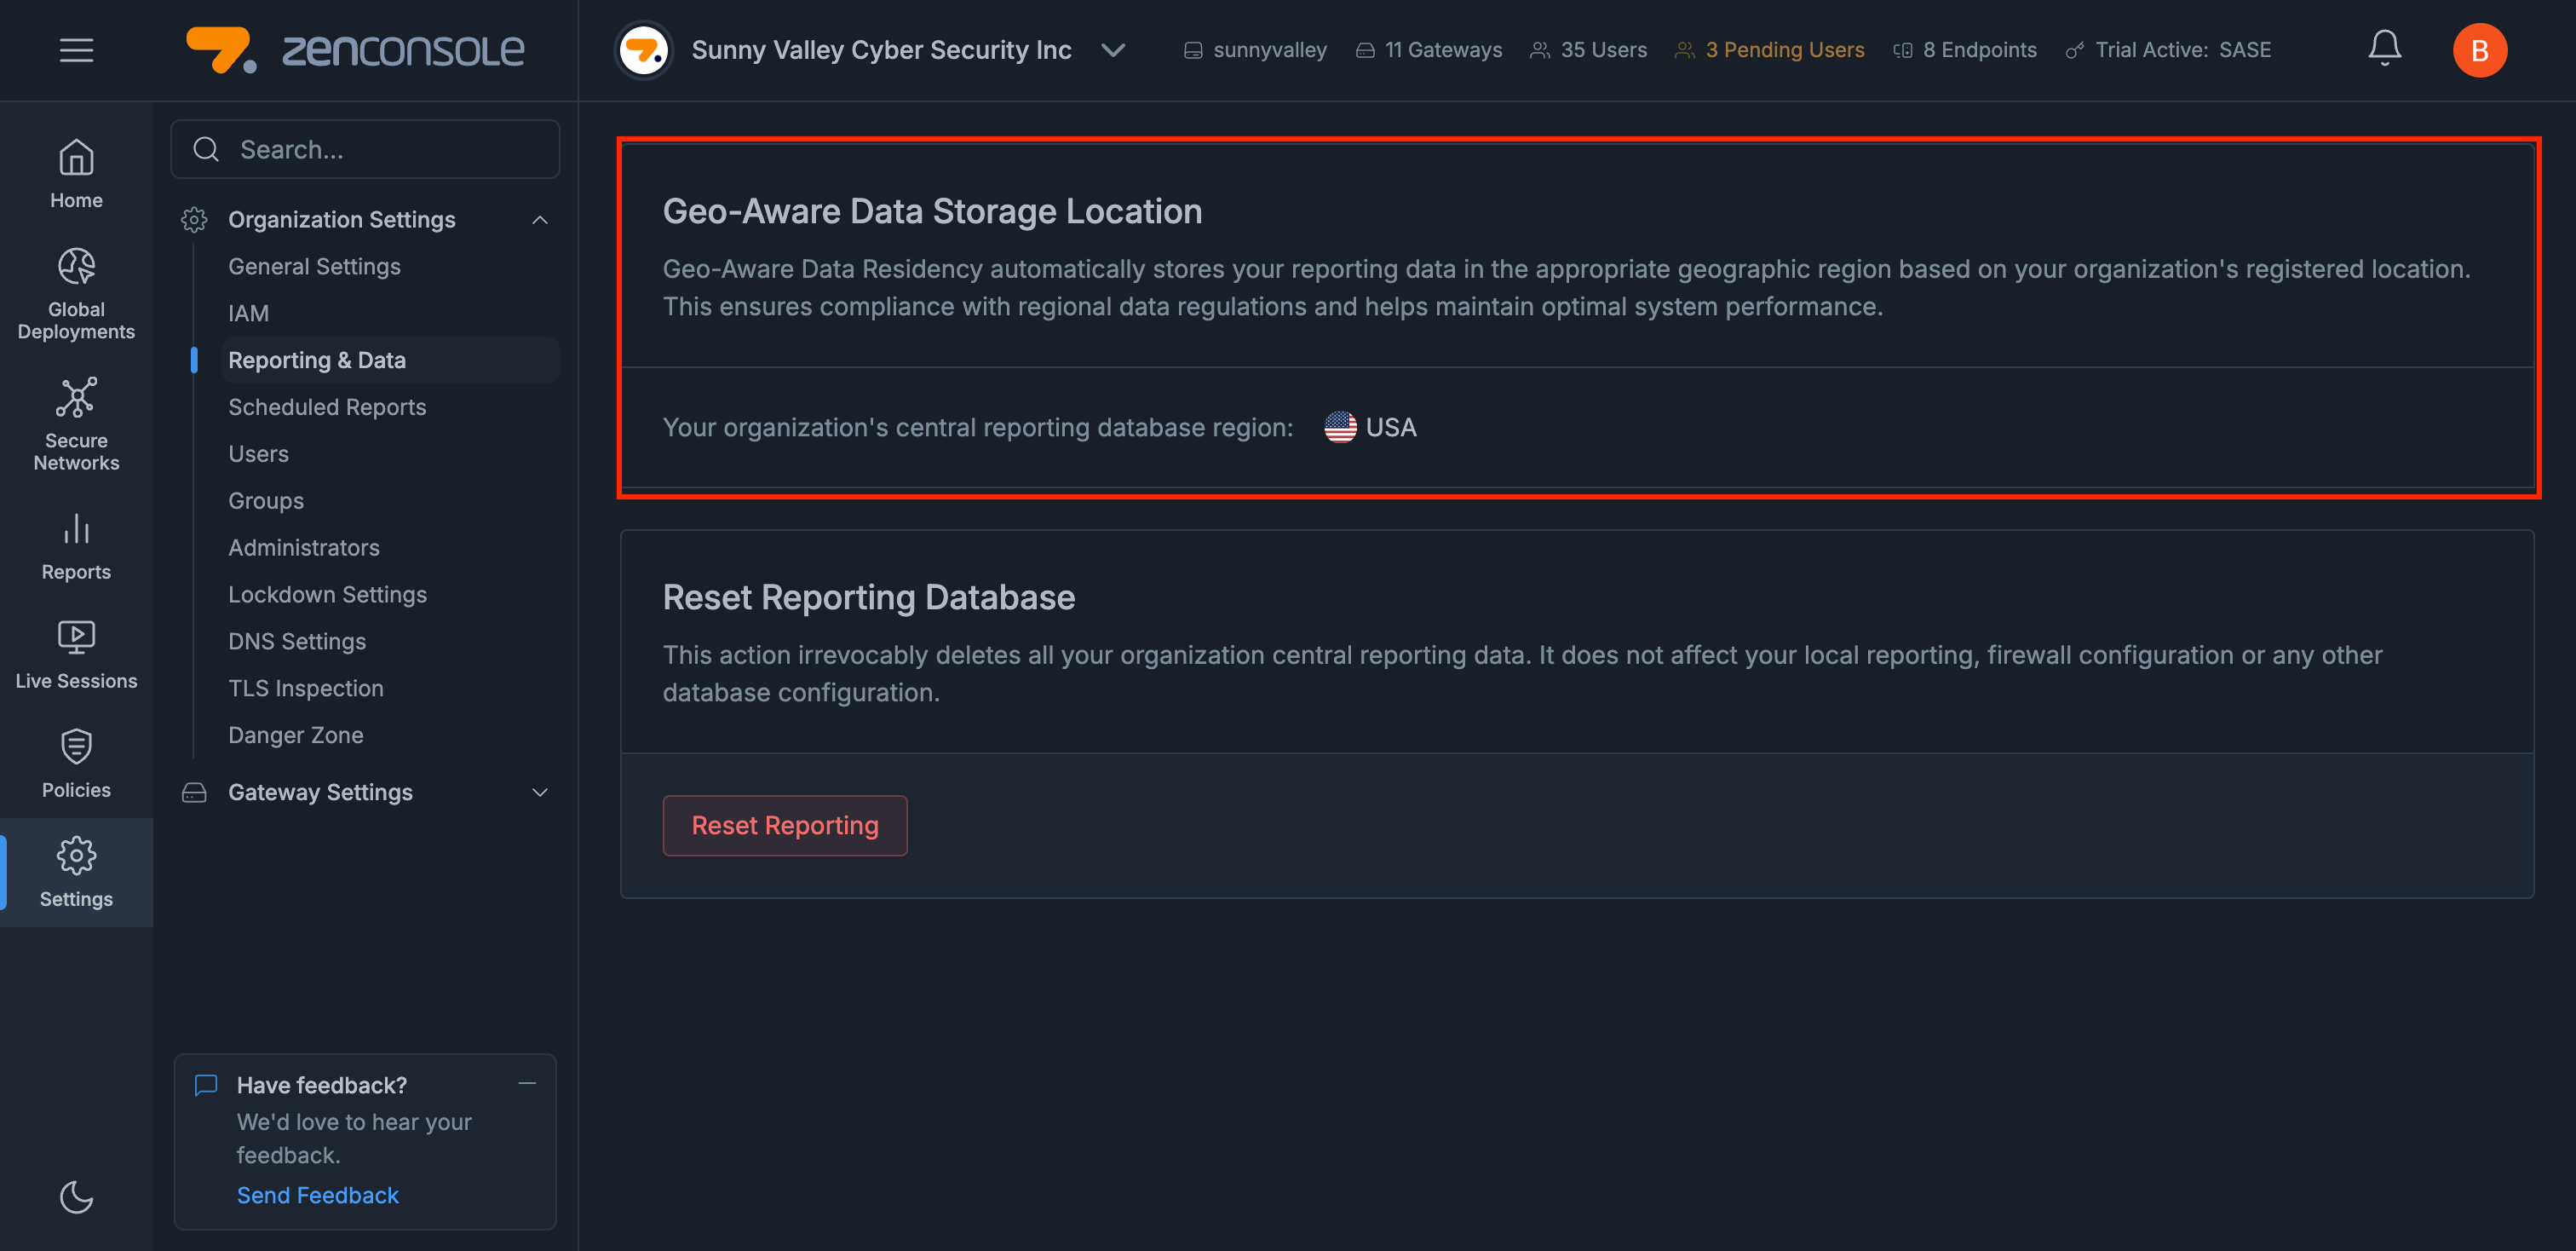
Figure 1. Central Reporting Geo-Aware Data Residency
Zenarmor automatically maps your organization’s registered country to the correct cloud region. You can find the full list of supported locations below:
| Country / Region | Cloud Region (Assigned Storage) |
|---|---|
| USA | us-central1 (US Central) |
| Canada | northamerica-northeast2 (Toronto) |
| United Kingdom (UK) | europe-west2 (London) |
| Germany | europe-west3 (Frankfurt) |
| France | europe-west9 (Paris) |
| Netherlands | europe-west4 (Netherlands) |
| Sweden | europe-north2 (Stockholm) |
| Finland | europe-north1 (Finland) |
| UAE | me-central1 (Doha / Qatar) |
| South Africa | africa-south1 (Johannesburg) |
| India | asia-south1 (Mumbai) |
| Singapore | asia-southeast1 (Singapore) |
| Australia | australia-southeast2 (Melbourne) |
| Japan | asia-northeast1 (Tokyo) |
Viewing Geo-Aware Data Storage Location
You can view the assigned data residency region for your organization directly in Zenconsole with the following steps.
-
Log in to Zenconsole.
-
Select the organization that you want to view.
-
Click Settings from the left sidebar menu.
-
Navigate to: Organization Settings → Reporting & Data
-
Under Geo-Aware Data Storage Location, you will see the cloud region automatically assigned based on your organization’s registered country.

Figure 2. Geo-Aware Data Storage Location
Resetting Reporting Database
The Reset Reporting Database function permanently deletes all central reporting data for your organization. This operation does not affect local gateway reporting, firewall configuration, or your organization’s data residency settings.
You can access the Reset Reporting Database as follows.
-
Log in to Zenconsole.
-
Select the organization you want to manage.
-
Click Settings from the left sidebar menu.
-
Navigate to: Organization Settings → Reporting & Data
-
Click Reset Reporting to delete the central reporting data permanently.

Figure 3. Reset Reporting Database
-
After clicking Reset Reporting, a confirmation dialog will appear. Once you enter the Organization ID, click:I understand the consequences, reset the reporting data.
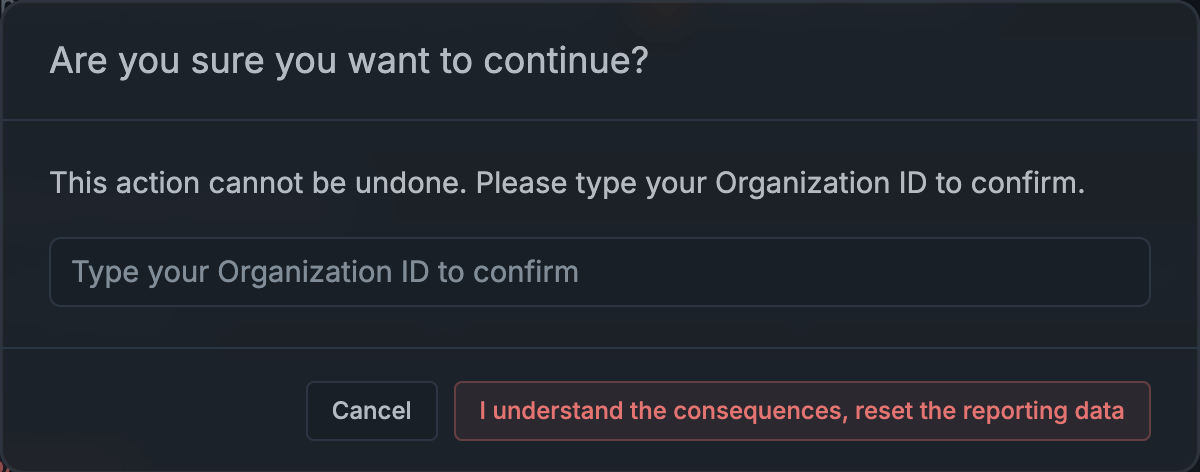
Figure 4. Confirmation Popup
This action is irreversible. Once the reporting database is reset, the data cannot be recovered.