Configuring Authentication Method for Organization
After creating an organization associated with your SSE or higher edition license keys, you must first select and configure an authentication method to enable users to log into the organization. Zenconsole organization supports 3 authentication methods. You can use one of these methods to allow your gateways or endpoints to register with your organization:
- Google Cloud Identity
- SAML 2.0
- Built-in Authentication (Email & Password)
- Azure AD
One-Time Password support will be available soon.
1. Enabling Google Cloud Identity
To be able to use Google Workspace for identity management in your organization, you must integrate your Zenconsole organization with your Google Workspace. This integration ensures your organization's users and groups are automatically added and updated with regular syncs, keeping all information accurate and current without manual effort.
You may easily enable Google Cloud Identity for your organization and allow users to sign in to the organization using their Google Workspace accounts by following the next steps.
-
Login Zenconsole.
-
Select the organization you want to manage.
-
Navigate to the Settings > Identity & Access Management page.
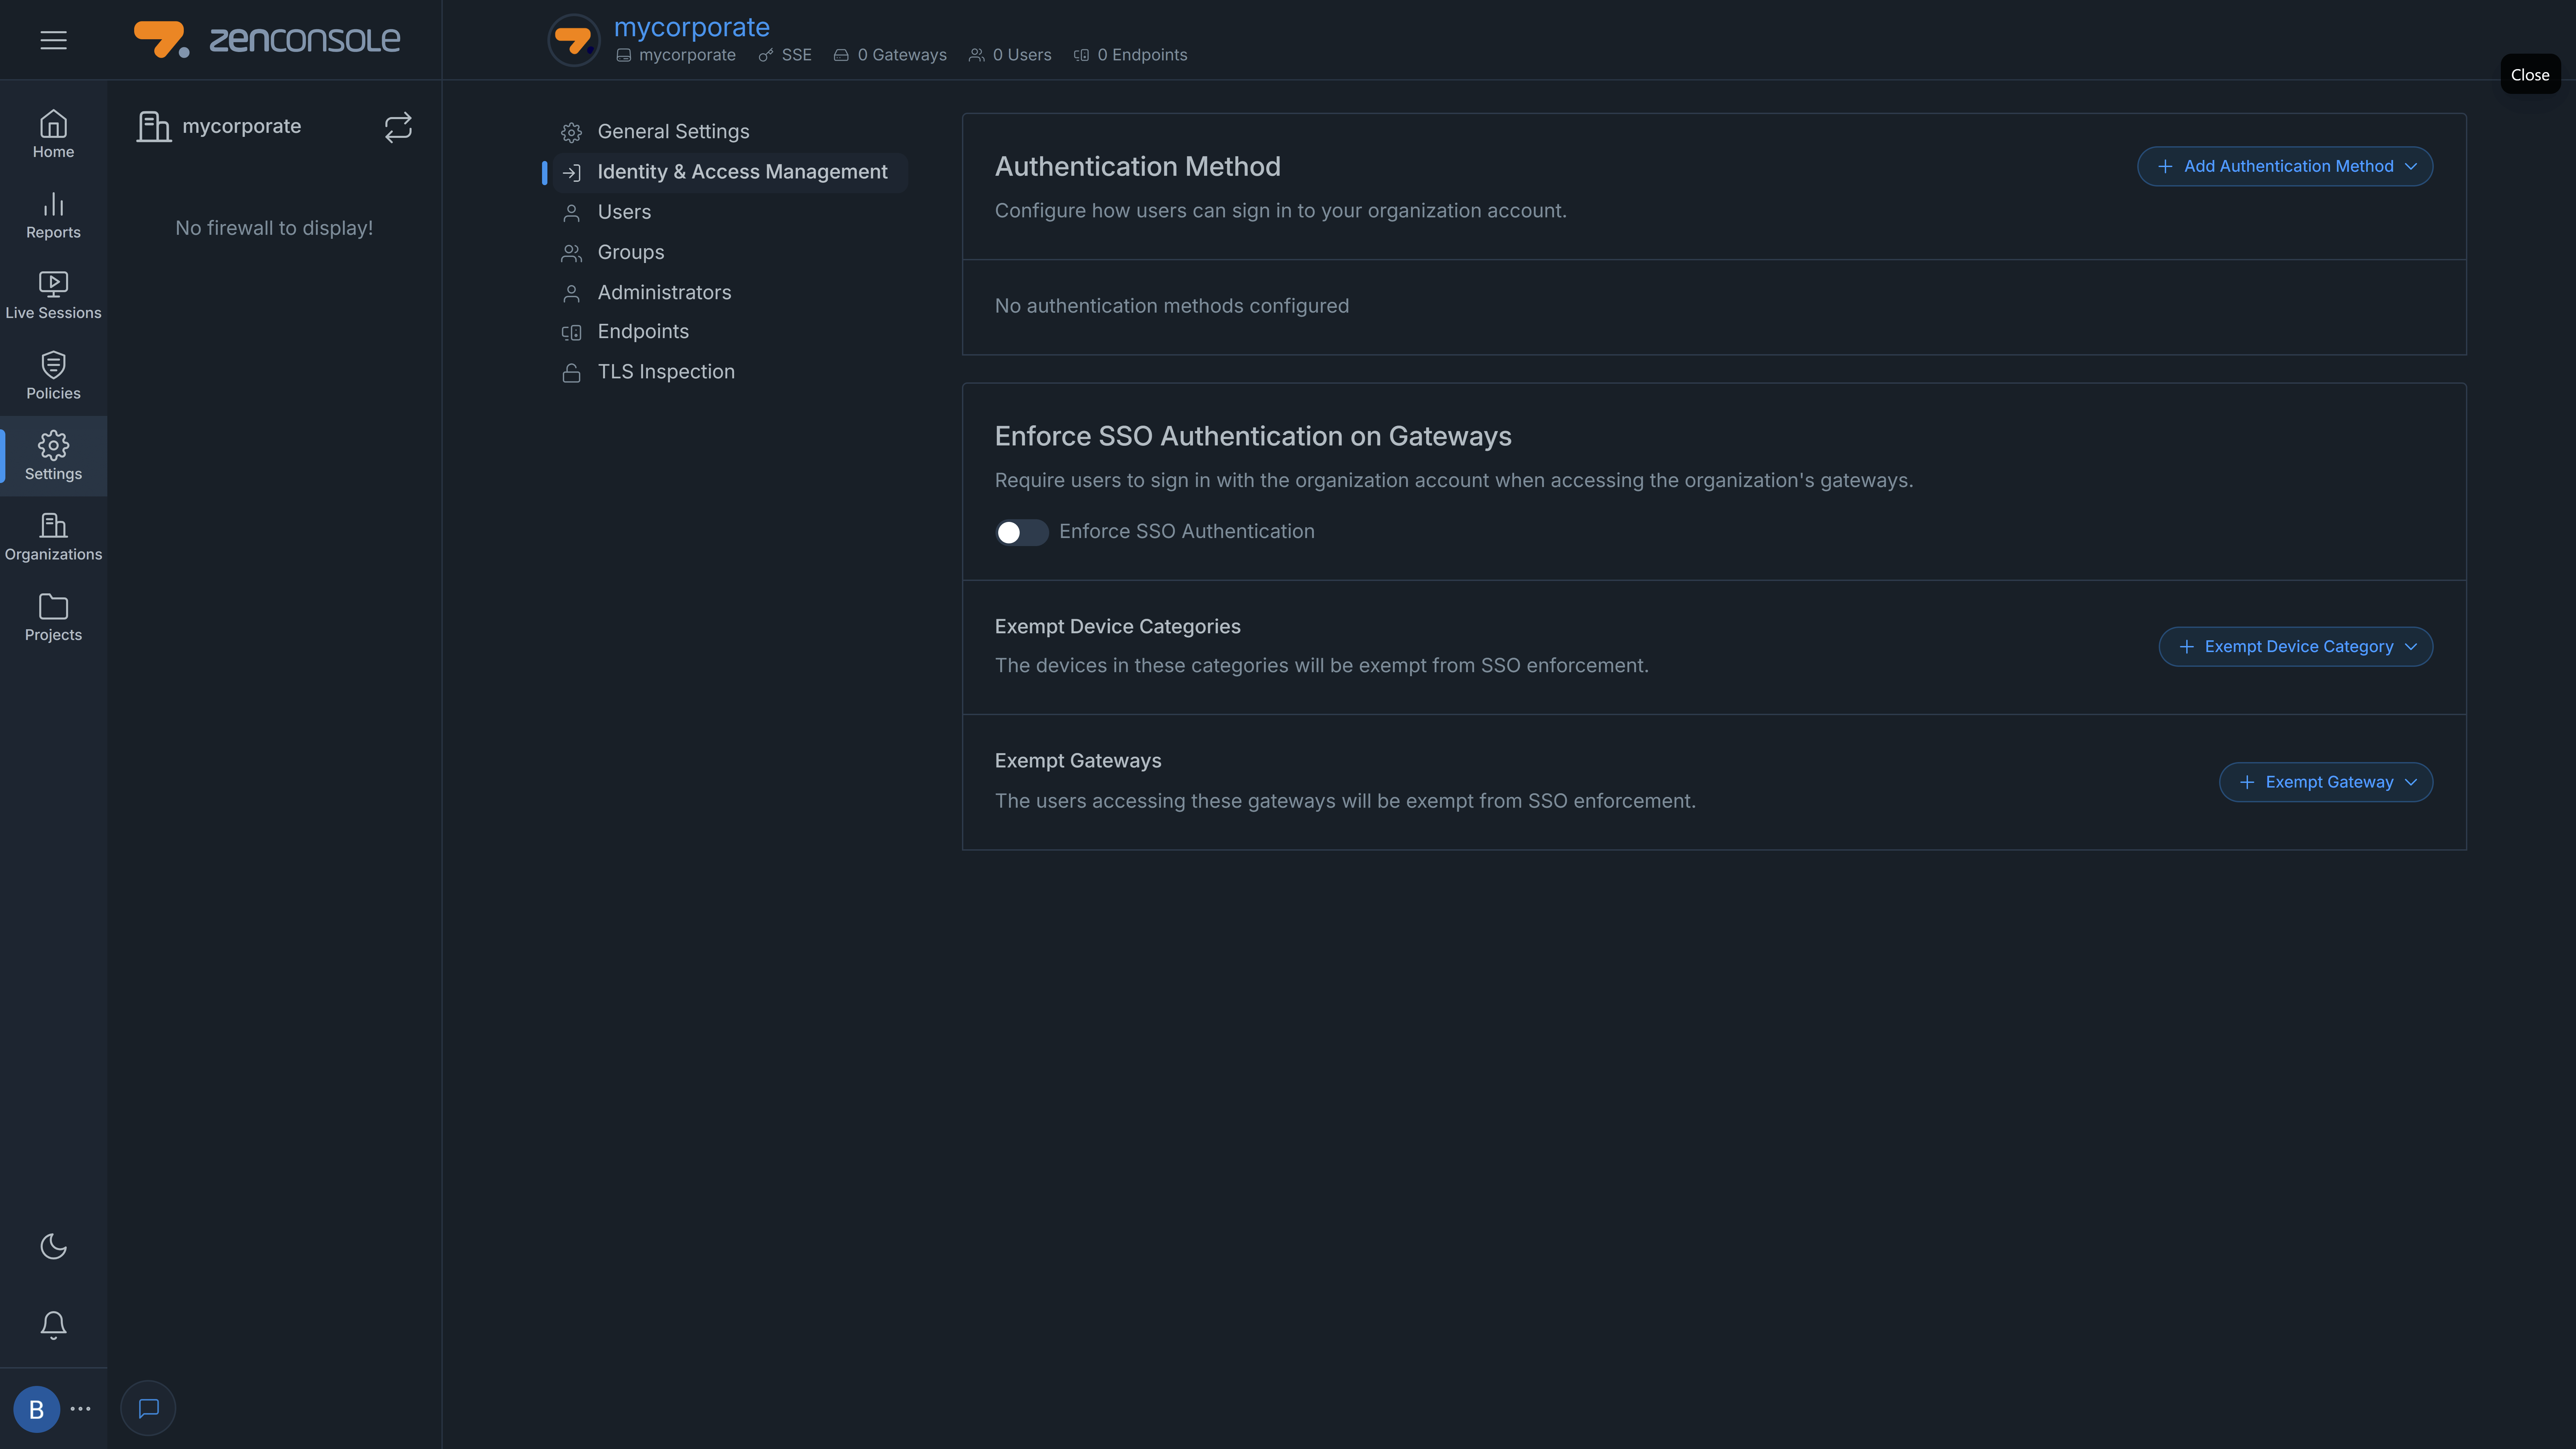
Figure 1. Identity & Access Management page
-
Go to Authentication Method pane at the top of the page.
-
Click + Add Authentication Method drop-down menu at the top right of the pane. All supported authentication methods will appear.

Figure 2. Selecting Authentication Method
-
Click Google Cloud Identity option to configure Google Workspace as the organization authentication method. This will pop up the Google Cloud Identity configuration wizard window.
-
Type the domain that you want to be synchronized with Zenconsole for user authentication. Users with email addresses from these domains can sign in to your organization.
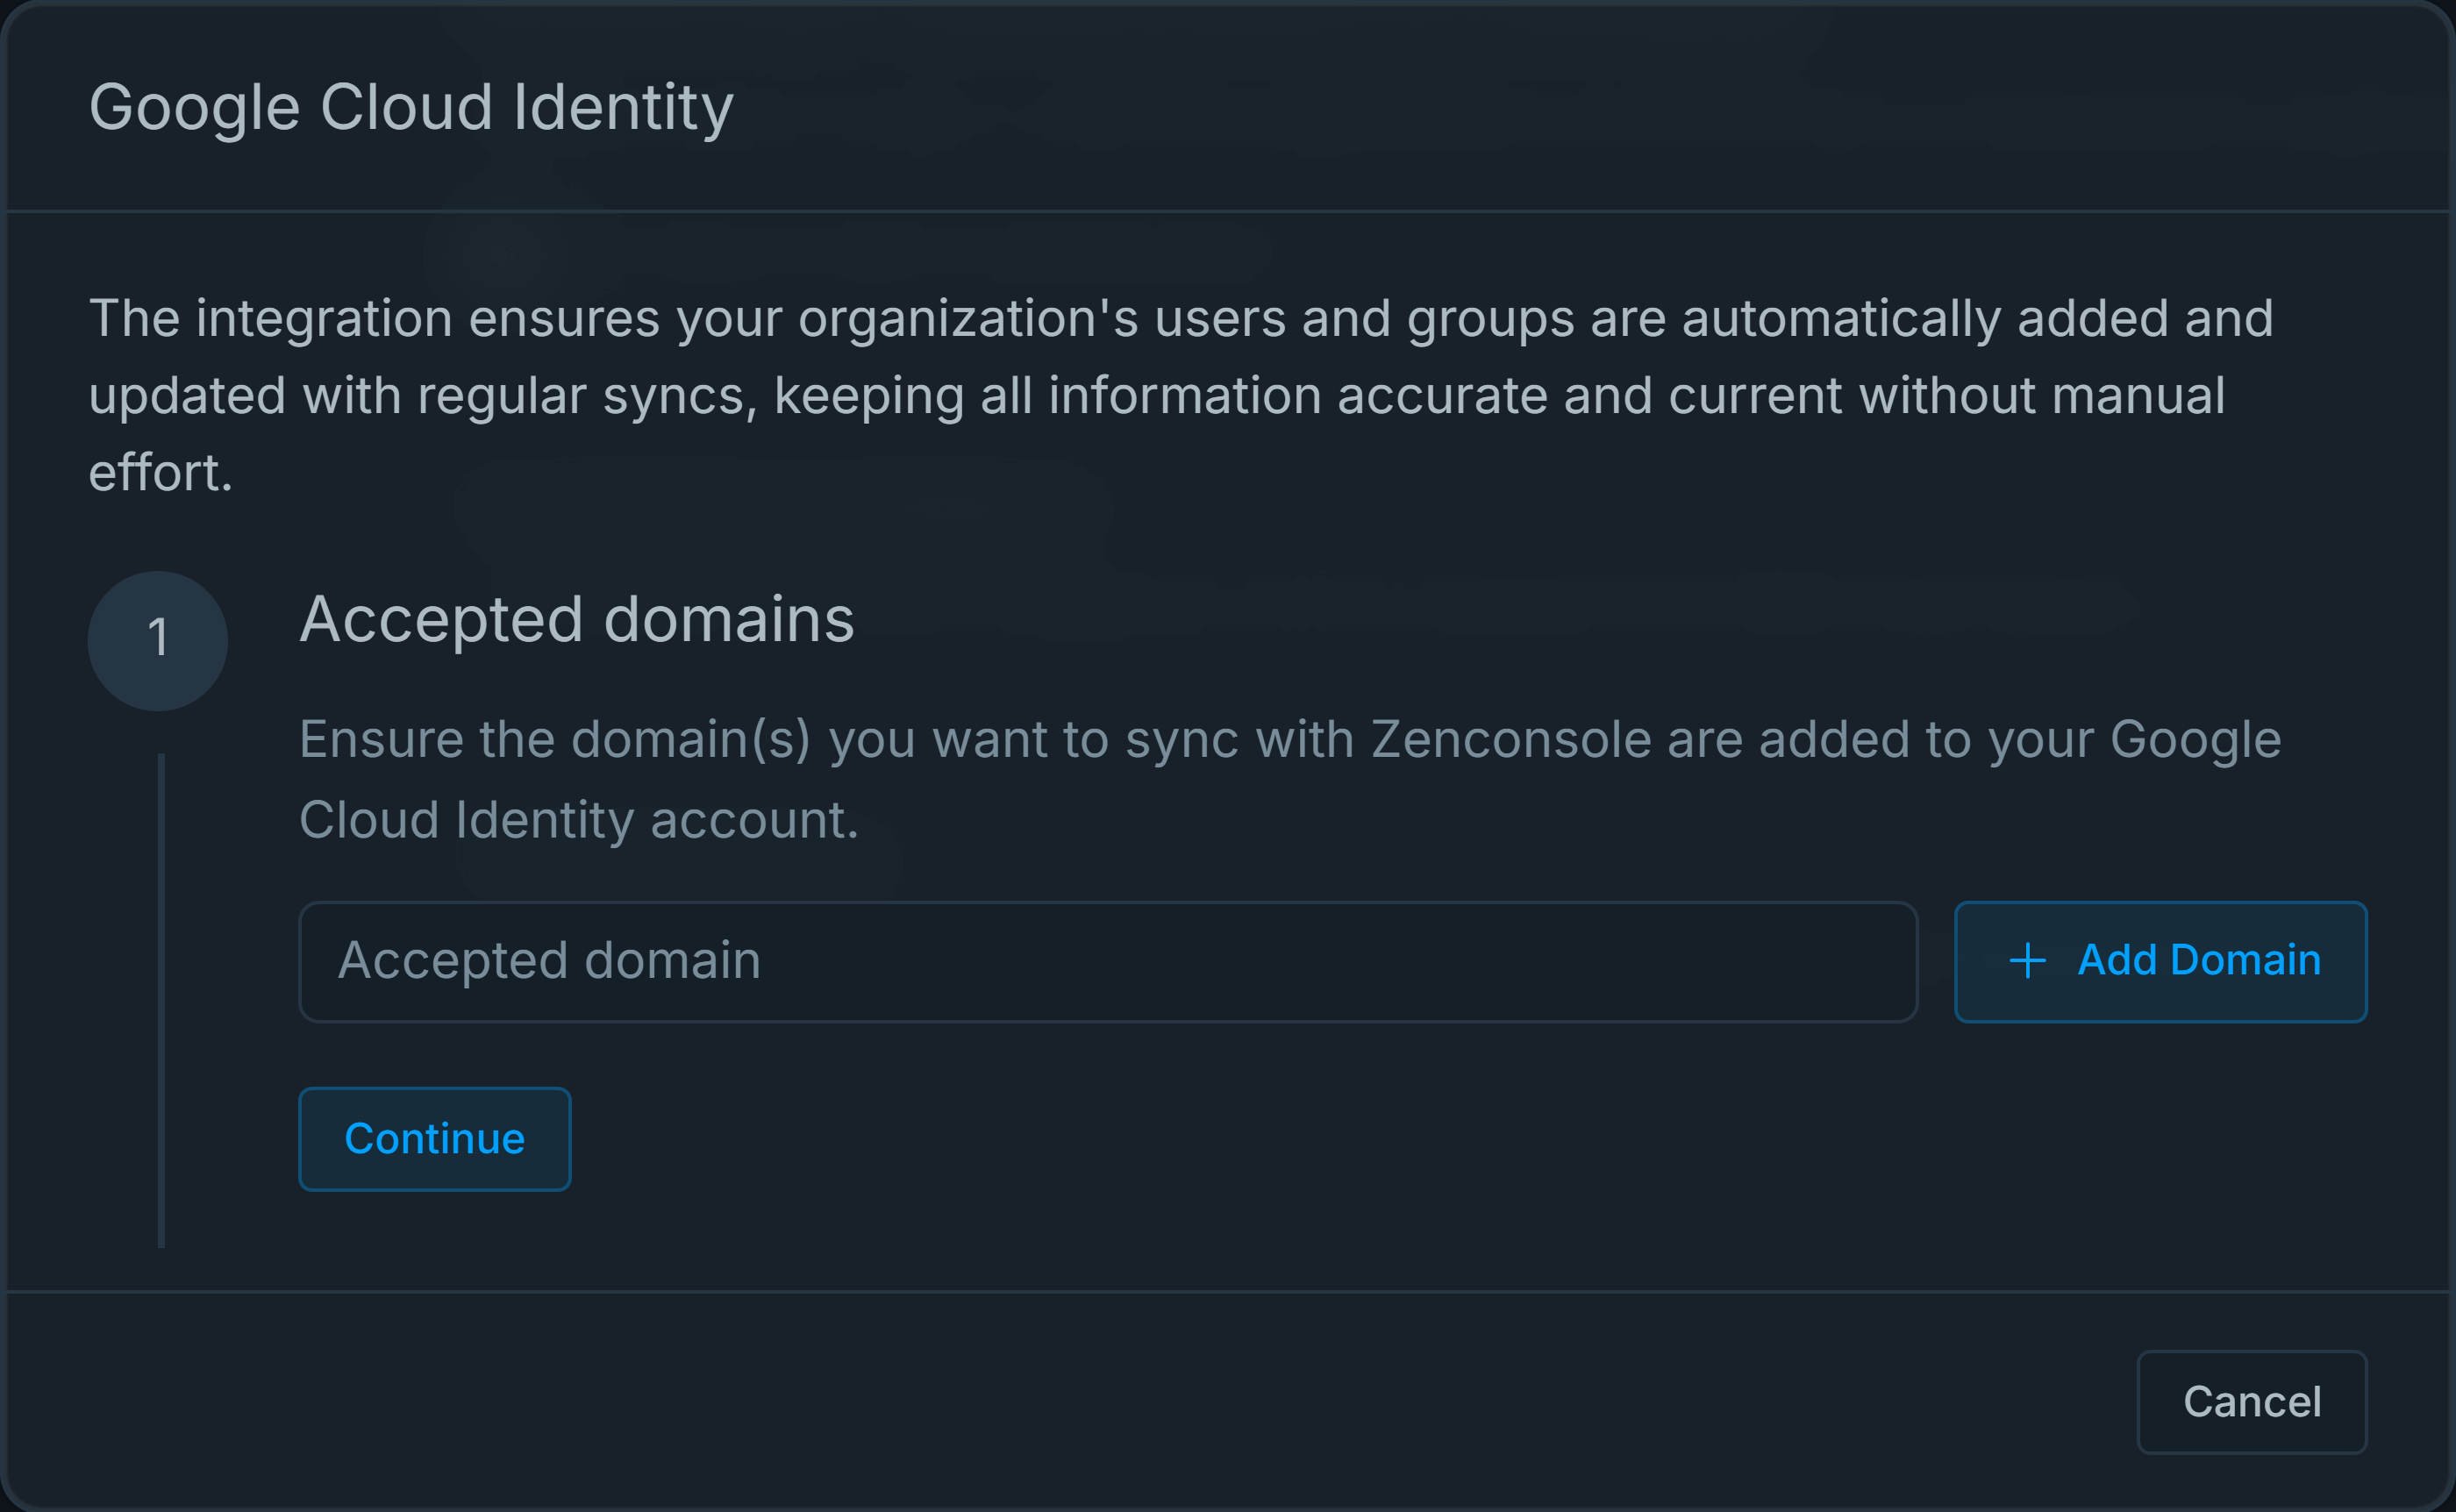
Figure 3. Adding Accepted Domains
-
Click + Add Domain button. You may add as many domains as you need. Accepted domains will be automatically displayed below. You may quickly remove them by clicking the
xicon next to the domain name if you need.
Figure 4. Accepted Domains
-
Click Continue to proceed with the Google Cloud Identity configuration. This will provide a link for the Google Cloud Identity integration and await authorization from your domain administrator.
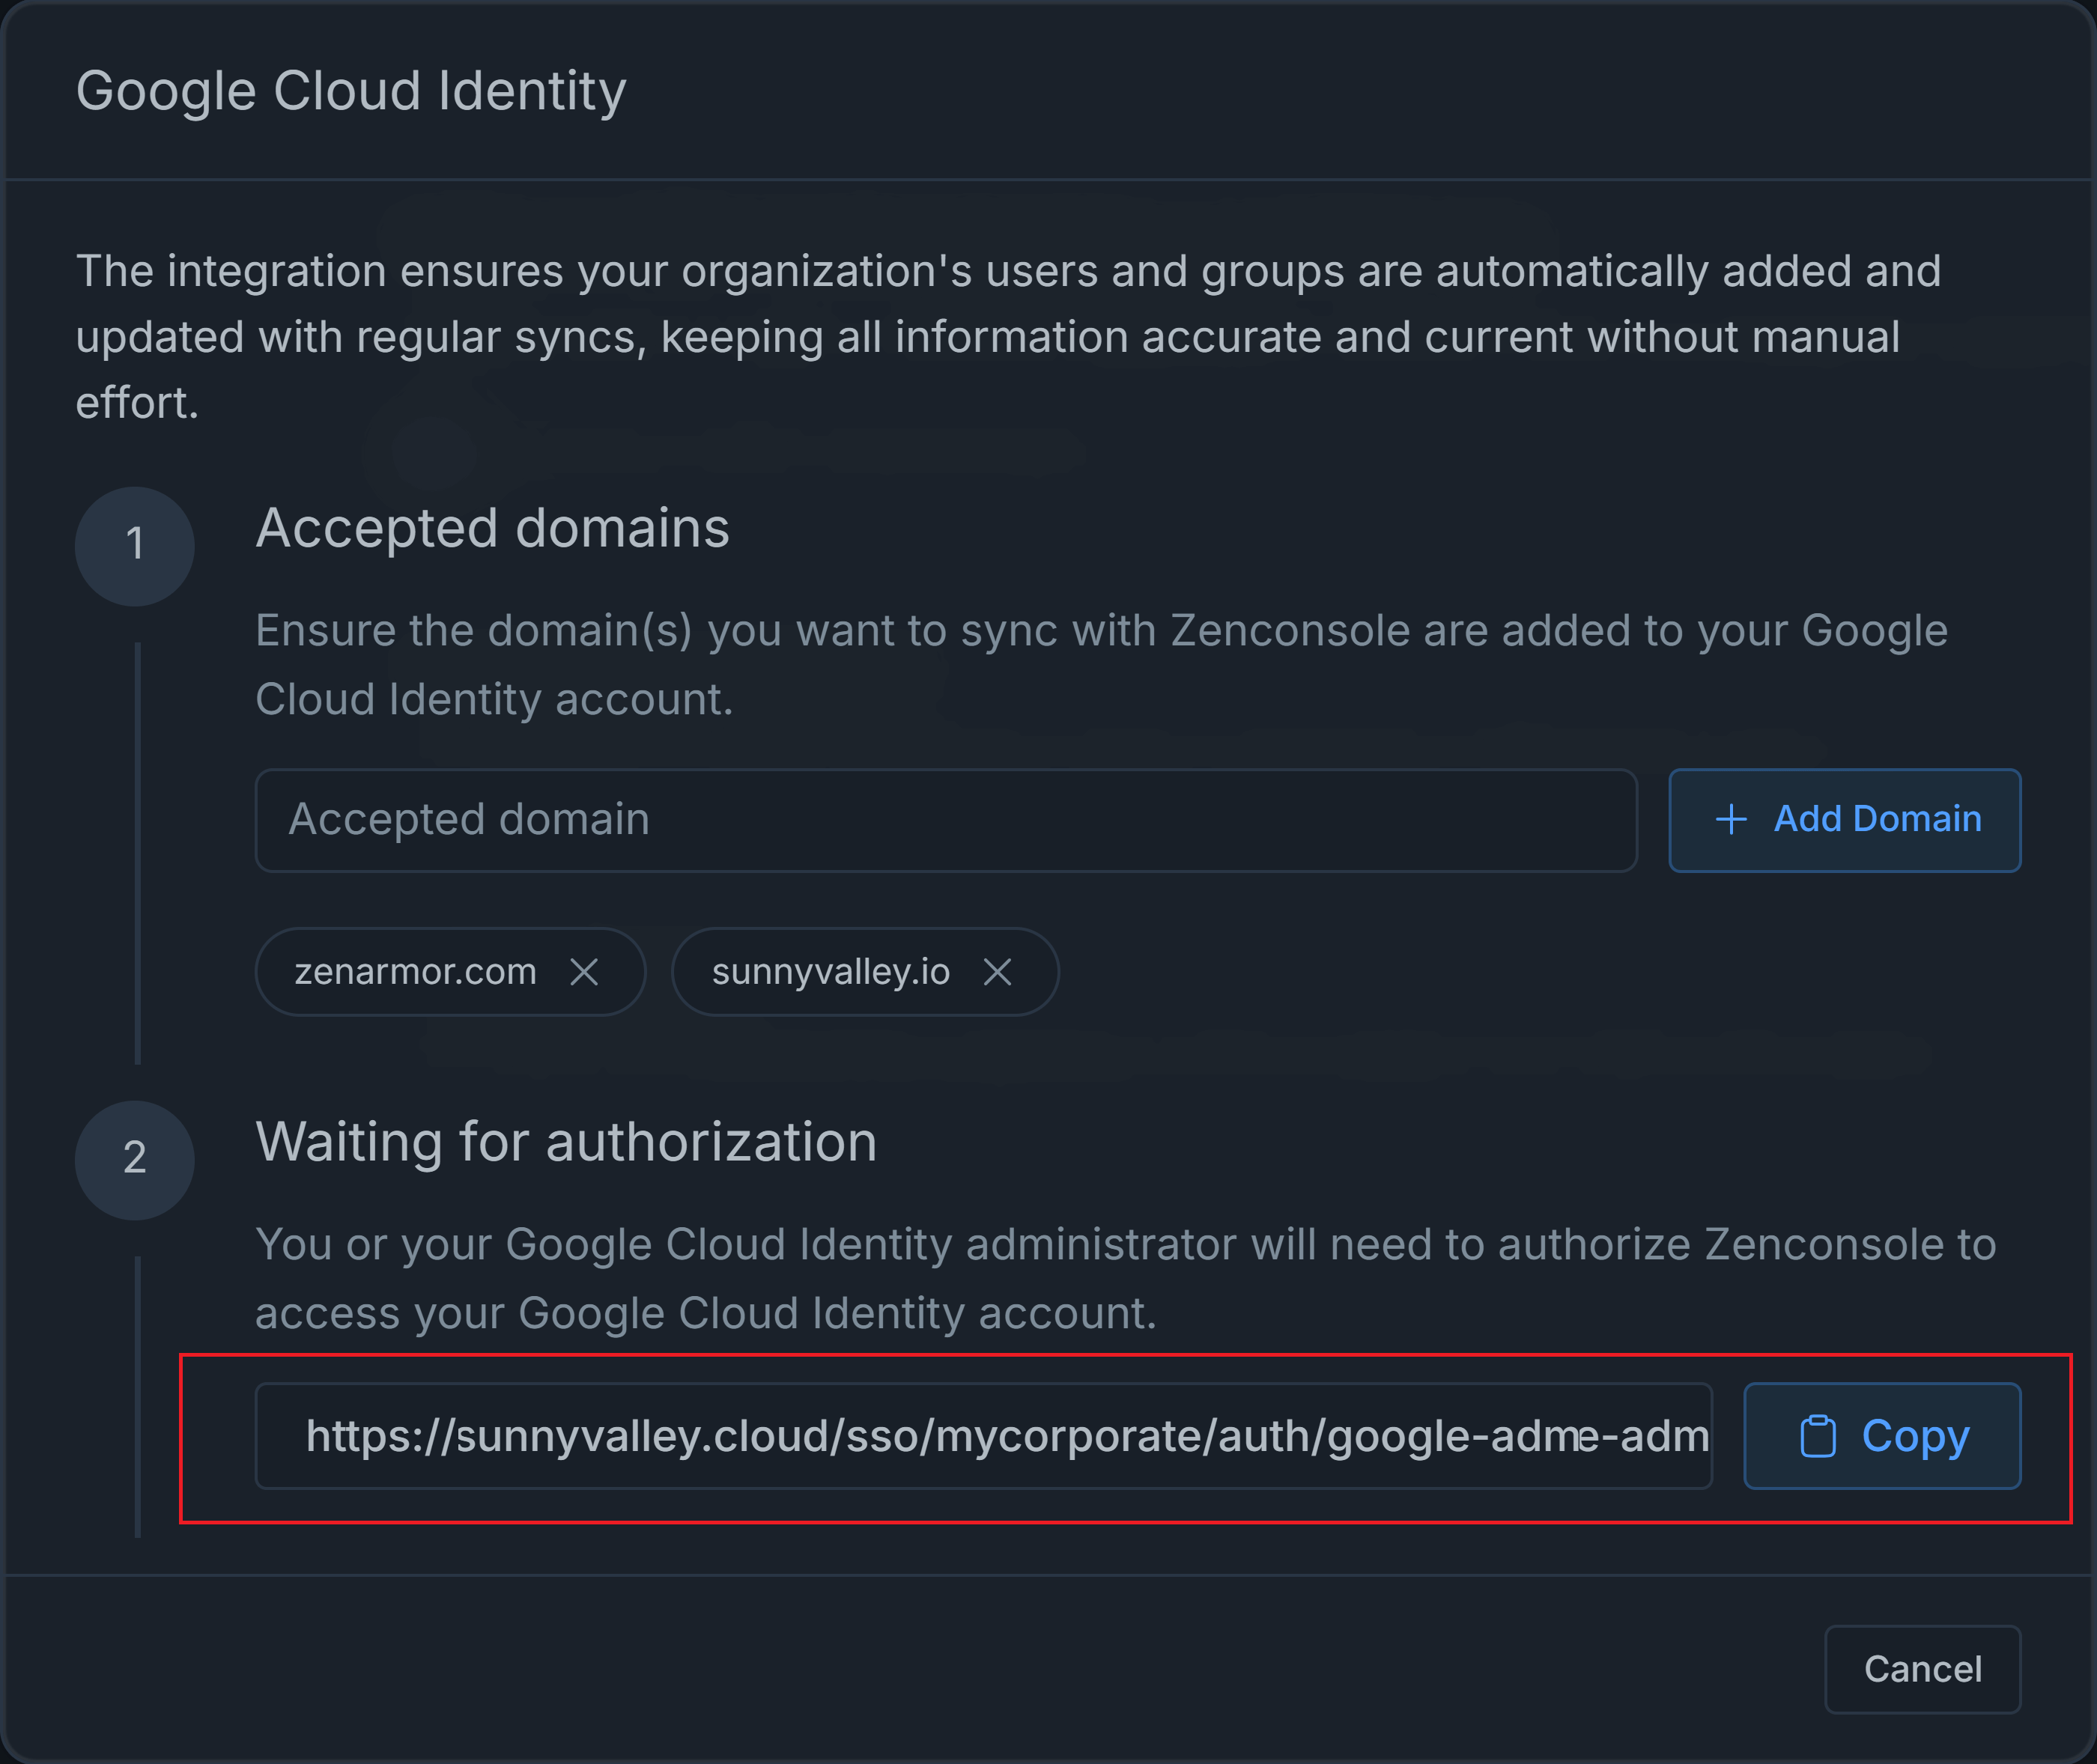
Figure 5. Generating Link and Waiting for Google IDP Authorization
-
You may either click on the link if you have administrator privileges for your domain or copy it to share it with domain administrators. So that Zenconsole will be able to access your Google Workspace and synchronize with user accounts.
-
Go to the link generated in the previous step and sign in to Google using an account with admin privileges.
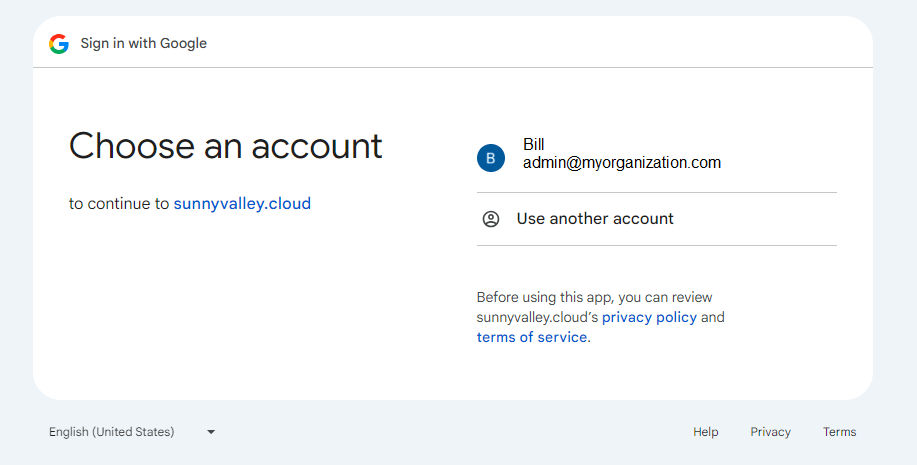
Figure 6. Signin Google with Admin Account
-
Click Allow to give the required privileges on your domain to Zenconsole.

Figure 7. Accepting Permission Requests
-
You should observe that Zenconsole access has been granted to your domain. Zenconsole will now routinely update your users and groups, as they are now synchronized.

Figure 8. Google Access Granted
-
Click on the Zenconsole link which will redirect you to the organization Identity & Access Management page. You should see that Google is set Default authentication method for your organization.

Figure 9. Google Default Authentication Method
Beware that to let your domain users sign in to the organization, you will need to approve them by navigating to the Users settings page.
2. Enabling Generic SAML 2.0
You may use any identity provider, like Google or Okta, that supports SAML 2.0 single sign-on (SSO) authentication protocol as an identity provider for your organization. If you prefer to use SAML 2.0 protocol as your organization's authentication method, you must follow the next steps:
- Select an identity provider such as Okta that supports SAML 2.0 protocol.
- Create a SAML application on IdP provider and download the metadata file.
- Import the SAML IdP metadata file to your Zenconsole organization.
In this section, you will find the details about enabling SAML 2.0 and downloading the IdP metadata file on both service providers, Google and Okta. Lastly, we will explain how you can import SAML metadata to your organization on Zenconsole.
Beware that when you use the SAML 2.0 authentication method for your organization, you must add users and groups to the organization manually. On the other hand, if your organization has Google Workspace and you integrate Zenconsole organization with Google Cloud services as described in the previous section, all users and groups are automatically fetched and regularly synced.
Creating SAML2 IdP Metadata using Google Workspace
You may easily create an application and download IdP metadata on Google Workspace for your organization by following these steps:
-
Sign in to your Google Admin console.
-
In the Admin console, Navigate to Apps > Web and mobile apps on the left-side bar.
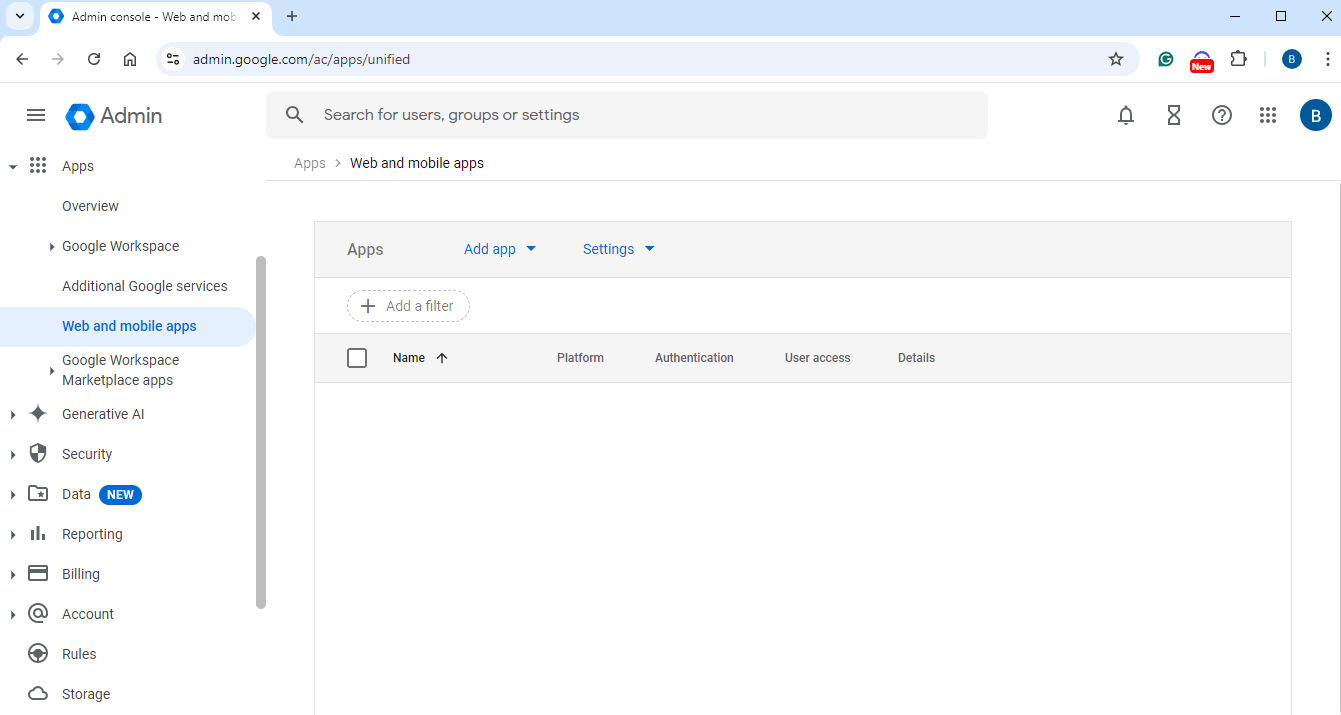
Figure 10. Google Web and Mobile Apps
-
Click Add app drop down menu and then select Add custom SAML app.
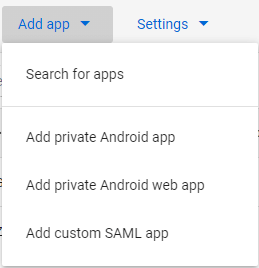
Figure 11. Adding Custom SAML App
-
Enter App Name, such as
Zenarmor. -
Optionally you may type Description and add an icon for the app.
-
Click Continue.
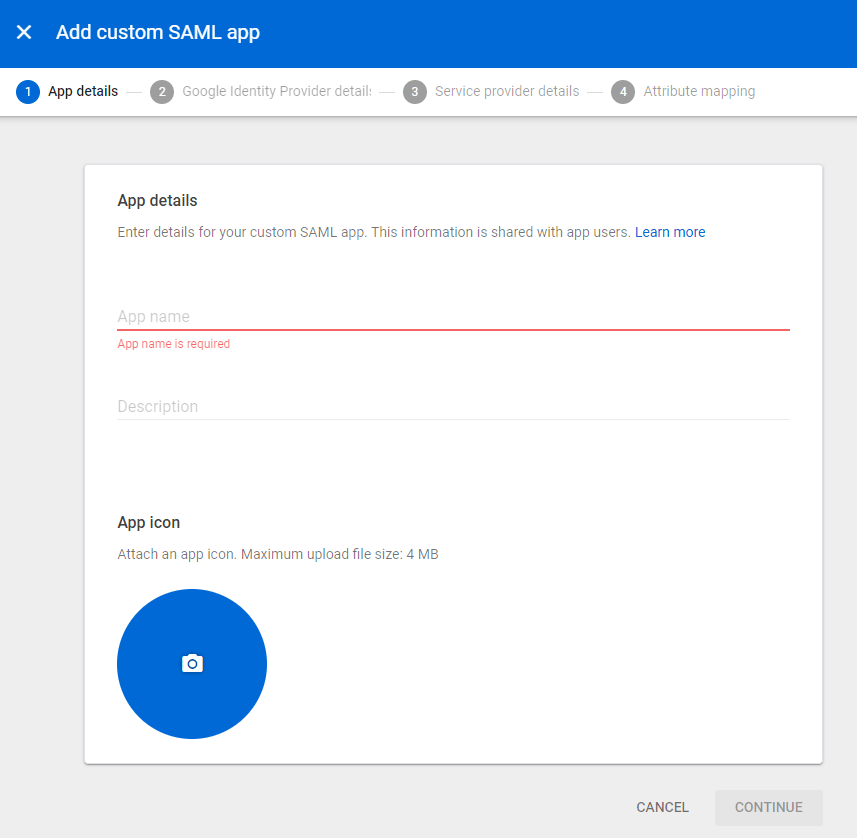
Figure 12. Google SAML App Details
-
Click Download Metadata button to download the IdP metadata file.

Figure 13. Downloading Google IDP Metadata
-
Click on the Save button to download the Google iDP metadata file in
xmlformat to your local disk. -
Click Continue.
-
Enter ACS URL, such as
https://dash.zenarmor.com/saml/{domain}. -
Enter Entity ID, such as
https://dash.zenarmor.com/saml/{domain} -
You may leave Name ID format and Name ID as default.

Figure 14. Google iDP Service Provider Details
-
Click Continue
-
You may skip Attribute Mapping settings and, click Finish.
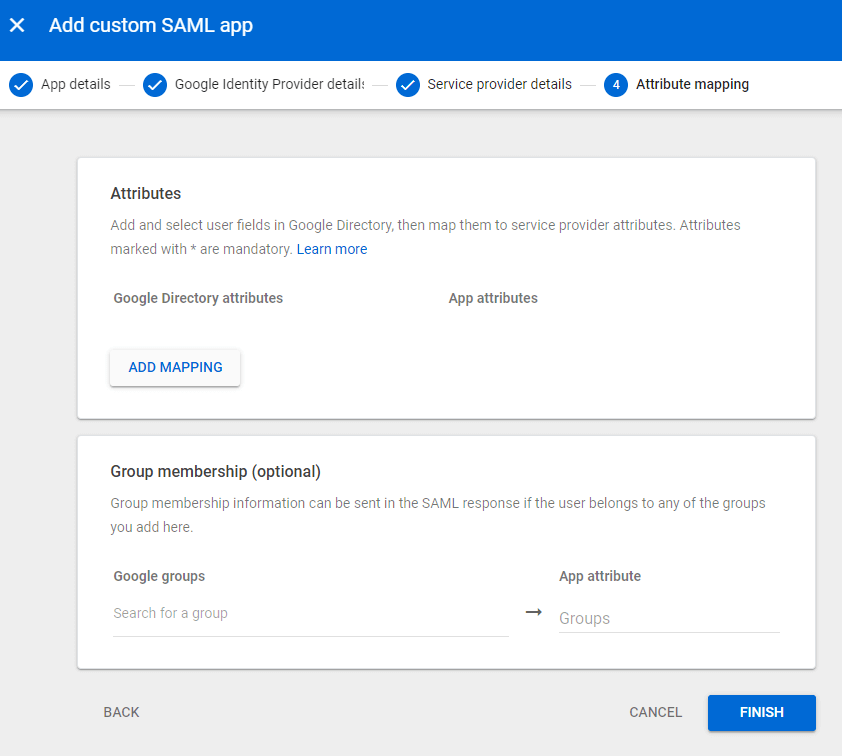
Figure 15. Google Attribute Mapping
-
Click on the User access pane.
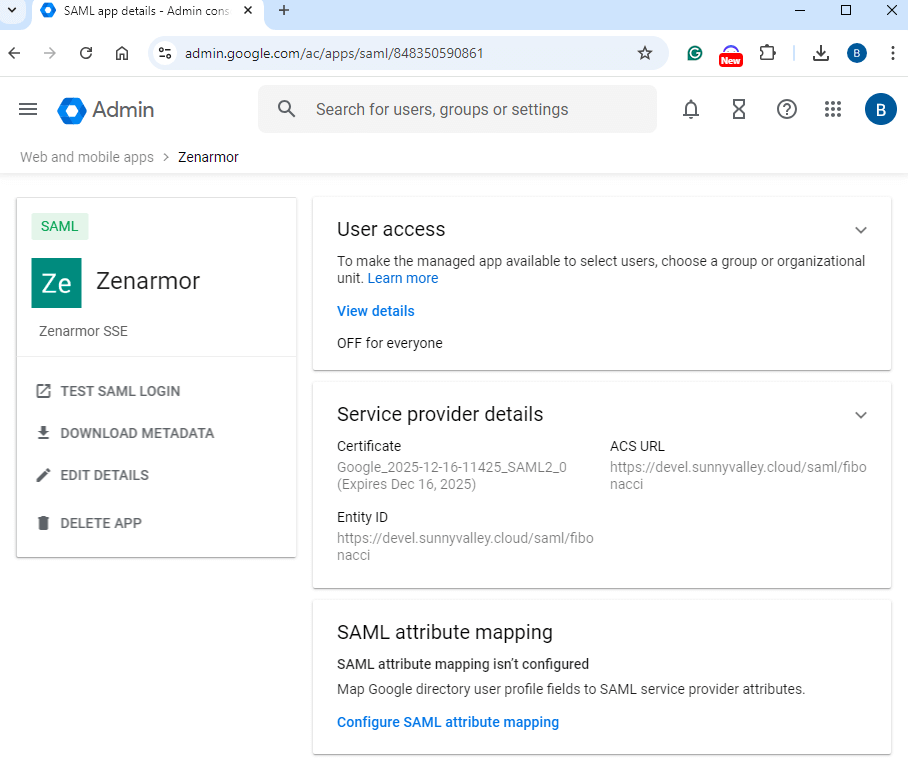
Figure 16. Google view saml conf
-
Set Service status to ON for Everyone.
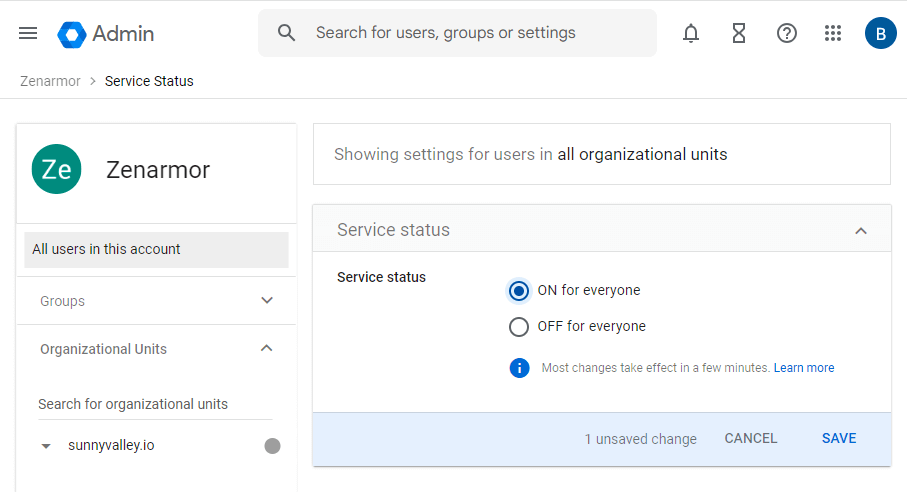
Figure 17. Setting Google Service Status
-
Click Save to activate settings.
Your Google IdP SAML 2.0 configuration is ready to use.
Creating SAML2 IdP Metadata using Okta
You may easily create an application and download IdP metadata on Okta for your organization by following these steps:
-
Sign in to your Auth0.
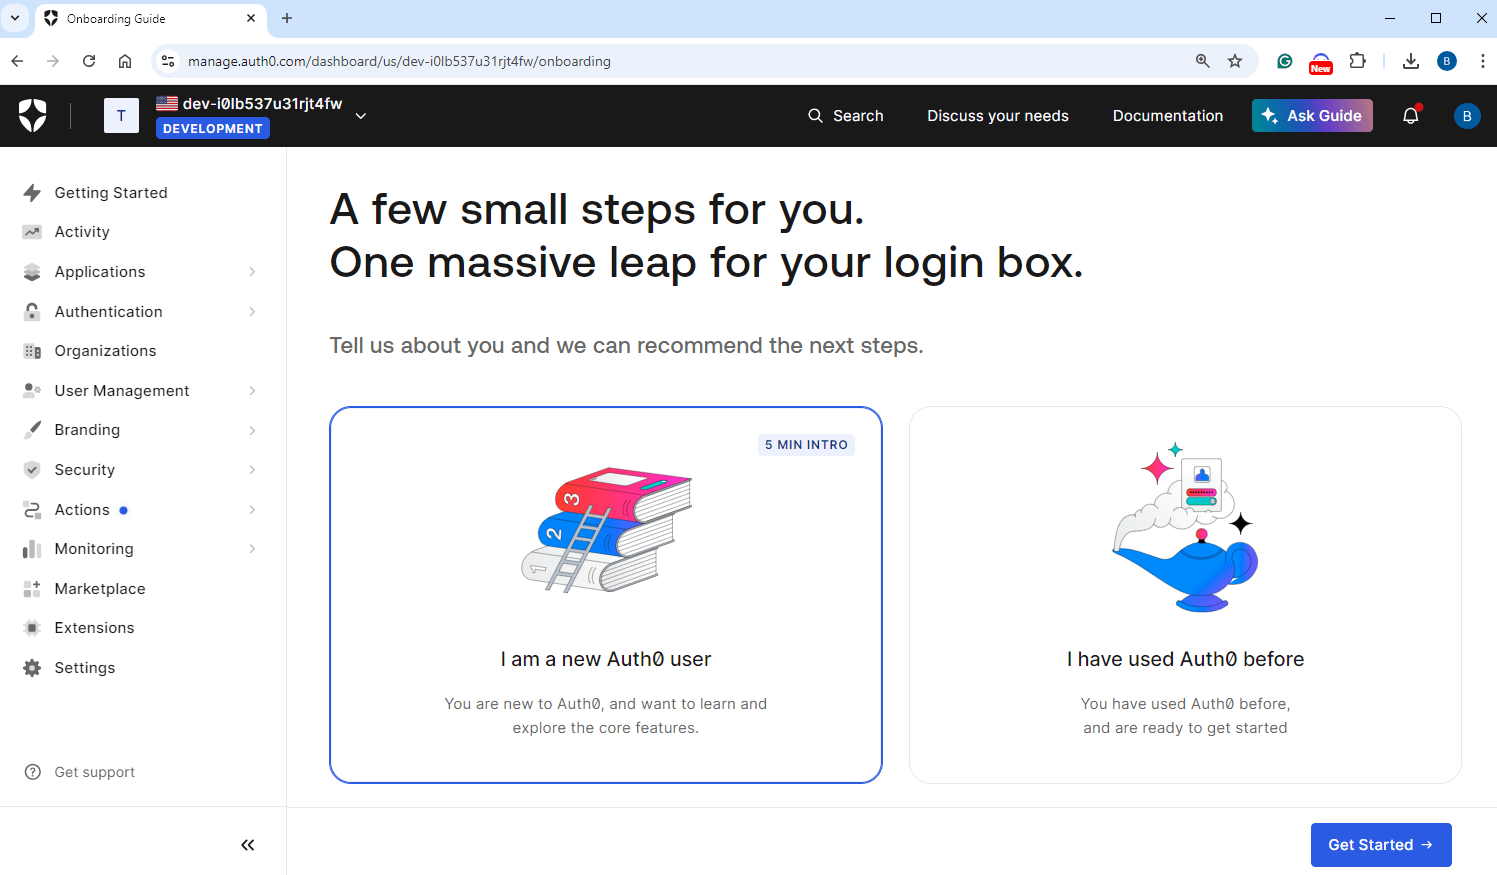
Figure 18. Auth0 Dashboard
-
Navigate to the Applications > Applications on the left-side bar.
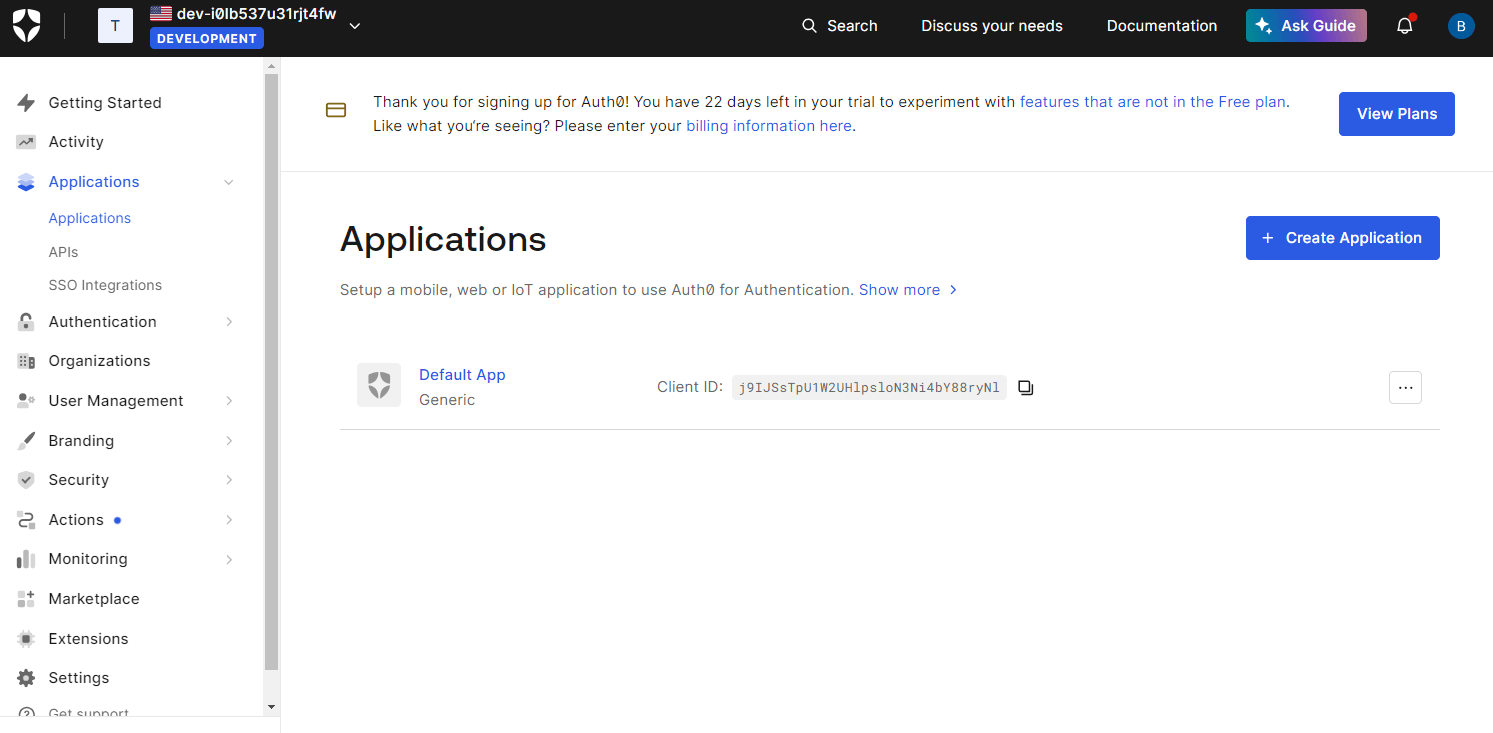
Figure 19. Navigate Applications
-
Click + Create Application to add an application.
-
Enter Name, such as Zenarmor and then click Create. You may leave the Application Type option as Native, default. This will automatically create your app.
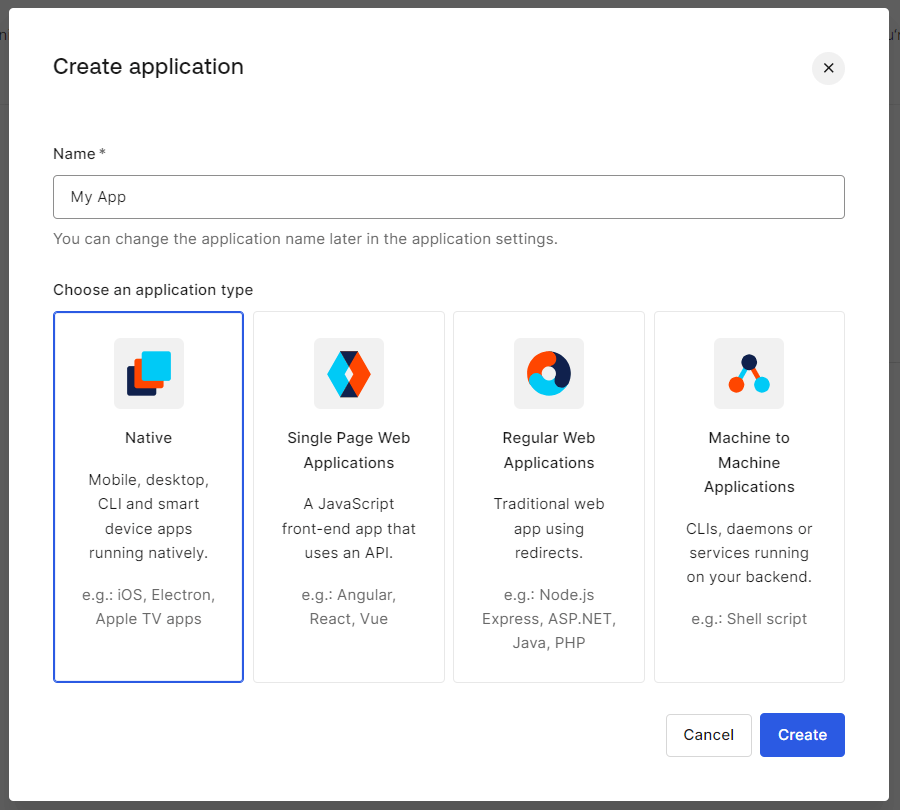
Figure 20. Naming Application
-
Go Addons tab on your new application dashboard.
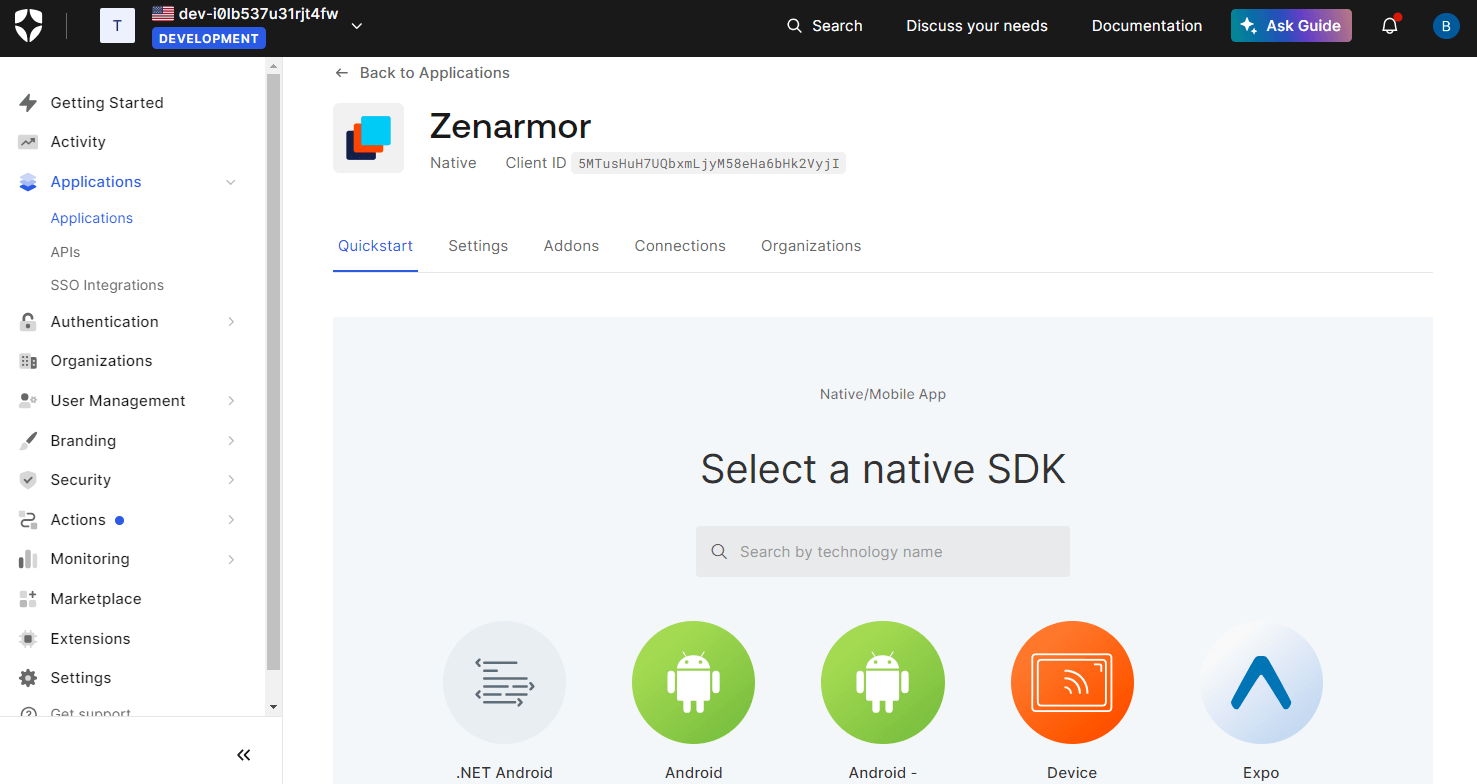
Figure 21. App Dashboard
-
Enable SAML2 WEB APP by clicking on the toggle bar. This will launch the SAML2 Web App Addon window.
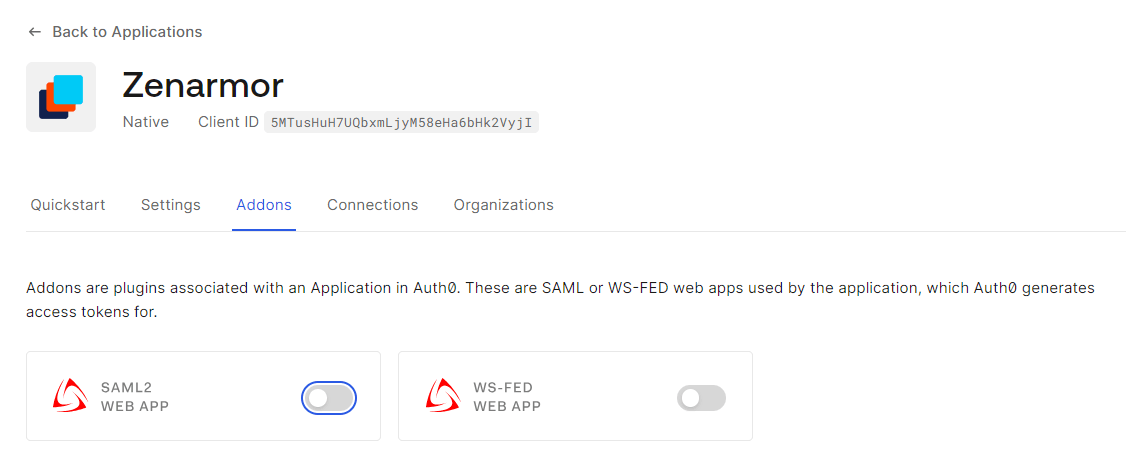
Figure 22. Enabling SAML2 WEB APP
-
Click on Download link next to Identity Provider Metadata in the SAML2 Web App Addon Usage tab.
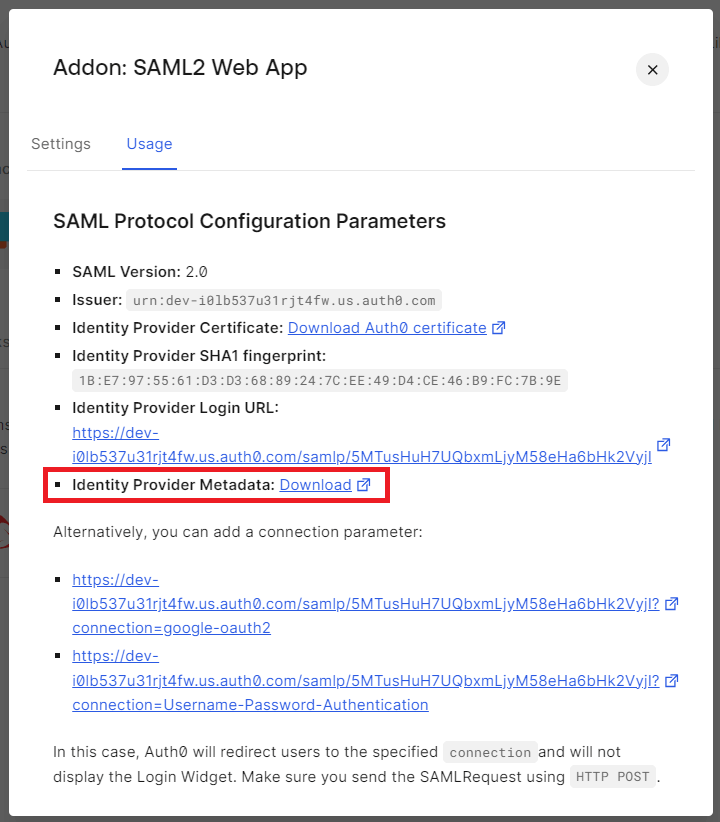
Figure 23. SAML2 Web App Addon Usage
-
Click on the Save button to download the iDP metadata file to your local disk.
-
Navigate to Settings tab in the SAML2 Web App Addon window.
-
Enter Application Callback URL, such as
https://dash.zenarmor.com/saml/{domain}.
Figure 24. Setting Application Callback URL
-
Navigate to the bottom of the window and then click Enable.
-
Close SAML2 Addon.
-
Navigate to the Settings tab.

Figure 25. App Settings
-
Scroll down to the Application URIs section.

Figure 26. Updating Application URI
-
Enter Application Login URI, such as
https://dash.zenarmor.com/saml/{domain}. -
Enter Allowed Callback URLs, such as
https://dash.zenarmor.com/saml/{domain}. -
Enter Allowed Web Origins, such as https://dash.zenarmor.com.
-
Click Save Changes to activate settings.
Importing SAML 2 IdP Metadata on Zenconsole
To complete SAML2 authentication configuration, you may quickly import your SAML 2.0 IdP metadata file you have recently created on the identity provider IdP website into the Zenconsole by following the next steps.
-
Login Zenconsole.
-
Select the organization that you have recently created.
-
Navigate to the Settings > Identity & Access Management.
Figure 27. Identity Access Management Settings Page
-
Go to Authentication Method pane at the top of the page.
-
Click + Add Authentication Method drop-down menu at the top right of the pane. All supported authentication methods will appear.
Figure 28. Selecting Authentication Method
-
Click Generic SAML 2.0 menu to configure the SAML 2.0 protocol as the organization authentication method. This will open the SAML 2.0 configuration window.
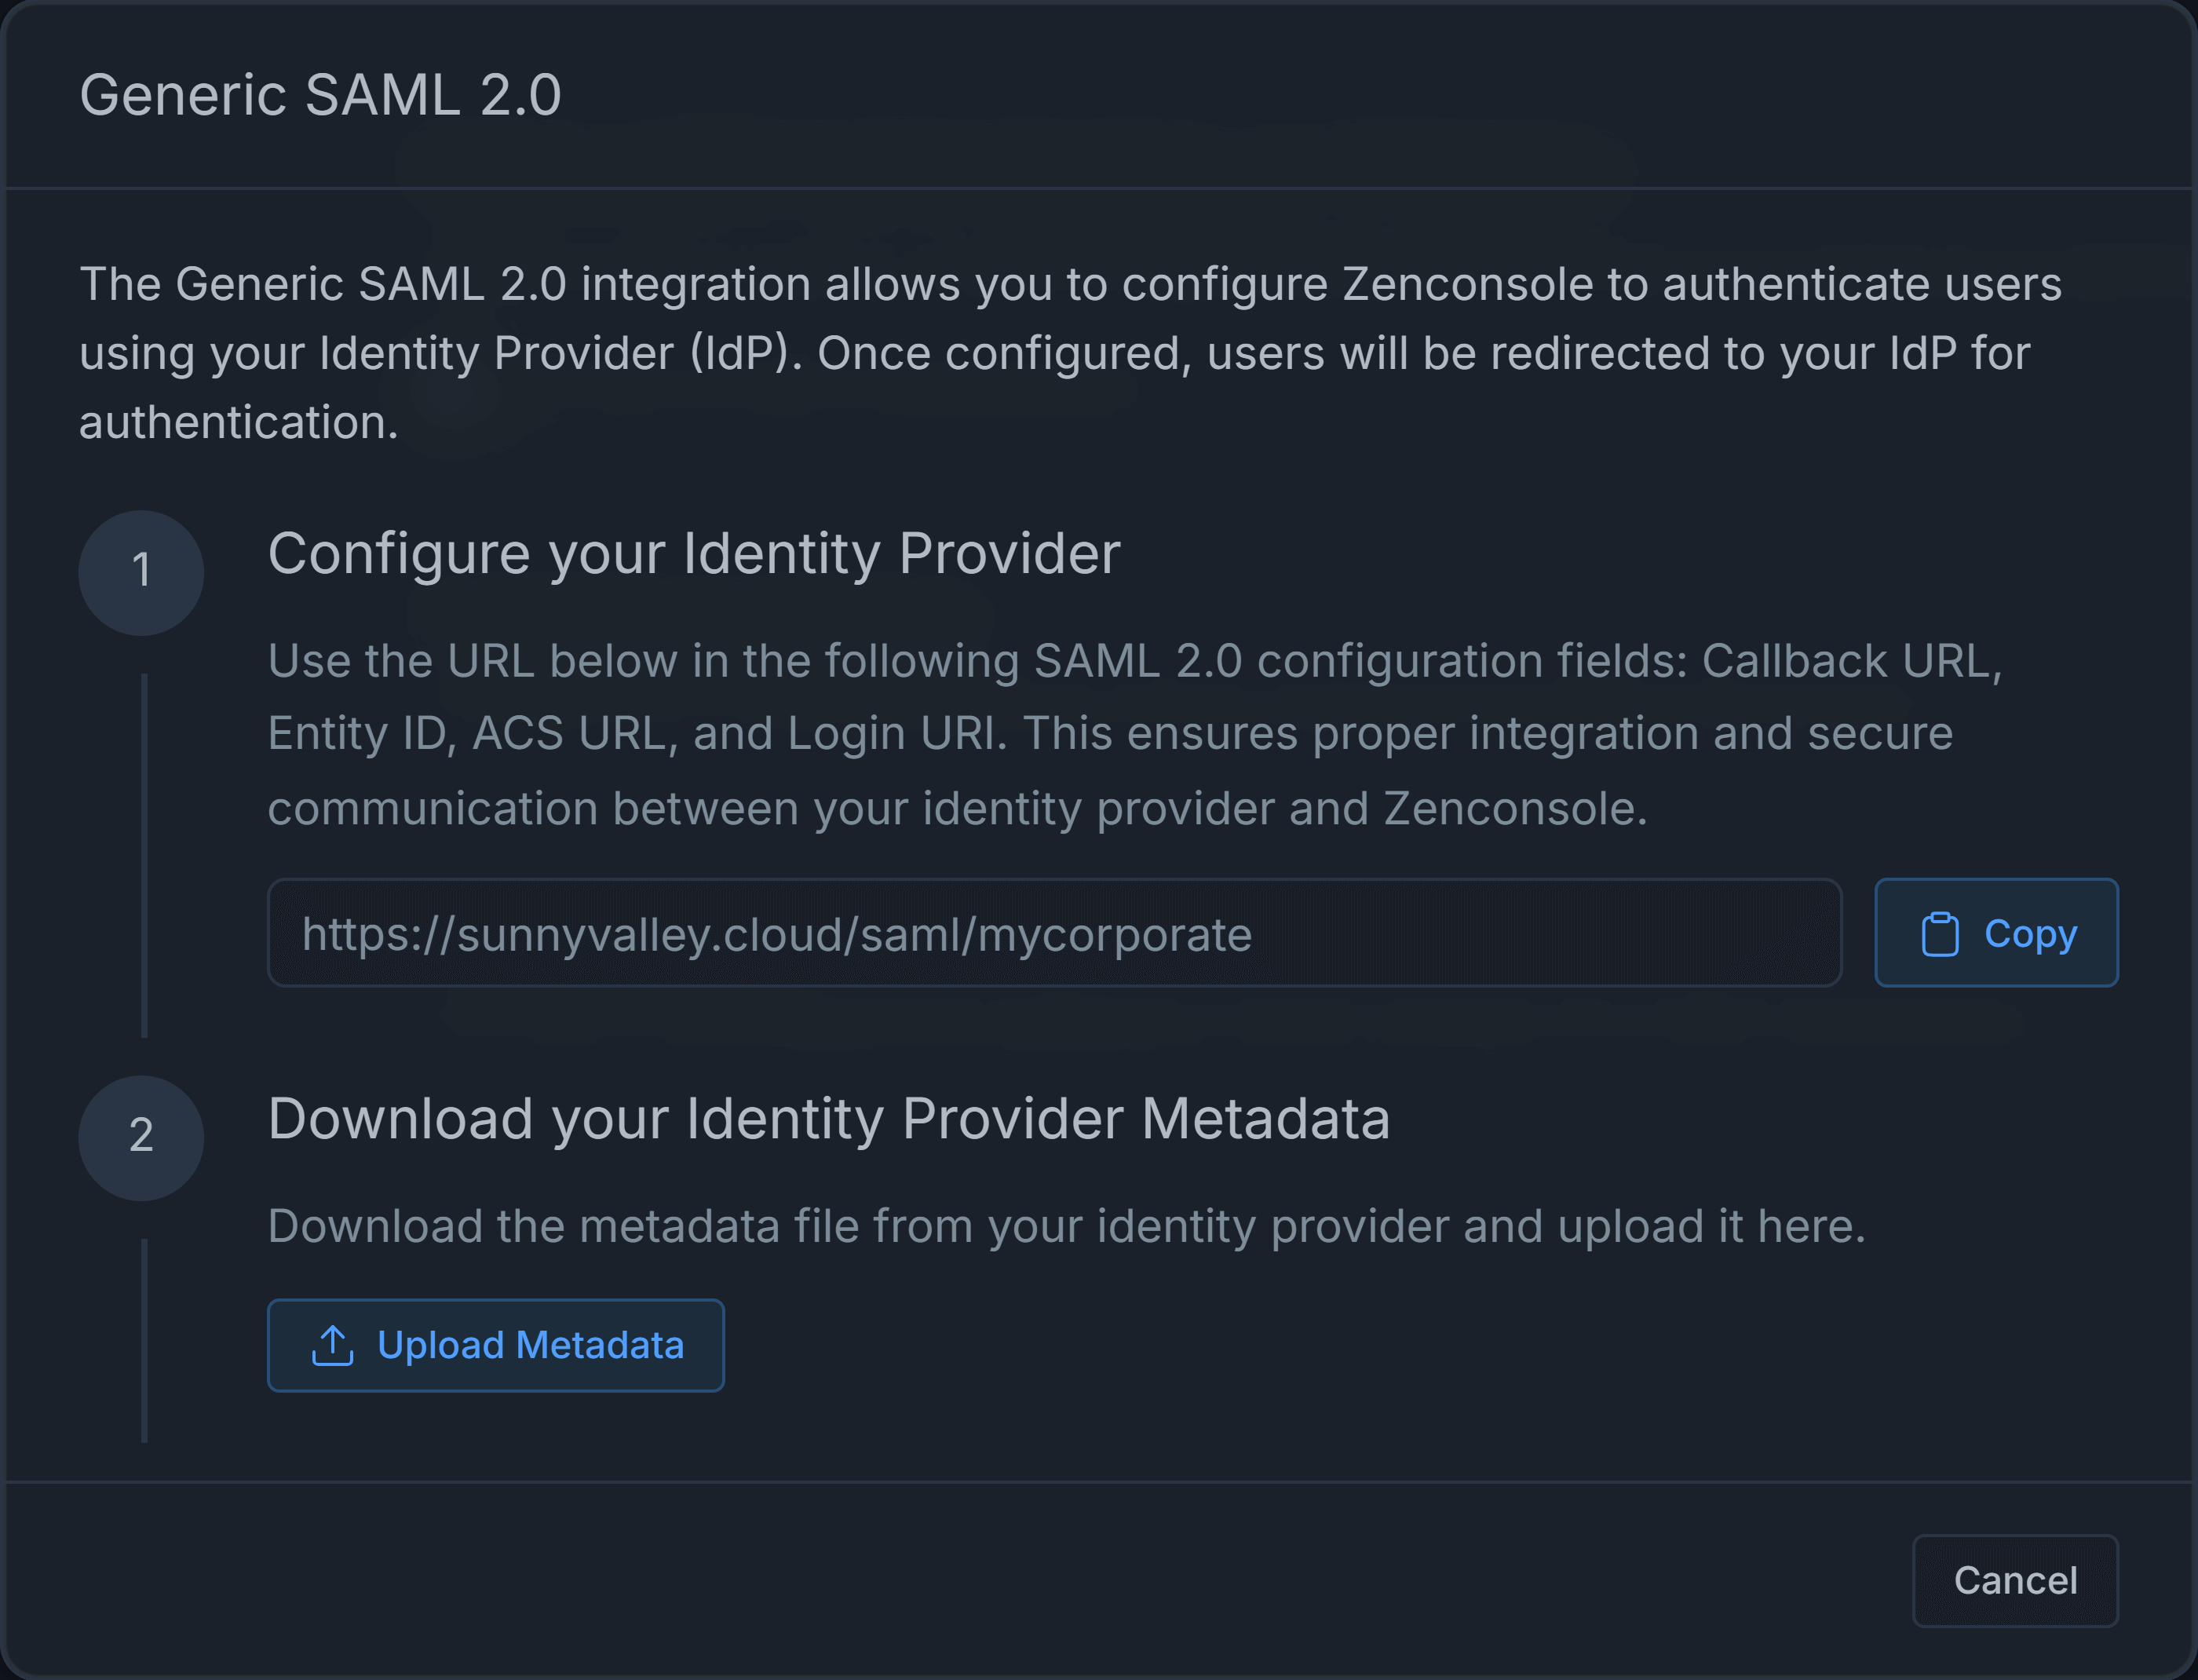
Figure 29. Configure SAML
-
You may copy the URL supplied in the window and integrate your identity provider and Zenconsole if you have not already done so.
-
Click Upload Metadata button to upload IdP metadata file. This will open file browser.
-
Select xml metadata file you have recently downloaded from identity provider and then click Open. This will upload the metadata file used for the SAML 2.0 integration.
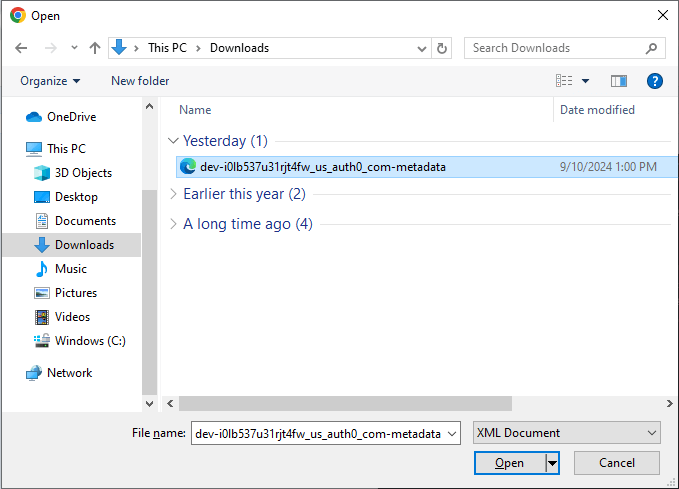
Figure 30. Selecting Metadata File
-
Click the Save Configuration button below to save the configuration and enable SAML 2.0 integration. Once the configuration is saved, the SAML 2.0 integration will be default authentication method for all users in this organization.

Figure 31. Enabling SAML Integration
-
You may check the Identity Provider (IdP) URL and Certificate Expiration date in the Generic SAML 2.0 configuration window.
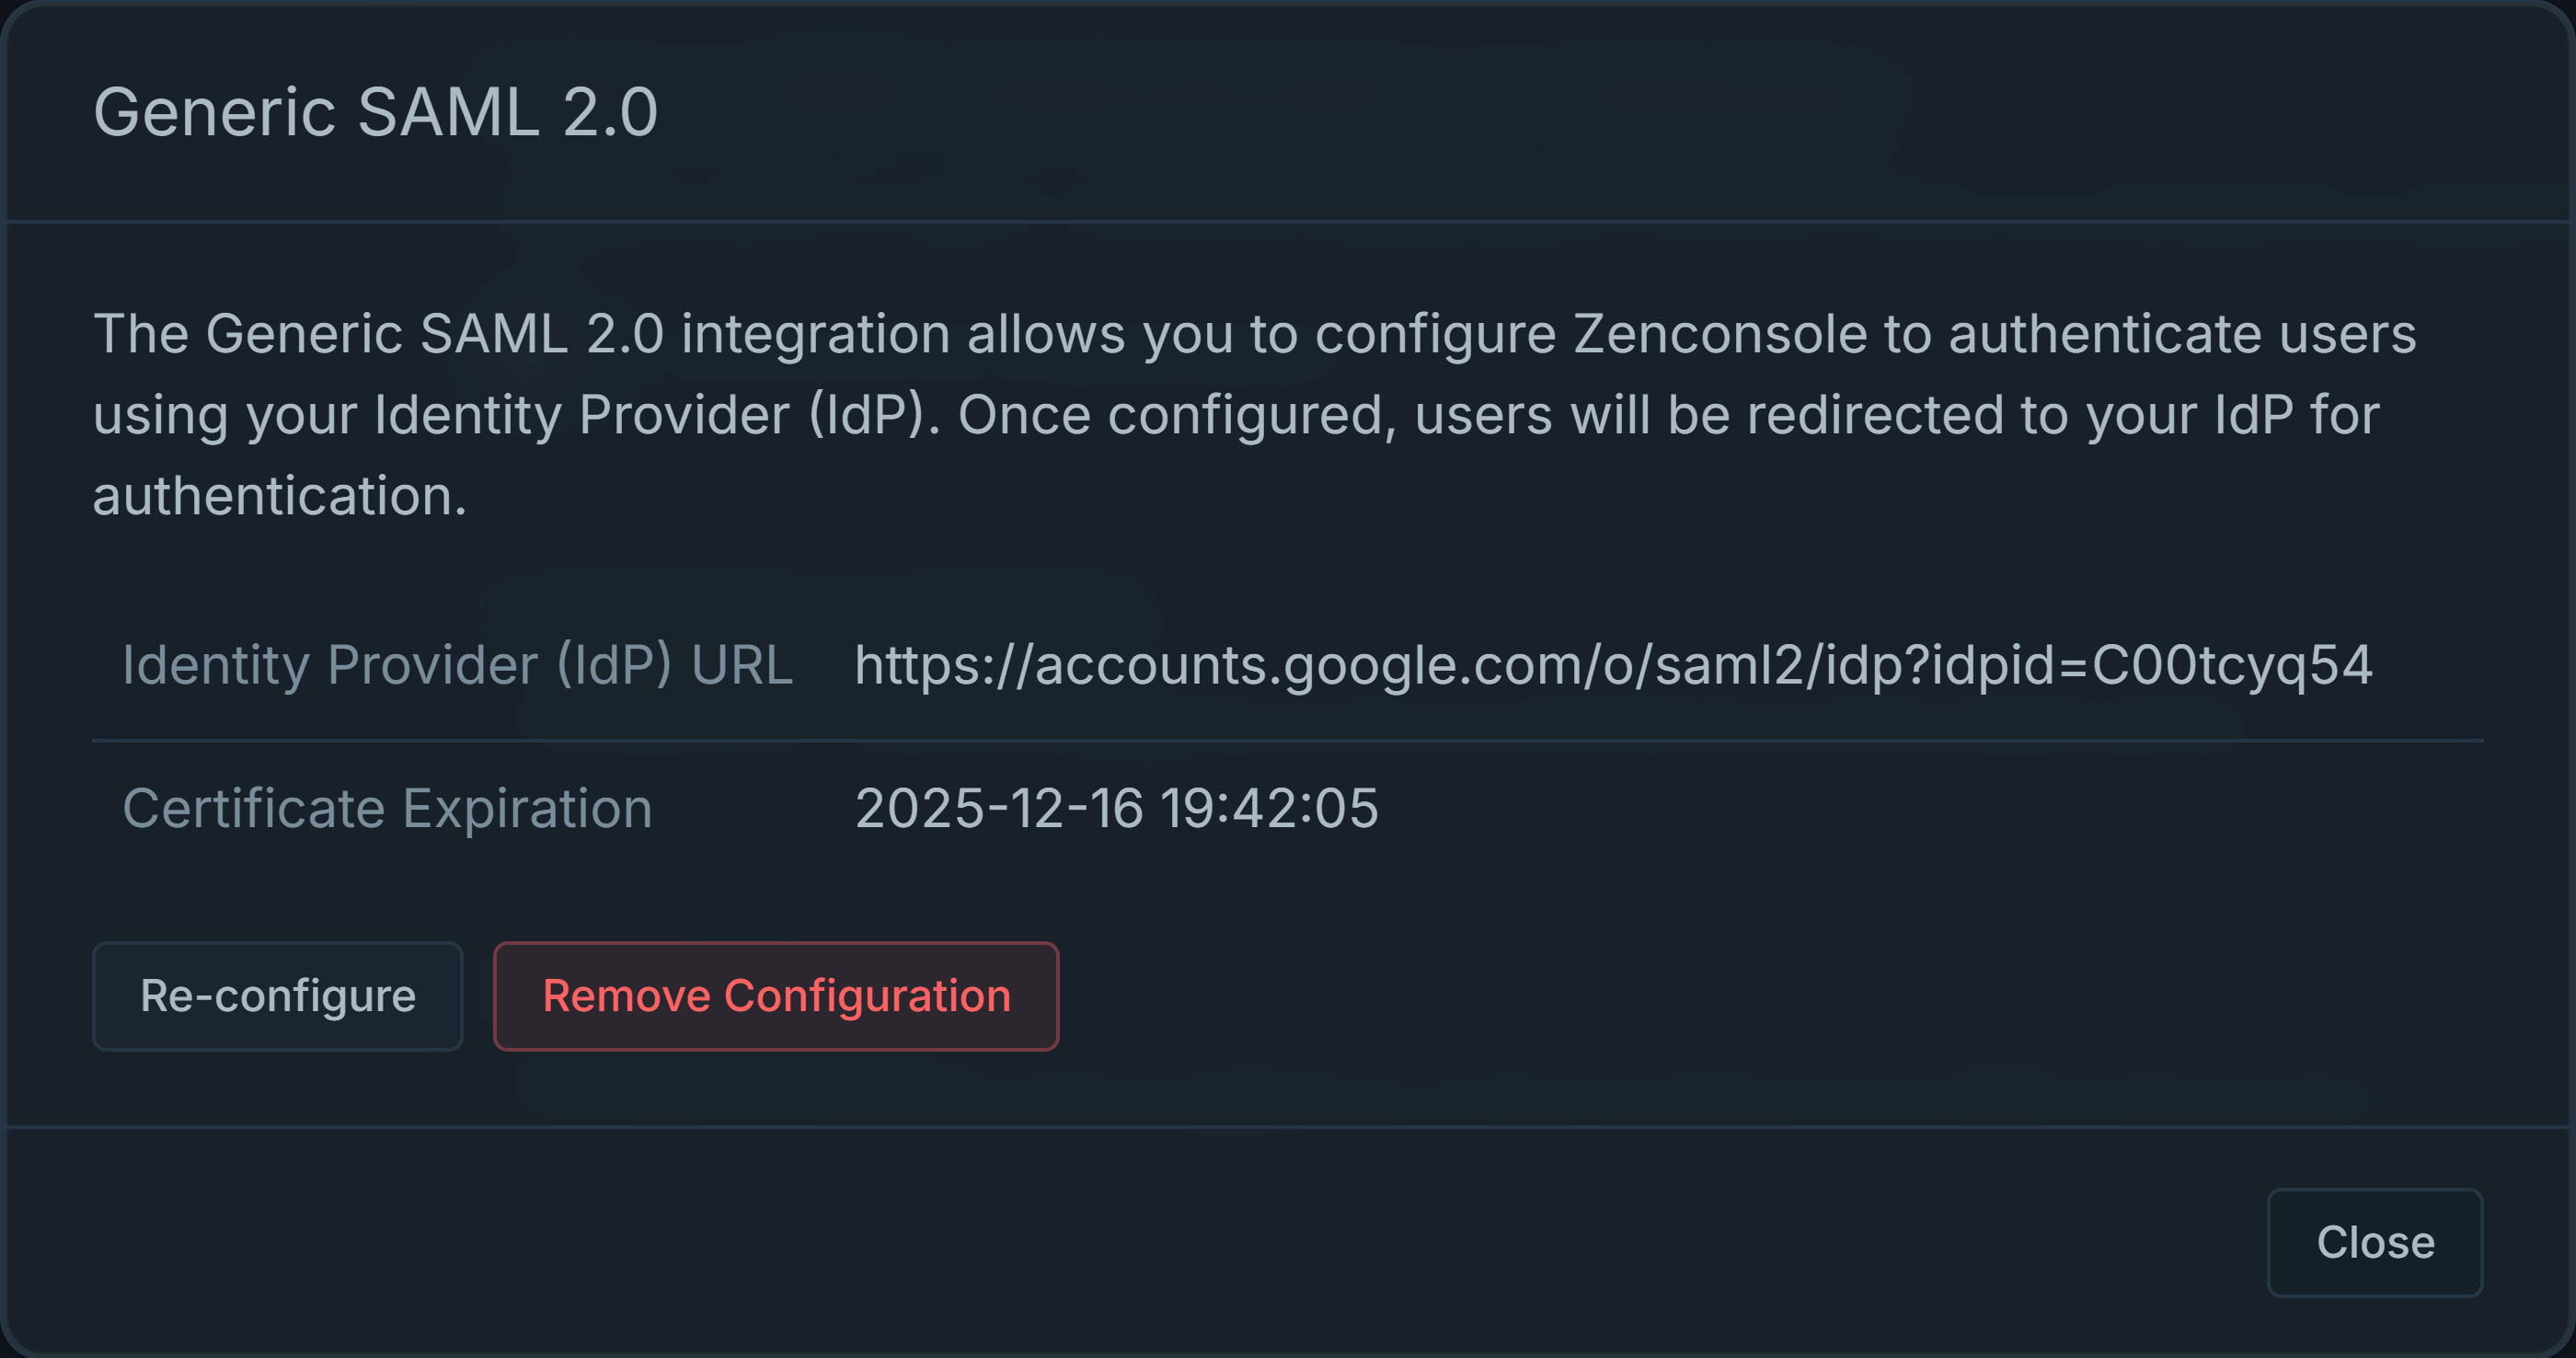
Figure 32. Generic SAML Configuration Completed
-
Click Close to complete the generic SAML2 configuration.
-
Now, you will see that SAML 2.0 is configured as the default authentication method for your organization.
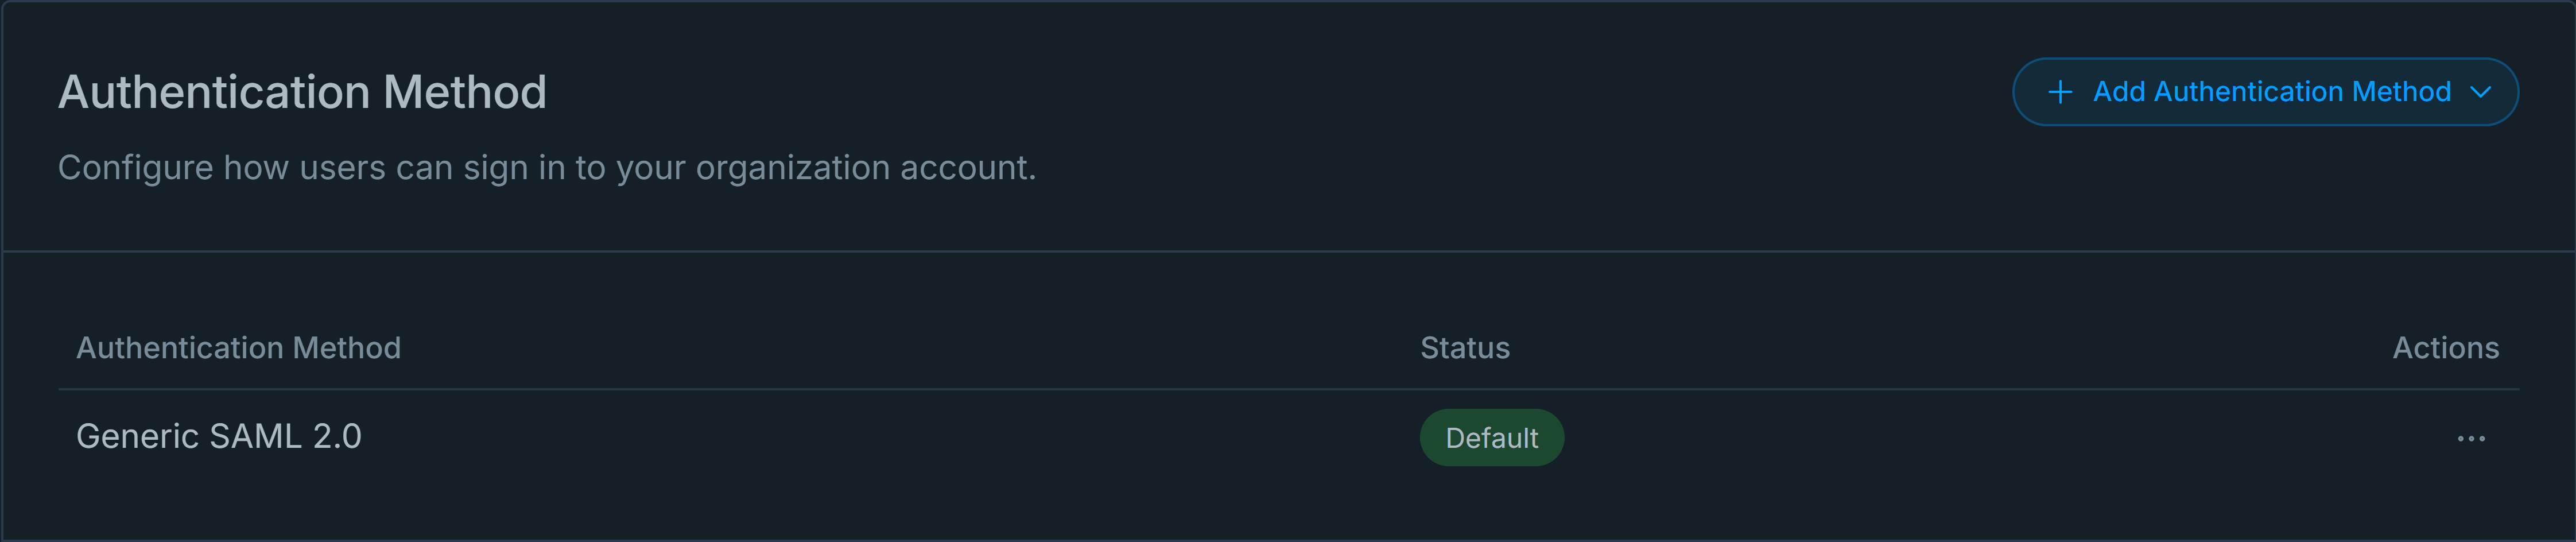
Figure 33. IAM Settings with-SAML Enabled
After enabling SAML 2.0 authentication method for your organization, do not forget to add users via the Users settings page. Otherwise, you may not be able to define user-based policies, or endpoints can not sign into the organization.
3. Enabling Built-in Authentication (Email & Password)
Zenconsole allows users to sign in to the organization with their email addresses and passwords. You may easily activate email and password option for the authentication method by following these steps.
-
Login Zenconsole.
-
Select the organization you want to manage.
-
Navigate to the Settings > Identity & Access Management page.
Figure 34. Identity Access Management Settings
-
Go to Authentication Method pane at the top of the page.
-
Click + Add Authentication Method drop-down menu at the top right of the pane. All supported authentication methods will appear.
Figure 35. Selecting Authentication Method
-
Click Built-in Authentication option to configure the organization authentication method. This will pop up the Email/Password configuration wizard window.
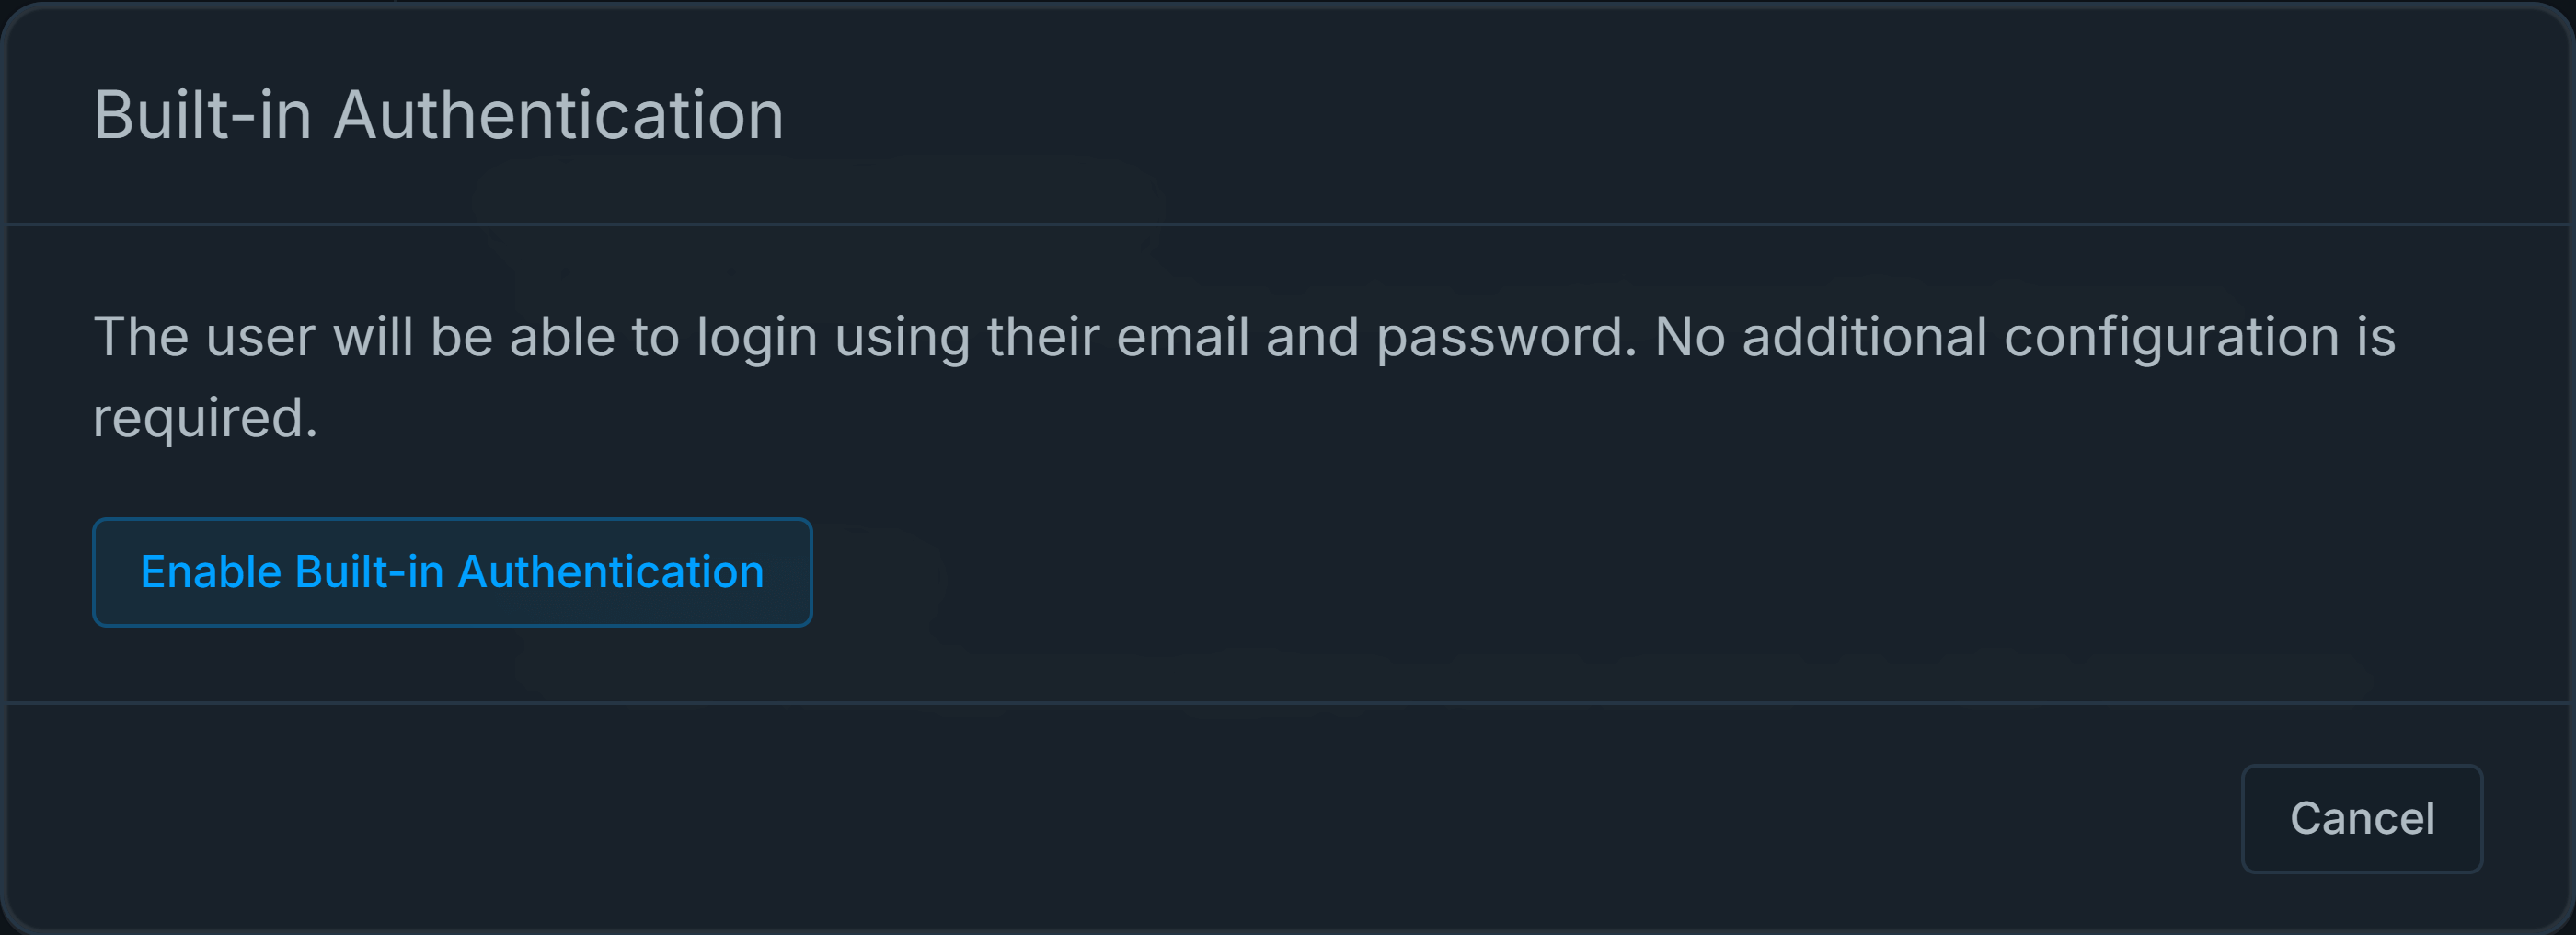
Figure 36. Enabling Email/Password
-
Click Enable Built-in Authentication button to enable users to login using their emails and passwords. No further configuration is required.
-
Click Close to activate the settings.
Beware that when you use the Built-in Authentication authentication method for your organization, you must add users and groups to the organization manually. On the other hand, if your organization has Google Workspace and you integrate Zenconsole organization with Google Cloud services as described in the previous section, all users and groups are automatically fetched and regularly synced.
If you configure Built-in Authentication as the default authentication method for your organization, users must set their passwords manually during their first login attempts. They will receive a verification code to be able to set their organization passwords safely.

Figure 37. Verification Email
4. Enabling Azure AD
To be able to use Azure AD for identity management in your organization, you must integrate your Zenconsole organization with your Azure account. This integration ensures your organization's users and groups are automatically added and updated with regular syncs, keeping all information accurate and current without manual effort.
You may easily enable Azure AD for your organization and allow users to sign in to the organization using their Azure AD accounts by following the next steps.
-
Login Zenconsole.
-
Select the organization you want to manage.
-
Navigate to the Settings > Identity & Access Management page.
Figure 38. Identity & Access Management page
-
Go to Authentication Method pane at the top of the page.
-
Click + Add Authentication Method drop-down menu at the top right of the pane. All supported authentication methods will appear.

Figure 39. Selecting Azure for Authentication Method
-
Click Azure AD option to configure Azure AD as the organization authentication method. This will pop up the configuration wizard window.
-
Type the domain that you want to be synchronized with Zenconsole for user authentication. Users with email addresses from these domains can sign in to your organization.
-
Click + Add Domain button. You may add as many domains as you need. Accepted domains will be automatically displayed below. You may quickly remove them by clicking the
xicon next to the domain name if you need. -
Click Continue to proceed with the Azure AD configuration. This will provide a link for the Azure AD integration and await authorization from your domain administrator.
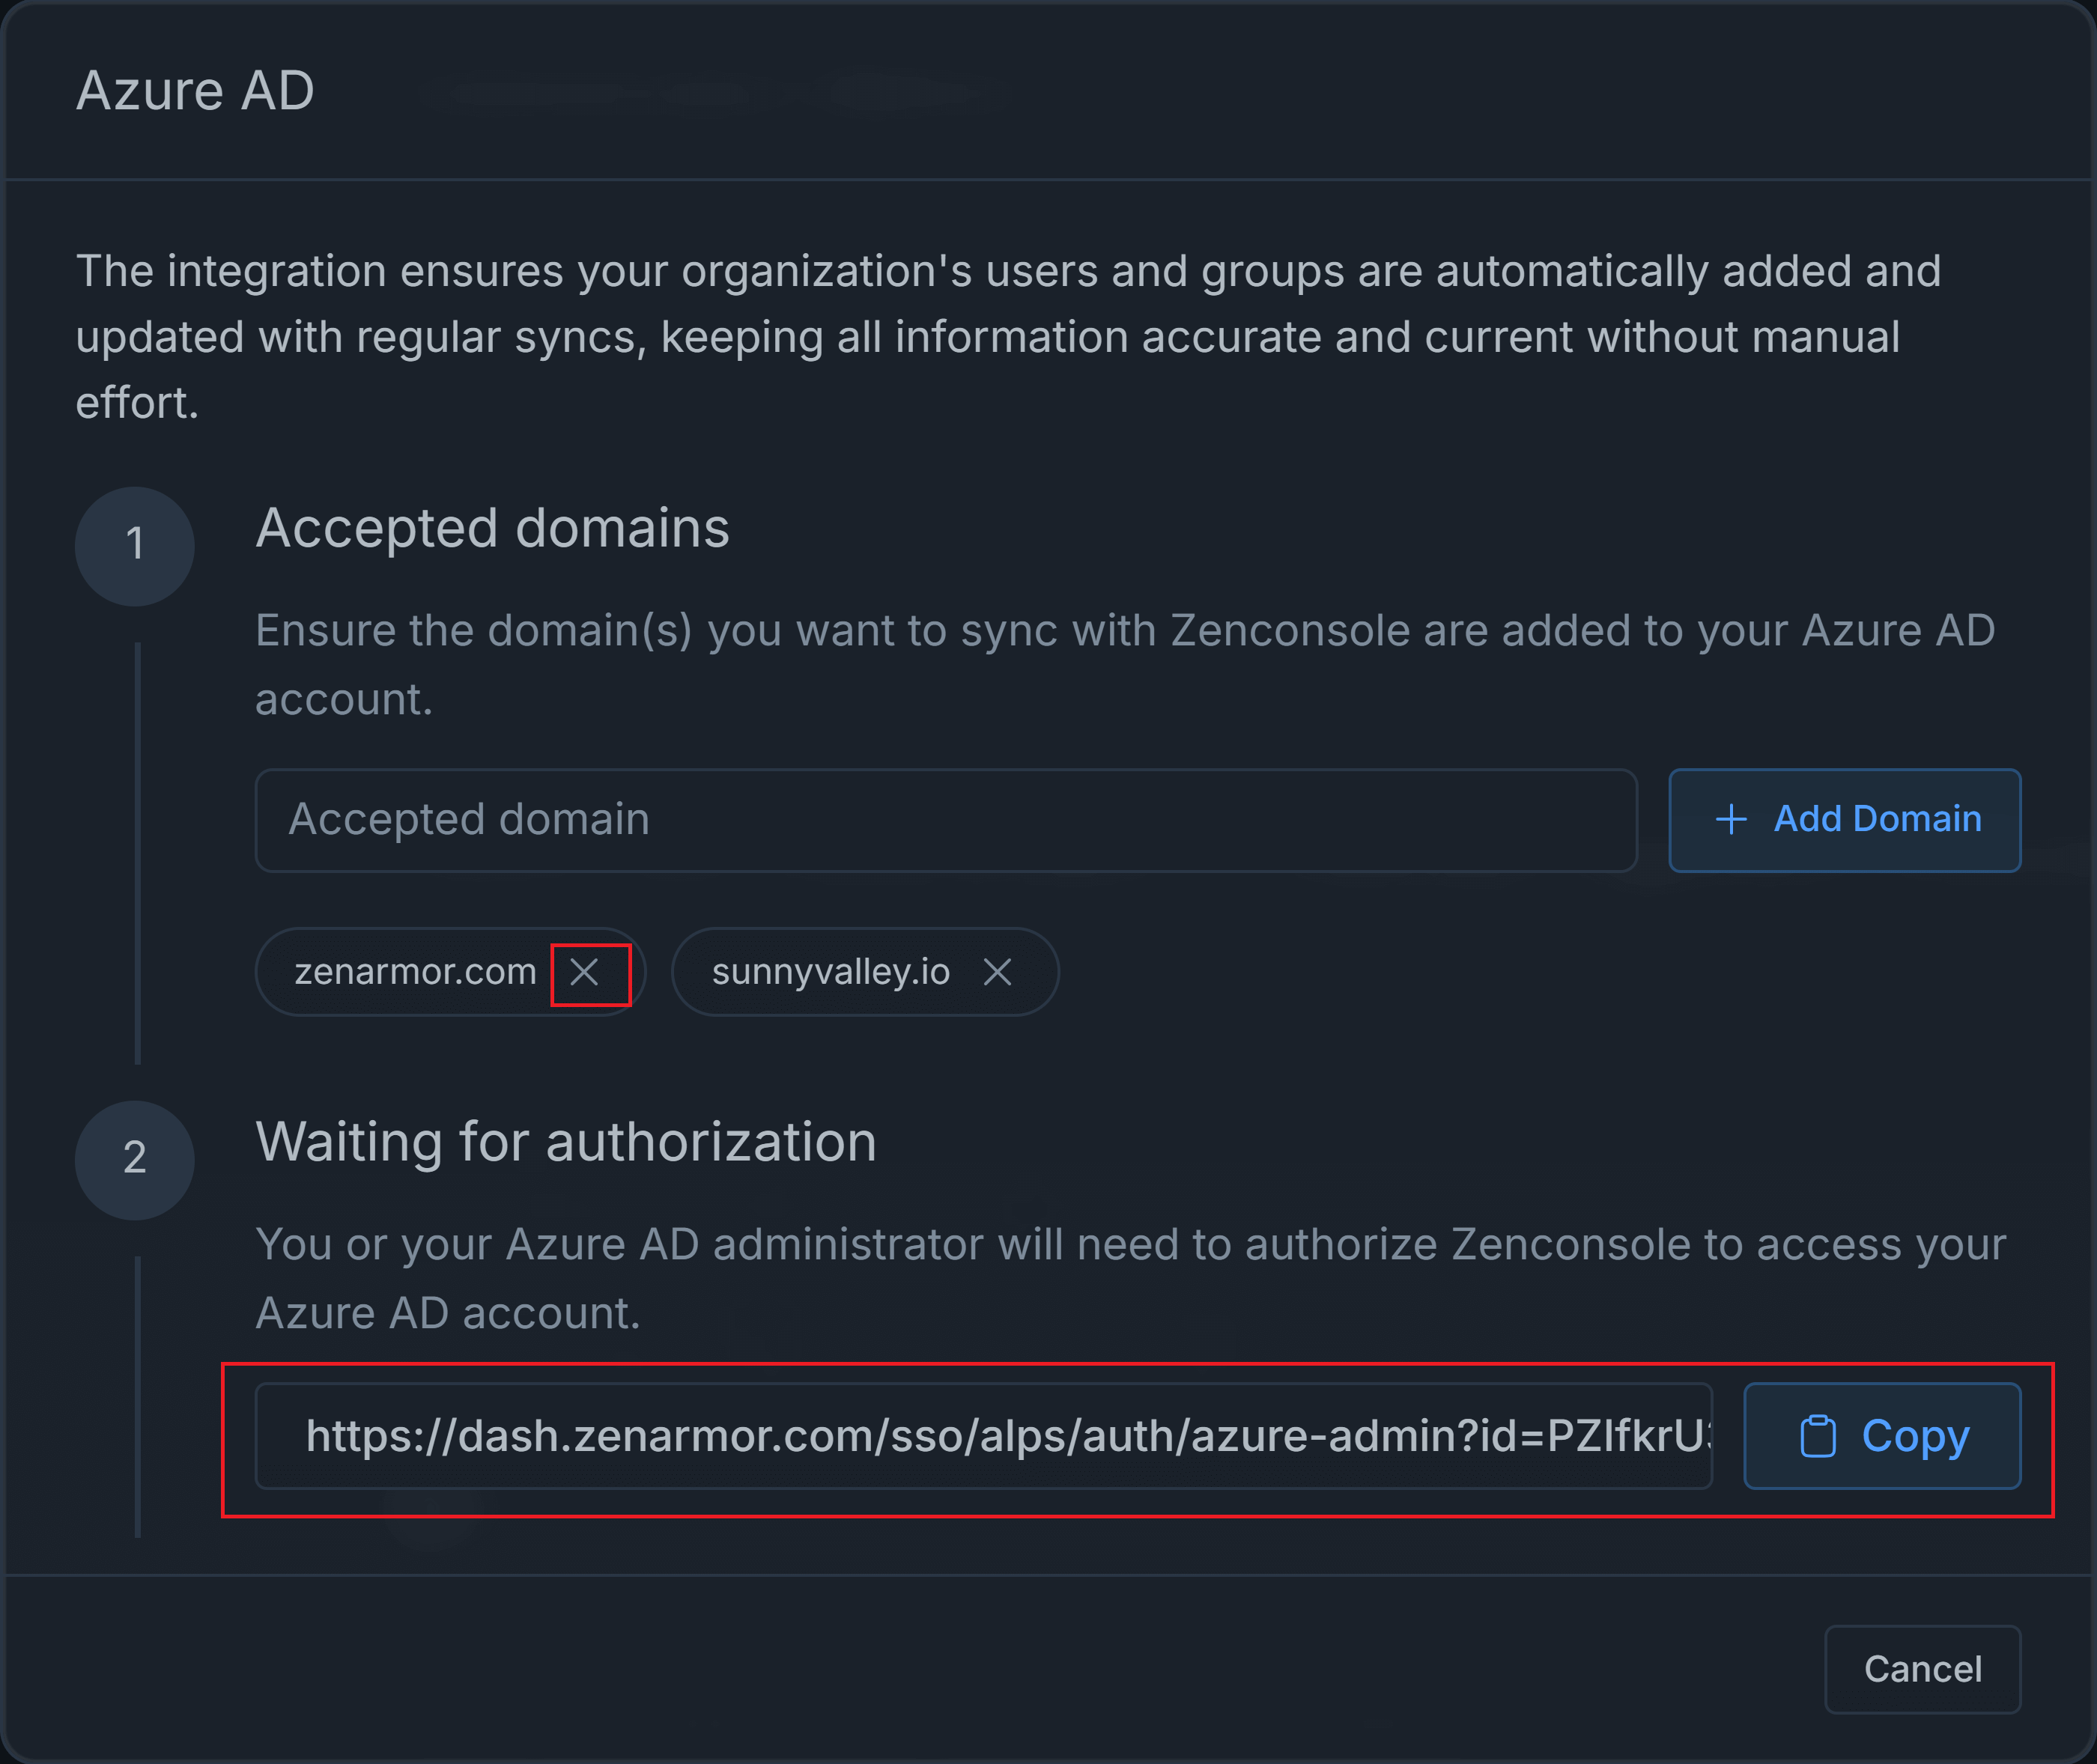
Figure 40. Adding Accepted Domains and Waiting for Azure AD
-
You may either click on the link if you have administrator privileges for your domain or copy it to share it with domain administrators. So that Zenconsole will be able to access your Azure AD and synchronize with user accounts.
-
Go to the link generated in the previous step and sign in to Azure using an account with admin privileges.
-
Click Accept to give the required privileges on your domain to Zenconsole.
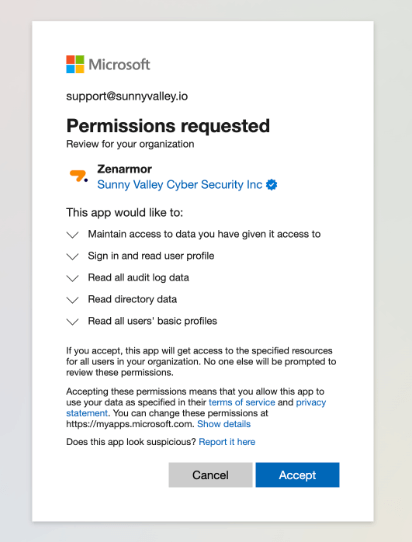
Figure 41. Accepting Permission Requests
-
You should observe that Zenconsole access has been granted to your domain. Zenconsole will now routinely update your users and groups, as they are now synchronized.
Figure 42. Google Access Granted
-
Click on the Zenconsole link which will redirect you to the organization Identity & Access Management page. You should see that Azure AD is set Default authentication method for your organization.
Beware that to let your domain users sign in to the organization, you will need to approve them by navigating to the Users settings page.
Even if you enable Azure Active Directory (AD) as an authentication method in your organization, it's important to enforce Single Sign-On (SSO) authentication. This is necessary in order to view the usernames of users who connect to the network through a gateway, such as OPNsense or pfSense software, in your reports.
Reconfiguring Authentication Methods
You may easily update your existing authentication methods by following the next steps.
-
Login Zenconsole.
-
Select the organization you want to manage.
-
Navigate to the Settings > Identity & Access Management page.
-
Go to Authentication Method pane at the top of the page.
-
Click the Actions menu with 3-dot
...icon next to the authentication method that you want to reconfigure. This will open a drop-down menu.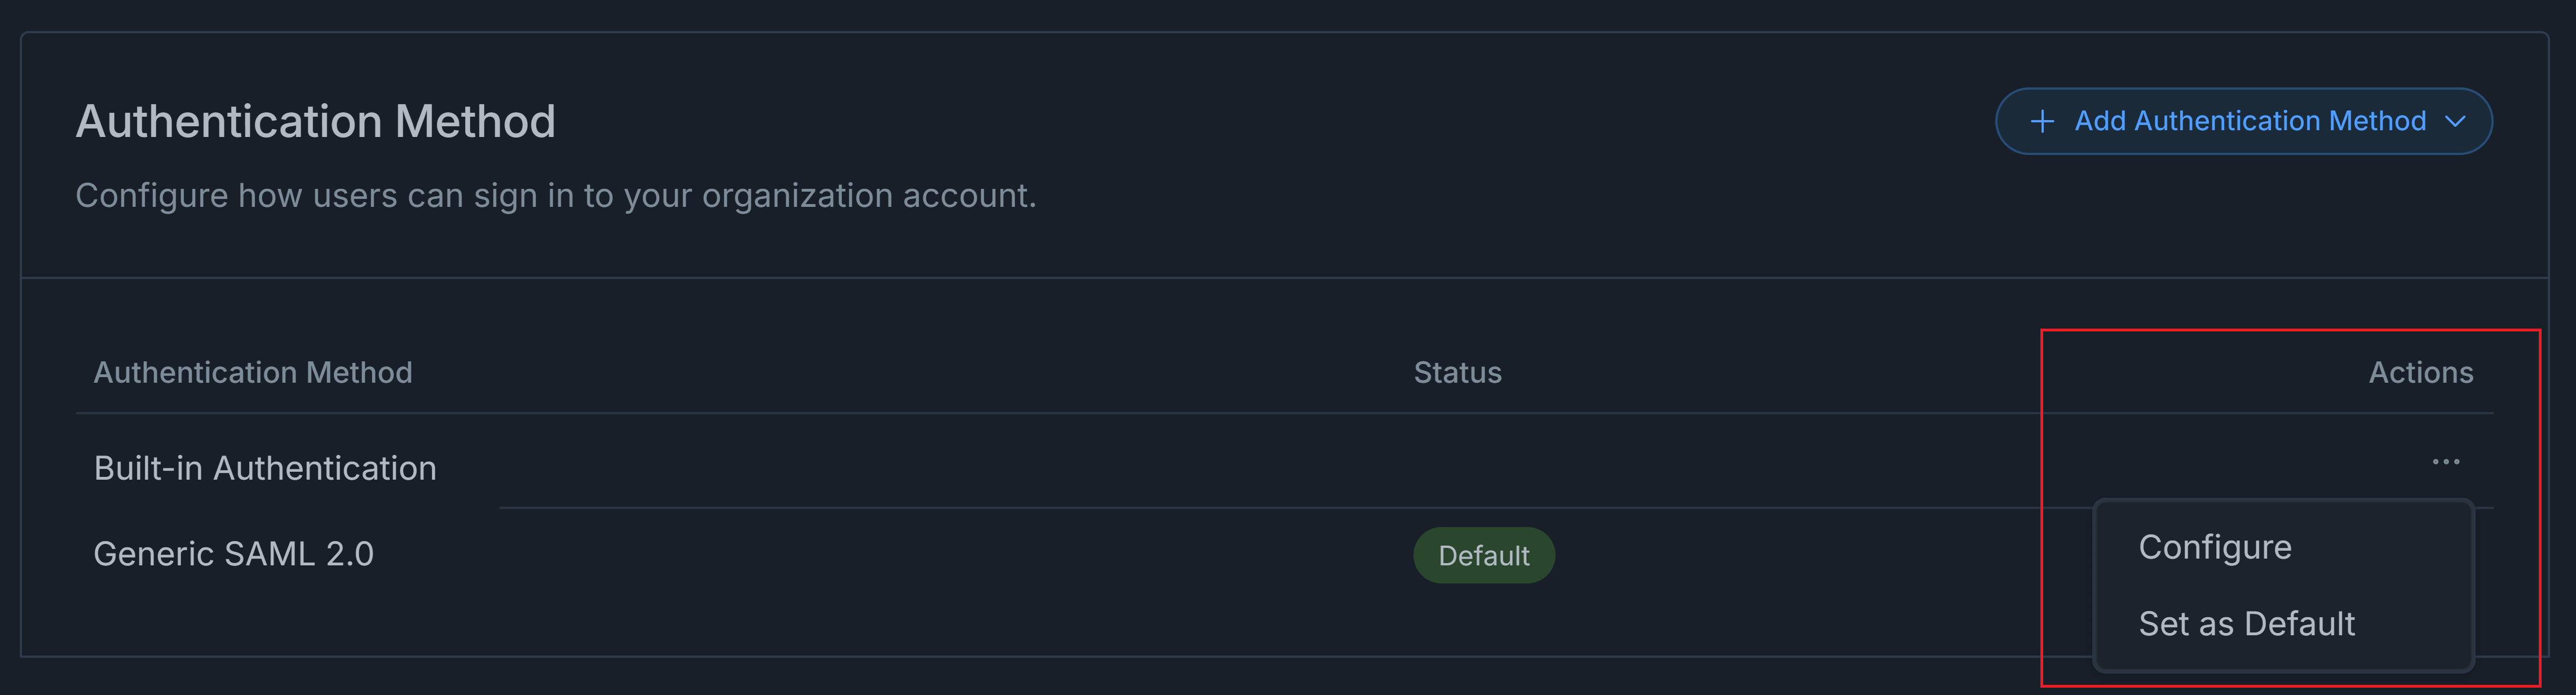
Figure 43. Authentication Method Actions
-
Click Configure menu to update settings. This will open authentication configuration window.
Figure 44. Reconfiguring Authentication Methods
-
Click Reconfigure button.
-
Upload new metadata by clicking on the Upload Metadata button.
-
Click Save Configuration button to save the new configuration.
-
Click Close.
Removing Authentication Methods
You may easily delete your existing authentication methods by following the next steps.
-
Login Zenconsole.
-
Select the organization you want to manage.
-
Navigate to the Settings > Identity & Access Management page.
-
Go to Authentication Method pane at the top of the page.
-
Click the Actions menu with 3-dot
...icon next to the authentication method that you want to remove. This will open a drop-down menu. -
Click Configure menu to update settings. This will open the authentication configuration window.
Figure 45. Removing Authentication Methods
-
Click Remove Configuration button. A notification will appear to confirm the removal.
-
Click Remove to delete the authentication method.
Setting Default Authentication Methods
You may easily change the default authentication method if you have multiple methods by following the next steps.
-
Login Zenconsole.
-
Select the organization you want to manage.
-
Navigate to the Settings > Identity & Access Management page.
-
Go to Authentication Method pane at the top of the page.
-
Click the Actions menu with 3-dot
...icon next to the authentication method that you want to set as default. This will open a drop-down menu.Figure 46. Setting Default Authentication Methods
-
Click Set as Default menu to update settings. A notification will appear to confirm the new settings.
-
Click Set as Default to save the settings.
Video
Here is the hands on video for Zenarmor IAM Management feature.