Registering Gateway to Zenconsole Organization
To register your gateway running Zenarmor in L3 routing mode for your organization, you must follow the next steps:
-
Enable Cloud Management Portal on your node
-
Activate the subscription key associated with your organization. You must have an SSE or higher subscription.
-
Go to your organization.
-
Select your node that is waiting in a pending state to join the organization on the left sidebar. This will automatically redirect you to the Zenconsole integration wizard.
-
Back up your Zenarmor policies if any exist on your node.
warningYour organization's policies are administered centrally on Zenconsole. Therefore, you can not access your existing policies after registering your node to the organization. It is necessary to explicitly remove any existing policies before adding this gateway to the Zenconsole. To prevent the potential loss of critical configurations, it is advised to back up the current settings using the OPNsense UI prior to making any modifications.
Please note that this policy backup file can only be restored on a Zenarmor instance running on the OPNsense node locally. You are not permitted to restore local policy backup files to an OPNsense node that is part of an organization.
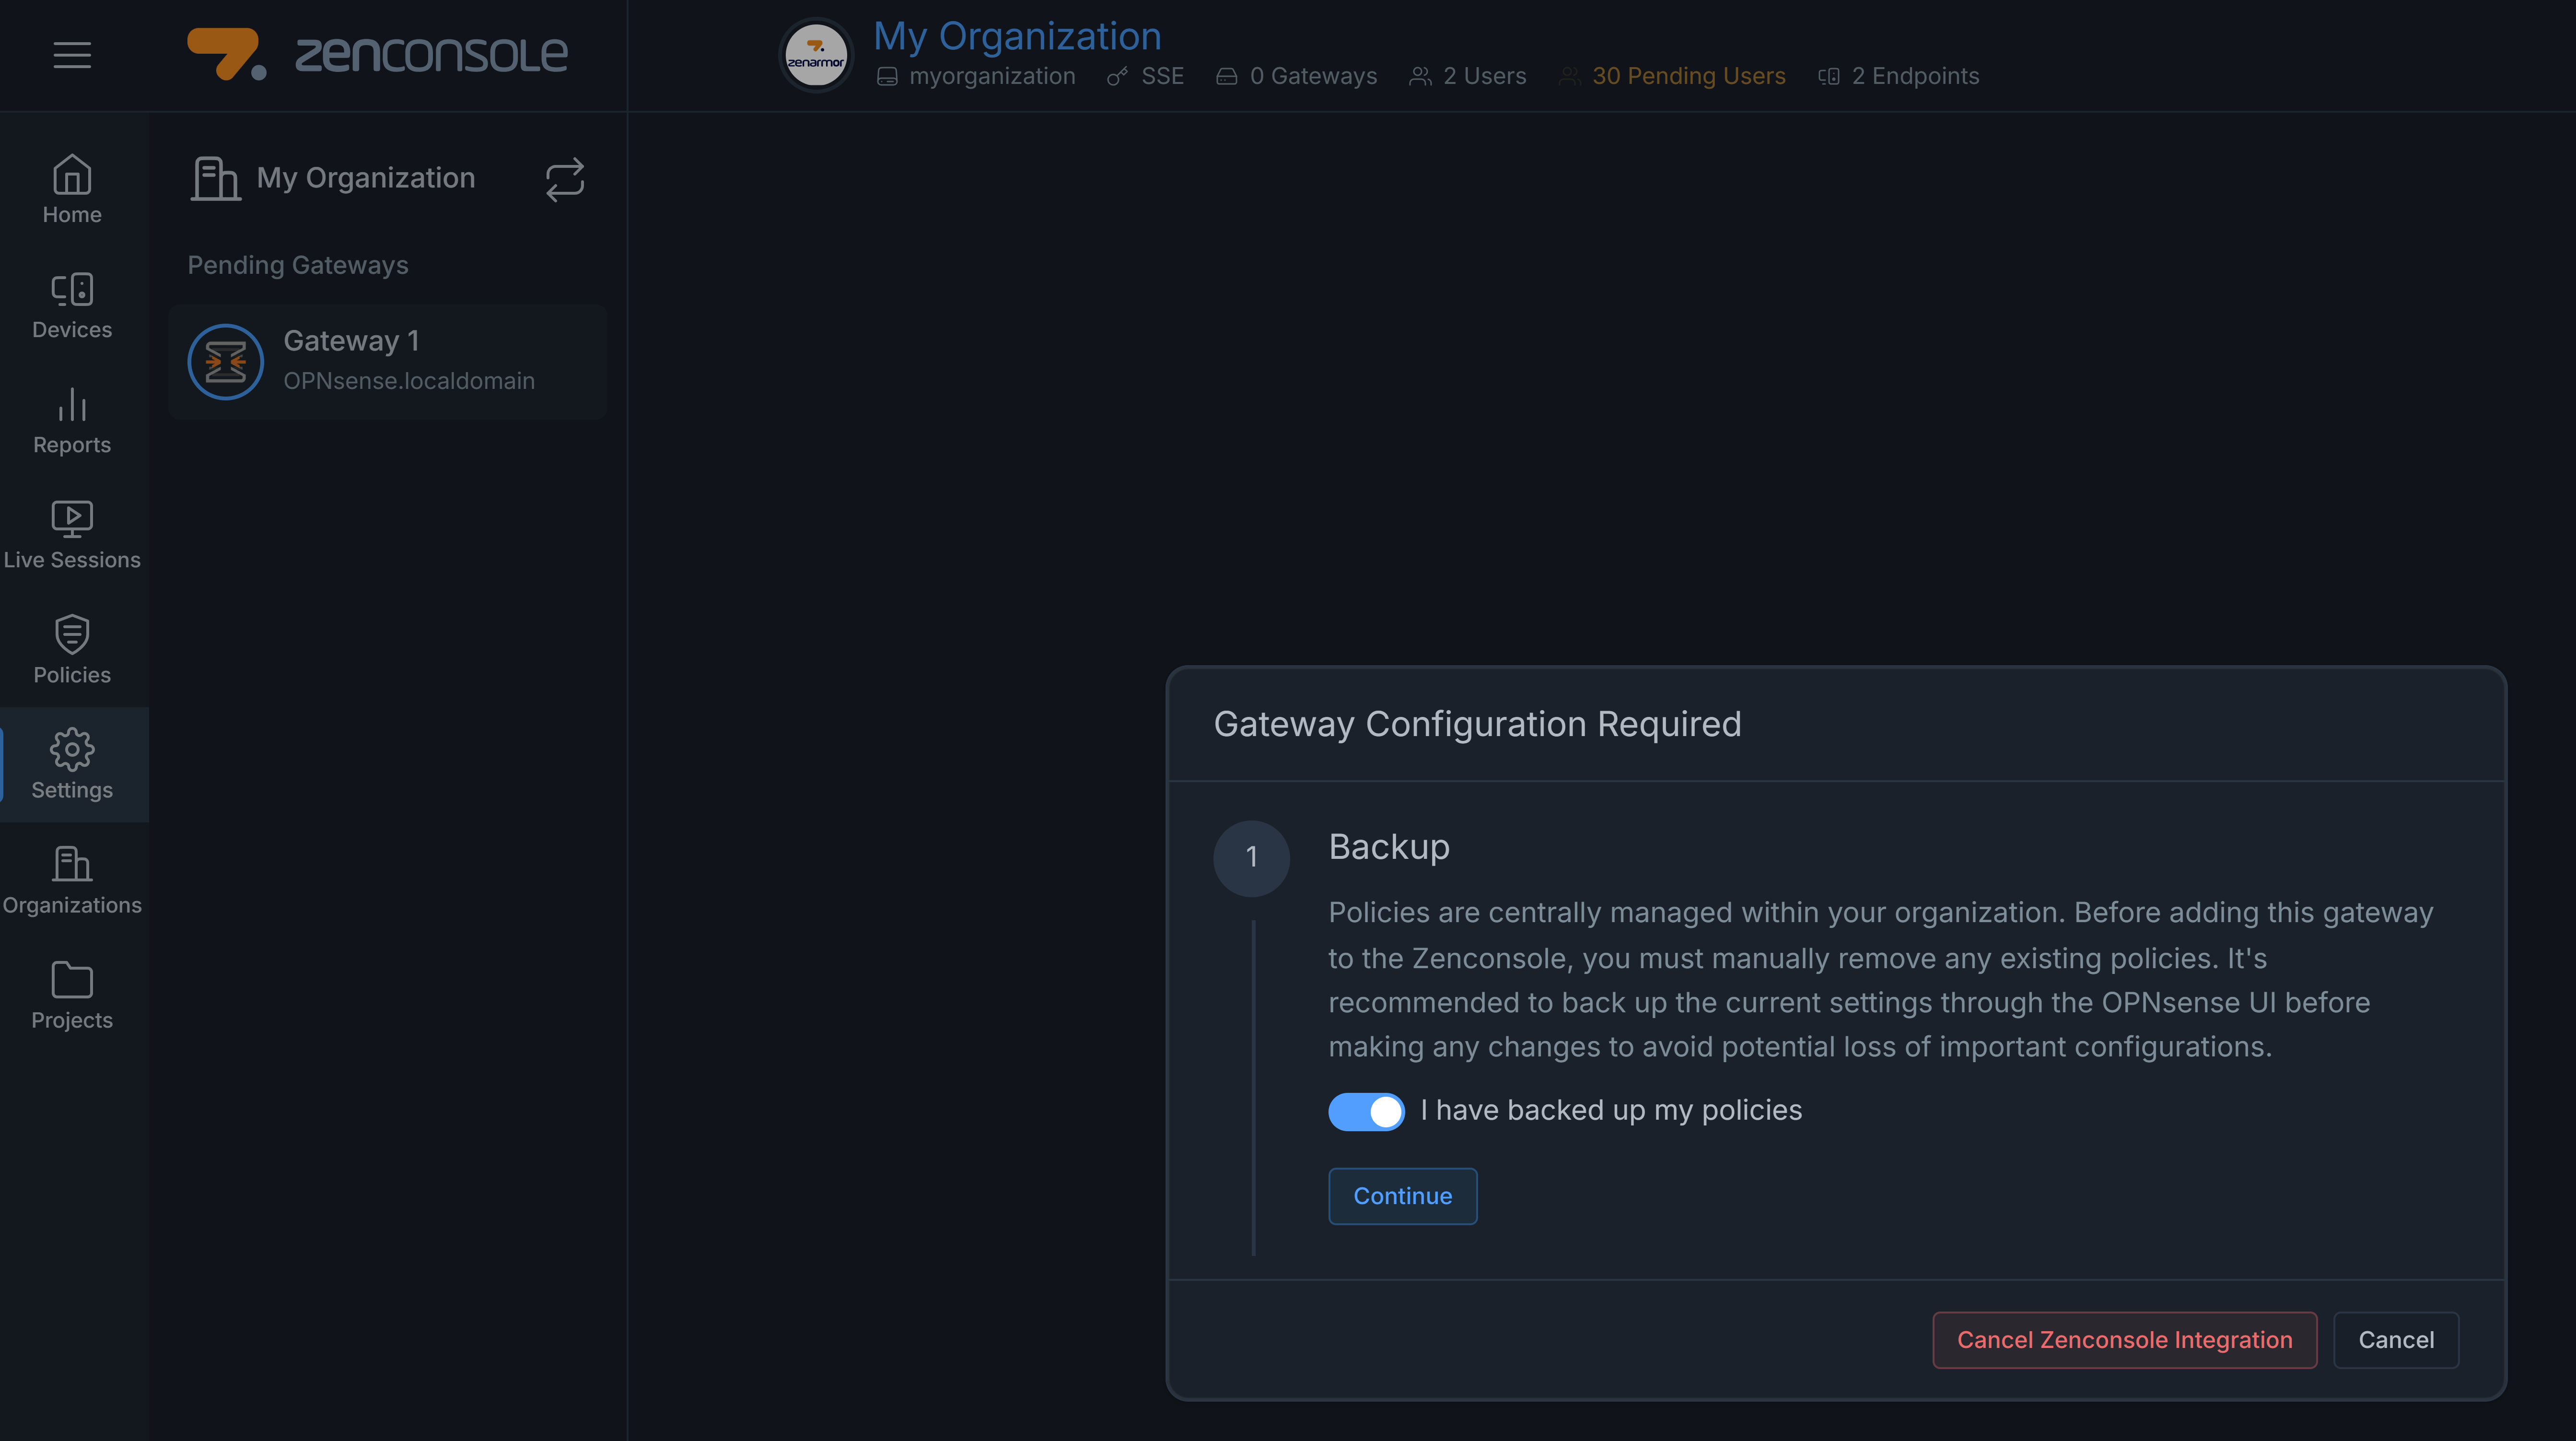
Figure 1. Backup policies
-
You may click the Cancel Zenconsole Integration button if you are unsure what you are doing.
-
Click the toggle bar next to the I have backed up my policies to confirm that you are ready to proceed.
-
Click Continue button. This will check if there is any policy on your node and force you to delete them.
-
Click Remove All Policies to remove existing policies from the Zenarmor node. A dialog box will appear for your confirmation.
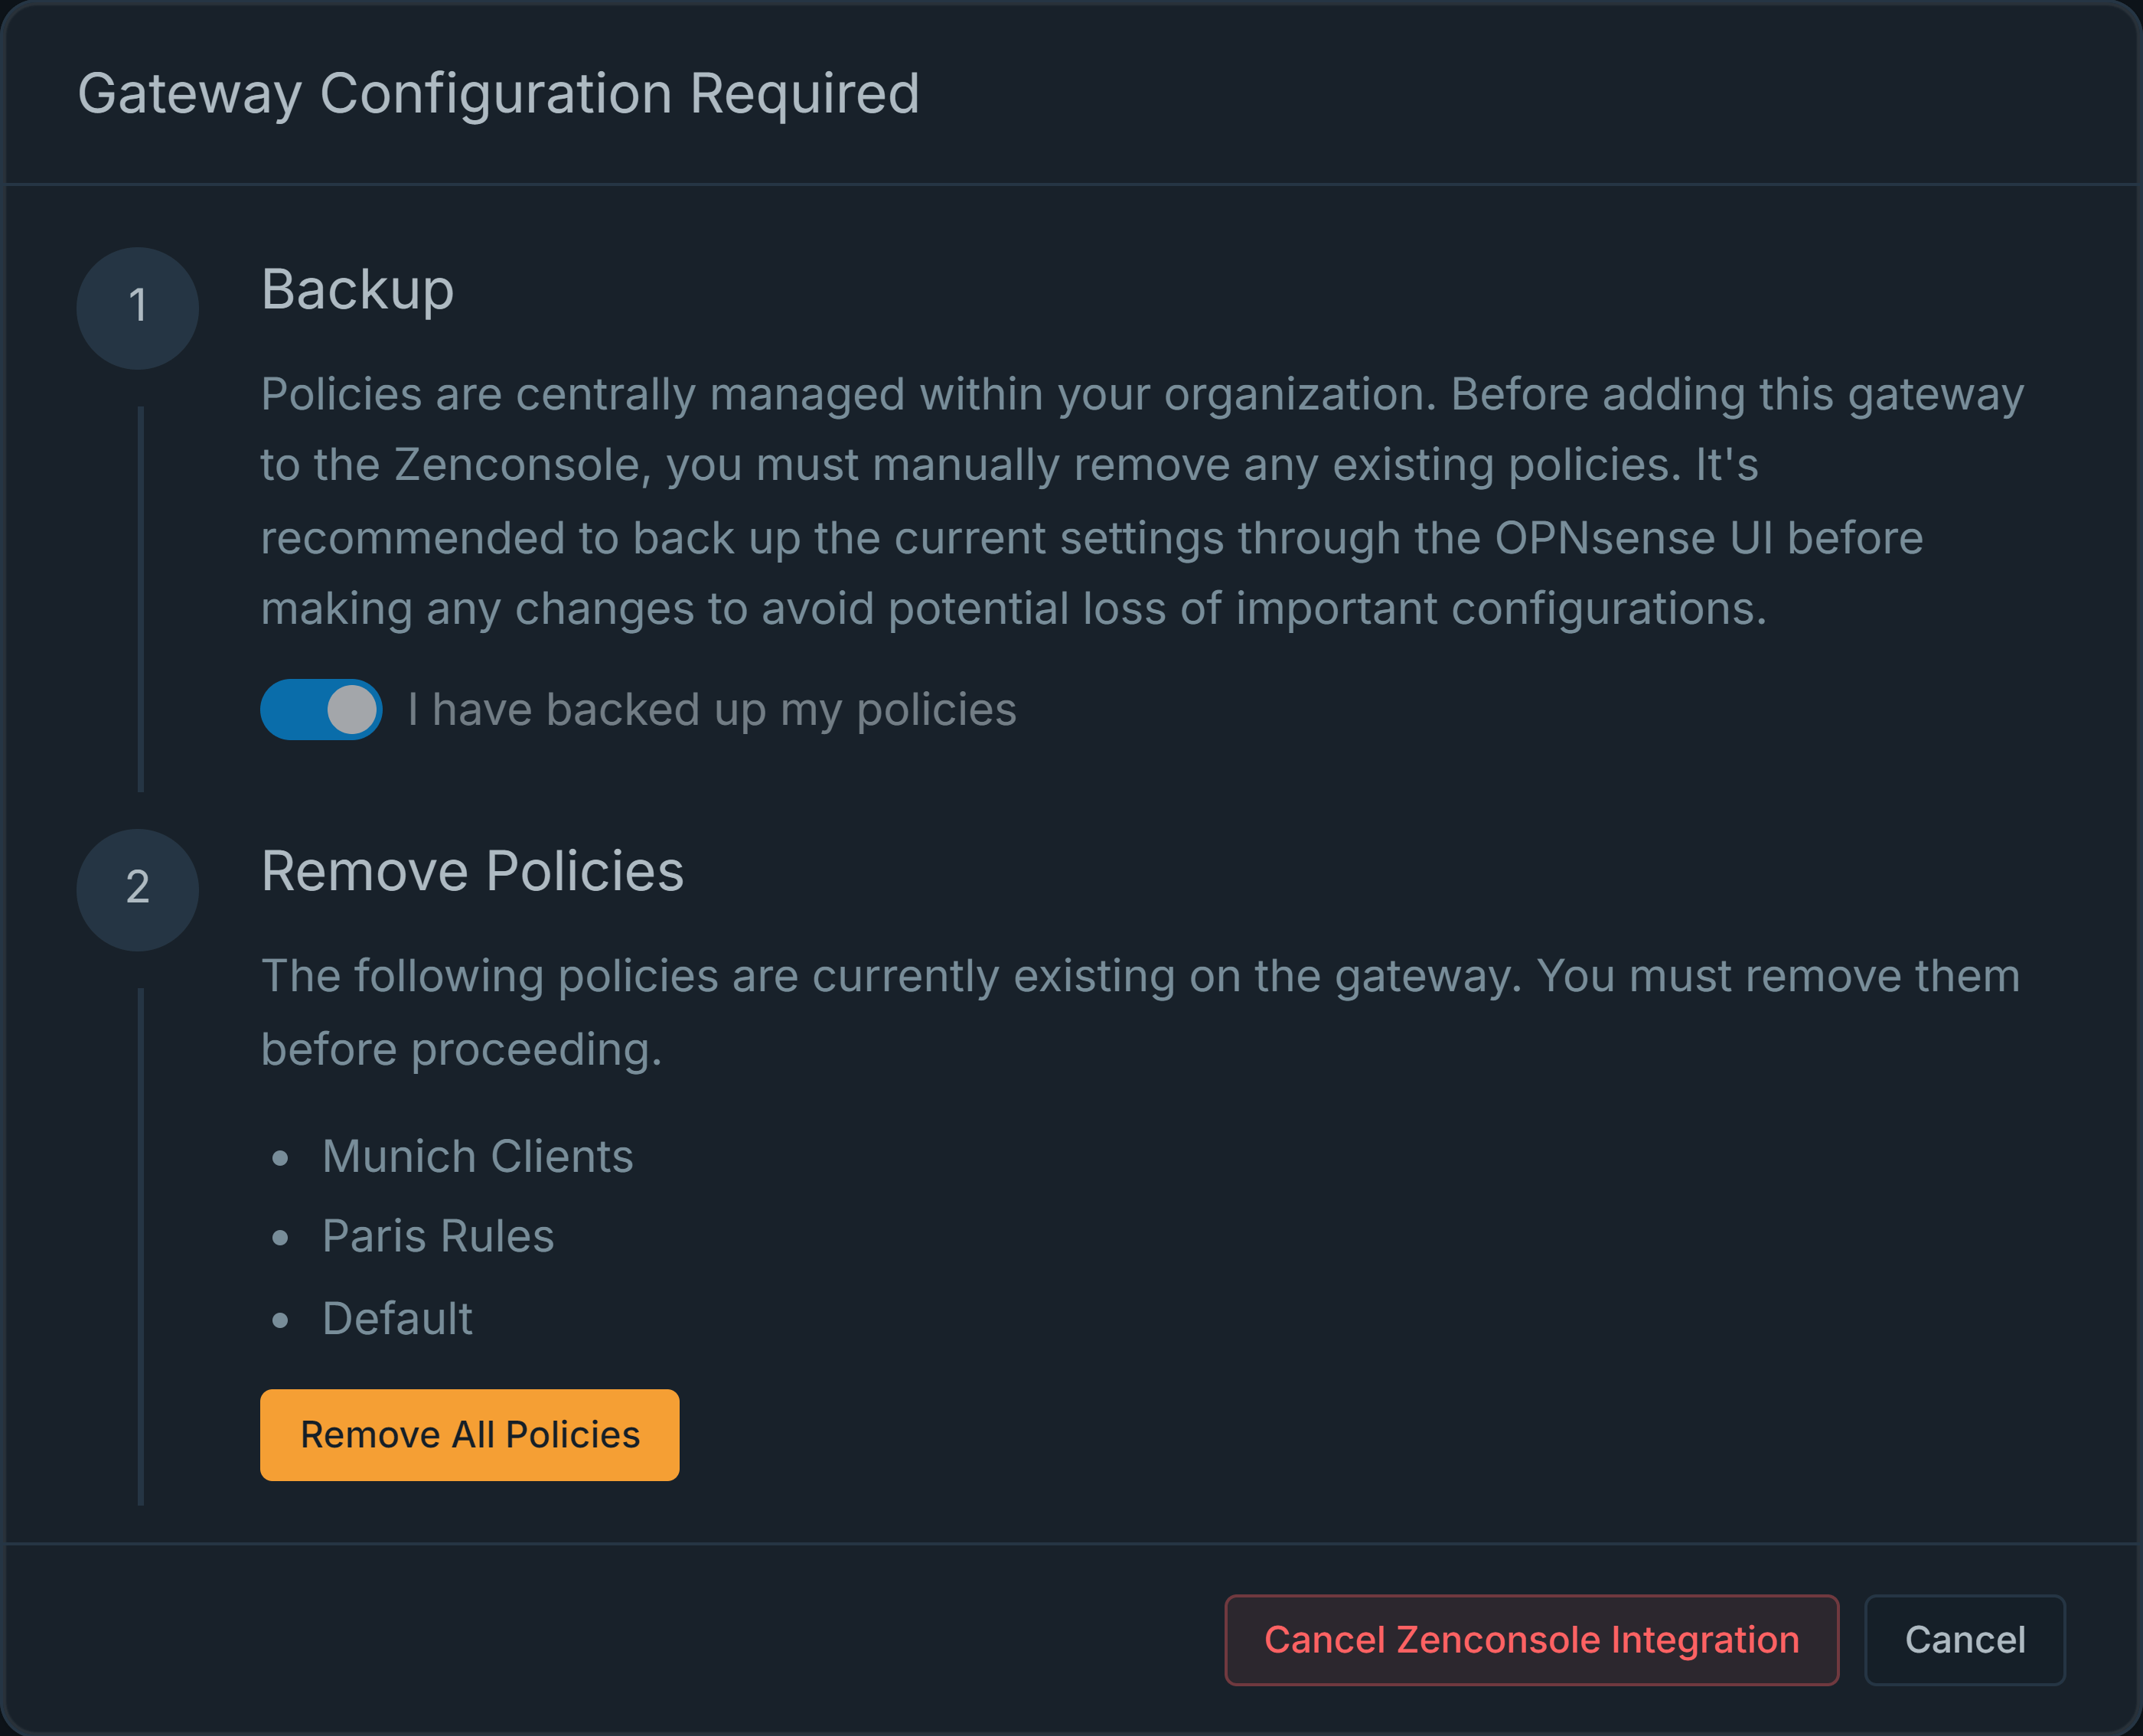
Figure 2. Removing Existing Policies
-
Click Remove All button to approve the policy removal.
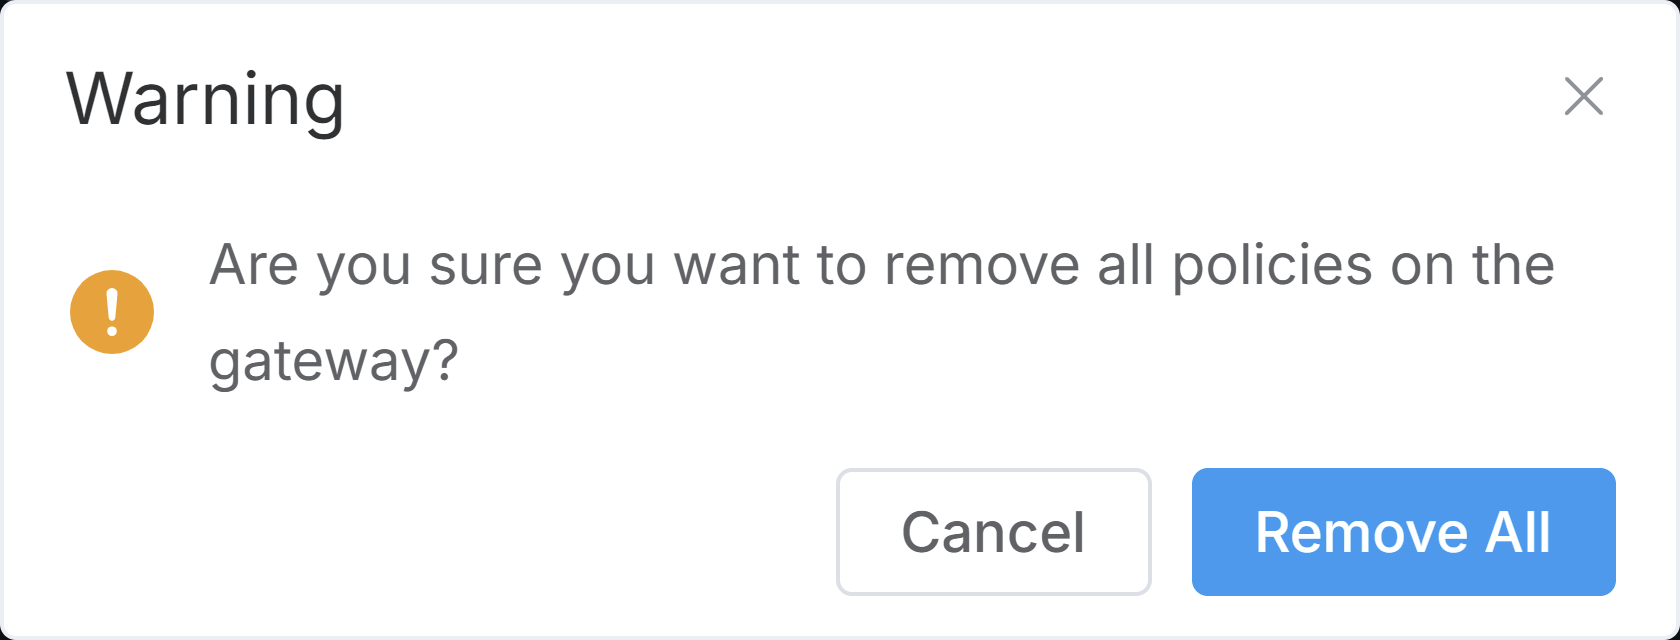
Figure 3. Notification for policy removal
-
Type a descriptive name for your Zenarmor gateway.
-
Click Add Gateway button. This will automatically add the new gateway to your Zenconsole organization.
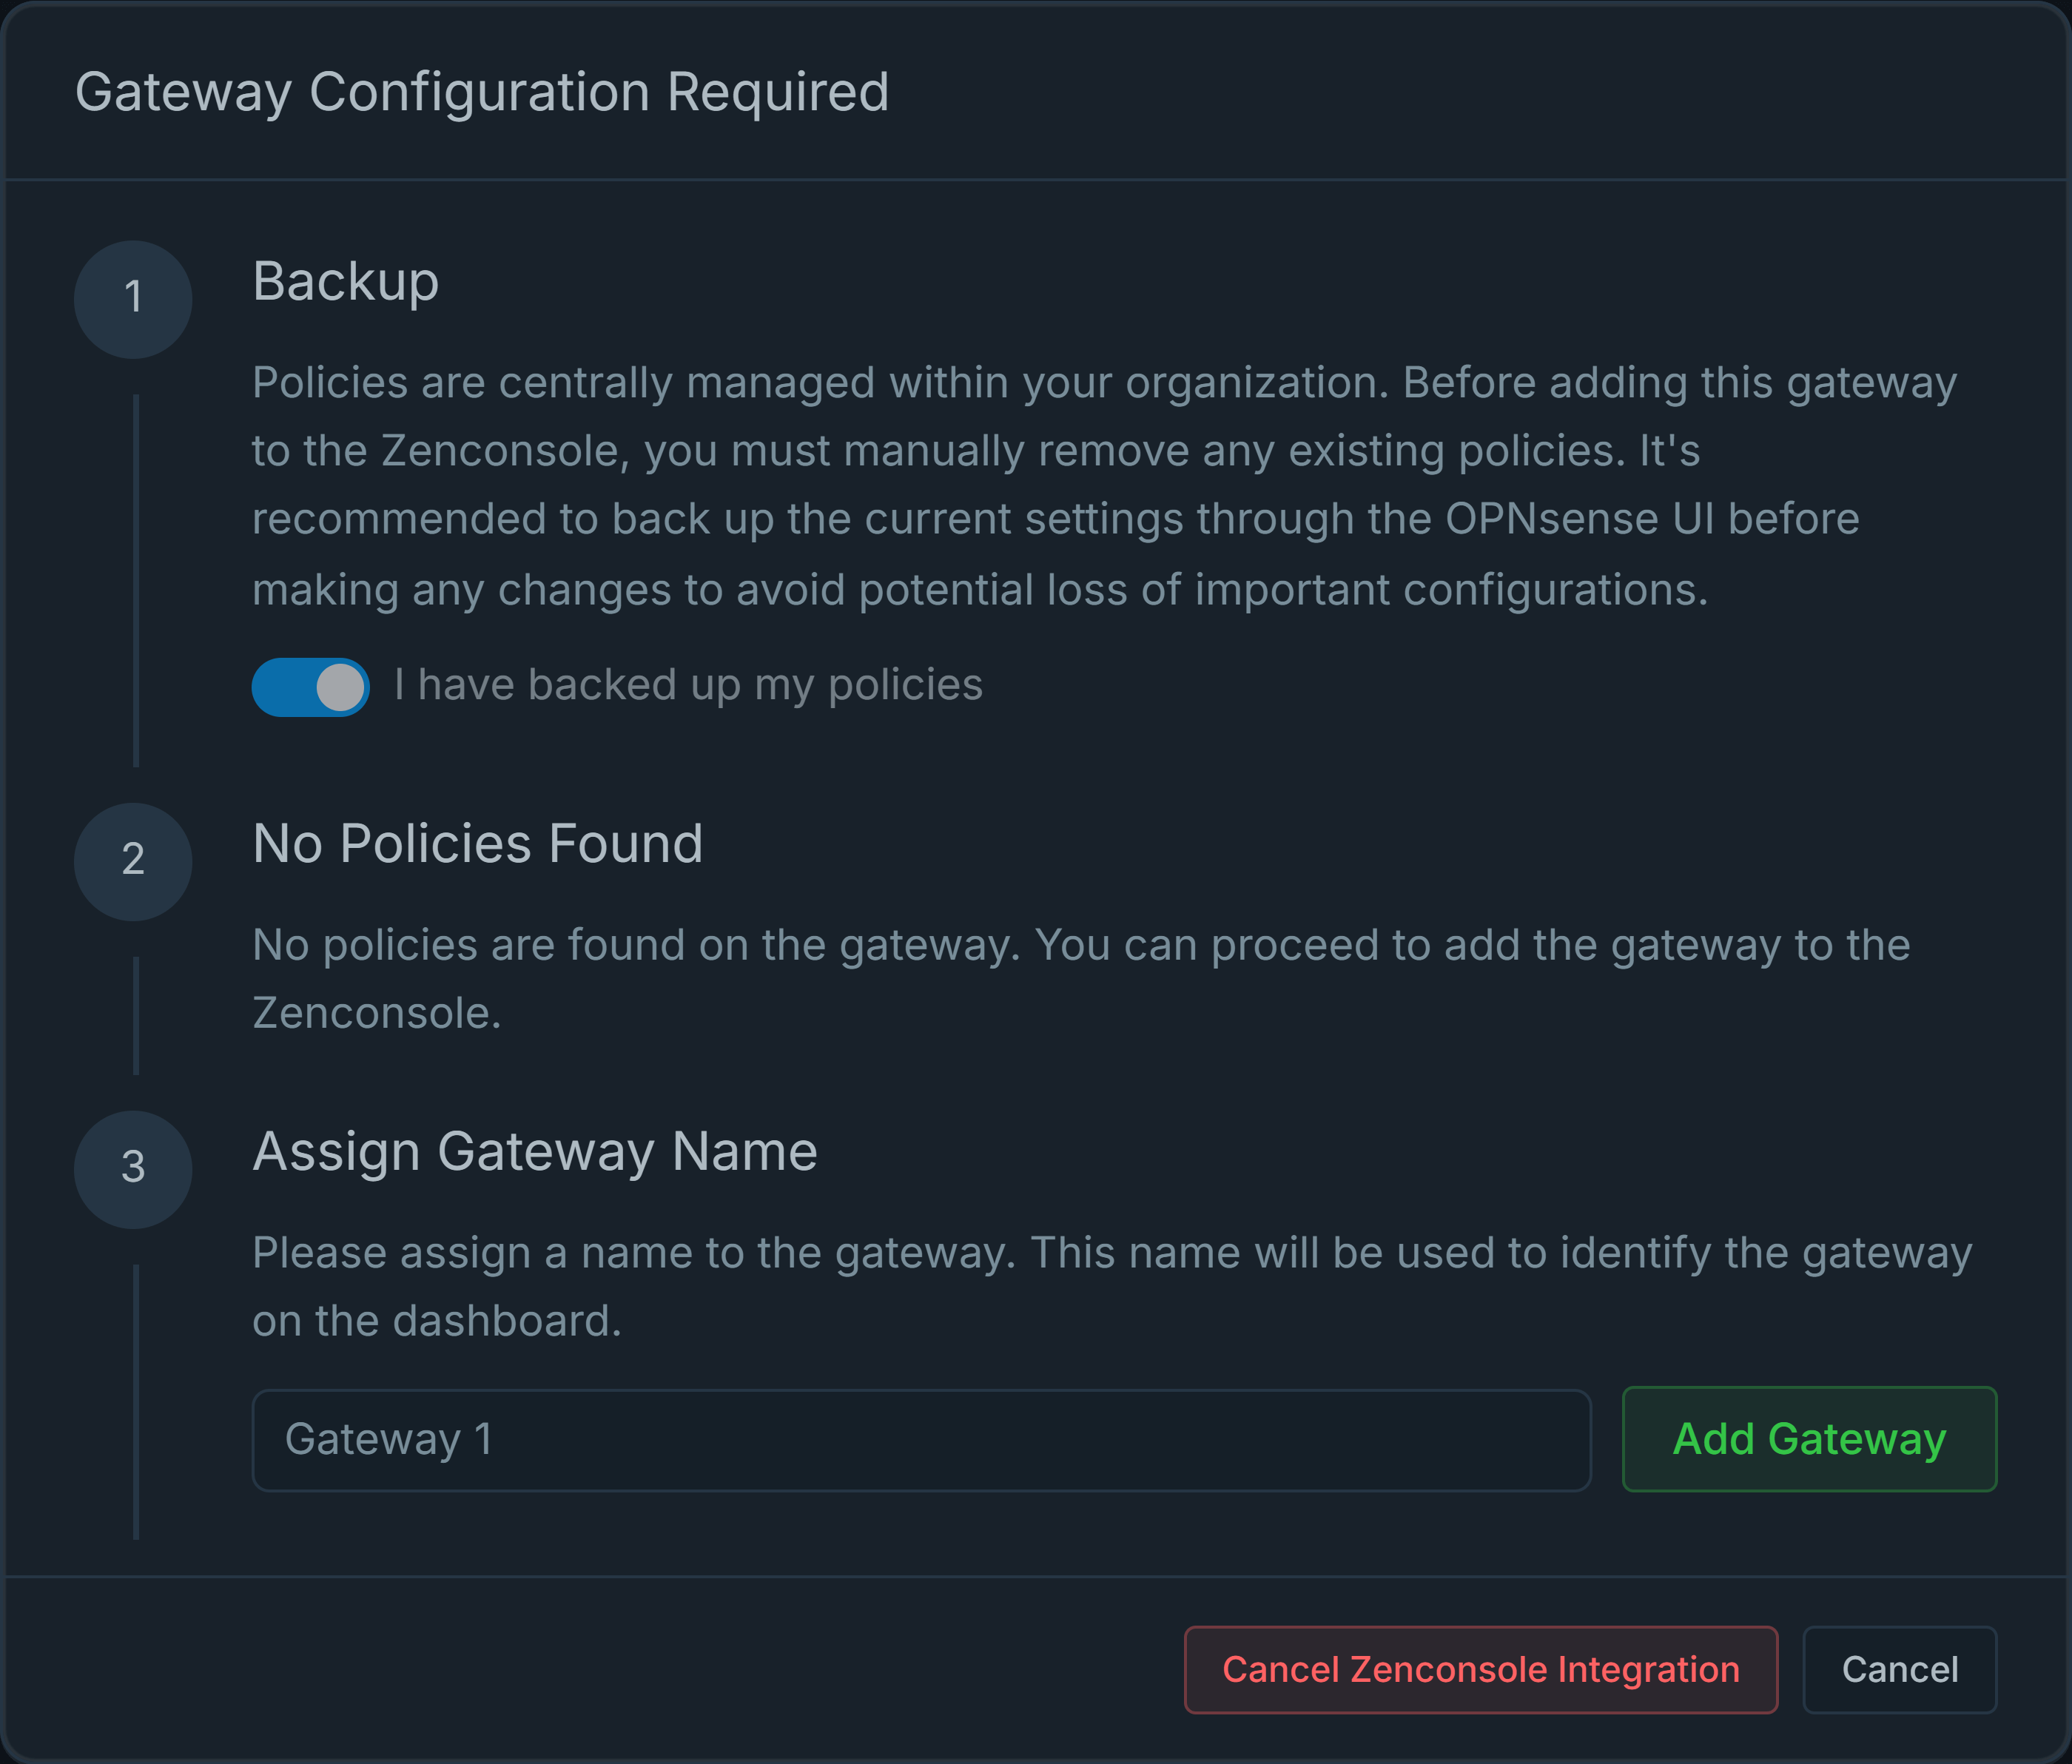
Figure 4. Adding Gateway
-
Click Close.
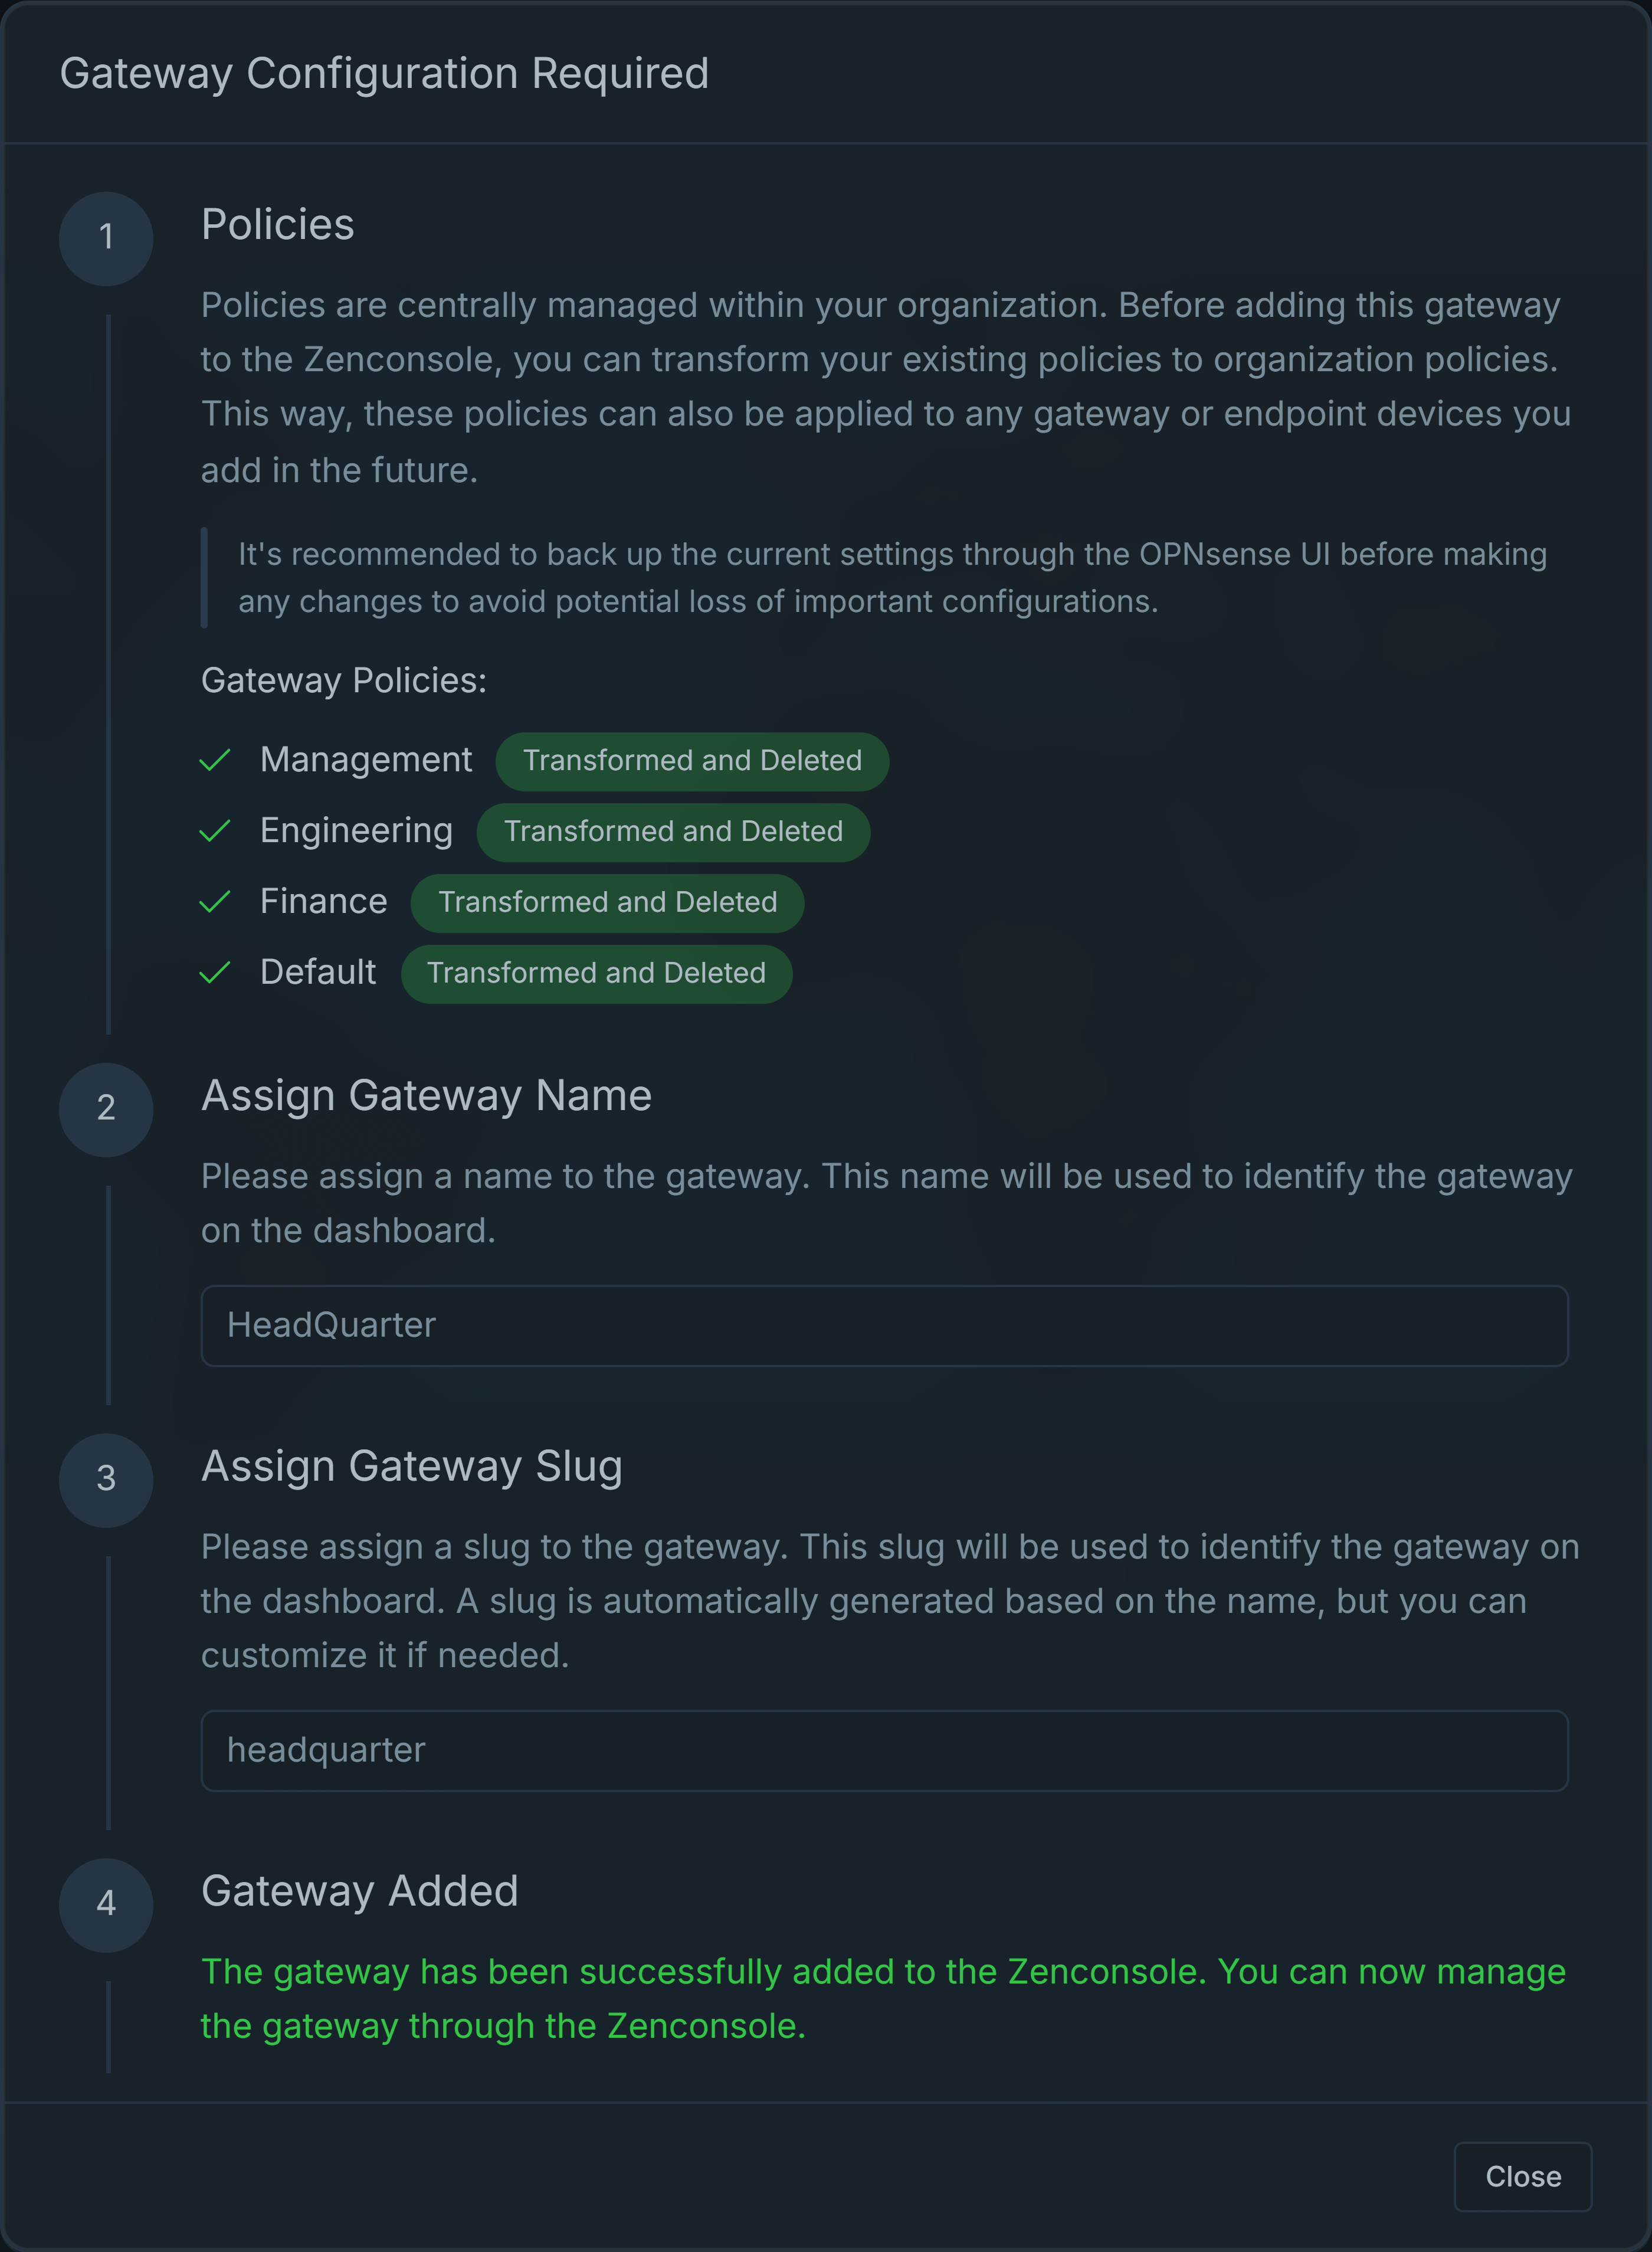
Figure 5. Gateway added succesfully
If you try to add your OPNsense node to your organization as a gateway before completing its initial configuration, you will be redirected to the Zenconsole initial configuration wizard. Click Add Firewall button. This will launch the Firewall Configuration page on Zenconsole.
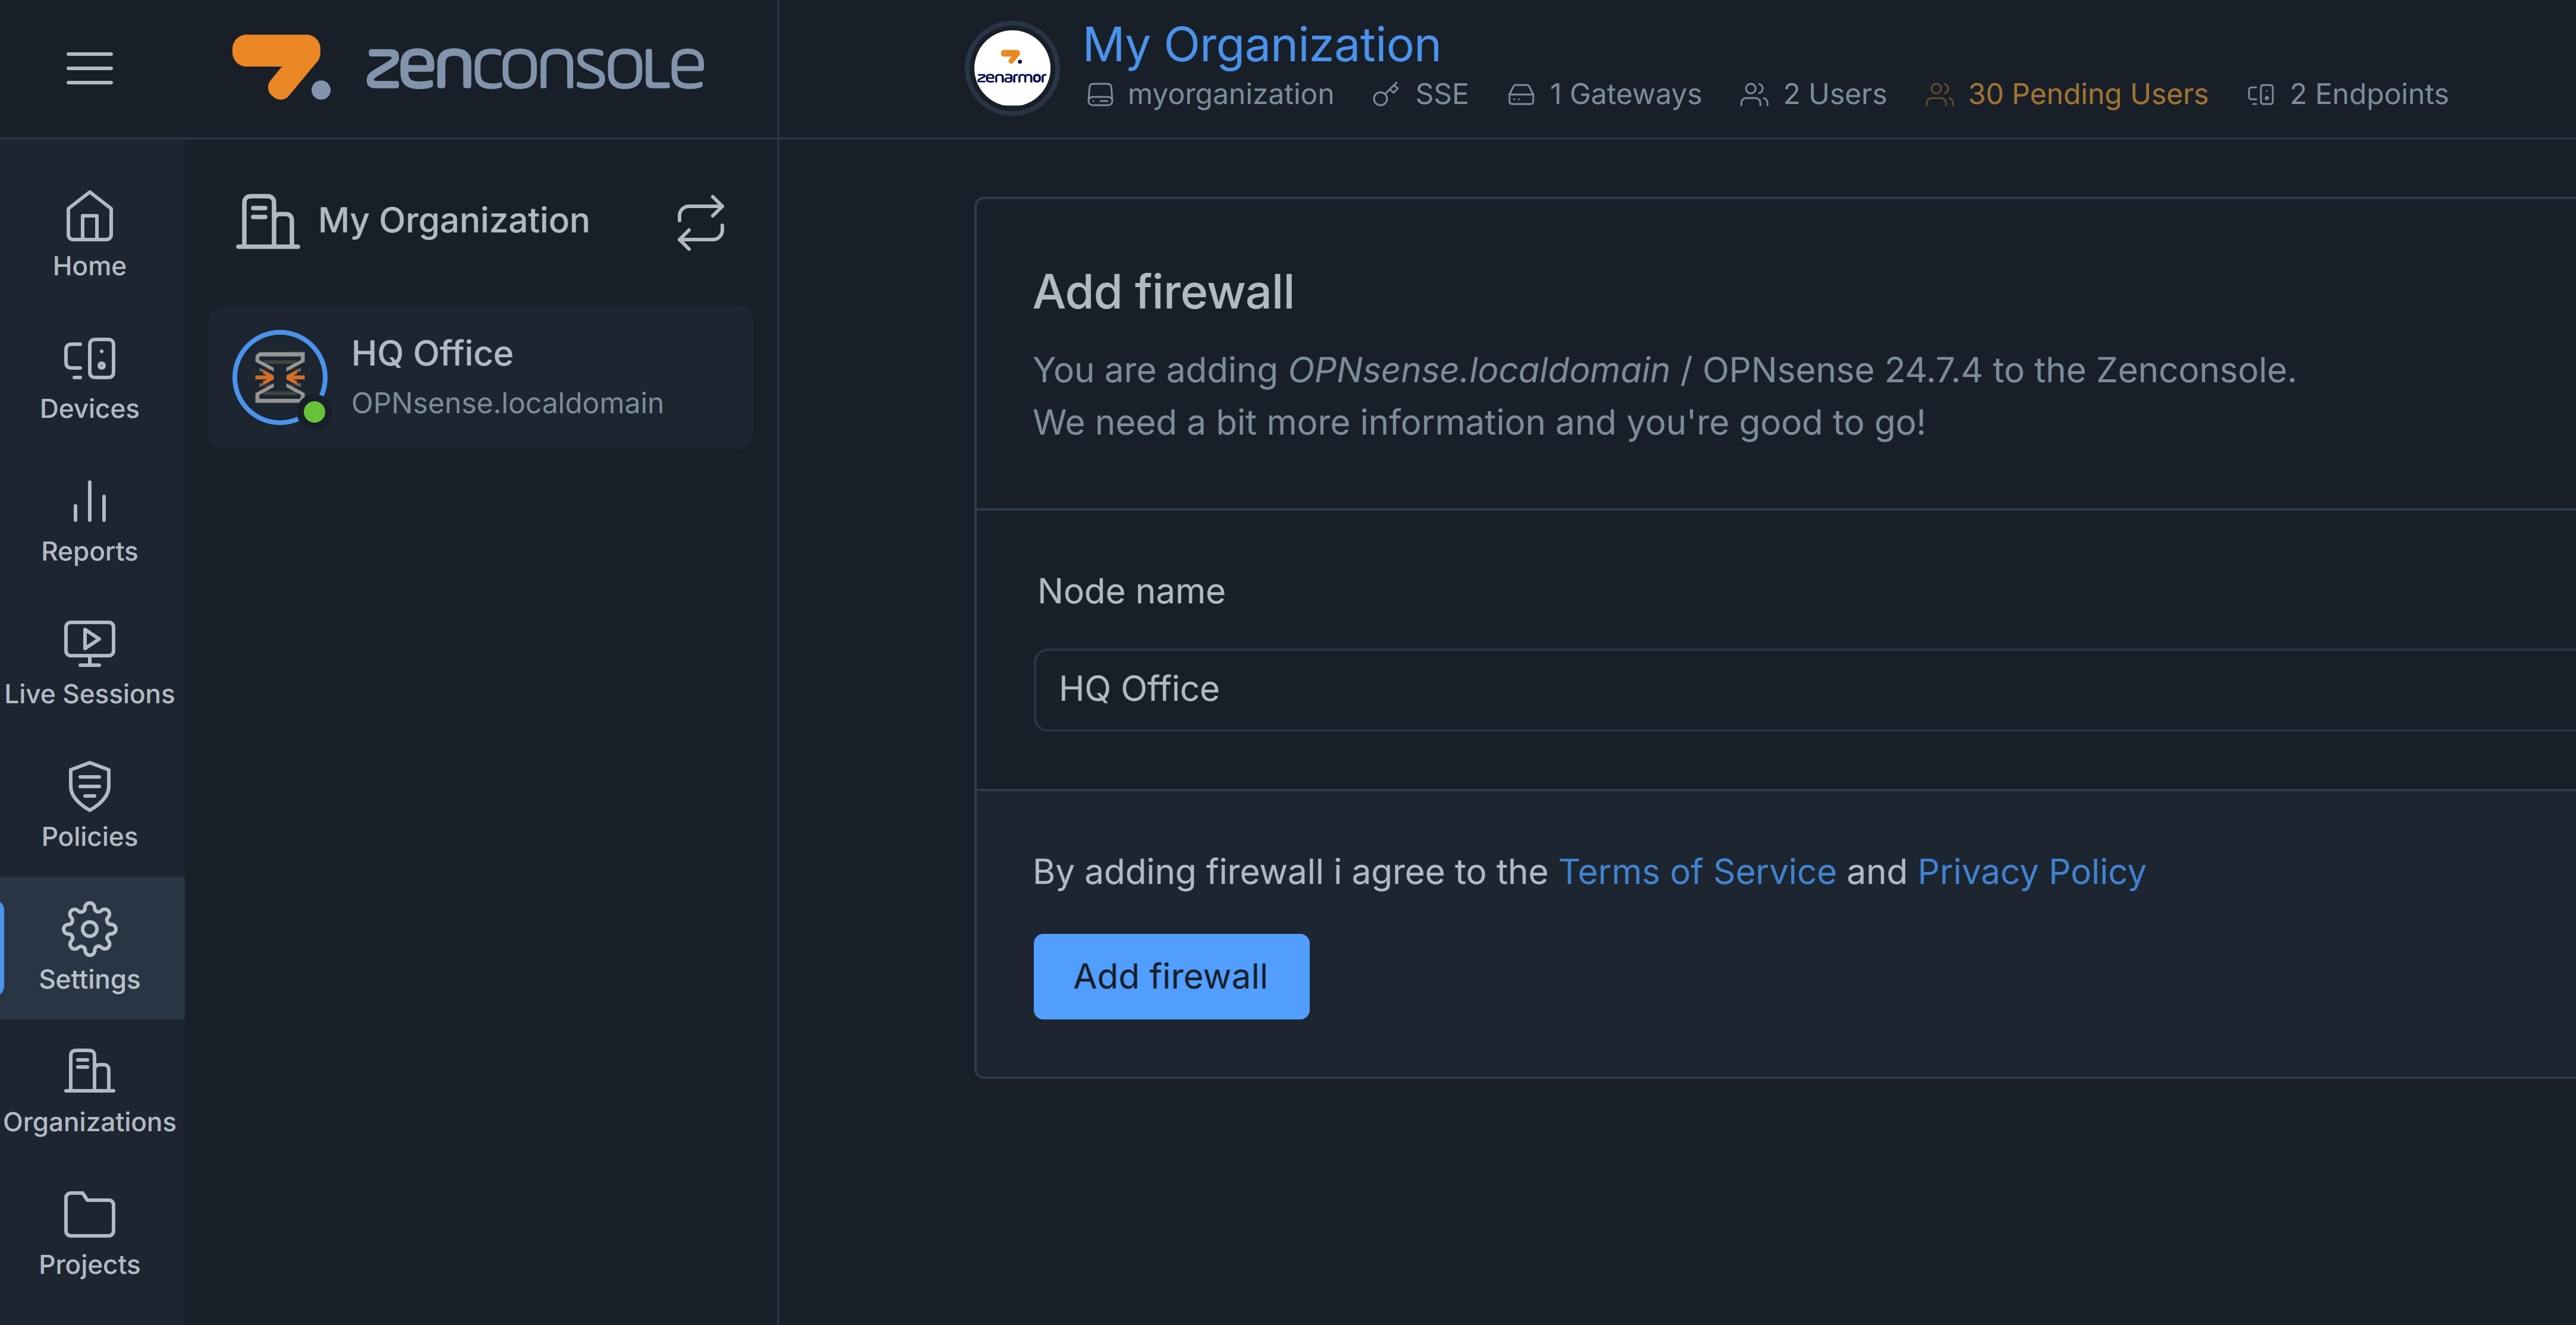
Figure 6. Adding Firewall
You may make configuration changes if you need and complete the initial configuration steps.
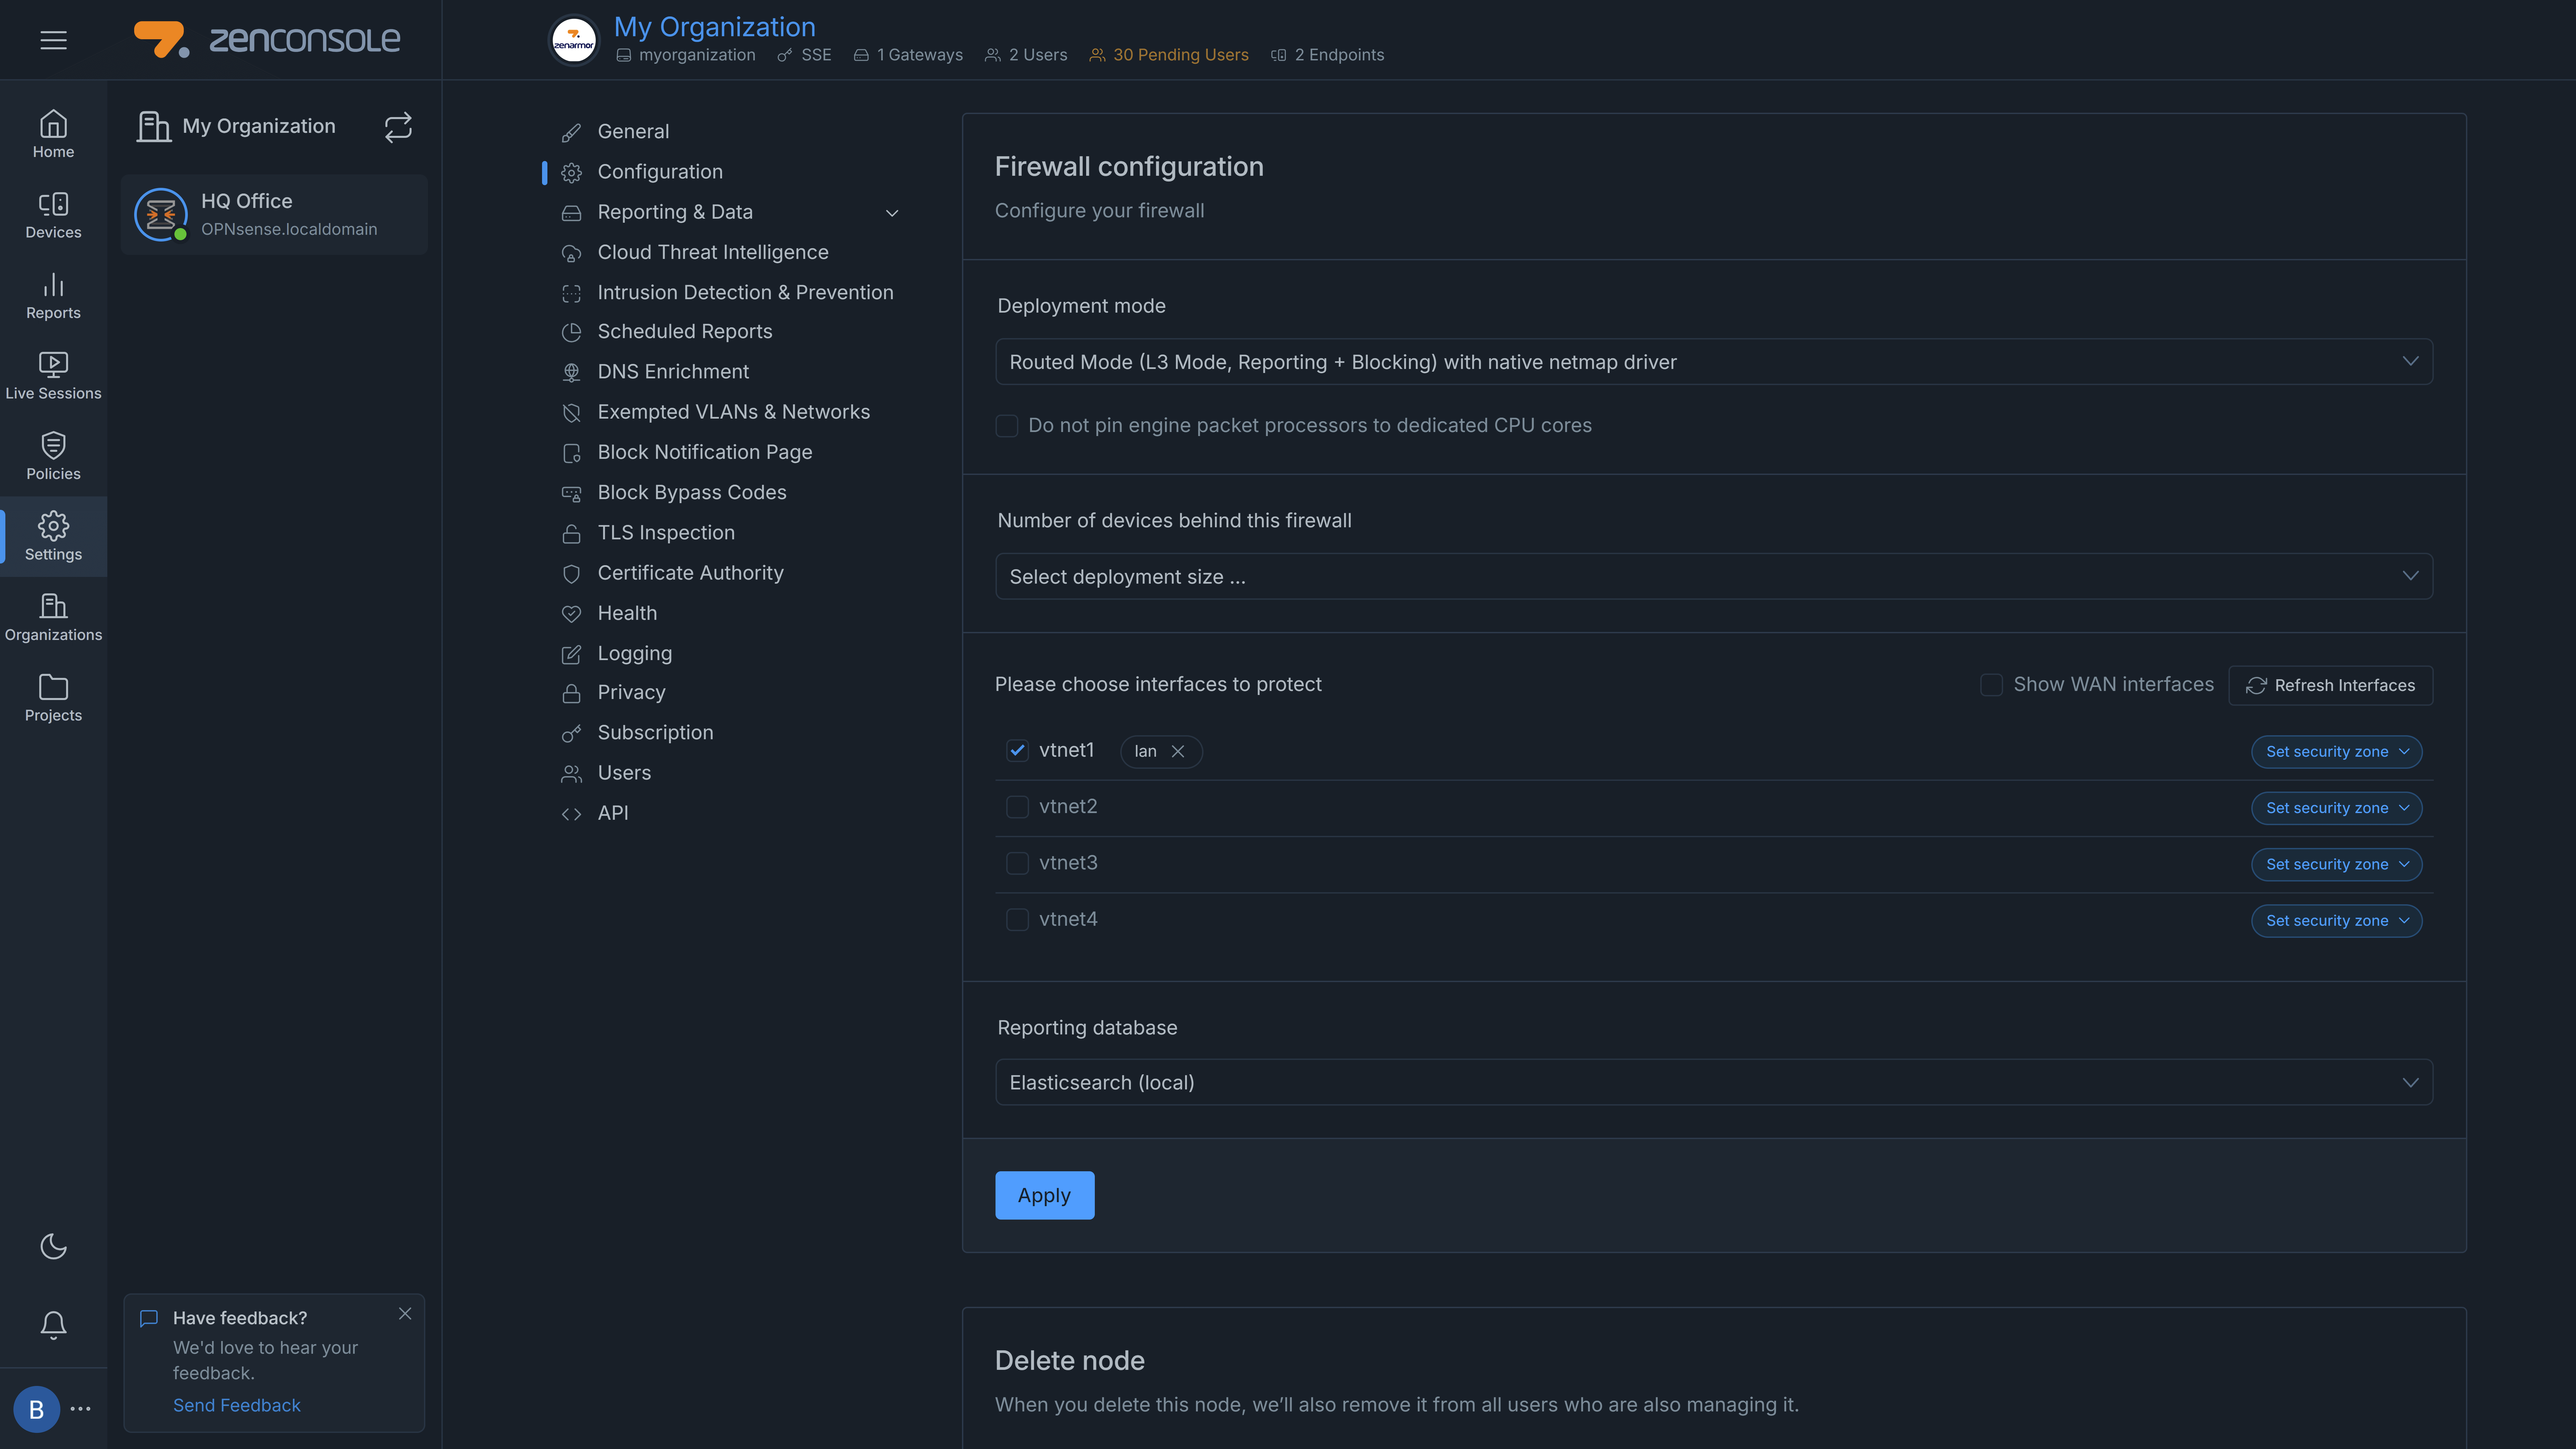
Figure 7. Initial firewall configuration on Zenconsole