How to Install WireGuard on FreeBSD?
In this tutorial, we'll show you how to install and configure the WireGuard VPN service on a FreeBSD 13 server. The client can be either your own computer or a smartphone. The first thing we'll do is set up and install WireGuard on FreeBSD 13 as a VPN server. Finally, we'll set up WireGuard as a client on both a Ubuntu Desktop PC and an Android smartphone. The FreeBSD 13 server will handle the client's internet traffic.

Figure 1. WireGuard P2P VPN Topology (WireGuard FreeBSD Server and Linux, Android Clients)
In this image, you can see what the WireGuard P2P VPN Topology looks like. It has a FreeBSD 13 server and Ubuntu, and Android clients.
This configuration may protect you against Man in the Middle attacks and offer you anonymity when browsing the web. Additionally, you may use this WireGuard setup to securely access your corporate network from anywhere around the globe.
It is highly advised that you install Zenarmor on your WireGuard VPN server to increase the security of your network. By setting the Zenarmor, and implementing web filtering and application control, you may prevent security risks from entering your WireGuard tunnel interface.
Configuring WireGuard is a breeze. To utilize the WireGuard VPN tunnel, just follow the five major procedures outlined below:
-
Update FreeBSD
-
Install WireGuard on both the server and the clients.
-
Create cryptographic key pairs (public and private) for both the server and the clients.
-
Configure both the server and client's WireGuard tunnel interfaces.
-
Enable WireGuard Service
Configure your WireGuard VPN server's firewall rules
Configure both the server and client to use WireGuard tunnel interfaces.
All below given commands to be executed directly as a root user on FreeBSD.
1. Update FreeBSD
Before you begin installing WireGuard, make sure your system is up to date and has already installed the required packages.
1.1. For fetching and installing binary updates to your FreeBSD run the following command:
freebsd-update fetch install
1.2. Run the following command to update the repositories:
pkg update
The following is an example of a similar output:
Updating FreeBSD repository catalogue...

FreeBSD repository is up to date.

All repositories are up to date.
1.3. Run the following command to upgrade your FreeBSD node:
pkg upgrade
A similar output would look as follows:
Updating FreeBSD repository catalogue...

FreeBSD repository is up to date.

All repositories are up to date.

Checking for upgrades (1 candidates): 100%

Processing candidates (1 candidates): 100%

Checking integrity... done (0 conflicting)

Your packages are up to date.
2. Installing a Wireguard VPN on a FreeBSD
You can easily install WireGuard itself and all of its dependencies by following the steps given below:
2.1. To view the available WireGuard packages run the following command:
pkg search wireguard
You should see something like this as the result:
wireguard-2,1 Meta-port for Wireguard

wireguard-go-0.0.20211016,1 WireGuard implementation in Go

wireguard-kmod-0.0.20211105 WireGuard implementation for the FreeBSD kernel

wireguard-tools-1.0.20210914_1 Fast, modern and secure VPN Tunnel

wireguard-tools-lite-1.0.20210914_1 Fast, modern and secure VPN Tunnel (lite flavor)
2.2. To install the WireGuard package and WireGuard tools run the next command:
pkg install wireguard wireguard-tools
This command will install the WireGuard kernel module on your FreeBSD system. Since this package is new, it should be considered "experimental".
If you have difficulties with it, you may revert to wireguard-go by uninstalling net/wireguard-kmod and installing net/wireguard-go. If the kernel module is available, the userland tools wg-quick(8) and wg(8) will attempt to utilize kernel support. Otherwise, they will fall back to wireguard-go automatically. Config files are completely compatible.
2.3. Optionally, to install QR Code library run the following:
pkg install libqrencode
You should see the following output:
Updating FreeBSD repository catalogue...

FreeBSD repository is up to date.

All repositories are up to date.

The following 2 package(s) will be affected (of 0 checked):


New packages to be INSTALLED:

libqrencode: 4.1.1

png: 1.6.37_1


Number of packages to be installed: 2


The process will require 1 MiB more space.

340 KiB to be downloaded.


Proceed with this action? [y/N]: y

[1/2] Fetching libqrencode-4.1.1.pkg: 100% 49 KiB 49.9kB/s 00:01

[2/2] Fetching png-1.6.37_1.pkg: 100% 292 KiB 298.8kB/s 00:01

Checking integrity... done (0 conflicting)

[1/2] Installing png-1.6.37_1...

[1/2] Extracting png-1.6.37_1: 100%

[2/2] Installing libqrencode-4.1.1...

[2/2] Extracting libqrencode-4.1.1: 100%
3. Generating keys for the WireGuard VPN server and client
One of the best things about the WireGuard is that it is built on top-of-the-line cryptographic primitives. A pair of cryptographic keys are used to encrypt your connection and make it safe. Each peer must have their own private and public keys in order for communication to be safe both ways. WireGuard requires that each server and client produce their own key pair and then exchange public keys in order to function.
3.1. Run the following commands on the FreeBSD server to create a public/private key pair.
cd /usr/local/etc/wireguard/
umask 077
wg genkey | tee /usr/local/etc/wireguard/server_private.key | wg pubkey | tee /usr/local/etc/wireguard/server_public.key
This will save both the private and public keys to the /usr/local/etc/wireguard directory.
3.2. You can view the contents of the WireGuard key files with cat or less.
cat /usr/local/etc/wireguard/server_private.key
The private key should never be shared with anyone and should always be kept secure.
cat /usr/local/etc/wireguard/server_public.key
Please note down the key pair which will be used for updating the WireGuard configuration file in the following steps.
3.3. We will create a private and public key pair for each of our clients, but we will also construct a preshared key pair this time around as well. You may use this optional key to boost the degree of security in your VPN tunnel, but it must be unique for each peer pair in order to be effective. To generate the key pairs for VPN clients, run the following commands:
wg genkey | tee /usr/local/etc/wireguard/ubuntu_private.key | wg pubkey | tee /usr/local/etc/wireguard/ubuntu_public.key
wg genpsk > ubuntu_preshared.key
wg genkey | tee /usr/local/etc/wireguard/android_private.key | wg pubkey | tee /usr/local/etc/wireguard/android_public.key
wg genpsk > android_preshared.key
4. Creating the wg0.conf configuration file
You can configure the WireGuard tunnel device in two different ways:
-
using the
wgcommand on CLI -
creating the configuration file with a text editor
In this tutorial, we will use the last method.
Let's start to configure the WireGuard server by creating a new configuration file called wg0.conf in the /usr/local/etc/wireguard folder and add the configuration line given below.
4.1. Firstly, open wg0.conf file by using vi editor.
vi /usr/local/etc/wireguard/wg0.conf
You can name the WireGuard interface as you wish. But, it is recommended to use something like wg0.
4.2. Add the following directives to the server configuration file.
[Interface]

Address = 10.96.100.1/32 # address the server will bind to

ListenPort = 51820 # listener port

PrivateKey = <contents-of-server-privatekey> // 0MGukqgbg93xnsvEt6k2kv4Z7rPMYZJJRiGK3luzyUI=


[Peer]

AllowedIPs = 10.96.100.2/32

PreSharedKey = your-preshared-client-key // Zjs5LuEWl+jHu29sHowGZ24tievBkHhpdmllYujoUUs=

PublicKey = <contents-of-client-publickey> //rxMHhoCX/zzghCUBWTQ9bboTWyf0Zgur2d6lBunDJ2k=
-
PrivateKey: The private key of VPN server, which can be found in the /usr/local/etc/wireguard/server_private.key file on the server.
-
Address: defines the private IPv4 and IPv6 addresses for the WireGuard server. Each peer in the VPN network should have a unique IP address.
-
ListenPort: specifies which port WireGuard will use for incoming connections. can be freely selected from the high ports range. If no port is specified, it is 51820/UDP by default.
4.3. Then save and close the file.
4.4. You can follow the instructions given below to create the client configuration file. Use a command-line text editor like nano to create a WireGuard configuration file for your Ubuntu VPN client.
nano wg_ubuntu.conf
4.5. Copy the following text and paste it to your configuration file. You need to use your own client private key and server public key.
[Interface]

PrivateKey = your-private-client-key-here

//EAW8ndmu8aMZDwHsK4Y9s6oXzVEBVSSklhrSPFDiD2o=

Address = 10.96.100.2/32

DNS = 8.8.8.8 # optional, useful to avoid DNS leaks

[Peer]

PublicKey = your-public-server-key-here

// 5ESY2ZP0SptM/eVrv5/1xdJYNxhrLnqJ0BsOnru0SwE=

PreSharedKey = your-preshared-client-key-here

// Zjs5LuEWl+jHu29sHowGZ24tievBkHhpdmllYujoUUs=

AllowedIPs = 0.0.0.0/0 # Internet

Endpoint = your-external-ip-or-host:51820


## Keep connection alive ##

PersistentKeepalive = 30
Where:
-
Address: Specify the private IP address of the VPN client.
-
DNS: specify 8.8.8.8 (VPN server) as the DNS server. For redundancy, you can also specify multiple DNS servers.
-
PrivateKey: The client's private key, which can be found in the /usr/local/etc/wireguard/client_private.key file on the client computer.
-
PublicKey: The server's public key, which can be found in the /usr/local/etc/wireguard/server_public.key file on the server.
-
AllowedIPs: 0.0.0.0/0 represents the whole Internet, which means all traffic to the Internet should be routed via the VPN. If you want to only use WireGuard for specific destinations, set their IP address ranges in the list separated by a comma.
-
Endpoint: The public/WAN IP address and port number of the VPN server. Replace 22.33.44.55 with your server's real public IP address.
-
PersistentKeepalive: Send an authenticated empty packet to the peer every 25 seconds to keep the connection alive. If PersistentKeepalive isn't enabled, the VPN server might not be able to ping the VPN client.
Wireguard is not a chatty protocol. If the client does not transmit any traffic over an extended period of time and does not have a stable address, the server may 'forget' how to find the client.
It is possible that the client is connected to a NAT network. Wireguard supports this scenario through the persistent-keepalive configuration option. Although this option is disabled by default, it enables our client to receive packets from the server when it is not actively transmitting data.
While RFC4787 suggests a two-minute delay for NATs and middleboxes, contemporary UDP protocols (such as QUIC) advocate delivering packets every 30 seconds to avoid middleboxes losing state during UDP flows.
If you want the tunnel connection to be maintained, you must use the persistent-keepalive parameter:
4.6. Save and close the file.
4.7. Android VPN clients, just repeat the same steps 4.4.-4.6 using a different private IP address, such as 10.96.100.3/32, and, configuration file name, like wg_android.conf.
4.8. Optionally, generate a QR code with the following command as root for android client.:
qrencode -t ansi < wg_client.conf
It will generate a QR code image like this:
Figure 2. WireGuard QR code for Android VPN Client
4.9. You can send client configuration files to your clients. You can also take a screenshot of the QR code and securely send it to your android client.
5. Enable WireGuard Service
We're ready to start the server now that we've completed the configuration. To enable WireGuard service on your FreeBSD server follow the steps given below:
5.1. Enable WireGuard by running the following command:
service wireguard enable
The output should be like this:
wireguard enabled in /etc/rc.conf
5.2. To set the WireGuard interface, run the following command:
sysrc wireguard_interfaces="wg0"
The output should be like this:
wireguard_interfaces: -> wg0
5.3. Start the WireGuard VPN server on your FreeBSD server by running the next command: and client
service wireguard start
The output should be like this:
[#] ifconfig wg create name wg0

[#] wg setconf wg0 /dev/stdin

[#] ifconfig wg0 inet 10.96.100.1/32 alias

[#] ifconfig wg0 mtu 1420

[#] ifconfig wg0 up

[#] route -q -n add -inet 10.96.100.2/32 -interface wg0

[+] Backgrounding route monitor
5.4. Check the VPN service by running the following command:
service wireguard status
This is what the final result should look like:
interface: wg0
public key: 5ESY2ZP0SptM/eVrv5/1xdJYNxhrLnqJ0BsOnru0SwE=
private key: (hidden)
listening port: 51820

peer: rxMHhoCX/zzghCUBWTQ9bboTWyf0Zgur2d6lBunDJ2k=
preshared key: (hidden)
allowed ips: 10.96.100.2/32
6. How To Set Up WireGuard Firewall Rules on FreeBSD
You need to establish a firewall to enable WireGuard clients to access your WireGuard server as well as any other services that you choose, such as DNS and SSH. Configuring a firewall will prevent any unauthorized connections from reaching your server and will keep it safe. You may proceed by following the procedures outlined below:
6.1. Packet forwarding and NAT must be enabled on the FreeBSD server if we wish to route and forward our VPN client packets. Modifying /etc/rc.conf enables packet forwarding:
sysrc gateway_enable="YES"
6.2. In order to set up NAT, we must first set up a firewall, which provides a chance to fortify the server. Our goal here is to allow all outgoing traffic from our server, including NAT traffic from the wireguard subnet, as well as incoming SSH connections. Run the following commands on FreeBSD CLI:
sysrc pf_enable="YES"
sysrc pflog_enable="YES"
sysrc pf_rules="/etc/pf.conf"
6.3. Update your firewall ruleset (/etc/pf.conf) as given below:
wireguard_clients="10.96.100.0/24"
wanint="vtnet0"
wg_ports="{51820}"
set skip on lo0
nat on $wanint inet from $wireguard_clients to any -> $wanint
pass in on $wanint proto udp from any to $wanint port $wg_ports
pass in on $wanint proto tcp from any to $wanint port 22 keep state
pass out quick
pass in on wg0 from any to any
6.4. Start the firewall services by running the following commands:
service pf start
service pflog start
7. WireGuard Setup as a VPN Client on Ubuntu Desktop
After you've configured your WireGuard server, you'll need to set up your client device. They provide software for the majority of operating systems that enables you to simply connect your Windows, Linux, macOS, and Android or iOS devices.
7.1. Prior to beginning the installation of WireGuard on your Ubuntu desktop, ensure that your system is up to date and that the necessary packages have been installed. Update your local package index by running the following command:
sudo apt update && sudo apt upgrade -y
7.2. Run the following command to install WireGuard itself and all of its dependencies:
sudo apt install wireguard wireguard-tools
7.3. Copy the client configuration file, wg_ubuntu.conf, created above as /etc/wireguard/wg0.conf on Ubuntu desktop.
- Run the following command the bring up the interface and start the connection:
sudo wg-quick up wg0

[#] ip link add wg0 type wireguard
[#] wg setconf wg0 /dev/fd/63
[#] ip -4 address add 10.10.10.2/24 dev wg0
[#] ip link set mtu 1420 up dev wg0
[#] wg set wg0 fwmark 51820
[#] ip -4 route add 0.0.0.0/0 dev wg0 table 51820
[#] ip -4 rule add not fwmark 51820 table 51820
[#] ip -4 rule add table main suppress_prefixlength 0
[#] sysctl -q net.ipv4.conf.all.src_valid_mark=1
[#] iptables-restore -n
7.4. You can also use the system command to start WireGuard as a service.
sudo systemctl start wg-quick@wg0
You can enable auto-start at system boot time.
sudo systemctl enable [email protected]
7.5. You can check its status:
systemctl status [email protected]
Now you should be connected to the FreeBSD VPN server, and the traffic from your client machine should be routed through it. You can check the connection with:
sudo wg
interface: wg0
public key: LxHDQokGy422z1byrSC6sO7HRo13KudzgE4w/ycxpCc=
private key: (hidden)
listening port: 51229
fwmark: 0xca6c
peer: hRhduFU4Jl2VlTNtYN4IXgqnw5DN6c4pKxAIvpr9+Do=
endpoint: Server-WAN-IP:51820
allowed ips: 0.0.0.0/0
latest handshake: 2 minutes, 16 seconds ago
transfer: 248.02 KiB received, 189.02 KiB sent
persistent keepalive: every 25 seconds
7.6. When you want to disconnect, use either of the following commands depending on which method you used to start it.
sudo wg-quick down wg0
or
sudo systemctl stop wg-quick@wg0
WireGuard will then disconnect from the server and remove the related network settings.
8. WireGuard Setup as a VPN Client on an Android Device
You can install WireGuard on an Android client by following the steps below:
8.1. You can get and install the official application from the Google Play Store on your Android device.

Figure 3. Installing WireGuard Android Application from Playstore
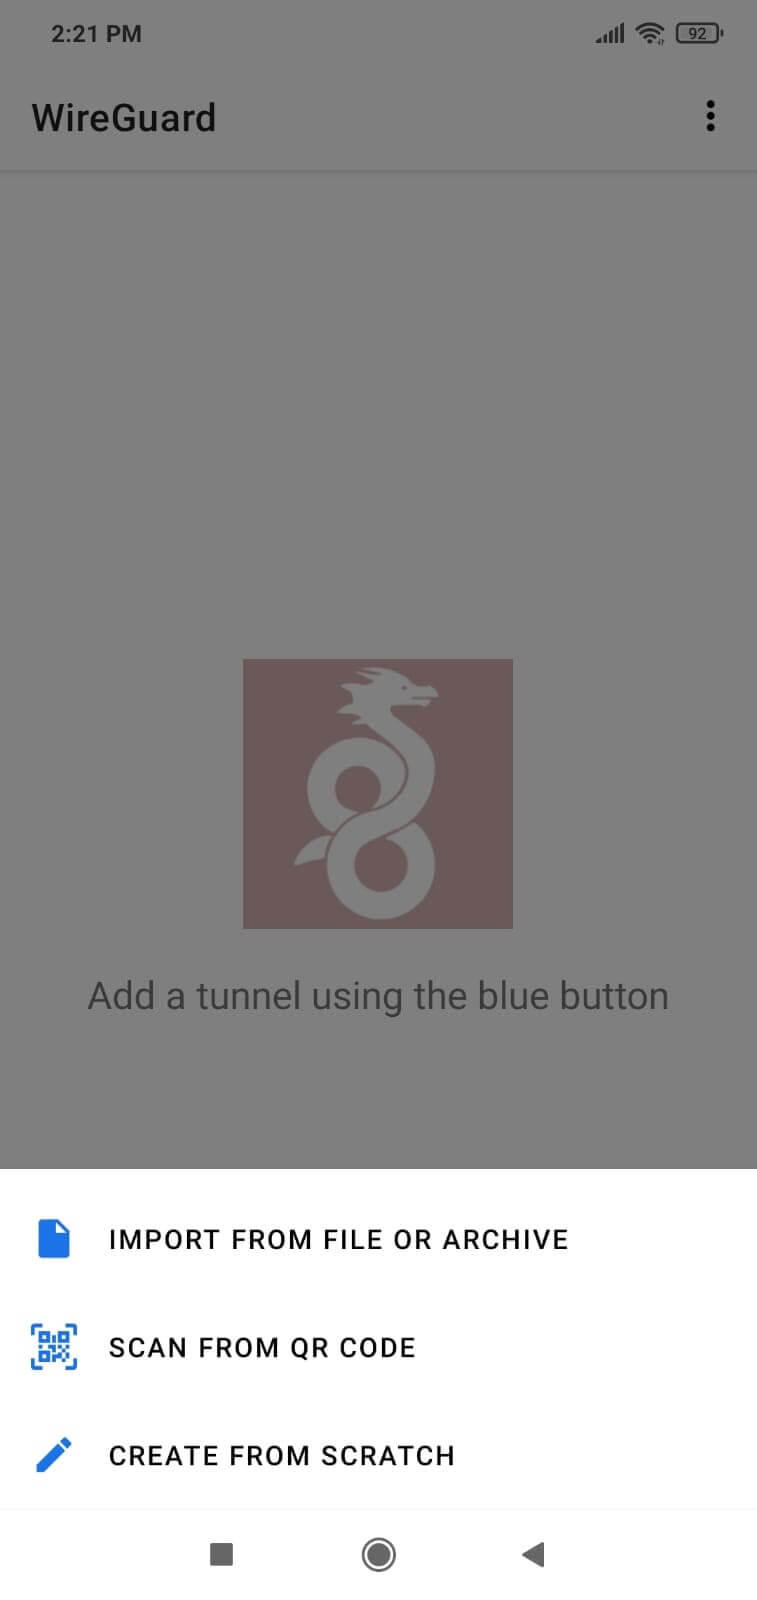
8.2. To add a new configuration file for the VPN tunnel click on the blue button with + icon. This will open a new view on your device to configure the tunnel.

Figure 4. Adding WireGuard tunnel for Android client
8.3. Tab on the Scan From QR Code.

Figure 5. Importing tunnel configuration by scanning QR code
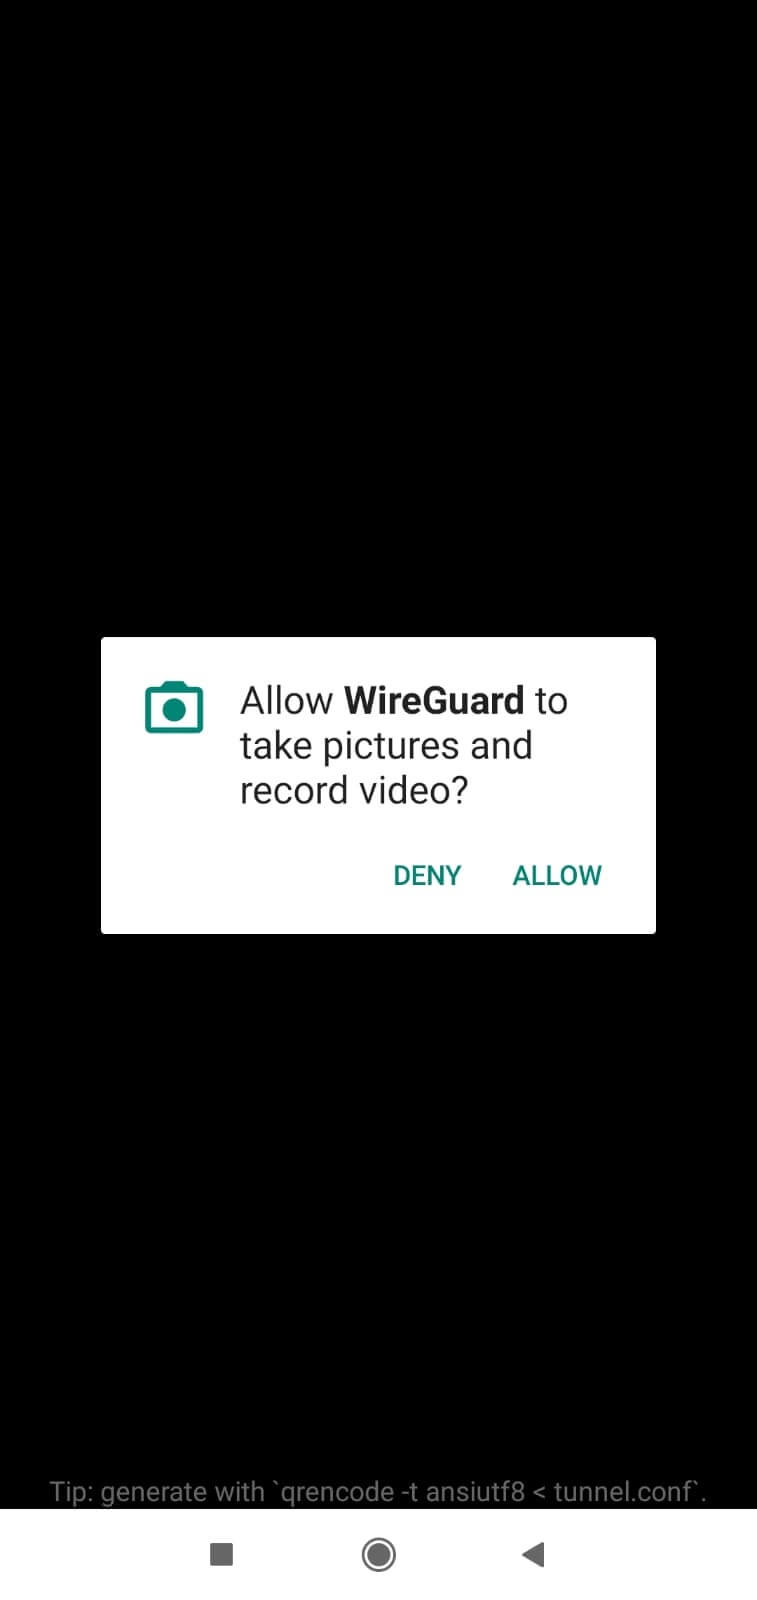
After giving permission for the camera, you can scan your QR code generated above.

Figure 6. Giving permission to WireGuard
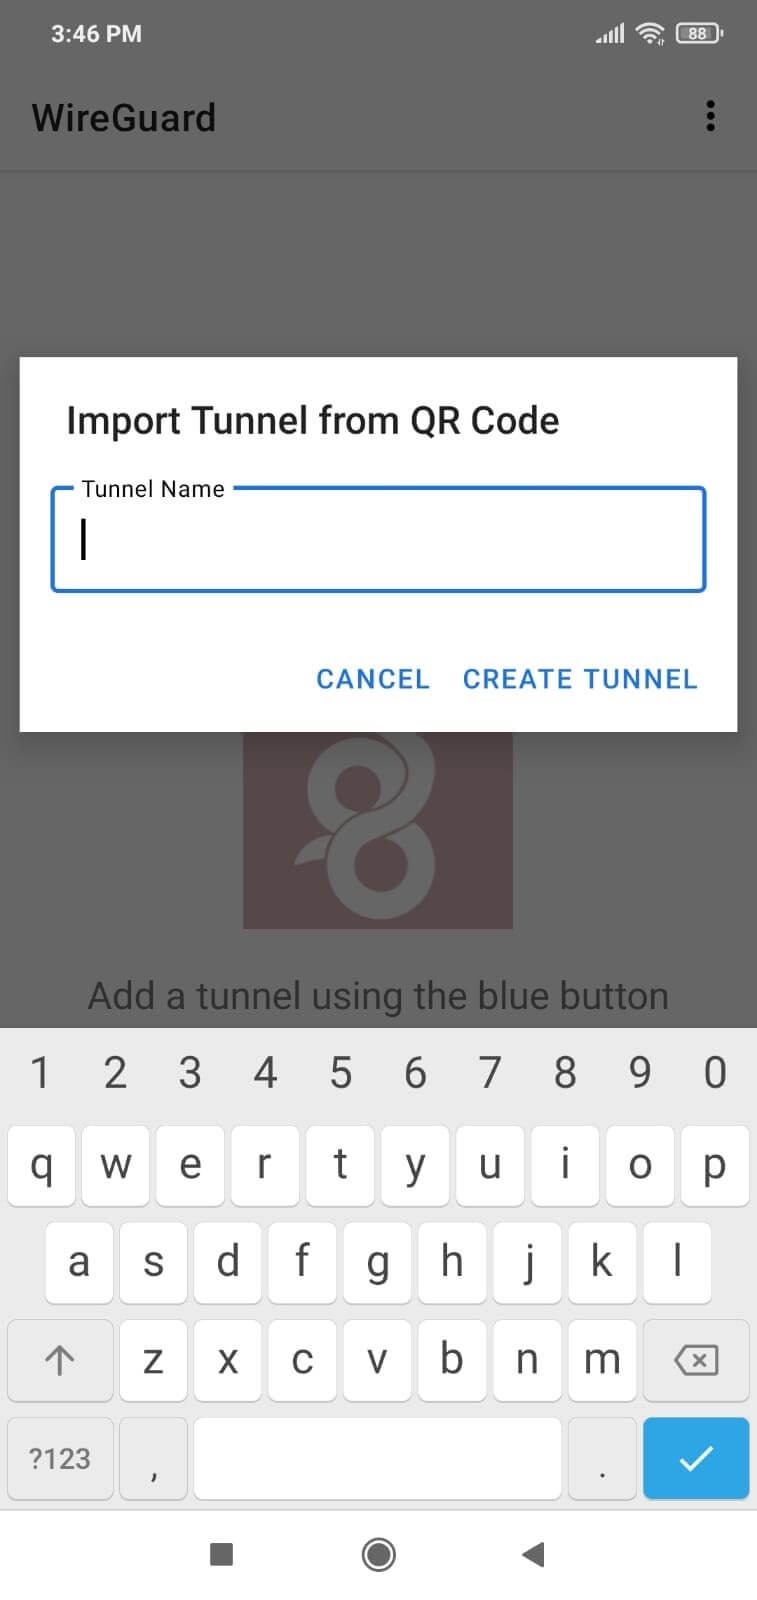
8.4. Enter the name of the VPN tunnel and click on the Create Tunnel button. This will import the WireGuard client configuration from the QR Code.

Figure 7. Naming WireGuard tunnel on Android client
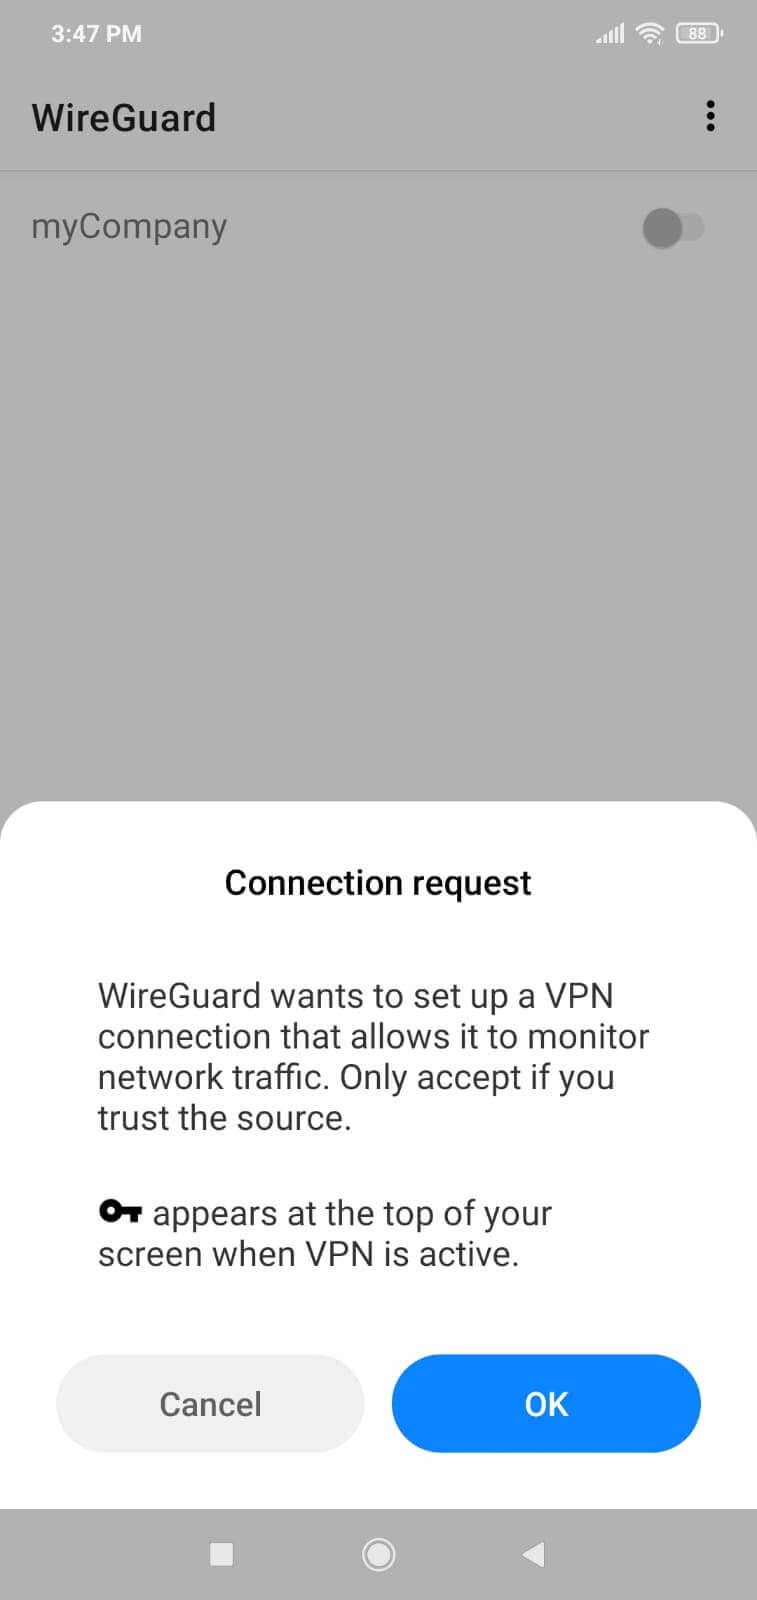
8.5. You'll be prompted to confirm the connection request, tab on OK.

Figure 8. WireGuard connection request on Android client
8.6. You can easily connect your Android device to the VPN server by just launching the WireGuard application and turning it on.

Figure 9. Activating/deactivating WireGuard tunnel on Android client
To disconnect from the WireGuard VPN tunnel, turn off the toggle button next to the VPN connection.
9. Connectivity with WireGuard VPN is tested.
You can test your WireGuard connection by following the instructions given below:
1. Ping Test
You should ping your WireGuard server from the client and vice versa successfuly:
wg-client # ping 10.96.100.1

PING 10.96.100.1 (10.96.100.1): 56 data bytes

64 bytes from 10.96.100.1: icmp_seq=0 ttl=64 time=3.253 ms

64 bytes from 10.96.100.1: icmp_seq=1 ttl=64 time=1.358 ms

64 bytes from 10.96.100.1: icmp_seq=2 ttl=64 time=1.089 ms

64 bytes from 10.96.100.1: icmp_seq=3 ttl=64 time=1.649 ms

^C
sudo wg
The last two lines of the output from running the wg command should be similar to:
latest handshake: 1 minute, 17 seconds ago

transfer: 98.86 KiB received, 43.08 KiB sent
This indicates that you now have a private connection between the server and client. You can also ping the client from the server to verify that the connection works both ways.
2. IP Control
Make sure you get public IPv4/IPv6 address of your VPN end point using the next command on VPN client:
drill TXT +short o-o.myaddr.l.google.com @ns1.google.com
Output:
;; ->>HEADER<<- opcode: QUERY, rcode: NOERROR, id: 51745
;; flags: qr aa rd ; QUERY: 1, ANSWER: 1, AUTHORITY: 0, ADDITIONAL: 0
;; QUESTION SECTION:
;; o-o.myaddr.l.google.com. IN TXT
;; ANSWER SECTION:
o-o.myaddr.l.google.com. 60 IN TXT "22.33.44.55"

;; AUTHORITY SECTION:
;; ADDITIONAL SECTION:
;; Query time: 58 msec
;; SERVER: 216.239.32.10
;; WHEN: Tue Apr 5 14:33:02 2022
;; MSG SIZE rcvd: 64
3. Traceroute Test
You should see the WireGuard Server VPN IP address in the traceroute command output:
traceroute 8.8.8.8
1 10.10.10.1 (10.10.10.1) 0.391 ms 0.348 ms 0.349 ms
2 _gateway (192.168.0.1) 0.641 ms 0.606 ms 0.625 ms
3 * * *


15 * * *
16 142.250.212.20 (142.250.212.20) 27.320 ms 74.125.37.238 (74.125.37.238) 29.852 ms 216.239.49.198 (216.239.49.198) 30.107 ms
17 142.251.52.83 (142.251.52.83) 34.252 ms 34.216 ms 38.622 ms
18 sof02s44-in-f4.1e100.net (142.250.187.100) 38.637 ms 38.542 ms 38.593 ms
What Does Wireguard Do in FreeBSD?
FreeBSD is an operating system that powers contemporary servers, desktop computers, and embedded devices. It has been continuously developed by a vast community for more than thirty years. FreeBSD's powerful networking, security, and storage characteristics have made it the platform of choice for many of the world's most popular websites and embedded networking and storage devices.
WireGuard is a fast and simple way to set up a virtual private network that uses modern cryptography. It's a lot faster than OpenVPN or IPsec, but it also has a smaller codebase that makes it easier to audit and keep up to date.
Following the COVID-19 pandemic, working from home has become more common and is thought to be necessary for most businesses around the world now. But remote work also has a lot of security risks. We recommend that you use the WireGuard protocol and Zenarmor together to make the internet more secure for your coworkers and to keep your company networks and resources more secure, too.
