Configuring Block Notification Page on OPNsense
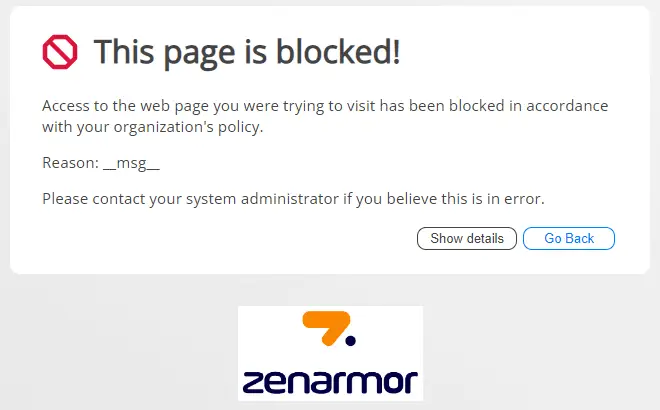
Block Notification Page, also known as "Landing Page", is the page users will be prompted to when traffic is blocked by Zenarmor®. Users are transferred to a secure landing page when accessing potentially dangerous activities according to your guidelines.
With Zenarmor's Customizable Landing Pages, businesses can now provide a safe and secure network environment for all users while maintaining total transparency about company standards.
Custom Landing Pages (CLP) from Zenarmor aid in educating and comforting everyone about potential threats to their organization.
As the owner of a Zenarmor Next-Generation Firewall, you have the ability to create Custom Landing URLs that explain to employees why certain HTTPS pages are blocked due to noncompliance with business laws, potential damage, or unknowing cyber threats to your organization. This capability reduces calls to the helpdesk and user frustration caused by the inability to access specific web content.
Block notification page is only available for web filtering. When a connection is blocked due to your application control rules, you may not view a landing page.
In the Block Notification Page Pane, you can perform the following tasks:
- Upload a new HTML template for a new design landing page
- View, edit, or download the current template
- Download CA certificate
To configure Block Notification Page features, you may follow the steps given below:
-
Click Zenarmor on your OPNsense UI.
-
Click Settings menu on the left-hand sidebar.
-
Click Block Notification Page menu.

Figure 1. Configuring Block Notification Page
Block Notification Page for TLS connections is only available for premium Zenarmor Editions.
In order to show the block notification page, it is necessary to ban clients on your network from utilizing DNS-over-HTTPS (DOH) or DNS-over-TLS (DOT), since the Block Notification Page feature relies on DNS-based filtering.
Typically, users activate DNS over HTTPS or DNS over TLS settings on their web browsers.
To prevent DOH and DOT traffic on your network, you may activate the DNS over HTTPS feature in the Essential Security rules. Additionally, you can enable the DNS over HTTPS and DNS over TLS choices in the Network Management settings under Application Controls.
Block Notification Page is enabled for TLS-encrypted connections by default.
Since your default internal CA is not trusted by the browser, you will get a warning message like Your connection isn't private. Attackers might be trying to steal your information NET::ERR_CERT_AUTHORITY_INVALID for each blocked SSL site you visit.
To solve this issue, you must add the Zenarmor default CA certificate as a trusted root CA certificate in your client OS. Or, users must type "thisisunsafe" to display the landing page.
Copy or Download Block Notification Page Template
For later use or archive purpose, you can download the template.
To download the existing template, you may follow the next steps:
-
Click
...(3-dot) icon at the top right corner of the code editor. This will open a drop-down menu.
Figure 2. Zenarmor - Copying/Downloading Block Notification Page Template
-
Click Download.
-
Select the location on your local filesystem.
-
Click the Save button to save the template.
Edit Block Notification Page
Zenarmor provides you with a simple HTML code editor to edit your block notification page. You may customize the landing page for your company as you wish.
Adding Tag
Zenarmor allows you to add the following tags to the landing page so that you can give more details about the traffic blocks to your users:
- Rule Application
- Rule Username (if applicable)
- Rule Client IP address
- Rule Remote IP address
- Connection Client IP address
- Connection Remote IP address
- Rule Application Category
- Rule Web Category
- Rule Based Alert Message
For example, you may add add Rule Application Category tag to the default landing page template by following the steps given below:
-
Go to the end of the line number 257 and press enter.
-
Add the following lines.
<tr>
        <td style="text-align:right"><b>Application Category:</b></td>
        <td>__appcat__</td>
</tr> -
Click Preview at the top right of the code editor.
-
Click Show Details. You should see the following page.

Figure 3. Zenarmor - Adding Application Category Tag to Landing Page Template
-
Click Save.
Adding Logo
Zenarmor allows you to add a logo to the landing page by following the steps below:
-
Click Add Logo button at the top left corner of the code editor. This will open a file explorer.
-
Select the image file on your local filesystem.
-
Click Open to upload your logo. This will add a line at the end of your HTML file.
-
Click Preview t the top right of the code editor to view your new landing page.
-
Click the Save button to save the template.

Figure 4. Zenarmor - Adding Logo to Landing Page Template
Upload a New Template
To upload a new template you may follow the next steps:
-
Click Add HTML File button at the top of the code editor. This will open a file explorer.
-
Select
template fileon your local filesystem and click Open.
Figure 5. Zenarmor - Uploading Block Notification Page Template
-
You can view existing templates or newly created templates by clicking the
Previewbutton at the top right of the code editor. -
Click the
Savebutton to save the template.
Download CA Certificate
Zenarmor allows you to download internal CA certificate in both PEM and CRT format via Block Notification Page pane.
You may easily download internal CA certificate by following next steps:
-
Click Download CA Certificate button in the Certificate Authority pane at the bottom of the page. This will open a drop-down menu.
-
Select the certificate format that you want to save. This will open a file explorer window.
-
Click Save.

Figure 6. Zenarmor - Downloading CA Certificate
Video on Block Notification Page
Here is a video that will will explain the benefits of the Zenarmor Block Notification Page: