Managing Reporting Database on OPNsense
The Reporting Database Management page on OPNsense allows administrators to manage how reporting data is stored and maintained for the Zenarmor reporting engine.
This page, accessible from the OPNsense web interface under Zenamor → Settings, provides firewall-specific controls for configuring how reporting data is stored, retained, and managed. Administrators can view the active reporting database backend and manage reporting-related data directly from the user interface.
Reporting database management is performed on a per-gateway basis, enabling administrators to optimize reporting behavior based on network size, traffic volume, and available hardware resources. Within OPNsense, these settings are managed through the Zenarmor plugin interface, providing clear and structured controls for reporting database management.
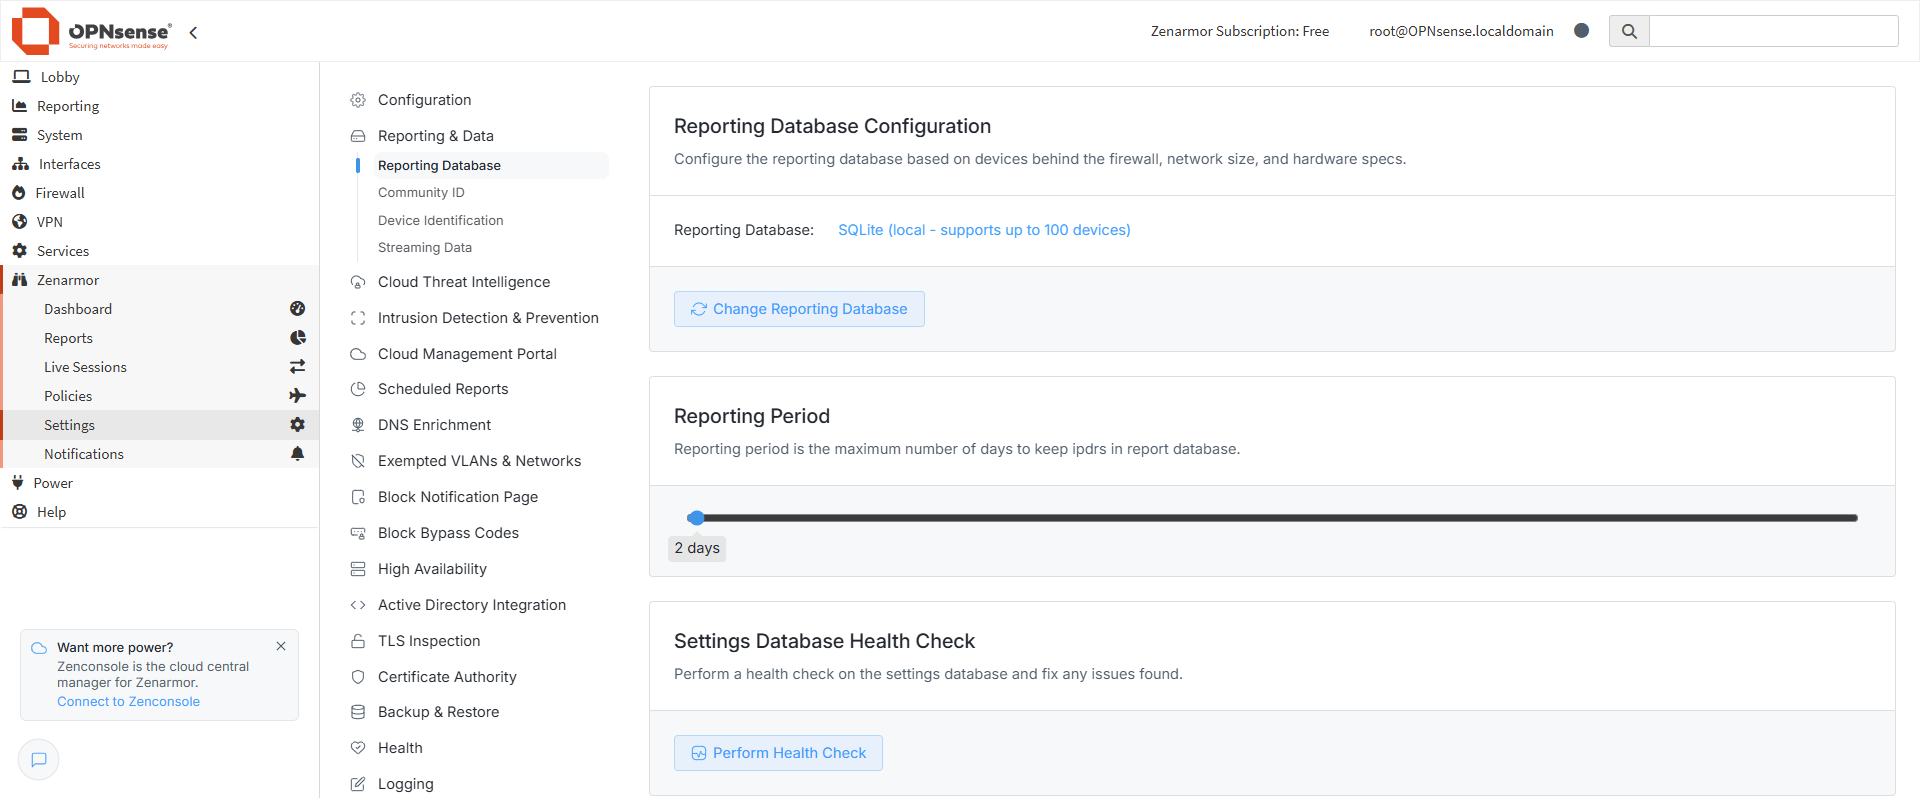
Figure 1. Reporting Database Management
The Reporting Database Management page provides access to various configuration and management options related to reporting data. Details about the supported reporting database options and the database change process are described in the sections below.
Reporting Database Configuration
The Reporting Database Configuration section provides an overview of the reporting database settings configured for the gateway.
On this page, administrators can view the currently active reporting database backend and change the reporting database backend used by the gateway.

Figure 2. Reporting Database Configuration Pane
Follow the steps below to access the Reporting Database Configuration page for a gateway:
-
Log in to your OPNsense account.
-
Navigate to Zenarmor from the left-hand menu.
-
Click Settings.
-
Go to Reporting & Data.
-
Click Reporting Database.
-
Locate the Reporting Database Configuration pane.
The Reporting Database Configuration page is displayed, where you can view the active reporting database backend and access related management options.
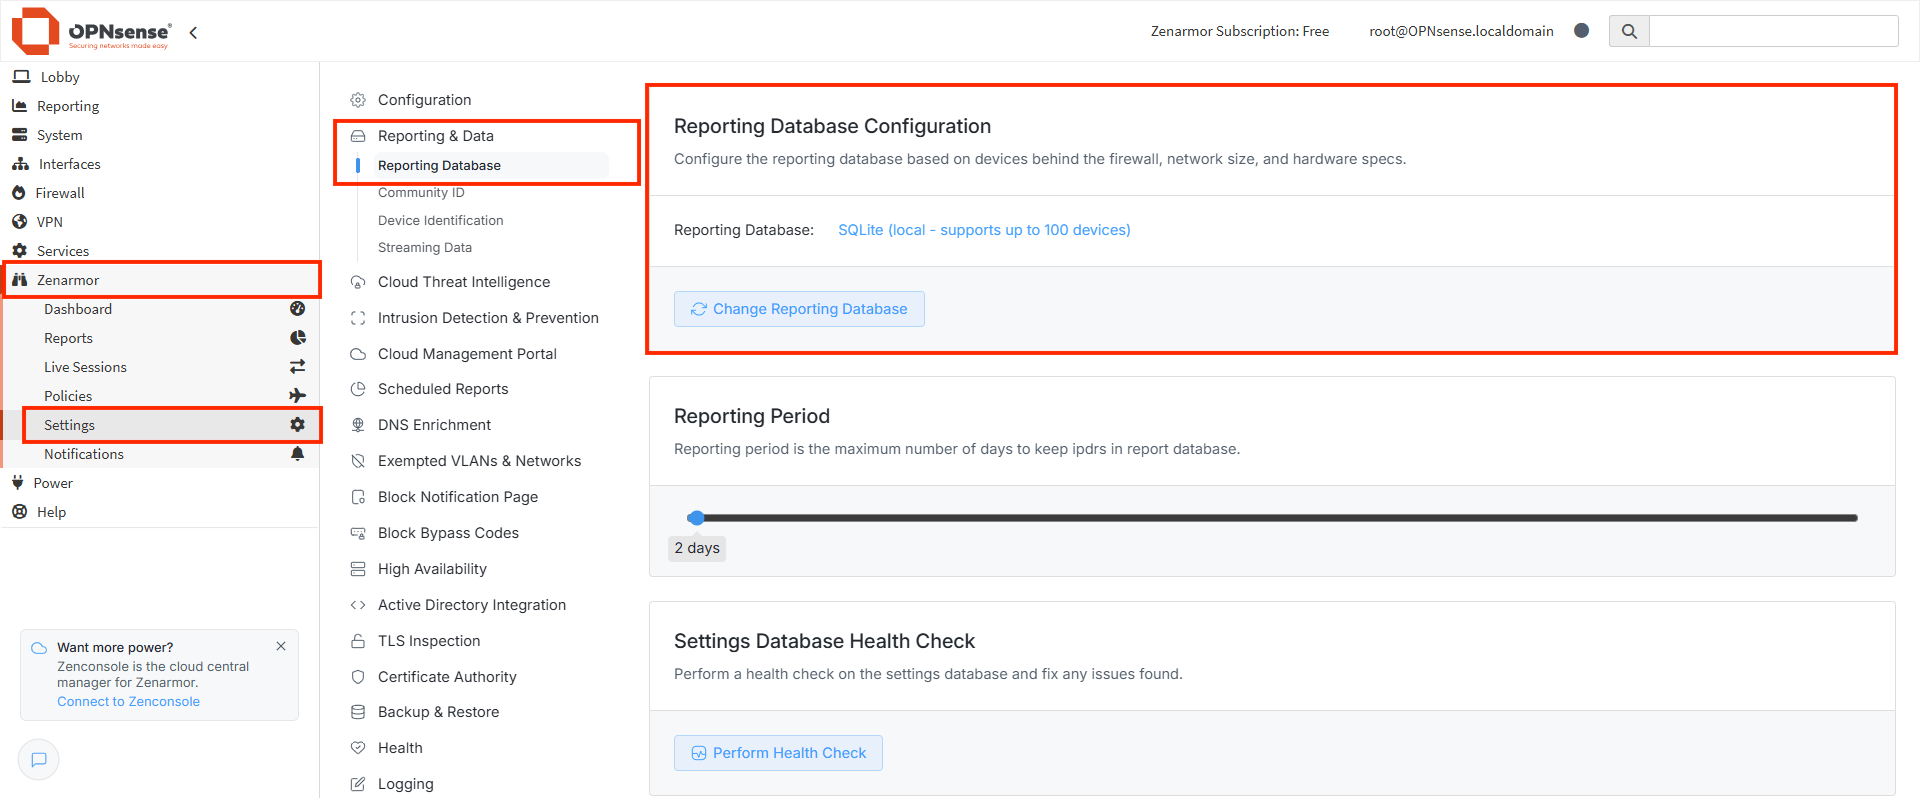
Figure 3. Reporting Database Page
Supported Reporting Databases
Zenarmor supports multiple reporting database backends on OPNsense to address different deployment sizes, reporting needs, and infrastructure capabilities. Each option provides a different balance between simplicity, scalability, and resource usage.
Before changing the reporting database backend, administrators should carefully evaluate the characteristics and requirements of each option to ensure that it aligns with their network size, traffic volume, and hardware resources.
Changing the reporting database backend will reset the reporting database for the selected gateway.
All existing reporting data will be permanently deleted.
This action is irreversible and should be carefully considered before proceeding.
You can find the available reporting database backends and their descriptions below.
-
Elasticsearch (Local): Elasticsearch (local) uses an Elasticsearch service installed and running directly on the gateway. Compared to SQLite, it provides better performance, scalability, and support for higher traffic volumes and longer data retention periods.
This option is suitable for medium to large networks where the gateway has sufficient CPU, memory, and disk resources to run Elasticsearch reliably.
noteBefore selecting Elasticsearch (local), Elasticsearch must be installed on the gateway and accessible via the HTTP port without requiring authentication credentials.

Figure 4. Changing reporting database - Elasticsearch (local)
-
SQLite (Local) Database: SQLite is a lightweight, file-based reporting database that runs locally on the gateway. It is designed for small-scale deployments and environments with limited reporting requirements.
This option supports up to 100 devices and requires minimal system resources, making it suitable for test environments, lab setups, or small networks where long-term data retention is not required.noteSQLite Database is not recommended for large-scale deployments or environments that require extended reporting data retention.

Figure 5. Changing reporting database - SQLite (local)
-
Elasticsearch Database (Remote): Elasticsearch (remote) allows the gateway to store reporting data in an external Elasticsearch service reachable over the network. This option enables centralized and scalable reporting architectures, especially in large or distributed environments.
When this option is selected, administrators must provide the remote Elasticsearch connection details, including the database URL and, if applicable, authentication credentials. Before the change can be applied, the gateway verifies that it can successfully connect to the remote Elasticsearch service.infoSelecting Remote Elasticsearch requires an active Premium subscription.
infoDatabase username and password are required only if authentication is enabled on the remote Elasticsearch server.

Figure 6. Changing reporting database - Elasticsearch (remote)
Change Reporting Database
The Change Reporting Database option allows administrators to change the reporting database backend used by the selected gateway.
This option is available on the Reporting Database Configuration pane and can be used to switch between supported reporting database backends according to reporting requirements and infrastructure capabilities.
Follow the steps below to change the reporting database backend:
-
Log in to your OPNsense account.
-
Navigate to Zenarmor from the left-hand menu.
-
Click Settings.
-
Go to Reporting & Data.
-
Click Reporting Database.
-
Locate the Reporting Database Configuration pane.
-
Click Change Reporting Database. Zenarmor runs a hardware check and displays the dialog with available reporting database backend options. If your system meets the requirements, the Use a local Elasticsearch Database option appears.
Figure 7. Changing reporting database
-
Select the reporting database backend you want to use and review the notes and warnings displayed in the dialog carefully.
-
If required, enter the necessary configuration details (for example, remote Elasticsearch connection information).
-
Click Change.
-
In the confirmation dialog (Please read carefully before proceeding), review the information and click Continue to confirm the operation, or click Cancel to abort.

Figure 8. The Confirmation Dialog
-
If Remote Elasticsearch is selected, the gateway must be able to successfully connect to the remote Elasticsearch service before the change can be applied. The connection will be verified automatically during the configuration process. Click Verify.

Figure 9. The Confirmation Dialog for Elasticsearch
-
Once the operation is completed successfully, a confirmation dialog is displayed. The system recommends restarting the packet engine for the changes to take effect. You can choose to restart immediately by clicking Restart or or postpone the restart by selecting Later.

Figure 10. Successful Configuration
-
If Later is selected, the Schedule Engine Restart dialog is displayed. In this dialog, administrators can schedule a specific time for the packet engine to restart or select I will restart engine manually to perform the restart manually at a later time.
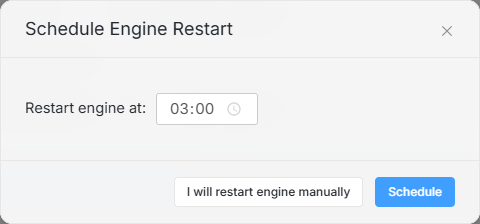
Figure 11. The Confirmation Dialog for Schedule Engine Restart