Managing CA Certificates on Zenconsole
Zenconsole allows you to manage Certificate Authority (CA) certificates and certificate chains used by the Zenarmor packet engine.
The Certificate Authority page under Gateway Settings allows administrators to perform the following operations:
- Viewing existing CA certificate details
- Generating a new CA certificate
- Importing a CA certificate and private key
- Downloading CA certificates
CA certificates are used for TLS inspection and displaying Zenarmor block notification pages for encrypted traffic.
Accessing Certificate Authority Settings
To access the Certificate Authority settings of a gateway, follow the steps below:
- Log in to Zenconsole.
- Navigate to Settings on the left-hand sidebar.
- Select the gateway that you want to manage under Gateway Settings.
- Click Certificate Authority on the gateway settings menu.
The Certificate Authority page displays the following information is displayed for the root CA certificate:
-
Root CA: Displays the certificate subject information, including the country, state, locality, organization, organizational unit, common name, and email address.
-
Valid From: Indicates the beginning of the certificate validity period.
-
Valid Until: Indicates the expiration date of the certificate.

Figure 1. Certificate Authority Gateway Settings Page
You can also download the existing CA certificate directly from this page.
It is recommended to use an intermediate Certificate Authority (CA) for Zenarmor and deploy your organization's root CA certificate to client devices.
If the gateway is compromised or reinstalled and the intermediate CA private key is lost, you can issue a new intermediate CA certificate using your organization's root CA. This eliminates the need to redistribute the root CA certificate to client devices that already trust it.
Generating a New CA Certificate
To generate a new CA certificate and private key for your gateway, follow the steps below:
-
Navigate to Settings on Zenconsole.
-
Select your gateway under Gateway Settings.
-
Navigate to Certificate Authority.
-
Click + Generate New. This opens the certificate generation dialog.
-
Configure the following certificate parameters:
- Key Type: Select the key type. You may retain the default setting.
- Key Length: Specify the cryptographic key length. The default value is 2048 bits.
- Digest Algorithm: Select the digest algorithm. The default algorithm is SHA-256.
- Valid Until: Specify the certificate expiration date.
- Country Code: Select the country code, such as US.
- State: Enter the state or province.
- City: Enter the city.
- Organization: Enter the name of your organization.
- Email Address: Enter the email address associated with the certificate.
- Common Name: Enter a common name for the CA certificate, such as
internal-zenarmor-ca.
-
Click Submit to generate the CA certificate.
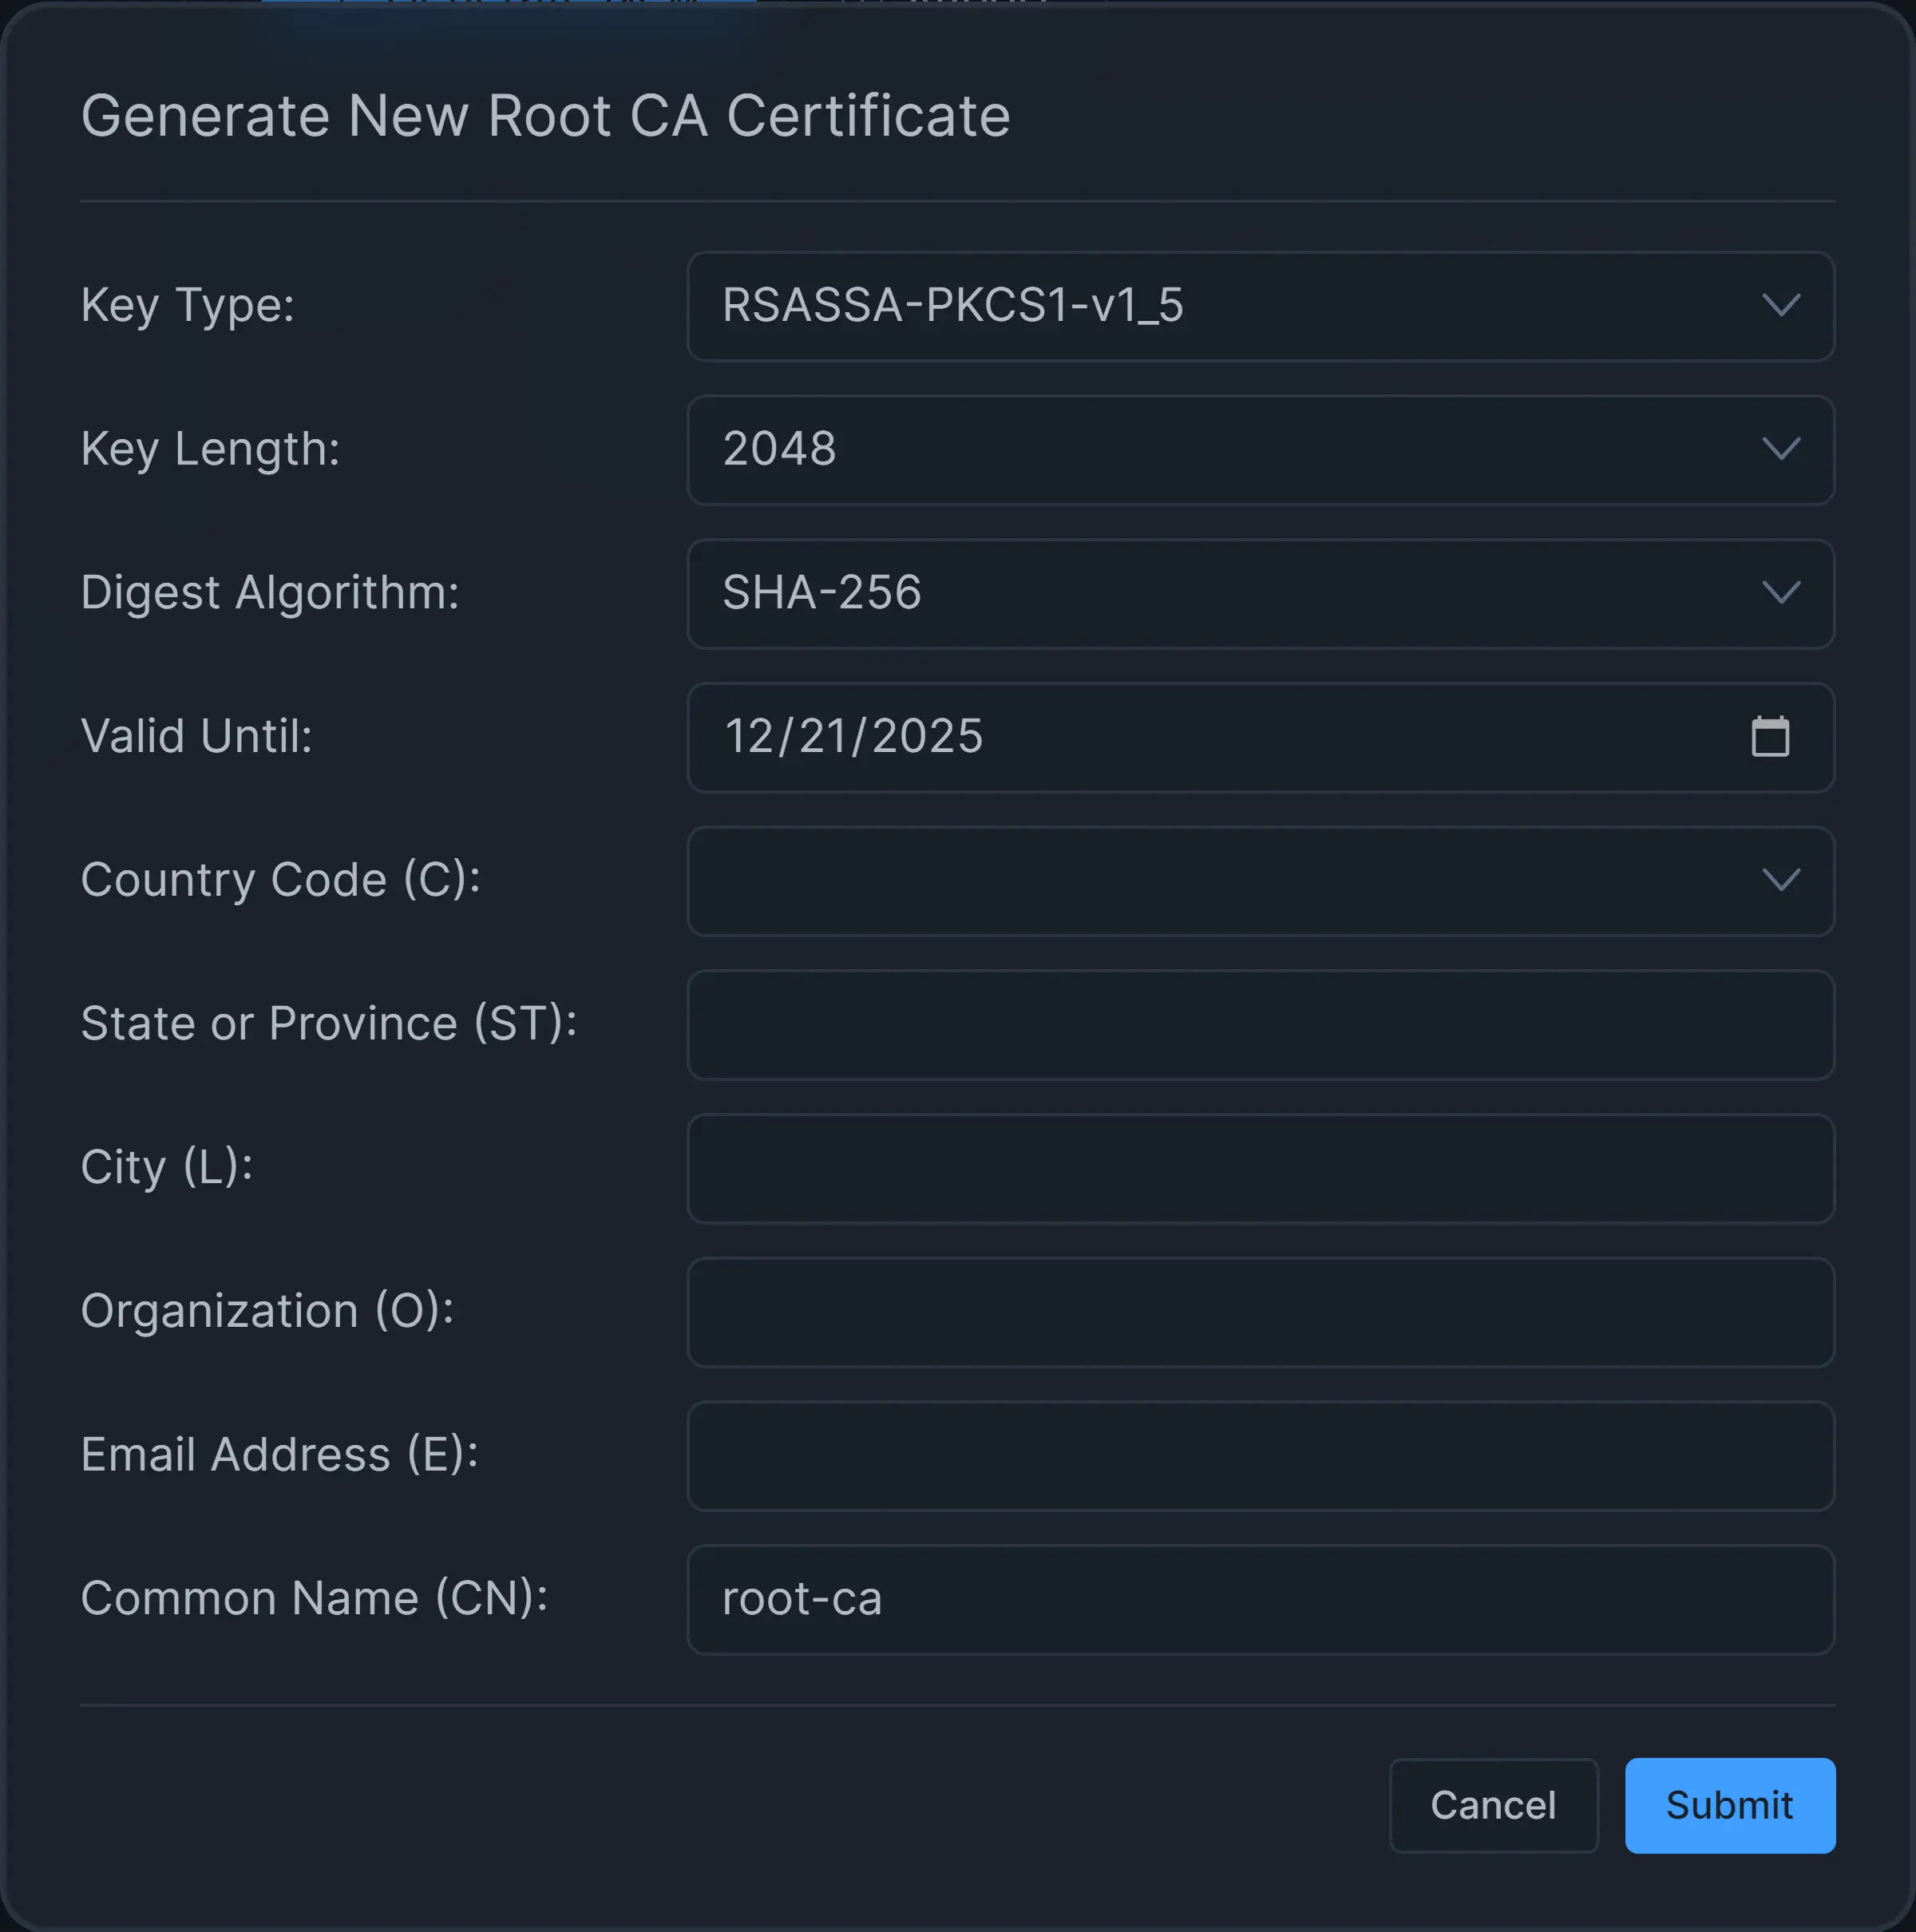
Figure 2: Generating a New CA Certificate and Private Key
If you replace an existing root CA certificate with a newly generated certificate, ensure that the new certificate is trusted by the relevant client devices before performing TLS inspection.
Importing a CA Certificate
Zenarmor allows you to use your organization's existing CA certificate and its corresponding private key instead of generating a new certificate.
To import a CA certificate into your gateway, follow the steps below:
-
Navigate to Settings on Zenconsole.
-
Select your gateway under Gateway Settings.
-
Navigate to Certificate Authority.
-
Click Import. This opens the certificate import dialog.
-
Enable the intermediate CA certificate option if you are importing an intermediate CA certificate.
-
Enter the required certificate information in the Certificate data field.
-
Enter the corresponding private key in the Private key data field.
-
Provide the additional CA certificate information if required for the certificate chain.
-
Click Submit.
-
Restart the Zenarmor packet engine to apply the imported certificate for TLS inspection.
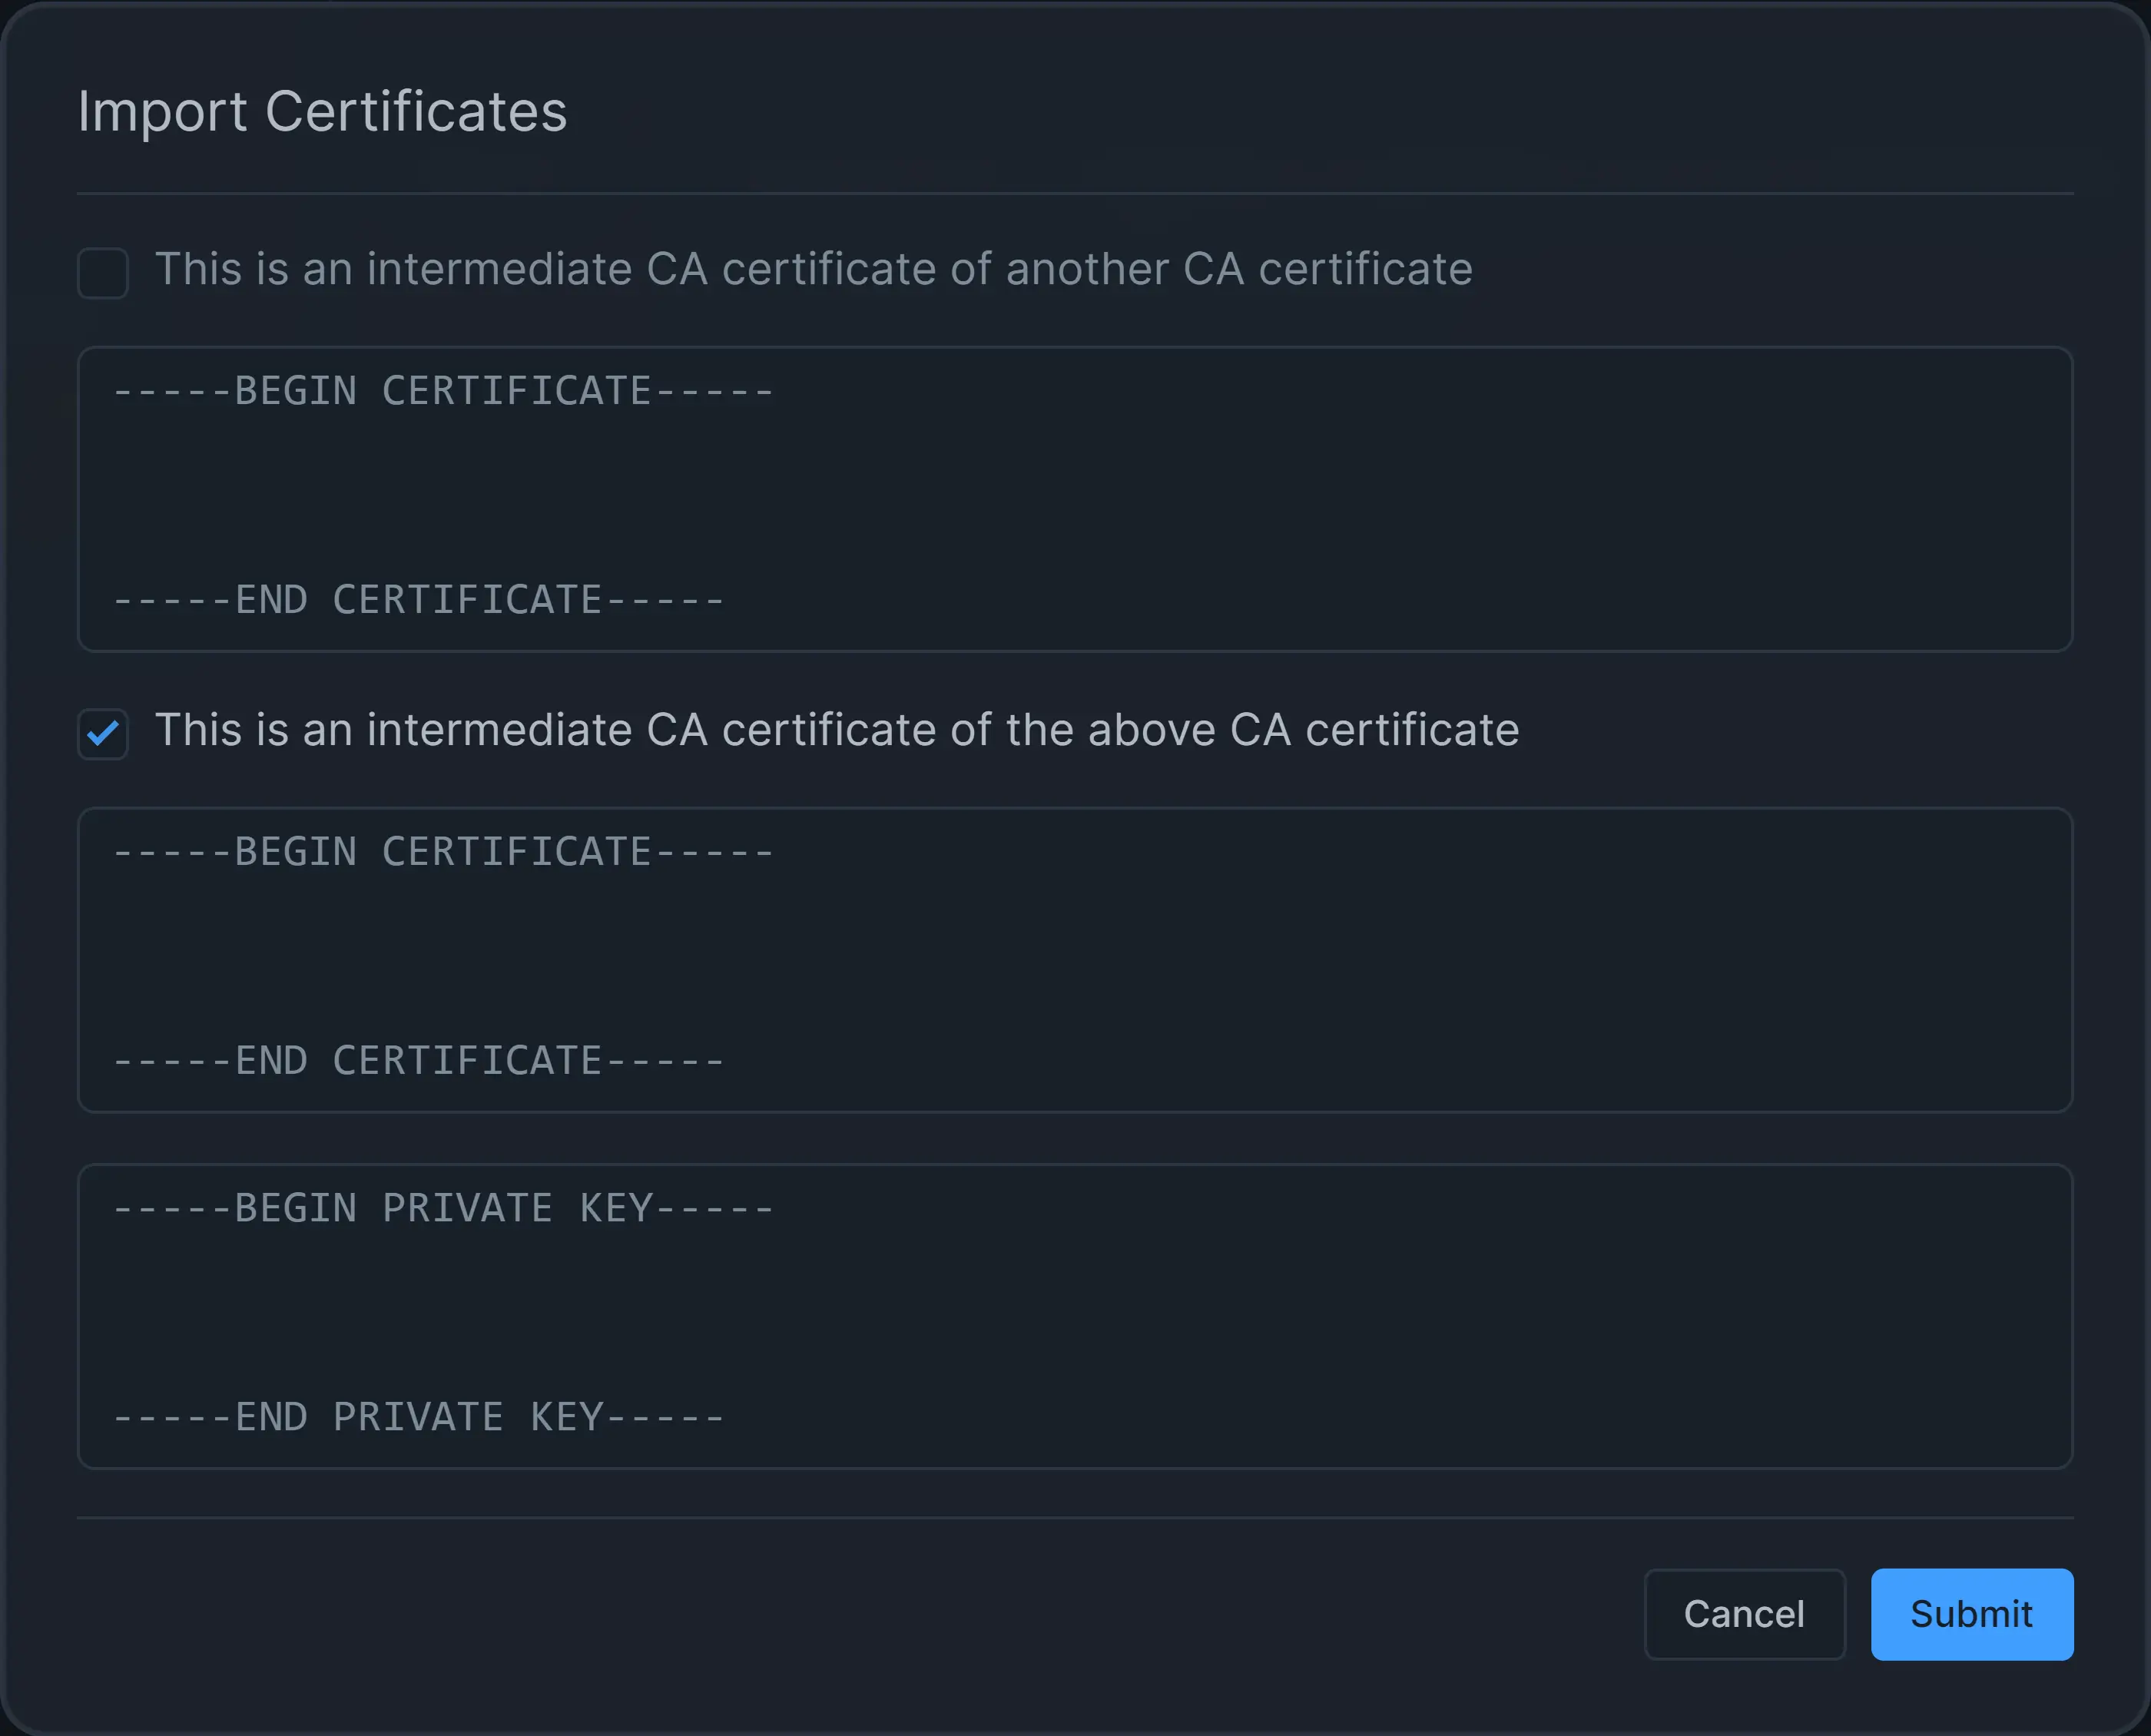
Figure 3: Importing a CA Certificate and Private Key
Downloading a CA Certificate
Zenarmor allows you to download CA certificates in PEM or CRT format.
To download a CA certificate, follow the steps below:
-
Navigate to Settings on Zenconsole.
-
Select your gateway under Gateway Settings.
-
Navigate to Certificate Authority.
-
Click the Download Certificate drop-down menu next to the certificate that you want to download.
-
Select one of the available certificate formats:
- PEM
- CRT
-
Save the certificate file to your local device.

Figure 4: Downloading a CA Certificate
Once downloaded, you can install the CA certificate in the trusted certificate store of your client devices or browsers.
When using the Zenarmor-generated CA certificate, client devices must trust the certificate to support TLS inspection and the display of block notification pages for TLS traffic without certificate warnings.
For more information, refer to Adding Zenarmor Certificate to a Trust Store.
Backing Up CA Certificates and Private Keys
If you reinstall your Zenarmor gateway, you may need to restore the previously configured CA certificate to maintain certificate trust across your client devices.
Restoring an existing CA requires both the certificate and its corresponding private key. Downloading the CA certificate from Zenconsole alone is not sufficient to restore the CA.
The following files are available in the /usr/local/zenarmor/etc/cert directory on your Zenarmor gateway:
internal_ca.pem: CA certificate file.internal_ca.key: CA private key file.
It is strongly recommended to back up both files and store them in a secure location with restricted access. Never expose the CA private key to unauthorized users or distribute it to client devices.
You can also use the Zenarmor backup and restore functionality to automate the certificate backup process.