Troubleshooting of Policy & Filtering
Most frequently seen Zenarmor policy and filtering issues and their solutions are given below.
Policy does not seem to get applied?
First, look at the live session explorer page to see which policy is letting the traffic through or blocking it. Then you can spot the misconfiguration issues in Policy Configuration.
Please note that the 'AND' logical operator is used to evaluate all policy criteria in Policy Configuration, not the 'OR' logical operator. So, for a particular type of traffic to match a specific policy, all criteria must be met. For instance, if you've created a policy and specified VLAN ID, IP, and username criteria, A session must match all of those.
I've allowed a specific App but it's not working?
I allowed the application on policy but it still gets blocked.
Most probably a blocked web session is the root cause of this problem.You need to debug web sessions by using a live session explorer to find the related blocked web domain.
How can I define user-based policy/filtering?
I need to block specific websites/applications for specific usernames or groups in my network. How can I define user-based policy/filtering?
- Zenarmor supports
Active DirectoryandOPNsense Captive Portalfor username resolution.
If you have an Active Directory, you can integrate it with Zenarmor and get user login and user's group(s) information. You can define policies for your AD groups and users. For more information on how to integrate AD with Zenarmor, please refer to Active Directory Integration Guide.
If your OPNsense Captive portal is active, Zenarmor can automatically get username information from it as well.
To get the benefits of user-based filtering, you need to upgrade to one of the premium editions. If you want AD integration, you must have a Business Edition.
Click, for more information about the license plan.

Figure 1: License Plan for User-Based Filtering Features
- If you don't have an Active Directory or active Captive Portal, you can define a new policy for the IP address/Network/VLAN of the specific users.
However, in the free edition there is only one policy called Default. It matches the whole traffic on the protected interface. Default policy configuration is managed by the Zenarmor engine. You can only edit the Security, App Controls and Web Controls tab. You can not assign a specific user/IP etc. You need to upgrade to the home license that has 2 more additional policy rights. You can add IP / Username / Network / VLAN to these 2 additional policies and define the schedule them as well.
- For more information about defining user-based policy please refer to Adding a new policy on OPNsense GUI or Configuring a Policy on Cloud Portal.

Figure 2. Defining User-Based Policy
How to avoid blocking wrong-categorized domains?
Due to improper web categorization, certain domains may be blocked. For instance, you are unable to access a website because Zenarmor has blocked it as a parked domain/firstly seen site. However, this site is not hazardous. What ought you to do now?
For more information about why you should block parked domains and firstly seen sites, click Managing Policies.
You can define exclusions(exceptions) for the domains to prevent them from being blocked by the engine.
To add the domains to the White-list
-
Navigate to Policies → Policy Name → Exclusions
-
Enter the domains/IP Addresses.
-
Leave the List option as
Whitelist. -
Click +Add Exclusion.
-
Click Apply Changes to activate the settins
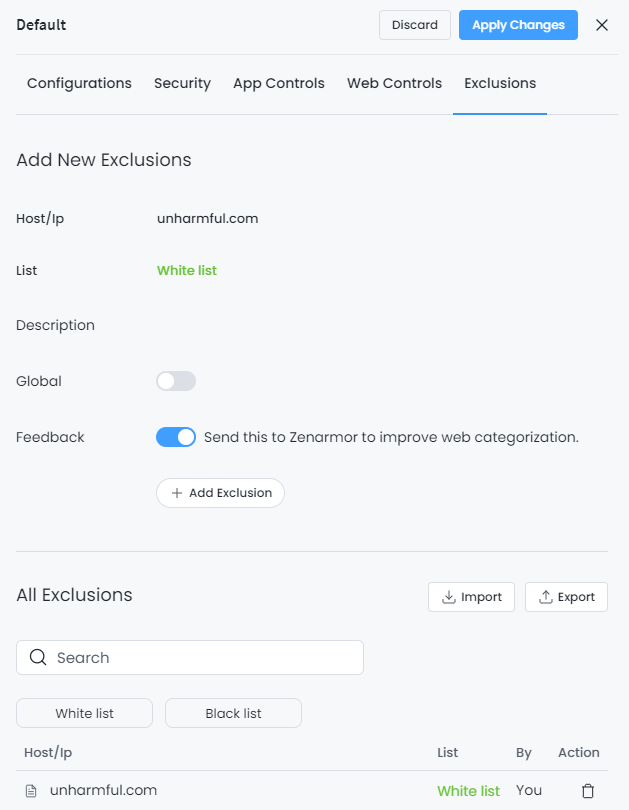
Figure 3. Managing Exclusions(Whitelist/Blacklist)
For more information about managing exclusions, please refer to Managing Policies.
We highly encourage you to share these false-positive blocked domains with our support team so that they are recategorized not to be blocked.
You can check out the classification or request re-categorization for a domain here.
Finding out why a particular website is blocked
Firstly, navigate to Zenarmor → Reports → Live Session Explorer → Blocks.
The blocks view tab provides you with viewing the details of the blocked connections in your network according to your policy rules.
To view Live Blocked Sessions Details, click magnify icon in the first column of the session.
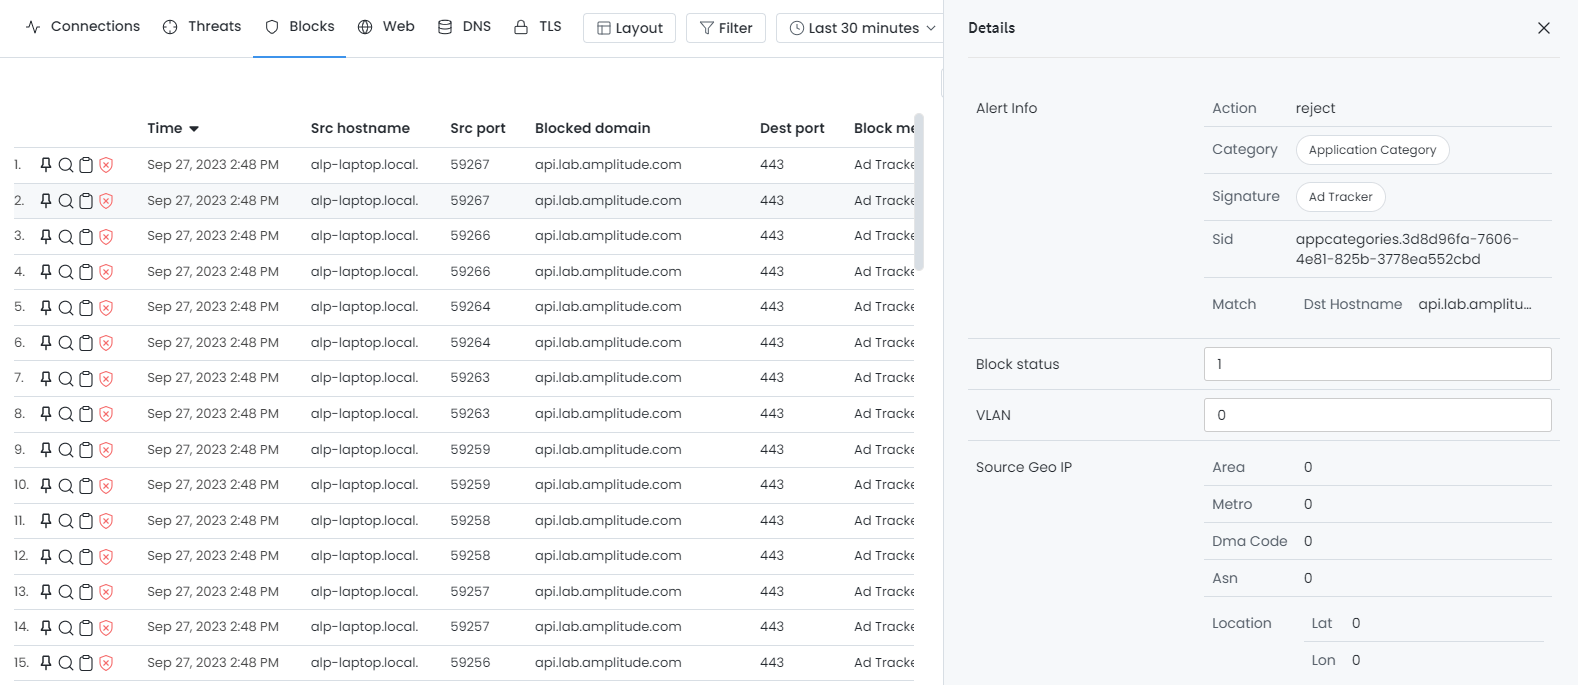
Figure 4. Live Blocked Sessions Explorer
Secondly, by using the shortcuts on the live session explorer, you can then whitelist the domain/IP by clicking on Allow button in the Actions column at the end of the session row.
We highly encourage you to share these false-positive blocked domains with our support team so that they are recategorized not to be blocked.
You can check out the classification or request re-categorization for a domain here.
Landing Page is not always displayed
In order to show the block notification page, it is necessary to ban clients on your network from utilizing DNS-over-HTTPS (DOH) or DNS-over-TLS (DOT), since the Block Notification Page feature relies on DNS-based filtering. Typically, users activate DNS over HTTPS or DNS over TLS settings on their web browsers.
To prevent DOH and DOT traffic on your network, you may activate the DNS over HTTPS feature in the Essential Security rules. Additionally, you can enable the DNS over HTTPS and DNS over TLS choices in the Network Management settings under Application Controls.
How do I prevent access to all websites except for certain ones?
This objective can be achieved by following the next 2 steps:
-
Establish a policy that restricts access to Secure Web Browsing (in the Web Browsing Category) and Web Browsing (in the Web Browsing Category) applications in the App Controls tab. This causes all HTTP(S) connections to be blocked.
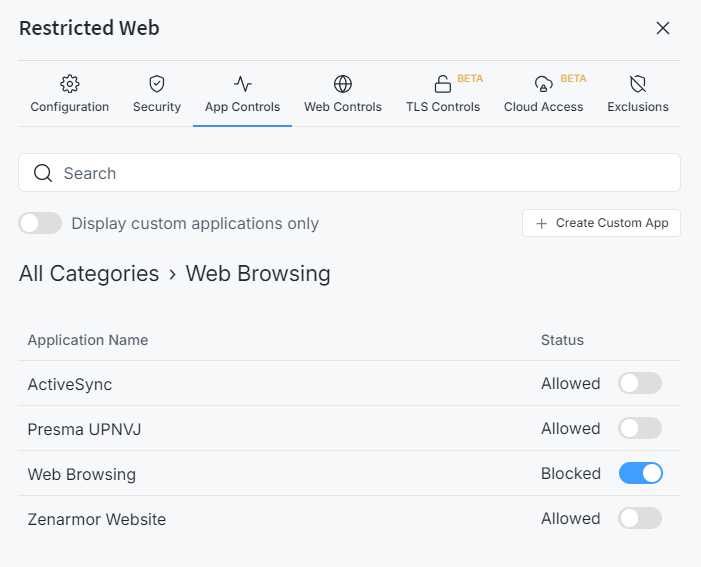
Figure 5. Blocking HTTP Connections
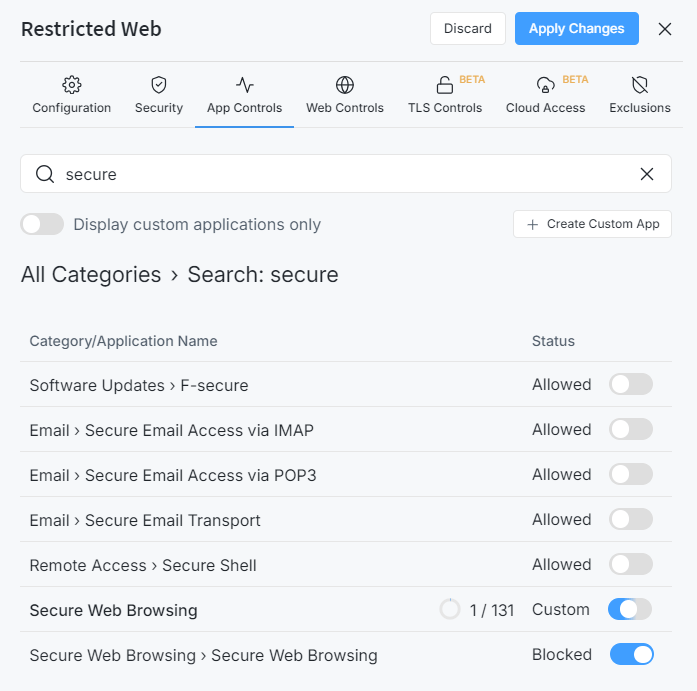
Figure 6. Blocking HTTPS Connections
-
In the Exclusions section, you can add IP addresses or domains that you wish to allow users access to as a Whitelist.
Bypass Codes Not Working
Due to the DNS cache and DNS resolver cache problems, you may not be able to access websites whitelisted with bypass codes. Clearing the resolver cache in web browsers and the DNS cache in operating systems can help resolve these DNS-related issues and refresh DNS records. When the DNS cache is cleared, the locally stored domain name resolution information your computer utilizes to navigate websites rapidly is removed.
How to Clear DNS cache on Windows
To clear the DNS cache in the Windows client, you may open Command Prompt as an administrator and run the next command:
ipconfig /flushdns
How to Clear DNS cache on macOS
To clear the DNS cache on macOS client, you may follow next steps:.
- Press
cmd + spaceto open Spotlight Search. - Type
Terminal. You can find it inOtherin the Launchpad. - Type the following command:
sudo dscacheutil -flushcache; sudo killall -HUP mDNSResponder - Enter your password. you'll get a message that the DNS was successfully flushed.
How to Clear DNS Cache on Linux
To clear the DNS cache on Linux client, you may run the next command as root privileged user:
systemd-resolve --flush-caches
How to Clear DNS cache on Google Chrome
Your browser's DNS cache may be flushed now by following the next steps:
- Type the next command in your address bar.
chrome://net-internals/#dns - Press Enter to access the DNS page.
- Click on the Clear host cache button to clear the resolver cache.
How to Clear DNS cache on Microsoft Edge (Chromium-based)
Your Microsoft Edge browser's DNS cache may be flushed now by following the next steps:
- Launch Edge and type the next command in your address bar.
edge://net-internals/#dns - Press Enter to go to the DNS page.
- Click on the Clear host cache button to clear the resolver cache.
How to Clear DNS cache on Mozilla Firefox
Your Mozilla Firefox browser's DNS cache may be flushed now by following the next steps:
- Open Firefox and type the next command in your address bar.
about:networking#dns - Press Enter to access the DNS page.
- Click on the Clear DNS Cache button to clear the resolver cache.
How to Clear DNS cache on Opera
Your Opera browser's DNS cache may be flushed now by following the next steps:
- Launch Opera and type the next command in your address bar.
opera://net-internals/#dns - Press Enter to go to the DNS page.
- Click on the Clear host cache button to clear the resolver cache.