Blacklist and Whitelist Exclusions
Zenarmor allows you to define Exclusions for your Zenarmor policies easily. The Exclusions section provides you with the opportunity to specify blacklists and whitelists.
What is an Exclusion?
The Zenarmor Exclusions list consists of entries that you may use to allow or restrict connections destined to specified host(s), IP address(es), and domain(s).
You can define an exclusion as Whitelist or Blacklist.
Whitelist is an allowed destinations list and your users that match the policy can reach the destinations placed in this list without any restrictions.
Blacklist is the blocked destinations list that can never be accessed by your users that match the policy.
Exclusions take precedence over all your Security/App/Web rules.
Why do you need an Exclusion?
You can employ exclusions to fine-tune Zenarmor's detecting behavior. By defining exclusions you can not only reduce false positives but also meet exceptional business requirements.
How to define an Exclusion?
You can exclude an IPv4/IPv6 address, domain, or hostname from scanning threats. These exclusions will apply to all devices in your network that match the related policy.
To manage your exclusions in a policy you may access Exclusions page by following the next steps:
-
Select the policy name in the
Policieslist view of a node. -
Navigate to the
Exclusionstab.
Add an Exclusion
To add an exclusion, you may follow the next steps:
- Enter an IP address, hostname, or domain.
You can enter hostnames, domains, and IP addresses. Domains match all subdomains. No need to use asterisk, zenarmor will match all subdomains and fully qualified domain names under this domain. If you would like anyting under domain.com (sub.domain.com, host.sub.domain.com) be allowed or blocked, just put domain.com and we'll match all. CIDR notation is acceptable for IP addresses (host.sub.domain.com, domain.com, 172.16.1.1, 10.10.10.0/24).
-
Select the type of exclusion List,
whitelistorblacklist. By default, it iswhitelist. -
You may fill in the Description field optionally.
-
You may enable the Global option if you want to define the exclusion to be applied for all policies on the node.
-
You may disable the Feedback option. Feedback option is used for sharing your exclusion definition with the Zenarmor team. It is very useful for maintaining the accuracy of the Zenarmor cloud threat intelligence database and resolving false-positive issues on web categorization.
-
Click on the +Add Exclusion button
-
Click Apply Changes to activate the settings.

Figure 1. Managing Exclusions

Figure 2. Exclusion - Black List
The Zenarmor Exclusions feature allows you to enable exclusions for all policies in your firewall by selecting the 'Global' option.
After you've defined your exclusions, you can enable the 'Global' option on the list individually.
Search Exclusion
You can filter your blacklist/whitelist entries by using search criteria. When you start to type the IP/hostname it will filter out the results instantly.

Figure 3. Exclusion - Search
View Exclusions
You can view your exclusions on the All Exclusion pane. By default both your Whitelist and Blacklistare displayed in this pane. The following information is provided in the Exclusions list view:
-
Description
-
Hostname/Domain/IP address
-
Tag (if
Globaloption is enabledGlobaltag displayed ) -
Exclusion Type (Whitelist/Blacklist)
-
Admin name(Who defines the exclusion)
-
Action button (Remove)

Figure 4. Exclusion - All List
You can view your Whitelist exclusions under the White list tab or view your Blacklist exclusions under the Black list tab in the All Exclusions pane.
To view the description of an exclusion, hover your mouse on the paper icon at the beginning of the exclusion line. This will display the Description you entered when creating the exclusion.

Figure 5. Exclusion - Viewing Description
Delete an Exclusion
To delete an exclusion in a policy, you may follow the next steps.
-
Search the domain/hostname/IP of the exclusion that you want to delete.
-
Click the trash icon in the search result. You will be prompted to a dialog box for confirmation.
-
Click Remove if you want to delete the exclusion.
-
Click Apply Changes button to activate settings.

Figure 6. Exclusion Delete Confirmation
Importing Exclusions
You can provide a file containing the list of exclusions to add in batches by following the next steps:
- Click on the Import button at the top right corner of the All Exclusions pane.
- Select the file from your disk and click Open.
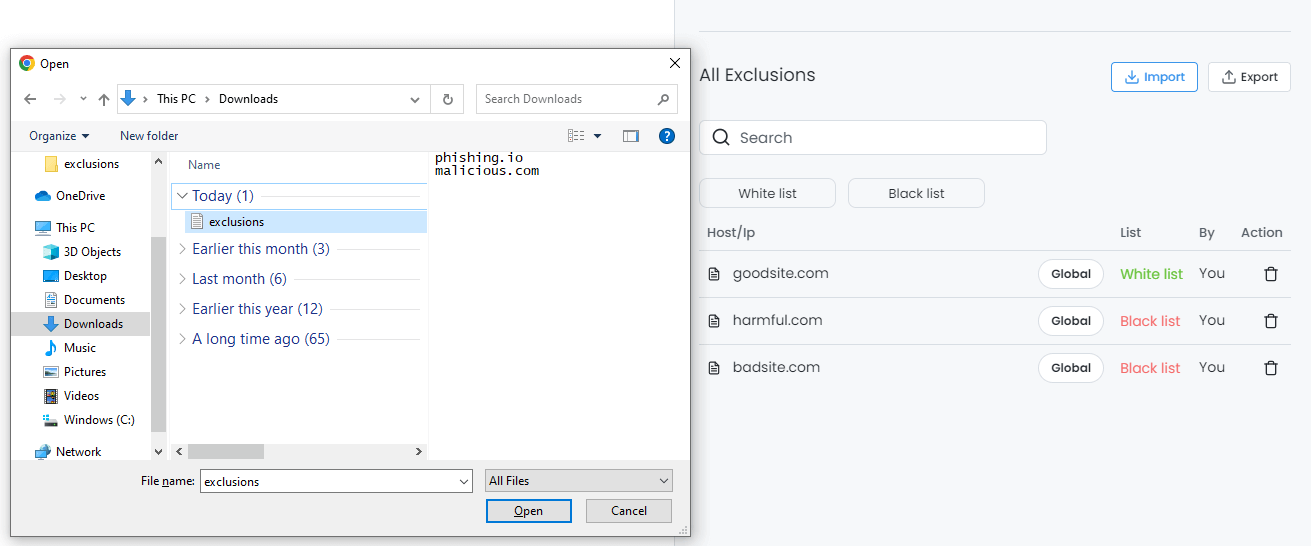
Figure 7. Import Exclusions
3. Select the type of exclusion List, whitelist or blacklist. By default, it is whitelist.
- You may enable the Global option if you want to define the exclusions to be applied for all policies on the node.
- You may fill in the Description field optionally.
- Click Import to add the exclusions list on your node. This will automatically update your exclusions.

Figure 8. Import Exclusions from a file
Exporting Exclusions
You can download exclusions lists to your local disk for later use or archival purposes. To download the whitelist, you may follow the next steps:
- Click on the Export button at the top right corner of the All Exclusions pane.
- Click Save to store your exclusion list as a
CSVfile on your PC.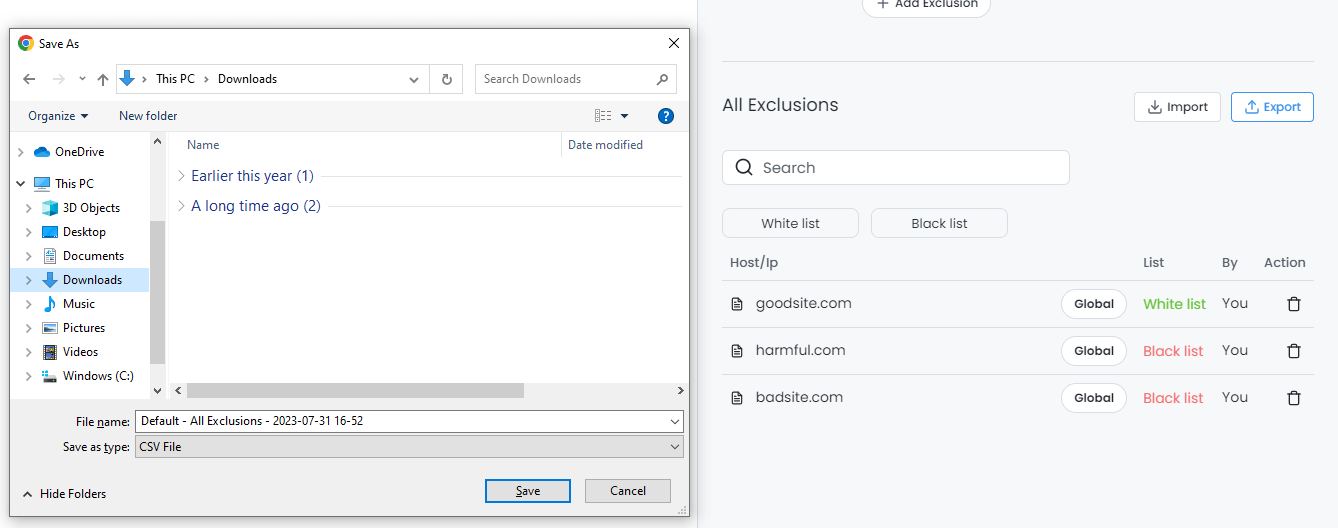
Figure 9. Export Exclusions
Activating the rules
When you're ok with the changes you made, click on the Apply Changes button at the top right corner of the screen to activate the rules.