What are the Best Practices for FreeBSD Security?
Cybersecurity is such a broad topic that an entire industry has grown up around it. Everyone is responsible for cybersecurity. Any system with a weak entry point could let hackers get to important information and mess up the whole network. The CIA triad, which stands for the Confidentiality, Integrity, and Availability of information systems, is one of the most important parts of information security. Users expect their data to be safe, so the CIA triad is an important part of computer security.
Security experts use a strategy called "defense in depth" to protect the CIA. The idea behind the defense in depth is to add multiple layers of security so that if one fails, the whole system doesn't fall apart. For instance, a system administrator can't just turn on a firewall and think that the system or network is safe. One must also audit accounts, check the integrity of binaries, and make sure that no malicious tools are installed. To make a good security plan, you need to know what the threats are and how to protect yourself from them.
Not all cyber threats come from remote attackers who try to get into a system without permission from a faraway place. Threats can also come from employees, bad software, unapproved network devices, natural disasters, security holes, and even competing businesses.
Systems and networks can be accessed without permission, sometimes by accident, sometimes by hackers from far away, and sometimes by former employees or corporate spies.
When securing a system, it is best to start with the basic accounts and system configuration. Then, secure the network layer so that it follows the system policy and the organization's security procedures. Many organizations already have a security policy that says how tech devices should be set up. The policy should say how workstations, desktops, mobile devices, phones, production servers, and development servers should be set up for security.
There have been hundreds of standard practices written about how to keep systems and networks safe, and if you use FreeBSD, you need to know how to protect yourself from attacks and other people getting in.
In this tutorial, we will outline some basic ideas and methods for security hardening on FreeBSD. The FreeBSD system comes with several layers of security, and many more can be added through third-party utilities.
For hardening your FreeBSD system you may perform the following tasks explained in this guide:
- Prevent User Login
- Permit Account Escalation
- Manage Password Hashes
- Manage Password Policy Enforcement
- Detect Rootkits
- Perform Binary Verification
- Perform System Tuning for Security
- Configure One-time Passwords
- Configure TCP Wrapper
- Enable and Configure ACL
- Monitor Third Party Security Issues
- Enable and Utilize Process Accounting
- Limit System Resources
- Configure Login Classes
- Enable and Configure Resource Limits
- Configure Sudo for Shared Administration
- Enable Session Logging
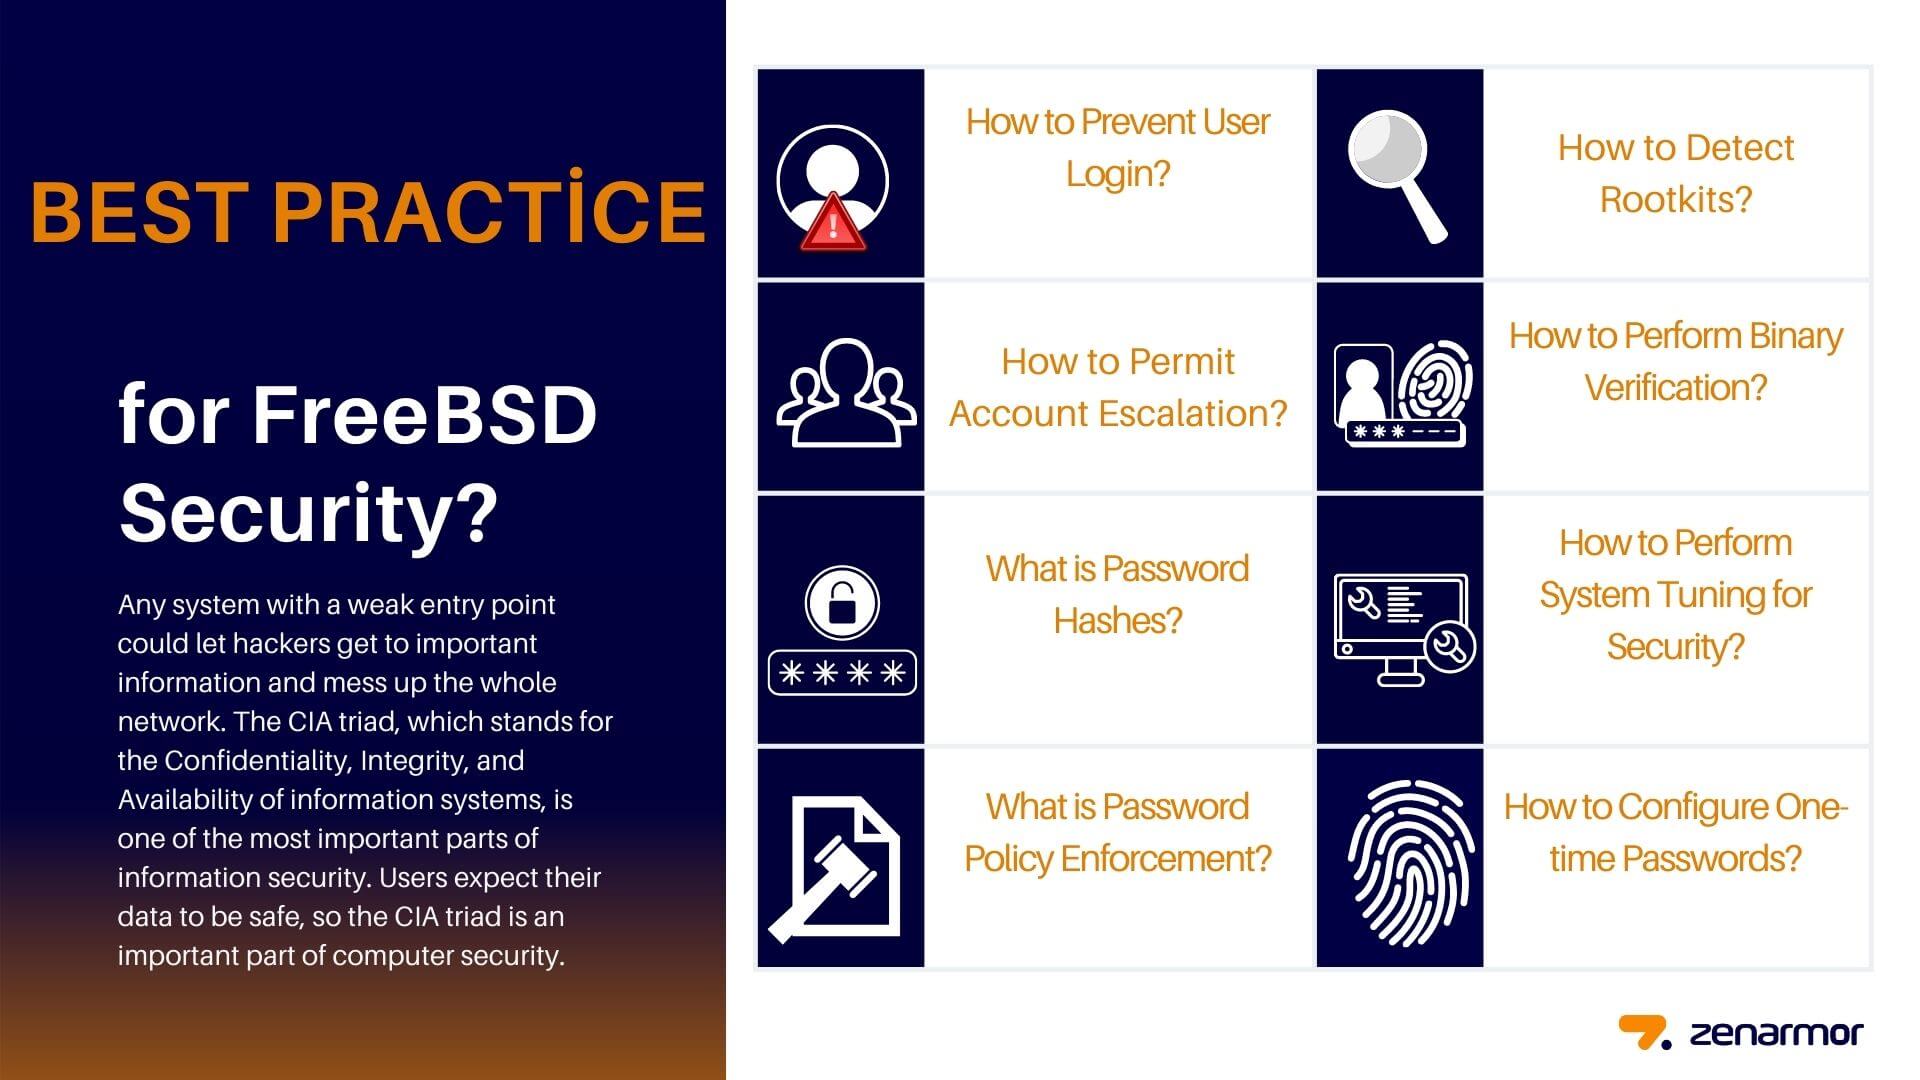
Figure 1. * Best Practices for FreeBSD Security*
How to Prevent User Login?
A good way to start securing a system is to check the accounts. Make sure root has a strong password and that no one else knows this password. Turn off any accounts that don't need to be logged in to. There are two ways to stop people from logging in to accounts. First, you can lock the account. You may lock a user account, such as username, by running the following command:
lock pw username
The second way to stop logins is to set the shell to /usr/sbin/nologin. The only person who can change the shell for other users is the superuser. Run the next command as root to change the login shell for a user, username.
chmod -s /usr/sbin/nologin username
When a user tries to log in, the /usr/sbin/nologin shell stops the system from giving the user a shell.
How to Permit Account Escalation?
Sometimes, other users need to be able to help with system administration. There are two ways to handle privilege escalation in FreeBSD:
-
The first one is a shared
rootpassword that people in thewheelgroup use. This method is not recommended. When a superuser account needs to be accessed, a user typessuand the password forwheel. After typing the commands that required administrative access, the user should typeexitto end privileged access. To add a user to this group, edit the/etc/groupfile and add the user's name to the end of thewheelentry. There must be no space between the user and the comma. -
The second way to allow privilege escalation, which is also the best way, is to install the
security/sudopackage or port. You may installsudopackage by running the next command:
pkg install sudo
This software adds more auditing, gives users more control, and can be set up so that users can only run the privileged commands you choose.
You may use visudo to change /usr/local/etc/sudoers after installation. In the following example, a new webadmin group is made, the john account is added to it:
pw groupadd webadmin -M john -g 6000
Then webadmin group is given permission to restart apache24 by editing /usr/local/etc/sudoers file via visudo:
%webadmin ALL=(ALL) /usr/sbin/service apache24 *
What is Password Hashes?
Passwords should be long and complicated, and the version that is stored in the password database should be encrypted with a strong hash mechanism. The crypt library in FreeBSD uses the following hash algorithms:
-
DES
-
MD5
-
SHA256
-
SHA512
-
Blowfish
The default hashing algorithm for SHA512 shouldn't be changed to one that is less safe, but it can be changed to the safer Blowfish algorithm. Blowfish is not part of AES and is not considered to meet any Federal Information Processing Standards (FIPS). In some places, you might not be able to use it.
The superuser can look at the user's hash in the FreeBSD password database to find out which hash algorithm is used to encrypt the user's password. Each hash starts with a symbol that shows what kind of hash mechanism was used to encrypt the password:
-
There is no symbol at the beginning when DES is used.
-
The sign for MD5 is
$. -
The symbol for SHA256 and SHA512 is
$6$. -
The sign for Blowfish is
$2a$.
In this example, the password for john is hashed using the default SHA512 algorithm, since the hash starts with $6$. Note that the password database stores the encrypted hash, not the password itself:
grep john /etc/master.passwd
john::$6$Z0eTpPzDq0qpZzV8$9RC7a2c3rz.1vSyqI.atX9fzEcg.xDzPzzvS5rNWX2JIDZXa7/.Xj3vD/1JgiT5Gn3L2lrG/RIeE91oSk9s.d0:1001:1001::0:0:dru:/usr/home/john:/bin/csh
The user's login class is where the hash method is set. In this case, the user is in the default login class and this line is in /etc/login.conf sets the hash algorithm:
:passwd_format=sha512:\
To switch to the Blowfish algorithm, change that line to look like this:
:passwd_format=blf:\
Then run the next command:
cap_mkdb /etc/login.conf
Note that this change won't affect any password hashes that have already been made. This means that all passwords should be re-hashed by asking users to run passwd to change their password.
Two-factor authentication should be used for logging in from a distance. "Something you have", like a key, and "something you know", like the passphrase for that key, are two examples of two-factor authentication. Since OpenSSH is part of the FreeBSD base system, all network logins should be done over a secure connection and use keys instead of passwords to prove who they are. Kerberos users may need to make more changes to their network in order to use OpenSSH.
What is Password Policy Enforcement?
A key part of system security is making sure that local accounts have strong password policies. Built-in Pluggable Authentication Modules (PAM) in FreeBSD can be used to set the length, strength, and complexity of passwords.
In this section we will show how to use the pam_passwdqc.so module which is a password quality-control PAM module to set the minimum and maximum password lengths and the rules for using mixed characters. The pam_passwdqc module is a simple module for PAM that checks how strong a password is. In addition to checking regular passwords, it checks passphrases and offers randomly generated passwords. When a user changes their password, this module is put into place.
To set up this module, you must be the superuser and uncomment the line that contains pam_passwdqc.so in /etc/pam.d/passwd. Then, change that line to fit the policy on passwords:
password requisite pam_passwdqc.so min=disabled,disabled,disabled,12,10 similar=deny retry=3 enforce=users
This example tells you what you need to do to get a new password. The minimum length of a password is set by the min setting. It has five values because this module defines five kinds of passwords based on how hard they are to guess. The type of characters that must be in a password, such as letters, numbers, symbols, and case, tells us how hard it is.
In this example, the first three types of passwords are turned off, which means that passwords that meet the complexity requirements for those types will not be accepted, no matter how long they are. The 12 sets a minimum password policy of at least 12 characters if the password has characters with three different types of complexity. The 10 tells the password policy that it's okay for passwords to be at least ten characters long as long as they have four different kinds of characters.
When the similar setting is on, passwords that look like the user's old password are not accepted. With the retry setting, a user has three chances to type in a new password.
When this file is saved, a user who wants to change their password will see a message like this:
Changing local password for john
Old Password:
You can now choose the new password.
A valid password should be a mix of upper and lower case letters,
digits and other characters. You can use a 12 character long
password with characters from at least 3 of these 4 classes, or
a 10 character long password containing characters from all the
classes. Characters that form a common pattern are discarded by
the check.
Alternatively, if noone else can see your terminal now, you can
pick this as your password: "knife.raven-cry".
Enter new password:
If a user enters a password that doesn't match the policy, it will be rejected with a warning, and the user can try again up to the number of times that was set.
Most password policies say that passwords must stop working after a certain number of days. In FreeBSD, you may set passwordtime for the user's login class in /etc/login.conf. This will tell FreeBSD how long the password should be valid. There is an example in the default login class:
# :passwordtime=90d:\
So, to set this login class to expire in 90 days, take out the comment symbol (#), save your changes, and run the next command:
cap_mkdb /etc/login.conf
To set the expiration date for a specific user, run pw: command an expiration date or the number of days until the user's password expires:
pw usermod -p 30-may-2023 -n john
As you see in the above example, date of expiration is written as a day, month, and year.
How to Detect Rootkits?
A rootkit is any kind of software that isn't supposed to be there and tries to get root access to a system. Once this malicious software is installed, it usually gives an attacker another way to get in. In reality, a system should be reinstalled from scratch after a rootkit has been used to break into it and an investigation has been done. Even the most careful security or systems engineer is very likely to miss something that an attacker left behind.
A rootkit does one thing that is helpful for administrators: when it is found, it shows that the system has been broken into at some point. But these kinds of apps are often very hard to find. This section shows security/rkhunter, a tool that can be used to find rootkits.
You may run the next command to install rkhunter package
pkg install rkhunter
You may see the following output:
Updating FreeBSD repository catalogue...
Fetching packagesite.pkg: 100% 6 MiB 3.4MB/s 00:02
Processing entries: 100%
FreeBSD repository update completed. 32410 packages processed.
All repositories are up to date.
The following 3 package(s) will be affected (of 0 checked):
New packages to be INSTALLED:
lsof: 4.96.5,8
p5-Digest-SHA1: 2.13_2
rkhunter: 1.4.6_1

Number of packages to be installed: 3

The process will require 1 MiB more space.
349 KiB to be downloaded.

Proceed with this action? [y/N]: y
The process will require 1 MiB more space.
349 KiB to be downloaded.

Proceed with this action? [y/N]: y
[1/3] Fetching lsof-4.96.5,8.pkg: 100% 110 KiB 112.4kB/s 00:01
[2/3] Fetching p5-Digest-SHA1-2.13_2.pkg: 100% 16 KiB 16.8kB/s 00:01
[3/3] Fetching rkhunter-1.4.6_1.pkg: 100% 223 KiB 228.5kB/s 00:01
Checking integrity... done (0 conflicting)
[1/3] Installing lsof-4.96.5,8...
[1/3] Extracting lsof-4.96.5,8: 100%
[2/3] Installing p5-Digest-SHA1-2.13_2...
[2/3] Extracting p5-Digest-SHA1-2.13_2: 100%
[3/3] Installing rkhunter-1.4.6_1...
[3/3] Extracting rkhunter-1.4.6_1: 100%
=====
Message from lsof-4.96.5,8:
--
NOTE: Due to the way the FreeBSD build clusters make packages,
you may see a warning similar to the following:
lsof: WARNING: compiled for FreeBSD release 11.1-RELEASE-p6; this is 11.1-RELEASE-p4.

This is because the poudriere jails that build the packages don't have
the corresponding kernel installed, so they don't know that the kernel version is different.

This warning can be ignored if you are using a system that is updated via freebsd-update and are using pre-built packages.
=====
Message from rkhunter-1.4.6_1:
--
You should keep your rkhunter database up-to-date.
This can be done automatically by putting this line to periodic.conf(5) files:

daily_rkhunter_update_enable="YES"
daily_rkhunter_update_flags="--update --nocolors"

Also, you can run rkhunter as a part of the daily security check by
putting this line to periodic.conf(5) files:

daily_rkhunter_check_enable="YES"
daily_rkhunter_check_flags="--checkall --nocolors --skip-keypress"
The following command can be used to check the system after this package or port has been installed. It will give out a lot of information and require you to press ENTER by hand:
rkhunter -c
When the process is done, a message about its status will be shown on the screen. This message will say how many files were checked, if there were any suspicious files or possible rootkits, and more. During the check, there may be some generic security warnings about hidden files, the OpenSSH protocol, and versions of installed software that are known to be weak. These can be taken care of right away or after a more thorough analysis.
[ Rootkit Hunter version 1.4.6 ]
Checking system commands...
Performing 'strings' command checks
Checking 'strings' command [ OK ]

Performing 'shared libraries' checks
Checking for preloading variables [ None found ]
Checking for preloaded libraries [ None found ]
Checking LD_LIBRARY_PATH variable [ Not found ]

Performing file properties checks
Checking for prerequisites [ Warning ]
/sbin/dmesg [ OK ]
/sbin/fsck [ OK ]
/sbin/ifconfig [ OK ]
/sbin/init [ OK ]
/sbin/md5 [ OK ]
/sbin/md5sum [ OK ]
/sbin/mount [ OK ]
/sbin/nologin [ OK ]
/sbin/ping [ OK ]
/sbin/route [ OK ]
/sbin/sha1 [ OK ]
/sbin/sha1sum [ OK ]
/sbin/sha224 [ OK ]
/sbin/sha224sum [ OK ]
/sbin/sha256 [ OK ]
/sbin/sha256sum [ OK ]
/sbin/sha384 [ OK ]
/sbin/sha384sum [ OK ]
/sbin/sha512 [ OK ]
/sbin/sha512sum [ OK ]
/sbin/sysctl [ OK ]
/sbin/kldload [ OK ]
/sbin/kldstat [ OK ]
/sbin/kldunload [ OK ]
/bin/cat [ OK ]
/bin/chmod [ OK ]
/bin/cp [ OK ]
/bin/csh [ OK ]
/bin/date [ OK ]
/bin/df [ OK ]
/bin/echo [ OK ]
/bin/ed [ OK ]
/bin/kill [ OK ]
/bin/ls [ OK ]
/bin/mv [ OK ]
/bin/pgrep [ OK ]
/bin/pkill [ OK ]
/bin/ps [ OK ]
/bin/pwd [ OK ]
/bin/sh [ OK ]
/bin/test [ OK ]
/usr/sbin/adduser [ OK ]
/usr/sbin/chown [ OK ]
/usr/sbin/chroot [ OK ]
/usr/sbin/cron [ OK ]
------------
/usr/local/bin/perl [ OK ]
/usr/local/bin/rkhunter [ OK ]
/usr/local/bin/wget [ OK ]
/usr/local/bin/gegrep [ Warning ]
/usr/local/bin/gfgrep [ Warning ]
/usr/local/bin/ggrep [ OK ]
/usr/libexec/tcpd [ OK ]
/usr/local/etc/rkhunter.conf [ OK ]

[Press <ENTER> to continue]

Checking for rootkits...
Performing check of known rootkit files and directories
55808 Trojan - Variant A [ Not found ]
ADM Worm [ Not found ]
AjaKit Rootkit [ Not found ]
Adore Rootkit [ Not found ]
aPa Kit [ Not found ]
Apache Worm [ Not found ]
Ambient (ark) Rootkit [ Not found ]
Balaur Rootkit [ Not found ]
BeastKit Rootkit [ Not found ]
beX2 Rootkit [ Not found ]
BOBKit Rootkit [ Not found ]
cb Rootkit [ Not found ]
CiNIK Worm (Slapper.B variant) [ Not found ]
Danny-Boy's Abuse Kit [ Not found ]
Devil RootKit [ Not found ]
Diamorphine LKM [ Not found ]
Dica-Kit Rootkit [ Not found ]
Dreams Rootkit [ Not found ]
Duarawkz Rootkit [ Not found ]
Ebury backdoor [ Not found ]
Enye LKM [ Not found ]
Flea Linux Rootkit [ Not found ]
FreeBSD Rootkit [ Not found ]
Fu Rootkit [ Not found ]
Fuck`it Rootkit [ Not found ]
GasKit Rootkit [ Not found ]
Heroin LKM [ Not found ]
HjC Kit [ Not found ]
ignoKit Rootkit [ Not found ]
IntoXonia-NG Rootkit [ Not found ]
Irix Rootkit [ Not found ]
Jynx Rootkit [ Not found ]
Jynx2 Rootkit [ Not found ]
KBeast Rootkit [ Not found ]
Kitko Rootkit [ Not found ]
Knark Rootkit [ Not found ]
ld-linuxv.so Rootkit [ Not found ]
Li0n Worm [ Not found ]
Lockit / LJK2 Rootkit [ Not found ]
Mokes backdoor [ Not found ]
Mood-NT Rootkit [ Not found ]
MRK Rootkit [ Not found ]
Ni0 Rootkit [ Not found ]
Ohhara Rootkit [ Not found ]
Optic Kit (Tux) Worm [ Not found ]
Oz Rootkit [ Not found ]
Phalanx Rootkit [ Not found ]
Phalanx2 Rootkit [ Not found ]
Portacelo Rootkit [ Not found ]
R3dstorm Toolkit [ Not found ]
RH-Sharpe's Rootkit [ Not found ]
RSHA's Rootkit [ Not found ]
Scalper Worm [ Not found ]
Sebek LKM [ Not found ]
Shutdown Rootkit [ Not found ]
SHV4 Rootkit [ Not found ]
SHV5 Rootkit [ Not found ]
Sin Rootkit [ Not found ]
Slapper Worm [ Not found ]
Sneakin Rootkit [ Not found ]
'Spanish' Rootkit [ Not found ]
Suckit Rootkit [ Not found ]
Superkit Rootkit [ Not found ]
TBD (Telnet BackDoor) [ Not found ]
TeLeKiT Rootkit [ Not found ]
T0rn Rootkit [ Not found ]
trNkit Rootkit [ Not found ]
Trojanit Kit [ Not found ]
Turtle Rootkit [ Not found ]
Tuxtendo Rootkit [ Not found ]
URK Rootkit [ Not found ]
Vampire Rootkit [ Not found ]
VcKit Rootkit [ Not found ]
Volc Rootkit [ Not found ]
Xzibit Rootkit [ Not found ]
zaRwT.KiT Rootkit [ Not found ]
ZK Rootkit [ Not found ]

[Press <ENTER> to continue]

Performing additional rootkit checks
Checking for possible rootkit files and directories [ None found ]
Checking for possible rootkit strings [ None found ]

Performing malware checks
Checking running processes for suspicious files [ None found ]
Checking for login backdoors [ None found ]
Checking for sniffer log files [ None found ]
Checking for suspicious directories [ None found ]
Performing trojan specific checks
Checking for enabled inetd services [ OK ]
Performing FreeBSD specific checks
Checking sockstat and netstat commands [ OK ]
Checking for KLD backdoors [ OK ]
Checking package database [ OK ]
Checking the network...
Performing checks on the network ports
Checking for backdoor ports [ None found ]
Performing checks on the network interfaces
Checking for promiscuous interfaces [ None found ]
Checking the local host...
Performing system boot checks
Checking for local host name [ Found ]
Checking for system startup files [ Found ]
Checking system startup files for malware [ None found ]
Performing group and account checks
Checking for passwd file [ Found ]
Checking for root equivalent (UID 0) accounts [ None found ]
Checking for passwordless accounts [ None found ]
Checking for passwd file changes [ None found ]
Checking for group file changes [ None found ]
Checking root account shell history files [ OK ]
Performing system configuration file checks
Checking for an SSH configuration file [ Found ]
Checking if SSH root access is allowed [ Not set ]
Checking if SSH protocol v1 is allowed [ Not set ]
Checking for other suspicious configuration settings [ None found ]
Checking for a running system logging daemon [ Found ]
Checking for a system logging configuration file [ Found ]
Checking if syslog remote logging is allowed [ Not allowed ]
Performing filesystem checks
Checking /dev for suspicious file types [ None found ]
Checking for hidden files and directories [ None found ]
[Press <ENTER> to continue]
System checks summary
=====================
File properties checks...
Required commands check failed
Files checked: 129
Suspect files: 3
Rootkit checks...
Rootkits checked : 498
Possible rootkits: 0
Applications checks...
All checks skipped
The system checks took: 5 minutes and 16 seconds
All results have been written to the log file: /var/log/rkhunter.log
One or more warnings have been found while checking the system.
Please check the log file (/var/log/rkhunter.log)
Every system administrator should know what programs are running on the computers they are in charge of. Tools like rkhunter and sysutils/lsof from outside the system and built-in commands like netstat and ps can show a lot of information about the system. Write down what is normal, ask questions when something doesn't seem right, and be suspicious. Even though it's best to avoid compromises, you have to be able to find them.
How to Perform Binary Verification?
It's important to check system files and binaries because it tells the system administration and security teams about changes to the system. An Intrusion Detection System (IDS) is a piece of software that checks the system for changes.
A basic IDS system is already built into FreeBSD. Even though the nightly security emails will let an administrator know about changes, the information is stored locally, and a bad user could change this information to hide the changes they made to the system. As a result, it is best to make a separate set of binary signatures and store them in a read-only, root-owned directory or, better yet, on a removable USB disk or remote rsync server.
With the built-in mtree utility, you can make a list of what is in a directory. The mtree utility compares a file hierarchy to a specification. It creates or changes a specification for a file hierarchy. The default action is to compare the file hierarchy rooted in the current directory with a specification read from the standard input. Messages are written to the standard output for any files whose properties don't match the specification or which are missing from either the file hierarchy or the specification.
The syntax of the mtree utility is given below:
mtree [-bCcDdejLlMnPqrStUuWx] [-i | -m] [-E  tags] [-F  flavor] [-f  spec]
[-I  tags] [-K  keywords] [-k  keywords] [-N  dbdir] [-O  onlyfile]
[-p  path] [-R  keywords] [-s  seed] [-X  exclude-file]
A seed, which is a constant number, is used to make the specification and is needed to make sure the specification hasn't changed. This lets you find out if a file or binary has been changed. Since an attacker doesn't know the seed value, it will be hard to impossible for them to fake or check the checksum values of files. You may follow the next steps given below:
- The following example creates SHA256 hashes, one for each system binary in
/bin, and saves them in a hidden file,/root/.bin_chksum_mtree, in root's home directory called:
mtree -s 4182161448607305 -c -K cksum,sha256digest -p /bin > /root/.bin_chksum_mtree
This number, 4182161448607305, is the seed. Remember this value, but don't tell anyone else about it.
You should see the output similar to the given below:
mtree: /bin checksum: 1880145897
When you look at /root/.bin_cksum_mtree, you should see something like this:
more .bin_chksum_mtree
# user: john
# machine: john
# tree: /bin
# date: Mon Jan 30 12:18:14 2023
# .
/set type=file uid=0 gid=0 mode=0555 nlink=1 flags=uarch
. type=dir mode=0755 nlink=2 time=1652343953.000000000
\133 nlink=2 size=12528 time=1652343951.000000000 \
cksum=2289266582 \
sha256digest=0b7f89f71ff9406a25850c2f173ece51180ac12a086fd148d181e66c7fb18324
cat size=14640 time=1652343943.000000000 cksum=1443782139 \
sha256digest=a372894f03e2faf79de96263c0b3e17a286f9452354f4d0d37885a8b84959232
chflags size=8888 time=1652343943.000000000 cksum=1729338293 \
sha256digest=374b925a3bb72264ac876255330c7841bb803ed83584fe64d247ff47700bebf4
chio size=20664 time=1652343943.000000000 cksum=3864094717 \
sha256digest=56adad19d93d88fa1d9215db4843b1f3cb0c9d5dea9b164935bd3108bcd7531b
chmod size=9560 time=1652343943.000000000 cksum=1326999466 \
sha256digest=3f32f5dbc2fc5b239d7625a154688d0df651e7b54e2487aaa31da5ba339c6744
---------
test nlink=2 size=12528 time=1652343951.000000000 \
cksum=2289266582 \
sha256digest=0b7f89f71ff9406a25850c2f173ece51180ac12a086fd148d181e66c7fb18324
unlink nlink=2 size=13848 time=1652343948.000000000 \
cksum=1014344036 \
sha256digest=192ef4d5a22cb0270965a03df3247ef200fa39086f7c5772fe00c51bd4815b9d
uuidgen size=9360 time=1652343951.000000000 cksum=3096472463 \
sha256digest=768f89abfd04120495cdd0bec8a3a899a858e3abf790a7e547978799f424f6d3
This report has the hostname of the machine, the date and time the specification was made, and the name of the person who made the specification. Each binary in the directory has a checksum, size, time, and SHA256 digest.
- To make sure that the binary signatures haven't changed, compare the current contents of the directory to the previously generated specification and save the results to a file. This command needs the original seed that was used to make the specification:
mtree -s 4182161448607305 -p /bin < /root/.bin_chksum_mtree >> /root/.bin_chksum_output
This should give the same checksum for the /bin directory as was given when the specification was made. If none of the files in this directory have changed, the output file will be empty.
- To simulate a change, you may use
touchto change the date on the directory and run the verification command again:
touch /bin/cat
mtree -s 4182161448607305 -p /bin < /root/.bin_chksum_mtree >> /root/.bin_chksum_output
more /root/.bin_chksum_output
You should see the output similar to the given below:
cat: modification time (Thu May 12 11:25:43 2022, Mon Jan 30 12:44:00 2023)
It is best to create specifications for directories with binaries, configuration files, and sensitive data. /bin, /sbin, /usr/bin, /usr/sbin, /usr/local/bin, /etc, and /usr/local/etc are usually the places where specifications are made.
There are IDS systems that are more advanced, like security/aide. Advanced Intrusion Detection Environment, or AIDE, is a program that checks the integrity of files and directories. It uses the regular expression rules it finds in the config file to make a database(s). Once this database is set up, it is used to check if the files are correct. It has a number of message digest algorithms that check the file's integrity. Checking for inconsistencies can be done for all of the usual file attributes. It can read databases from versions both old and new.
Most of the time, mtree gives administrators what they need. It is important to keep malicious users from seeing the seed value and the checksum output.
How to Perform System Tuning for Security?
sysctl is used to change many aspects of the FreeBSD system. This section will talk about a few security features that is changed to stop Denial of Service (DoS) attacks. You may configure the following settings on sysctl to increase the security level of your FreeBSD system:
Every time a setting is changed with sysctl, the chance that something bad will happen goes up. This affects the system's availability. Before being used on a production system, all changes should be watched and, if possible, tried out on a test system.
-
By default, the security level of the FreeBSD kernel is set to
-1when it starts up. This is called "insecure mode" because all devices can be read from or written to and "immutable file flags" can be turned off. Unless you change it withsysctlor a setting in the startup scripts, the security level will stay at-1. During system startup, the security level can be raised by settingkern_securelevel_enabletoYESin/etc/rc.confand settingkern_securelevelto the level of security you want. There are five different levels of security for the kernel to run on. No process can lower the level, but any super-user process can raise it. The levels of kernel security are as follows: -
-1, Permanently insecure mode: The system will always run in this mode. This is the default value to start with. -
0, Insecure mode: You can turn off the immutable and append-only flags. As long as the device lets you, you can read or write on all of them. -
1, Secure mode: the system immutable and system append-only flags cannot be turned off; disks for mounted file systems,/dev/memand/dev/kmemcannot be opened for writing;/dev/io(if your platform has it) cannot be opened at all; kernel modules cannot be loaded or unloaded. The kernel debugger may not be entered using thedebug.kdb.enter sysctl. Thedebug.kdb.panic,debug.kdb.panic str, and othersysctlscannot be used to force a panic or trap. -
2, Highly secure mode: Highly secure mode is the same as secure mode, but disks cannot be opened for writing (except bymount) whether they are mounted or not. This level makes it impossible to change file systems by unmounting them. It makes it impossible to runnewfson a multi-user system. Changes to the kernel time can only happen when they are less than or equal to one second. If you try to change the time by more than this, the message "Time adjustment clamped to +1 second" will be written to the log. -
3, Network secure mode: Network secure mode is the same as highly secure mode, except that IP packet filter rules cannot be changed and the configuration ofdummynetorpfcannot be changed.
Changing the securelevel may cause Xorg to stop working and cause other problems.
-
Using the
net.inet.tcp.blackholeandnet.inet.udp.blackholesettings, incoming SYN packets on closed ports is dropped without sending an RST response. The default way to show that a port is closed is to return an RST. By changing the default, you can protect yourself a little bit from port scans, which are used to find out what programs are running on a system. Setnet.inet.tcp.blackholeto2andnet.inet.udp.blackholeto1. -
Redirect attacks can be stopped with the
net.inet.icmp.drop_redirectandnet.inet.ip.redirectsettings. DoS attacks that send a lot of ICMP type 5 packets are called redirect attacks. Setnet.inet.icmp.drop_redirectto1andnet.inet.ip.redirectto0to stop these packets from being sent. -
Source routing is a way to find and connect to internal addresses that can't be routed. This should be turned off, since addresses that are not routable are usually not routable on purpose. Set
net.inet.ip.sourcerouteandnet.inet.ip.accept_sourcerouteto 0 to turn the source routing feature off. -
A machine on the network sends an ICMP echo request message to the broadcast address when it needs to send a message to all hosts on a subnet. But there's no reason for an outside host to do something like this. Set
net.inet.icmp.bmcastechoto 0 to turn down all external broadcast requests.
How to Configure One-time Passwords?
FreeBSD versions before 14.x support One-time Passwords In Everything (OPIE) by default. However, OPIE is no longer thought to be safe, so it has been taken out of FreeBSD -CURRENT and won't be available after 14.x. If you want to use OPIE on FreeBSD versions after 13.x, you can use the security/opie package or port, but it is not recommended.
OPIE is made to stop replay attacks, which happen when an attacker finds out a user's password and then uses it to get into a system. Since OPIE only uses a password once, an attacker doesn't have much use for a found password. OPIE keeps track of passwords with a secure hash and a challenge/response system. The MD5 hash is used by default in the FreeBSD implementation.
There are three different kinds of passwords used by OPIE. The first is the normal password for UNIX or Kerberos. The second is a one-time password that opiekey makes. The "secret password" is the third type of password. It is used to make one-time passwords. The UNIX password has nothing to do with the secret password, and the two should be different.
Two other pieces of information are important to OPIE:
-
One of them is the "seed" or "key", which is made up of two letters and five numbers.
-
The "iteration count", a number between 1 and 100, is the other.
OPIE makes the one-time password by putting together the seed and the secret password, running the MD5 hash as many times as the iteration count says, and turning the result into six short English words that make up the one-time password.
The authentication system remembers the last one-time password used, and the user has verified if the user's password hash is the same as the last password. Since a one-way hash is used, if someone gets a hold of a one-time password that worked, they can't use it to make more. After each successful login, the iteration count goes down. This keeps the user and the login program on the same page. When the number of iterations gets down to 1, OPIE needs to be set up again.
There are a few programs that work together to make this happen. By giving opiekey an iteration count, a seed, and a secret password, you can make a one-time password or a list of one-time passwords that work together. opiepasswd is used to set up OPIE as well as change passwords, iteration counts, and seeds. opieinfo looks at the relevant credential files in /etc/opiekeys. It then shows the calling user's current iteration count and seed.
This part talks about four kinds of operations. The first is how to use a secure connection to set up one-time passwords for the first time. The second is how to use opiepasswd on a connection that is not secure. The third is how to sign in over a connection that isn't safe. The fourth is how to make a number of keys that can be written down or printed out and used in places that are not safe.
How to Initiliaze OPIE?
To initialize OPIE for the first time, you may run the following command:
opiepasswd -c
This will ask you to type a secret passphrase as given below:
Adding john:
Only use this method from the console; NEVER from remote. If you are using
telnet, xterm, or a dial-in, type ^C now or exit with no password.
Then run opiepasswd without the -c parameter.
Using MD5 to compute responses.
Enter new secret pass phrase:
Again new secret pass phrase:
ID john OTP key is 499 al6486
RANK GEM EGAN RAGE CAL GATE
The -c option sets console mode, which assumes that the command is being run from a safe place, like a user-controlled computer or an SSH session to a user-controlled computer.
When asked, enter the secret password that will be used to make the one-time login keys. This password should be hard to figure out and should be different from the password for the user's login account. It must have from 10 to 127 characters. Don't forget this passphrase.
On the ID line, you can find the login name (john), the default number of iterations (499), and the default seed (al6486). The system will remember these parameters and show them when you log in, so you don't have to remember them. On the last line, the one-time password that was made based on the parameters and the secret password is shown. Use this one-time password the next time you log in.
How to Initiliaze Insecure Connection?
On a insecure system, to set up or change the secret password, you need a secure connection to a place where opiekey can be run. This could be a shell prompt on a machine you trust. There needs to be a number of iterations, and 100 is probably a good choice. The seed can be given or it can be picked at random. Use opiepasswd on the insecure connection, on the machine that is being set up:
opiepasswd
Updating john:
You need the response from an OTP generator.
Old secret pass phrase:
otp-md5 498 to4268 ext
Response: GAME GAG WELT OUT DOWN CHAT
New secret pass phrase:
otp-md5 499 to4269
Response: LINE PAP MILK NELL BUOY TROY
ID mark OTP key is 499 gr4269
LINE PAP MILK NELL BUOY TROY
Press Return to accept the default seed. Before entering an access password, switch to the secure connection and give it the same parameters:
opiekey 498 al6488
Using the MD5 algorithm to compute response.
Reminder: Don't use opiekey from telnet or dial-in sessions.
Enter secret pass phrase:
KONG DANA ROOT ROLL GOAL DRAW
Change back to the unsecured connection and copy the one-time password to the program that needs it.
How to Generate Multiple One-time Passwords?
There are times when you can't get to a trusted computer or a secure connection. In this case, you can use opiekey to make several one-time passwords ahead of time by running the next command:
opiekey -n 5 30 zz99999
Using the MD5 algorithm to compute response.
Reminder: Don't use opiekey from telnet or dial-in sessions.
Enter secret pass phrase:
26: GWEN HOW FEED NOV VINE GO
27: OAK NULL IFFY ADDS NICE OLGA
28: TACT AVE BARN VIE MATE PLY
29: SITS MARK INN HIP PAY AT
30: RAM BOSS ONLY DOE RAID SAG
The -n 5 tells the program to send five keys in order, and the 30 tells it how many times to do this. Keep in mind that these are printed in the order of how to use them. If you are really worried, you might want to write down the results by hand. If not, you can just print the list. On each line, the number of iterations and the one-time password are shown. As the passwords are used, scratch them off.
How to Restrict Use of UNIX Passwords?
OPIE can limit UNIX passwords based on the IP address of the person logging in. The file that needs to be changed is /etc/opieaccess, which is already there.
The opieaccess file has a list of networks that the system thinks can be trusted when it comes to security against passive attacks. Users from these trusted networks will be able to log in with OPIE responses, but they won't have to. Users from networks that aren't trusted will always have to use OPIE responses (the default behavior). This trust makes it easier for a site to switch to OPIE by making it optional for "inside" networks and giving users the choice of whether or not to use OPIE to protect their passwords.
The whole idea of trust that is built into the opieaccess file is a major security hole because it lets the same passive attacks back into your system that the OPIE system is meant to protect you from.
The opieaccess file is made up of lines with three fields separated by spaces (tabs can also be used, but spaces should be used instead) as follows:
| Field | Description |
|---|---|
| action | "permit" or "deny" non-OPIE logins |
| address | Address of the network to match |
| mask | Mask of the network to match |
This is an example of an opieaccess:
permit 192.168.0.0 255.255.0.0
This line lets UNIX passwords be used at any time by users whose IP source address (which can be faked) matches the value and mask.
If no rules in opieaccess match, non-OPIE logins are denied by default.
What is TCP Wrapper?
TCP Wrapper is a host-based access control system used for extending capabilities of the inetd Super-Server. It can be set up to give server daemons that inetd is in charge of logging support, return messages and restrictions on connections.
TCP Wrapper is not a good replacement for a firewall that is set up correctly. TCP Wrapper should be used with a firewall and other security improvements to add an extra layer of protection when a security policy is put into place.
How to Configure TCP Wrapper?
You may add the following lines to /etc/rc.conf file to enable TCP Wrapper in FreeBSD:
inetd_enable="YES"
inetd_flags="-Ww"
Then, you must configure /etc/hosts.allow.
In FreeBSD, the use of /hosts/deny is no longer recommended, which is different from other TCP Wrapper implementations. /hosts/allow is where you should put all of your configuration options.
Depending on the options in /etc/hosts.allow, daemon connection policies are set to either allow or block, depending on how simple the configuration is. FreeBSD is set up so that all connections can be made to the daemons started with inetd.
Basic configuration usually looks like daemon: address: action, where
-
daemonis the daemon thatinetdstarted -
addressis a valid hostname. IP address, or IPv6 address enclosed in brackets ([]) -
actionis either allow or deny
TCP Wrapper uses a first rule match semantic, which means that the configuration file is read from the beginning to find a matching rule. When a match is found, the rule is put into effect, and the search stops.
For example, the following lines should be added to /hosts/allow to allow POP3 connections through the mail/qpopper daemon:
# This line is required for POP3 connections:
qpopper : ALL : allow
Whenever /hosts/allow file is edited, you must restart inetd by running the next service:
service inetd restart
How to Configure Advanced TCP Wrapper Options?
TCP Wrapper gives you more control over how connections are handled by giving you more advanced options. In some situations, it may make sense to send a comment back to certain hosts or daemon connections. In other cases, a log entry or email to the administrator should be made. In other situations, you need to use a service that only lets you connect with people in your area. All of this is possible by using settings called "wildcards", "expansion characters", and "external command execution".
Let's say there's a situation where a connection should be turned down, but the host that tried to make the connection should be told why. With twist, you could do that. When twist tries to make a connection, it runs a shell command or script. An example exists in hosts.allow:
# The rest of the daemons are protected.
ALL : ALL \
: severity auth.info \
: twist /bin/echo "You are not welcome to use %d from %h."
In the previous example, any daemon that is not set up in hosts.allow will return the message "You are not allowed to use daemon name from hostname". This lets you send a reply to the person who started the connection right after the connection is dropped. Any message that is sent back must be surrounded by quote characters (").
It may be possible to launch a denial of service attack on the server if an attacker sends a lot of connection requests to these daemons.
You could use the word "spawn". Like twist, spawn denies the connection by default and is used to run shell commands or scripts from the outside. Unlike twist, spawn will not send a reply back to the host that made the connection. For example, think about the following setup:
# We do not allow connections from example.com:
ALL : .malicious.com \
: spawn (/bin/echo %a from %h attempted to access %d >> \
/var/log/connections.log) \
: deny
All attempts to connect from *.malicious.com will be denied, and the hostname, IP address, and daemon to which access was tried will be written to /var/log/connections.log. In this example, the characters %a and %h are used as replacements.
Use ALL if you want to match every daemon, domain, or IP address. The PARANOID wildcard can be used to match any host that gives an IP address that can be faked because the IP address is different from the host's resolved hostname. In the following example, all requests to connect to Sendmail with an IP address that is different from its hostname will be turned down:
# Block possibly spoofed requests to sendmail:
sendmail : PARANOID : deny
Using the PARANOID wildcard will make it impossible to connect if either the client or the server has a broken DNS setup
When adding new configuration lines, make sure that hosts.allow doesn't have any entries for that daemon that you don't need.
How to Enable and Configure ACL?
Access Control Lists (ACLs) are a POSIX.1e-compatible way to add to the standard UNIX permission model. This makes it possible for an administrator to use a permissions model with more fine-grained control.
ACL support for UFS file systems is built into the FreeBSD GENERIC kernel. If a user wants to compile their own kernel, they must add the following option to their custom kernel configuration file:
options UFS_ACL
If this option is not built in, a warning message will be shown when a file system that supports ACLs is mounted. ACLs depend on extended attributes, which are natively supported in UFS2.
To enable ACLs the mount-time administrative flag, acls, is added to /etc/fstab. Using tunefs to change a superblock ACLs flag in the file system header, the mount-time flag is set automatically and in a way that lasts. Most of the time, it is better to use the superblock flag because:
-
You can't change the superblock flag by remounting with
mount -u. You have to unmount and then mount again. This means that ACLs can't be turned on after boot for the root file system. It means that ACL support cannot be changed on a file system while the system is being used. -
When the superblock flag is set, the file system is always mounted with ACLs turned on, even if there is no
fstabentry or if the order of the devices changes. This keeps the file system from being mounted without ACL support by accident. -
It is good to prevent accidental mounting without ACLs because bad things can happen if ACLs are turned on, turned off, and then turned on again without flushing the extended attributes. In general, once ACLs are enabled on a file system, they shouldn't be turned off. This is because the resulting file protections may not be what the users of the system had in mind, and re-enabling ACLs may re-attach the old ACLs to files whose permissions have changed, which can cause files to behave in unexpected ways.
When ACLs are turned on, file systems will have a plus sign (+) next to their permission settings:
drwx------ 2 john john 512 May 17 12:44 private
drwxrwx---+ 2 john john 512 May 13 11:56 directory1
drwxrwx---+ 2 john john 512 May 12 09:27 directory2
drwxrwx---+ 2 john john 512 May 17 10:51 directory3
drwxr-xr-x 2 john john 512 Nov 10 10:52 public_html
In this example, ACLs are being used by directory1, directory2, and directory3, but not by private or public_html.
getfacl utility is used to see the ACLs of a file system. To view the ACL settings on a file, you may run the next command:
getfacl filename
for example:
% getfacl test
#file:test
#owner:1001
#group:1001
user::rw-
group::r--
other::r--
You may use setfacl to change ACL settings for a file. General syntax of the setfacl is given below:
setfacl [-R [-H | -L | -P]] [-bdhkn] [-a  position  entries]  [-m  entries]
[-M  file] [-x  entries | position] [-X  file] [file  ...]
You may add -k to remove all of the ACLs that are currently set from a file or file system. But the best way is to use -b because it leaves the basic fields that ACLs need to work.
setfacl -k filename
You may use -m option to modify the default ACL settings:
setfacl -m u:username:rwx,group:web:r--,o::--- filename
In this case, there were no pre-defined entries because the last command took them away. This command sets the listed options as well as the default options. If a user or group is added that doesn't already exist on the system, an error message saying "Invalid argument" will show up.
How to Monitor Third Party Security Issues?
When third-party utilities are installed and set up for almost any operating system on the market today, the risk of system intrusion grows. Assessing how vulnerable something is is a key part of security. FreeBSD puts out advisories for the base system, but the FreeBSD Project can't do that for every third-party program. There is a way to fix problems caused by third parties and let administrators know about known security problems. The pkg add-on utility for FreeBSD has options that are made for monitoring third party security issues.
pkg asks a database if there are any security problems. The FreeBSD Security Team and ports developers keep the database up to date and take care of it.
Installation gives you periodic configuration files for keeping the pkg audit database up to date and a way to keep it up to date with code. This feature is enabled by setting daily_status_security_pkgaudit_enable to YES in periodic.conf. The file periodic.conf tells how system maintenance jobs should run every day, every week, and every month. Make sure that the daily emails about security runs that are sent to root's email account are read.
After installation, an administrator can choose to update the database and look at known vulnerabilities in installed packages to check on third-party utilities that are part of the Ports Collection or to check on them at any time.
Run the next command to force pkg to send a message if any installed packages have known vulnerabilities:
pkg audit -F
Then pkg sends messages if any installed packages have known security flaws as given below:
Fetching vuln.xml.xz:  100%  974 KiB 997.4kB/s 00:01
go119-1.19.3 is vulnerable:
go -- multiple vulnerabilities
CVE:  CVE-2022-41717
CVE:  CVE-2022-41720
WWW: https://vuxml.FreeBSD.org/freebsd/6f5192f5-75a7-11ed-83c0-411d43ce7fe4.html
python39-3.9.15_1 is vulnerable:
Python -- multiple vulnerabilities
WWW: https://vuxml.FreeBSD.org/freebsd/050eba46-7638-11ed-820d-080027d3a315.html
ruby-3.0.4_3,1 is vulnerable:
rubygem-cgi --  HTTP response splitting vulnerability
CVE:  CVE-2021-33621
WWW: https://vuxml.FreeBSD.org/freebsd/84ab03b6-6c20-11ed-b519-080027f5fec9.html
python38-3.8.15_1 is vulnerable:
Python -- multiple vulnerabilities
WWW: https://vuxml.FreeBSD.org/freebsd/050eba46-7638-11ed-820d-080027d3a315.html
4  problem(s)  in  4 installed package(s) found.
An administrator can find out more about the vulnerability by pointing a web browser to the URL that is shown. This will include the FreeBSD port versions that are affected, as well as links to other websites that may have security advisories.
What is FreeBSD Security Advisories?
The FreeBSD Project has a security team that is in charge of figuring out when each FreeBSD release will reach its End-of-Life (EoL) and providing security updates for supported releases that have not yet reached their EoL. One job of the security team is to fix security holes in the FreeBSD operating system when they are found. Once a vulnerability has been confirmed, the security team checks to see what needs to be done to fix it and then adds the fix to the source code. The information is then put out as a "Security Advisory". Security advisories are posted on the FreeBSD website and sent to the FreeBSD security notifications mailing list, the FreeBSD security mailing list, and the FreeBSD announcements mailing list.
The following format is used for every security advisory:
-
PGP key: The Security Officer's PGP key is used to sign each security advisory. At OpenPGP Keys, you can check that the Security Officer has a public key.
-
Name: The name of the security advisory always starts with "FreeBSD-SA-", which stands for "FreeBSD Security Advisory". Next comes the year in two-digit format (14:), then the advisory number for that year (04), and then the name of the application or subsystem that is affected (bind). This is the fourth advisory for 2014, and it has to do with BIND.
-
Topic: The vulnerability is summed up in the Topic field.
-
Category: The Category shows which part of the system is affected, which could be
core,contrib, orports. If the vulnerability is in thecorecategory, it means that it affects a core part of the FreeBSD operating system. The fact that the vulnerability is in thecontribcategory means that it affects software that comes with FreeBSD. Theportscategory means that the bug affects software that is part of the Ports Collection. -
Module: The module location is shown in the Module field.
-
Announced: The date the security advisory came out is shown in the Announced field. This means that the security team has confirmed that the problem exists and that a fix has been added to the FreeBSD source code repository.
-
Credits: The Credits field gives credit to the person or group that found and reported the vulnerability.
-
Affects: The Affects field tells you which versions of FreeBSD this vulnerability affects.
-
Corrected: The date, time, time offset, and releases that were changed are shown in the Corrected field. In the section between the parentheses, there is a list of each branch where the fix has been merged, along with the version number of the release from that branch. The version number and, if necessary, the patch level are both part of the release identifier. The patch level is the letter
pfollowed by a number. This number shows the sequence number of the patch and lets users know which patches have already been put on the system. -
CVE Name: If there is an advisory number in the public
cve.mitre.orgsecurity vulnerabilities database, it is shown in the CVE Name field. -
Background: In the Background field, you can tell what the affected module is.
-
Problem Description: The problem is described in the Problem Description field. This can include information about the broken code and how the utility could be used maliciously.
-
Impact: In the Impact field, you can write down how the problem could affect a system.
-
Workaround: The Workaround field tells system administrators who can't patch the system right away if there is a way around the problem.
-
Solution: In the Solution field, you'll find instructions on how to fix the affected system with a patch. This is a step-by-step plan that has been tested and proven to get a system patched and working safely.
-
Correction Details: The revision number of the changed code is shown in the Correction Details field for each affected Subversion branch.
-
References: In the References field, you can find links to more information about the vulnerability.
How to Enable and Utilize Process Accounting?
Before using process accounting, you must enabled it by running the following commands:
sysrc accounting_enable=yes
service accounting start
The accounting information is kept in files in /var/account. If needed, these files are created automatically the first time the accounting service starts. These files have sensitive information in them, such as all the commands that all users have given. The files can only be changed by root, and only root and people in the wheel group can read them. Change the mode of the /var/account directory so that only root can access it. This stops people in the wheel group from reading the files.
Once accounting is turned on, it starts to keep track of things like CPU statistics and commands that have been run. All accounting logs are in a format that people can't read, but sa can read them. sa is an utility that is used to print system accounting statistics. It reports on, cleans up, and generally maintains system accounting files. If sa is run without any options, it will print out information about the number of calls made by each user, the total amount of time that has passed in minutes, the total amount of time spent by the CPU and users in minutes, and the average number of I/O operations. See sa(8) for a list of the options you can use to control the output.
You may use lastcomm to show the commands that users have given. For example, this command shows on the ttyp1 terminal all of the times that john used ls:
lastcomm ls john ttyp1
How to Limit System Resources?
FreeBSD has a number of ways for an administrator to limit how much a user can use the system's resources. Disk quotas tell users how much disk space they can use. Either a flat file or a command can be used to set limits on other resources, like CPU and memory, in a resource limits database.
-
Editing
/etc/login.confis the traditional way to set up login classes. This method is still supported, but any changes require editing this file, rebuilding the resource database, making the necessary changes to/etc/master.passwd, and rebuilding the password database. Depending on how many users you need to set up, this can take a long time. -
rctlcan be used to control resource limits in a more fine-grained way. This command can do more than just set limits on users. It can also be used to set limits on how much resources a process or jail can use.
This section shows both ways to manage resources. It starts with the traditional way.
How to Configure Login Classes?
In the traditional method, /etc/login.conf is used to define login classes and the amount of resources that can be used by each login class. The main features of login class are as follows:
-
Each user account can be given a login class.
-
The default login class is called "default".
-
Each login class comes with its own set of login capabilities.
-
A login capability is a
name=valuepair, wherenameis a well-known identifier andvalueis any string that is treated differently depending on the name.
When /etc/login.conf is changed, the following command must be run to update the /etc/login.conf.db file:
cap mkdb /etc/login.conf
There are two ways in which resource limits are different from the default login capabilities. First, there is a soft limit and a hard limit for every limit. The user or the app can change a soft limit, but it can't be set higher than the hard limit. The user can lower the hard limit, but only the superuser can raise it. Second, most limits on resources are set per process and per user.
Login Class Resource Limits that are most often used are listed below:
| Resource Limit | Description |
|---|---|
| coredumpsize | Other limits on disk usage, like filesize or disk quotas, take precedence over the size limit of a program's core file. This limit is often used as a less strict way to control how much space is used on the disk. Since users don't make core files and often don't delete them, this setting could keep them from running out of disk space if a large program crashes. |
| cputime | The most time a user's process can take up on the CPU. The kernel will kill any processes that break the rules. This is a limit on how much CPU time can be used. It is not a percentage of the CPU, as some of the fields in top and ps show. |
| filesize | The largest file size that a user can own. Unlike disk quotas (Disk Quotas), this limit is set for each file, not for all the files that a user owns. |
| maxproc | The most processes a user can run in the foreground and in the background at the same time. This limit can't be bigger than the system limit specified by kern.maxproc. If you set this limit too low, it could slow down a user's work because some tasks, like compiling a big program, start a lot of processes. |
| memorylocked | The most memory a process can ask to be locked into main memory with the mlock command. Some programs that are important to the system, like amd, lock into main memory so that if the system starts swapping, they won't cause the disk to thrash. |
| memoryuse | The most memory that can be used by a process at any given time. It shows how much core memory and swap memory was used. This is not the only way to limit how much memory is used, but it is a good start. |
| openfiles | The most files that a process can have open at once. In FreeBSD, sockets and IPC channels are represented by files, so don't set this too low. The limit for the whole system is set by kern.maxfiles. |
| sbsize | The most network memory that a user can use at once. This can be used to restrict network communications in general. |
| stacksize | The maximum stack size of a process. This is not sufficient to restrict the amount of memory a program may use, thus it must be combined with additional constraints. |
Table 1. Login Class Resource Limits
There are a few more considerations when establishing resource limits:
-
The daemon login class is allocated to processes launched by
/etc/rcduring system startup. -
Although
/etc/login.confis an excellent source of realistic settings for most limitations, they may not be suitable for all systems. Setting a restriction that is too high may expose the system to misuse, while setting a limit that is too low may hinder production. -
Xorg is resource-intensive and encourages users to run many apps concurrently.
-
Individual processes are subject to several restrictions, not the user as a whole. For instance, setting
openfilesto 100 allows each user-executed process to open up to 100 files. The maximum number of files a user may open is equal to the product ofopenfilesandmaxproc. This applies to memory utilization as well.
How to Enable and Configure Resource Limits?
The kern.racct.enable tunable must be set to a value greater than zero. Custom kernels must be configured uniquely:
options RACCT
options RCTL
Once the system has restarted with the upgraded kernel, rctl may be used to configure system rules.
Rule syntax is governed by a subject, subject-id, resource, and action, as shown by the following sample rule:
user:john:maxproc:deny=10/user
The subject of this rule is user, the subject-id is john, the resource is maxproc, and the action is deny, which prevents the creation of any additional processes. This indicates that the user john will be limited to a maximum of 10 processes. Other options include logging to the terminal, notifying devd, and issuing a sigterm to the process.
When introducing regulations, caution is necessary. The following example will restrict the user from completing more actions after login in and running a screen session due to the user's process limit of 10. Once a resource limit has been reached, an error will be shown, as seen here:
% man test
/usr/bin/man: Cannot fork: Resource temporarily unavailable
eval: Cannot fork: Resource temporarily unavailable
Another example is preventing a jail from exceeding a memory limit. This rule might be expressed as:
rctl -a jail:httpd:memoryuse:deny=2G/jail
If you add rules to the /etc/rctl.conf file, they will survive through reboots. The format is a rule, with no command before it. For instance, the above rule may be modified as follows:
# Block jail from using more than 2G memory:
jail:httpd:memoryuse:deny=2G/jail
To remove a rule, you may use rctl to delete it from the list:
rctl -r user:john:maxproc:deny=10/user
To removing all rules for a single user, you may run the following command for our example:
rctl -r user:john
There are several other resources that may be employed to exercise extra control over certain subjects.
How to Configure Sudo for Shared Administration?
System administrators must be able to provide elevated rights to users so that they may execute privileged duties. The notion that team members are granted access to a FreeBSD system to accomplish their respective jobs presents administrators with new issues. These team members only need a subset of access above typical end-user levels; yet, they virtually always report to management that they cannot complete their jobs without superuser access. There is no need to grant such access to end users, since there are already methods to address this precise demand.
Some users may need access to application initialization scripts, or a team of administrators may be required to manage the system. Traditionally, this access was managed through regular users and groups, file permissions, and even the su program. And as applications demanded more access and as more users required system resources, a more effective solution was necessary. Currently, the most popular application is Sudo.
Sudo enables administrators to specify more stringent system command access and provides extensive logging capabilities. As a tool, the Ports Collection provides security/sudo or the pkg application. To use the sudo package tool, you must install it by running the next command:
pkg install sudo
visudo is highly recommended for configuring sudo because to its built-in syntax checker, which verifies that there are no syntax problems before saving the file. The sudo configuration file, /usr/local/etc/sudoers, consists of several tiny parts that provide substantial customisation.
In the following example, the web application administrator, webadmin, must start, stop, and restart the webservice application. Add the following line to the end of /usr/local/etc/sudoers to allow this user to do these actions:
webadmin ALL=(ALL) /usr/sbin/service webservice *
The user may now start webservice with the following command:
sudo /usr/sbin/service webservice start
This setup enables a single person access to the webservice service; nevertheless, in the majority of enterprises, the service is managed by an entire web team. Additionally, a single line might provide access to a whole group. These procedures will establish a web group, add a user to it, and enable all group members to administer the service:
pw groupadd -g 6001 -n webteam
You may add the user, webadmin, to the webteam group using pw command:
pw groupmod -m webadmin -n webteam
You may add the following line in to /usr/local/etc/sudoers to allow any member of the webteam group to administer webservice:
%webteam ALL=(ALL) /usr/sbin/service webservice *
In contrast to su, Sudo just needs the user's password. This adds the benefit that users will no longer need shared passwords, a finding in the majority of security assessments and plain terrible practice all around.
Users who are authorized to execute apps using Sudo must input only their own passwords. This is more secure and provides more control than su, which requires the root password and gives the user full root privileges.
The majority of firms are using or have implemented a two-factor authentication methodology. In some instances, the user may not have a password. The NOPASSWD variable is provided by Sudo in these circumstances. For our example, adding it to the settings above will enable all webteam group members to control the service without requiring a password:
%webteam ALL=(ALL) NOPASSWD: /usr/sbin/service webservice *
How to Enable Session Logging?
A benefit of installing Sudo is the option to enable session logging. Using the built in log mechanisms and the accompanying sudoreplay command, all commands initiated using Sudo are recorded for further verification. To enable this functionality, add a default log directory entry, this example utilizes a user variable.
Defaults iolog_dir=/var/log/sudo-io/%{user}
This directory will be generated automatically after the configuration of logging. It is safer to allow the system to create directories with default permissions. Additionally, this item logs administrators that use the sudoreplay command. To modify this behavior, read and remove the comment from the logging settings under sudoers.
Once this directive has been added to the sudoers file, the request to log access may be added to any user configuration. In the illustration, the modified webteam entry would include the following modifications:
%webteam ALL=(ALL) NOPASSWD: LOG_INPUT: LOG_OUTPUT: /usr/sbin/service webservice *
From this point on, all webteam members who modify the webservice application's status will be tracked. The list of past and present sessions may be presented using:
sudoreplay -l
To replay a particular session, find the TSID=entry in the output and feed it to sudoreplay without any further parameters. For instance:
sudoreplay webadmin/00/00/02
While sessions are logged, administrators have the ability to delete sessions, leaving only a question as to why they did so. It is desirable to implement a daily scan using an intrusion detection system (IDS) or comparable software so that other administrators are notified about manual changes.
How to Use doas as a substitute for sudo?
As an alternative to security/sudo, security/doas may be used to allow users to get elevated permissions. The doas application enables an ordinary user to execute instructions as another user (usually root). The doas command is a streamlined (presumably more secure) version of the sudo command that gives a configuration that is simpler to read/modify. The doas tool is accessible through the security/doas ports collection or the pkg utility.
After installation, /usr/local/etc/doas.conf must be adjusted to allow users access to certain commands or responsibilities.
The simplest entry would be the one below, which allows local user root privileges without asking for its password when the doas command is used.
permit nopass local_user as root
After installation and setup of the doas program, a command, for instance, may now be performed with elevated privileges.
doas vi /etc/rc.conf
The following example allows users in group wsrc to construct ports; wheel to execute commands as any user while retaining the environment variables PS1 and SSH AUTH SOCKET and without setting ENV; john to run procmap as root without a password; and root to execute unrestricted commands as itself.
# Non-exhaustive list of variables needed to
# build release and ports
permit nopass setenv  { \
FTPMODE PKG_CACHE PKG_PATH SM_PATH SSH_AUTH_SOCK \
DESTDIR DISTDIR FETCH_CMD FLAVOR GROUP MAKE MAKECONF  \
MULTI_PACKAGES NOMAN  OKAY_FILES OWNER PKG_DBDIR \
PKG_DESTDIR PKG_TMPDIR PORTSDIR RELEASEDIR SHARED_ONLY \
SUBPACKAGE WRKOBJDIR  SUDO_PORT_V1 } :wsrc
permit setenv { -ENV  PS1=$DOAS_PS1 SSH_AUTH_SOCK } :wheel
permit nopass john as root cmd /usr/sbin/procmap
permit nopass keepenv root as root